
This post is the first in a series that includes multi-cloud deployment behind a global DNS.
The evolution of deployment platforms and orchestration engines has been a tremendous accelerant for application and infrastructure teams alike. Clear boundaries and well defined interfaces between the layers of our technology stack means we can rapidly iterate and deploy with repeatable results. For many teams, Docker has become a key ingredient in this architecture, allowing for deployment to platforms like Kubernetes.
Wrapping an application in Docker is a powerful way to enforce the correct dependencies and operating system. Unfortunately, it requires additional knowledge to properly configure and package the container images. In this blog post, I’ll discuss the use of Jib, an open source project from Google, which aims to simplify that effort for Java applications.
We will be using several technologies in this blog and a basic understanding of CircleCI is required. If you’re new to CircleCI, we have introductory content to help you get started.
What is Jib?
Jib builds Docker and OCI images for your Java applications and is available as a plugin for Maven and Gradle.
Jib has a few interesting value propositions. They are described in more detail on their project page. Namely, it reduces the complexity and time required to turn a stand-alone Java application into a fully-portable Docker image. Our sample application is a Spring Starter web app, but the project supports any Java based application with great support for any required customizations. In addition to the core libraries, the team is sharing plugins for Maven and Gradle to integrate seamlessly into your existing build process.
Prerequisites
To follow along with this demo, you need an account with a Docker registry. I’ll be using Docker Hub, but many others are supported including Artifactory, Nexus, and GCR.
Our sample application
I’m using a sample Java application from Spring Initializer. I have shared the full project at https://github.com/eddiewebb/circleci-jib-demo if you just want to jump into the code or follow along. Before moving forward, confirm your application runs locally. For Spring Boot applications, this is as simple as:
mvn spring-boot:run
The sample project and blog post use the Maven plugin, but as noted above, Gradle is fully supported.
Running Jib
Jib reduces the boilerplate configuration needed by setting some reasonable defaults that include a base distroless image. Jib will even infer the appropriate class to use as an entrypoint when starting your application.
If you want to test locally, you can build right into your Docker daemon.
mvn clean compile com.google.cloud.tools:jib-maven-plugin:0.9.7:dockerBuild

You can spin it up with:
docker run -p 8080:8080 java-jib-demo:0.0.1-SNAPSHOT
Note: 8080 is the default port for Spring Boot applications. It may vary based on your starting point.
Pushing Jib images to a registry
One of the perks of using Jib is that we actually don’t need a Docker daemon. We can build and publish an image directly to a public/private registry. Since registries require authentication, let’s setup our Maven project to use our Docker Hub credentials. (Docker Hub is the default registry, see Configuration Guide if you are using an alternate).
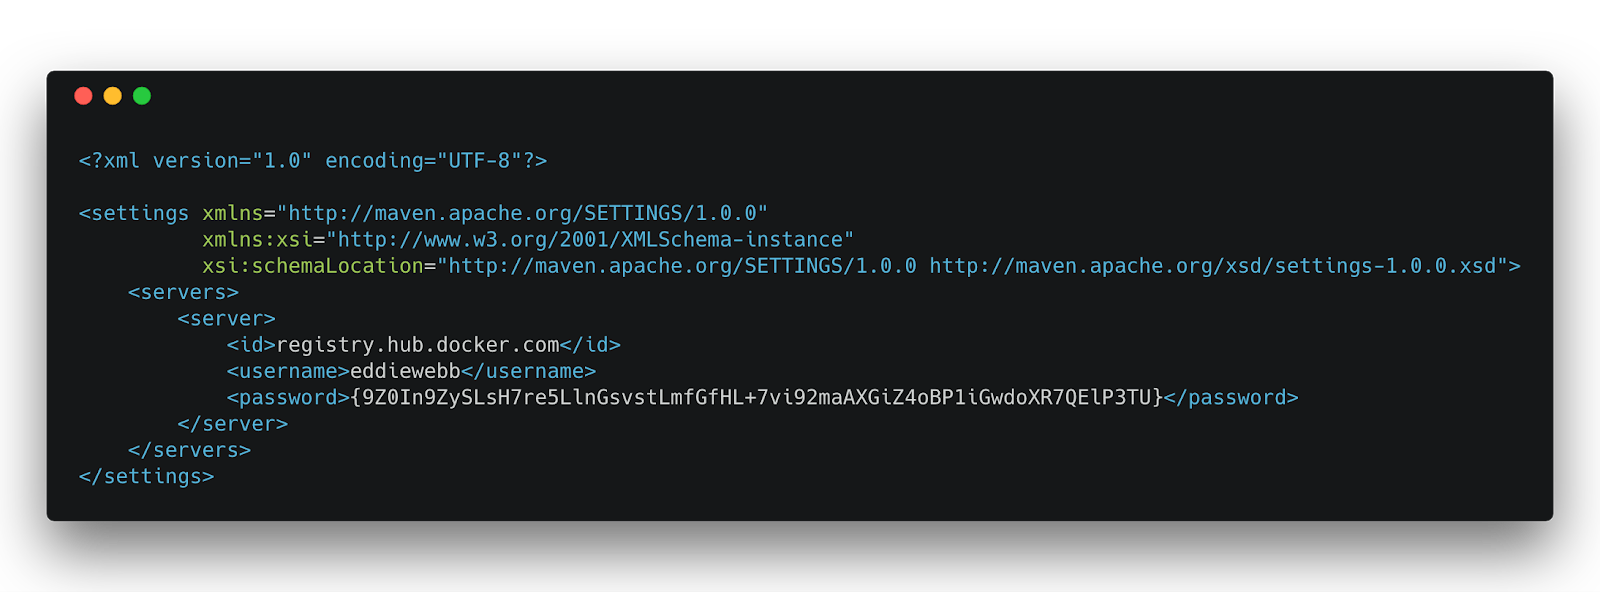
In your Maven’s settings.xml (typically found in <HOME>/.m2/settings.xml), define a server block for the Docker Hub registry that includes your Docker username and password:
Setting passwords in clear-text is never a good idea and certainly not something we want in our code repository. In the “Enabling CircleCI Deployments” section below, we will setup Maven Encryption.
With credentials configured, the only other information you need to provide is the resulting Docker image name to use by passing -Dimage.
Let’s give is shot by saving the created image locally. For that we will use the jib:build target:
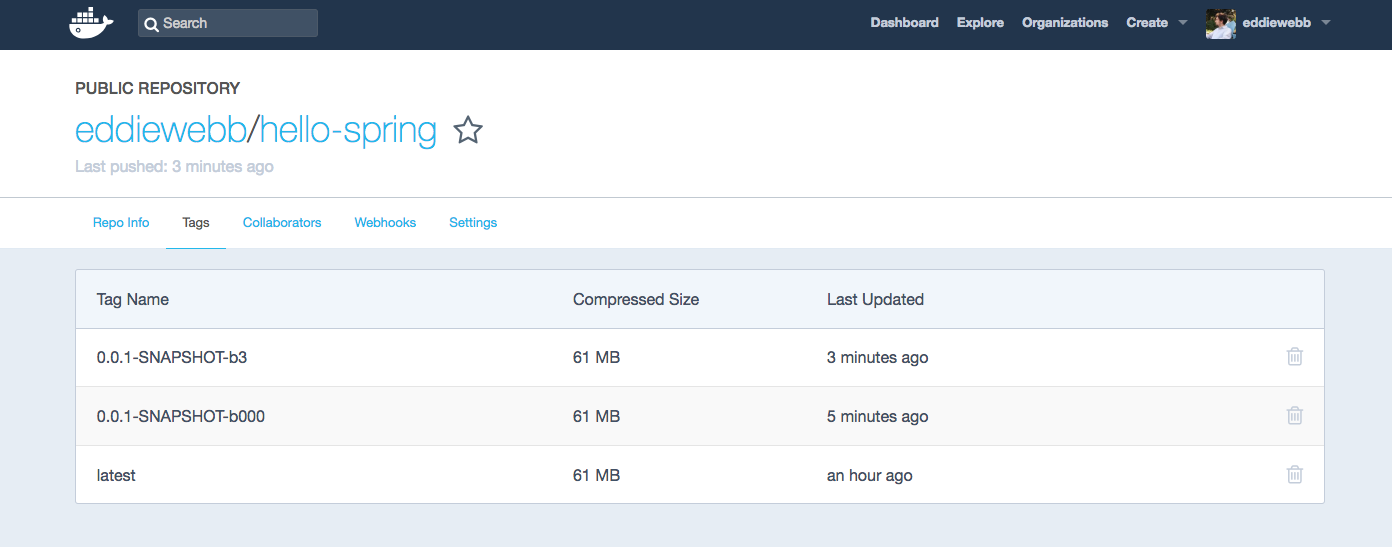
mvn clean compile com.google.cloud.tools:jib-maven-plugin:0.9.7:build -Dimage=eddiewebb/hello-spring

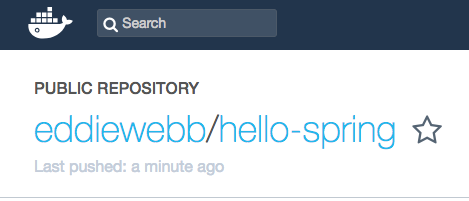
Once the build completes, you will find a brand new image sitting in your registry.
Configuring Jib
With anything beyond trivial applications, you will need to make modifications to the generated image. Fortunately, Jib provides several configuration parameters that can be dropped right into your pom.xml.
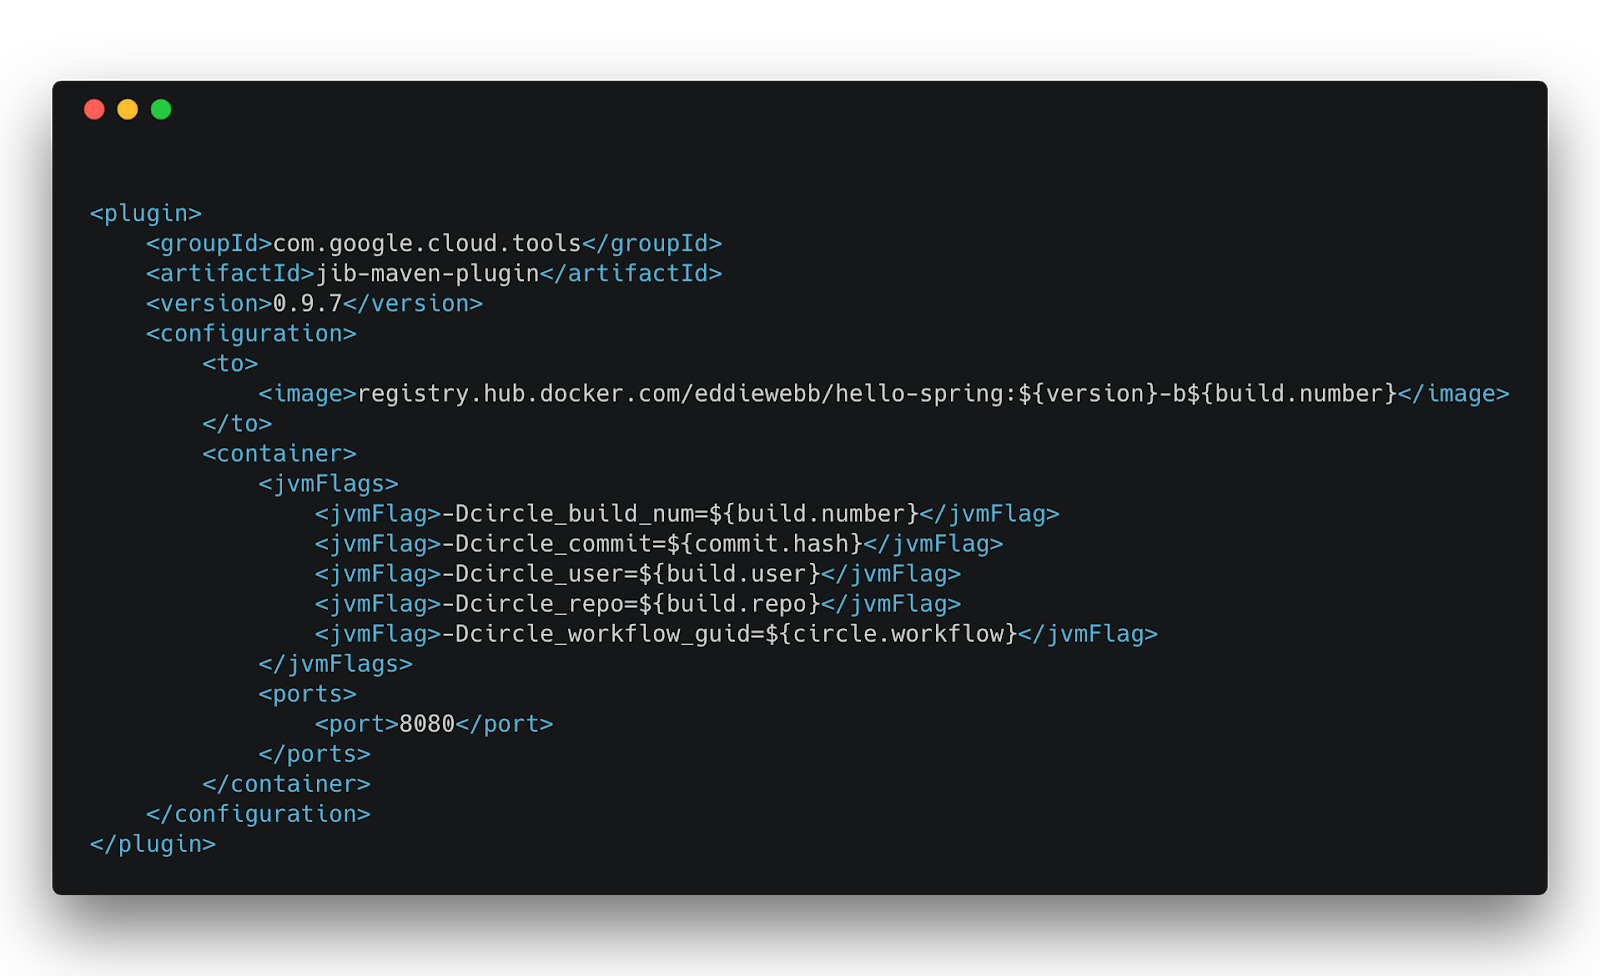
To keep some discipline around our versioning, we can’t release every image with the default “latest” tag. Using the <to> element of our configuration we can fully specify the location and tagging.
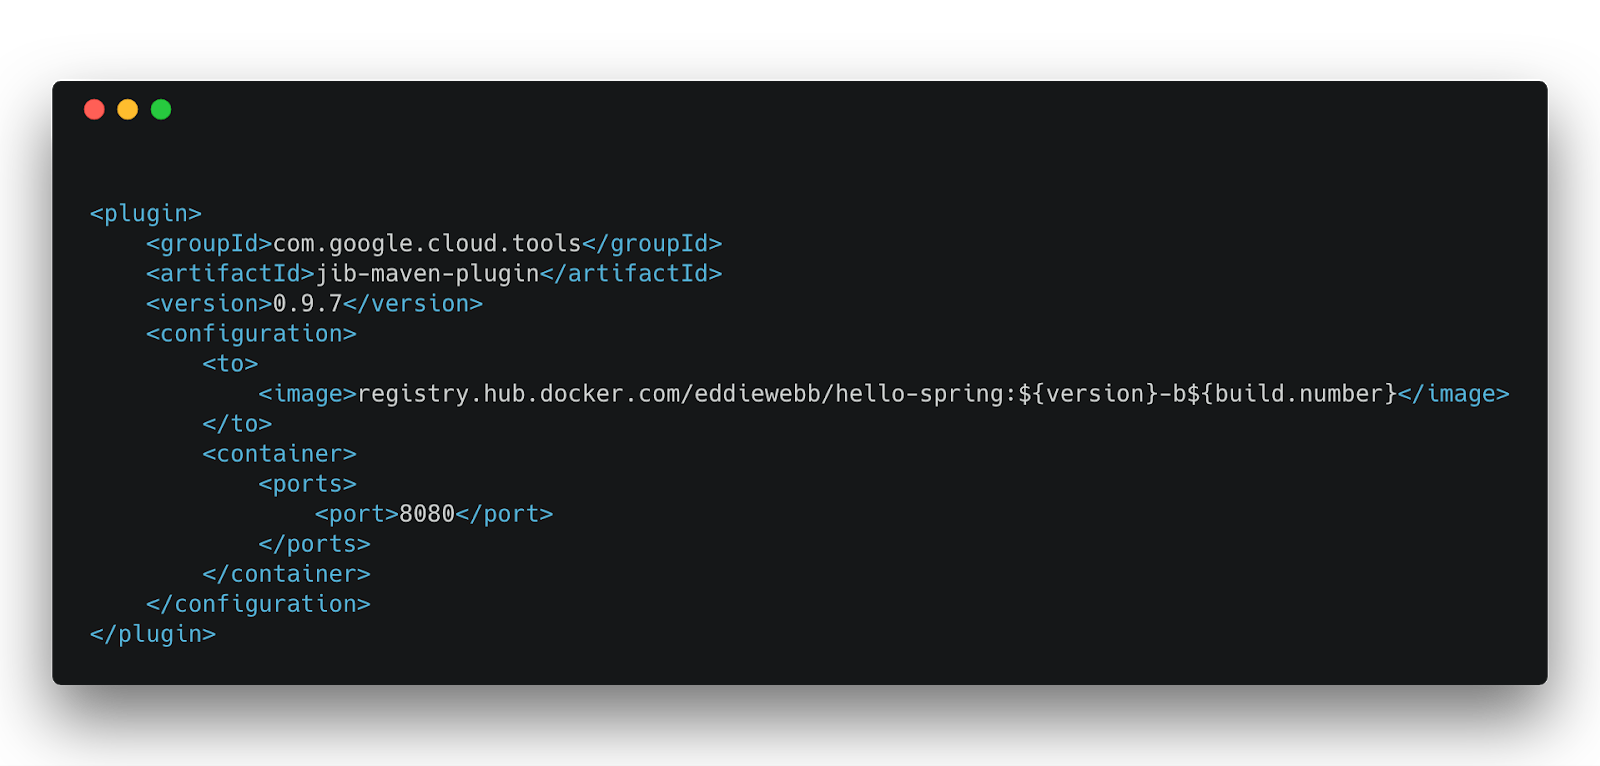
The property build.number is something we will pass in that correlates to the CircleCI build identifier. Add a default value to keep local development simple, i.e., 000.
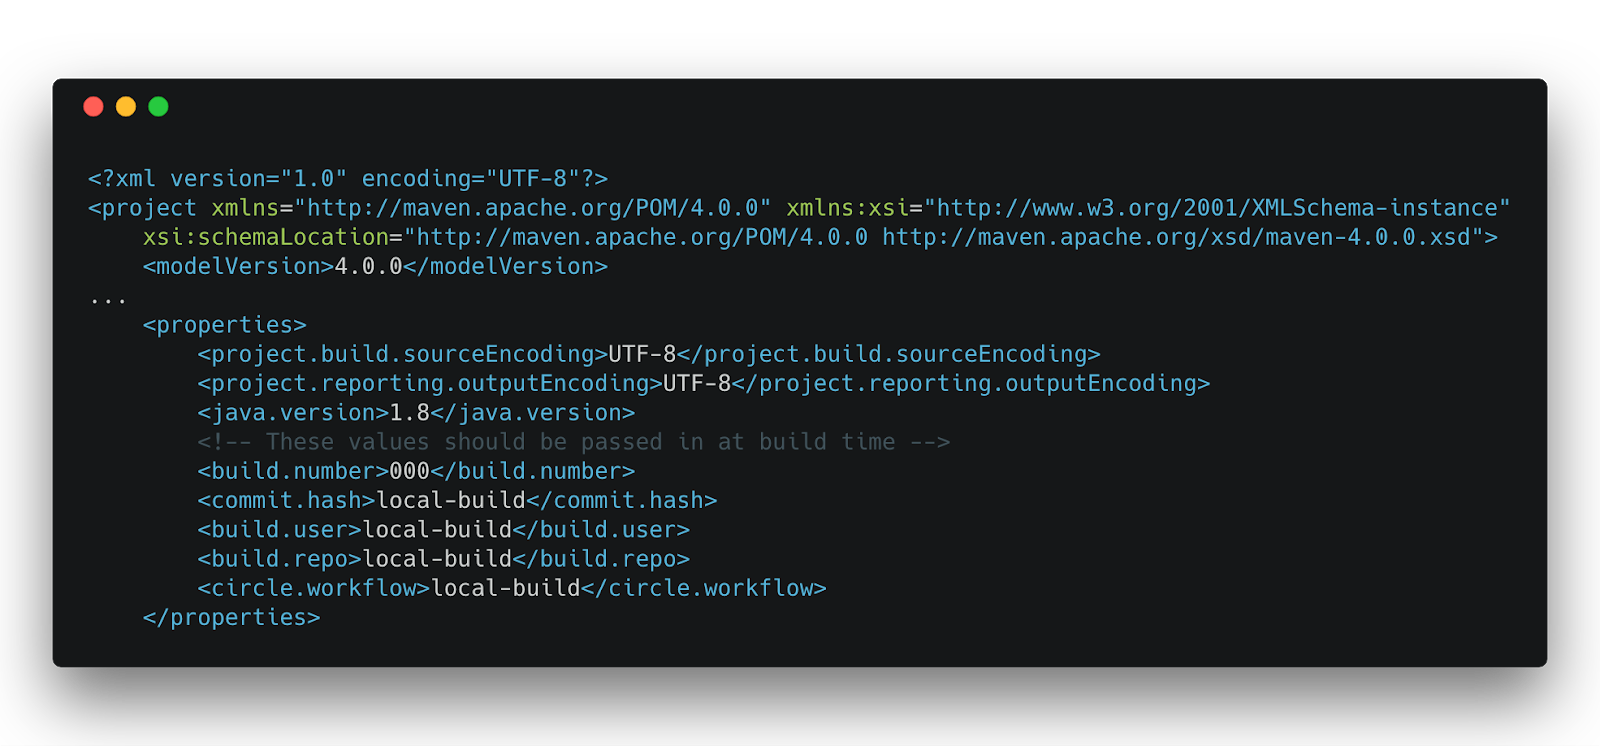
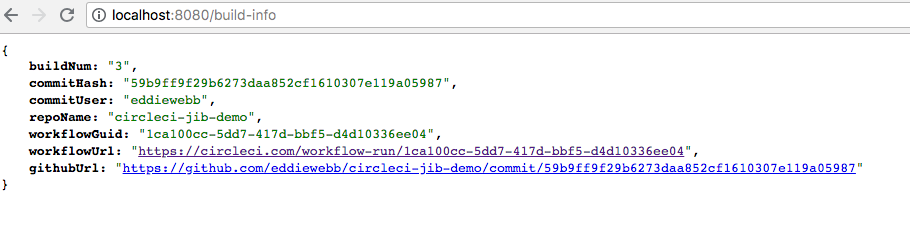
You will notice several other properties including the commit hash and workflow ID. These are just a few of the environment variables made available to every CircleCI job. We will use them as additional properties that we pass into the application to display important build information from a running application. In order to set these values within the JVM, we will use another configuration block, <jvmFlags>.
You can find additional configuration parameters explained on the project page.
Let’s validate our configuration one last time before configuring CircleCI.

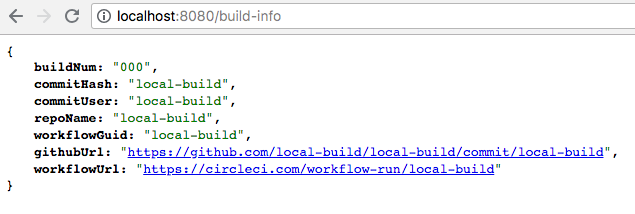
Now, visit http://localhost:8080/build-info and you will see how the demo application exposes the additional JVM flags we passed in.
Let’s use CircleCI to automate this process for repeatable and deterministic builds, enabling end-to-end traceability.
Encrypting Maven credentials
The first thing to address is credential management. We’re not going to check any sensitive credentials into source code, but our CircleCI builds will need access to them. There are a few ways to solve this, and my example uses a combination of Maven Encryption and CircleCI Environment Variables.
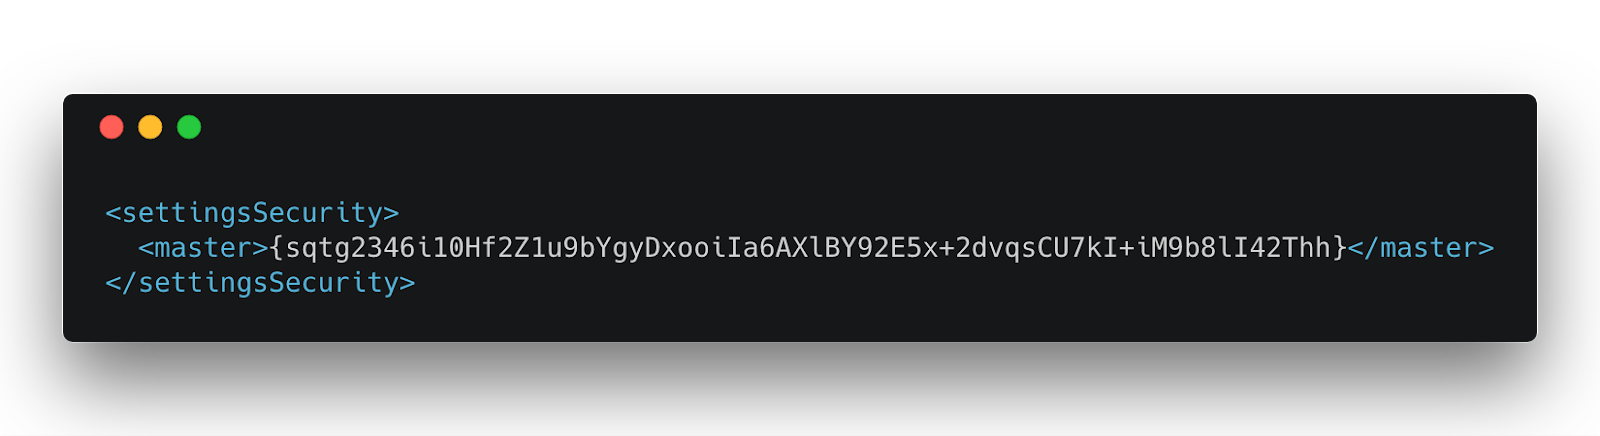
Encrypt a “master” password:
mvn --encrypt-master-password
Master password: <<type some random but lengthy string as input>>
{sqtg2346i10Hf2Z1u9bYgyDxooiIa6AXlBY92E5x+2dvqsCU7kI+iM9b8lI42Thh}
Save the results in a file named settings-security.xml in your Maven home directory, i.e. ~/.m2/settings-security.xml.
Encrypt your Docker Registry password:
mvn --encrypt-password
Password: <<your Docker registry credentials>>
{9Z0In9ZySLsH7re5LlnGsvstLmfGfHL+7vi92maAXGiZ4oBP1iGwdoXR7QElP3TU}
Update your settings.xml with the generated cipher:
At this point you can run
mvn clean compile jib:build
again to confirm the encrypted credentials are working.
Setting up CircleCI
Add your project to CircleCI by visiting https://app.circleci.com/dashboard and following the prompts to “Start Building” your project’s repository.
The first build will fail since we haven’t finished configuring the project. To get it passing, you will need to visit the project’s configuration page and add a variable named maven_security_master that contains your master password from the previous steps. That variable is used by our .circleci/config.yml to recreate the critical settings-security.xml file in our builds.
You will also want to copy your ~/.m2/settings.xml to the projects .mvn/wrapper/ folder. It is important that both the settings.xml and master password are made available to CircleCI to properly upload.
With the settings.xml file in place, commit and push your latest changes to your repository. CircleCI should start building and successfully publish your Docker image.
Once published, if you run our newly generated image you will see all the values we passed from CircleCI’s execution environment exposed on the /build-info url, giving your application end-to-end traceability!
If you’d like to take your CircleCI workflow to the next level, and start deploying your containerized application to ECS or Kubernetes, be sure to checkout our next blog post in the series and watch our previously recorded webinar with our Solutions Engineer Chris Black - Docker Deployments 102.
Happy building!