
Laravel comes shipped with a robust testing suite that allows developers to perform unit tests, test API endpoints, and run automated feature tests in the browser.
In this post, we will be adding testing processes that are available in the Laravel framework to our CircleCI configuration file to automate these tests each time we push new code.
Prerequisites
To follow along with this post, there are a couple of things you will need to have set up:
- PHP >= 7.1 installed on your system. You can confirm this by running the command
php -von your terminal. - Composer installed globally. Confirm this by running the
composercommand on your terminal. - A GitHub account.
- A CircleCI account.
Our tutorials are platform-agnostic, but use CircleCI as an example. If you don’t have a CircleCI account, sign up for a free one here.
Once you have these up and running, you will be ready to follow along.
Cloning the sample project
To begin, clone this Laravel project. It already contains some tests that we will be automating with CircleCI.
git clone https://github.com/yemiwebby/laravel-api-test
Once you have cloned the project, create a new GitHub repository and push the sample project to it. To get familiar with the project you just cloned, install the dependencies for the project by running the command:
cd laravel-api-test

composer install
Next, create a file named .env at the root of the project and copy the contents of .env.example into it (if you are using Linux you can simply run cp .env.example .env). This file should be ignored in your .gitignore file (this has already been ignored in the .gitignore of the cloned project).
Run this command to generate an application key for the Laravel project:
php artisan key:generate
Now, run the project in your browser by running this command:
php artisan serve
Go to the project homepage in your browser by visiting the URL http://127.0.0.1:8000.
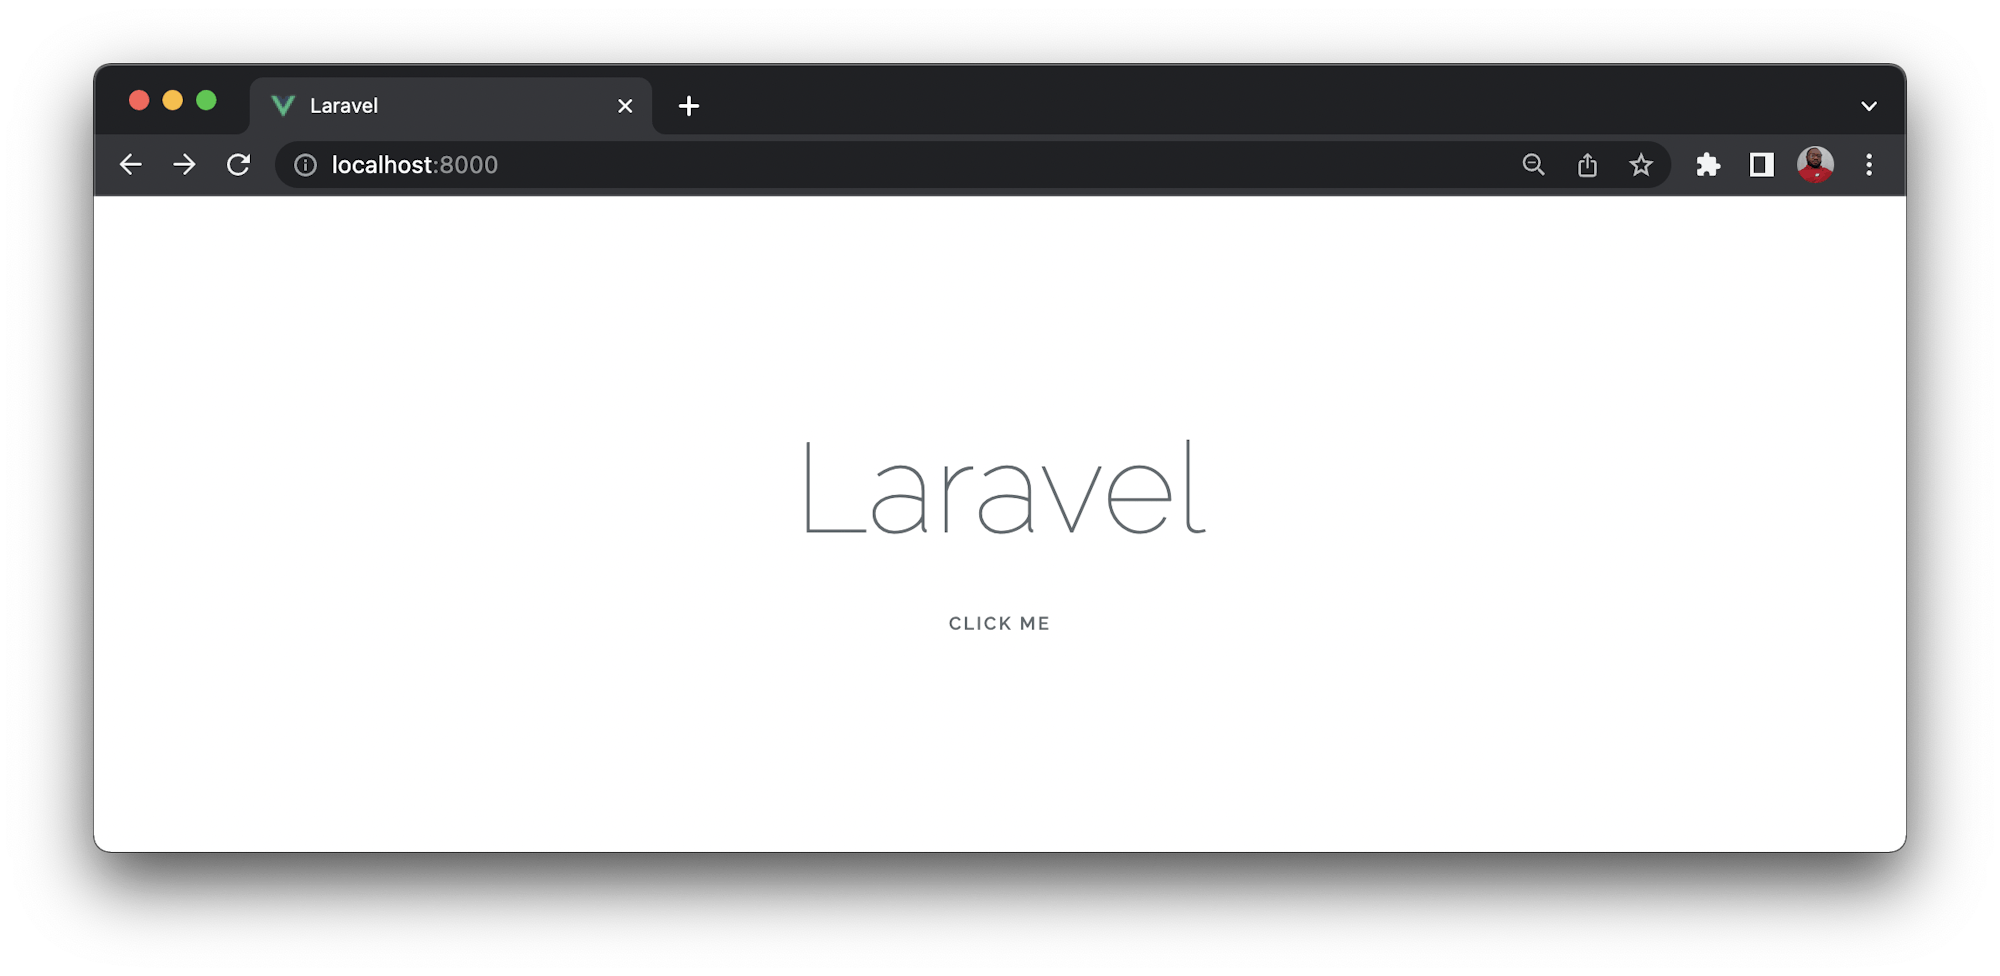
It’s a simple homepage similar to the default page that comes with every new Laravel project. In this case, the page contains a link that says Click Me. When clicked, the link redirects you to http://127.0.0.1:8000/myresponse.
The /myresponse route displays Here is my response.
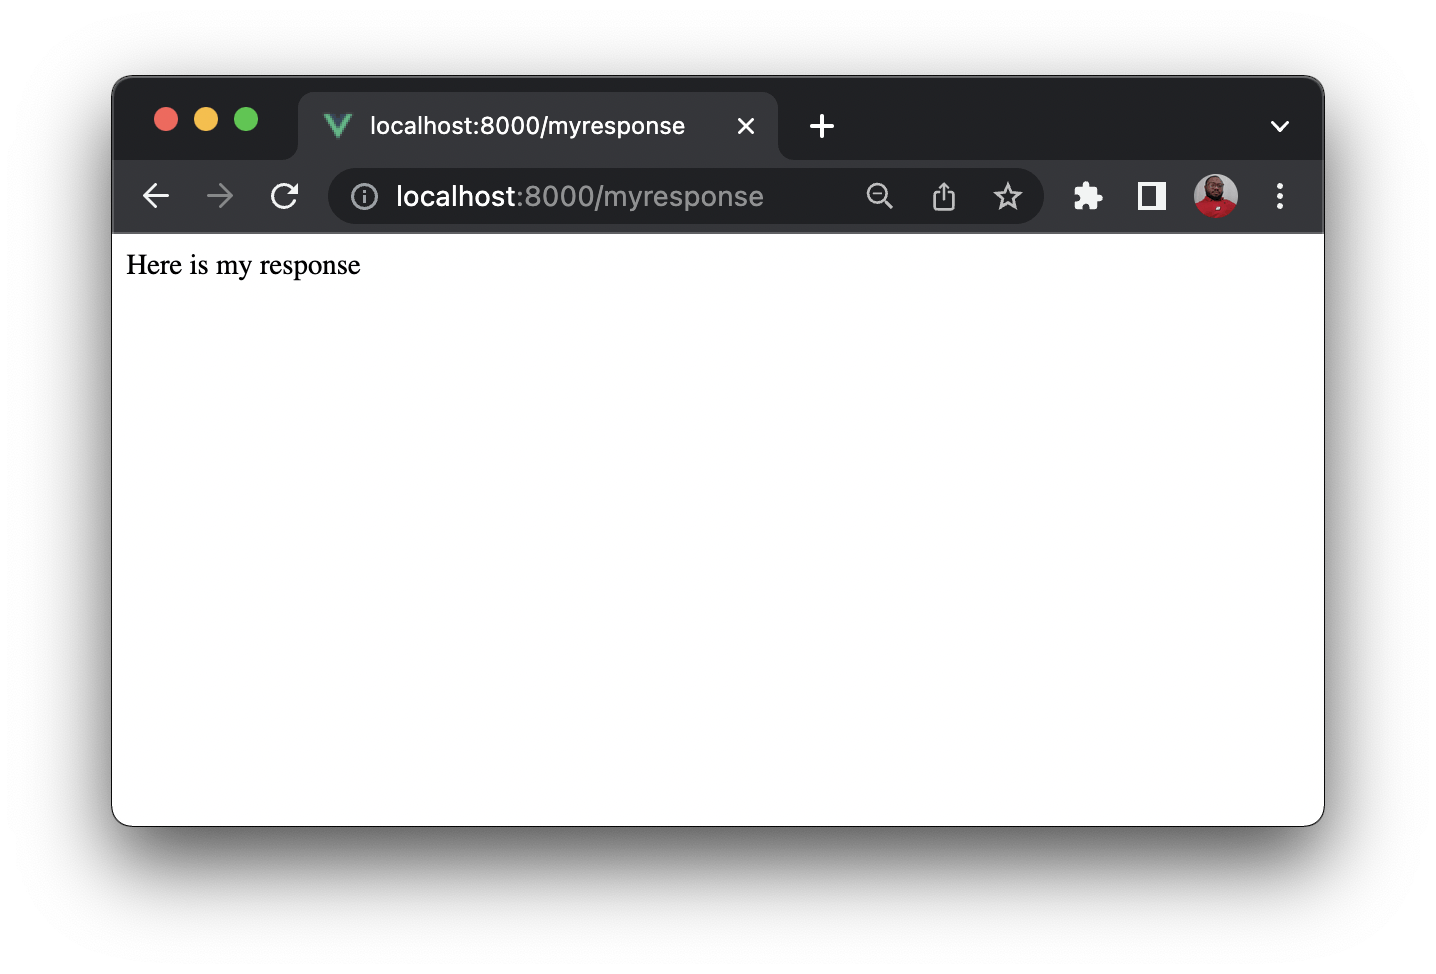
We will be testing this behavior later on.
The project also contains a .env.testing environment file just for our test cases. The application tests can be found in the tests folder.
Three types of tests have been set up in the tests folder. A unit test file in the Unit folder (ExampleUnitTest.php), another file containing HTTP tests in the Feature folder (ExampleHttpTest.php), and finally, a browser test file in the Browser folder (ExampleBrowserTest.php).
In this post, we will automate these tests by adding them to our CircleCI configuration.
Adding unit tests to the CircleCI configuration
The first set of tests to add to your CircleCI config are the unit tests contained in the tests/Unit/ExampleUnitTest.php file.
This file contains two test cases:
public function testBasicTest()
{
    $this->assertTrue(true);
}

public function testUserCreation()
{
    $user = new User([
        'name' => "Test User",
        'email' => "test@mail.com",
        'password' => bcrypt("testpassword")
    ]);

    $this->assertEquals('Test User', $user->name);
}
The first test comes by default with any Laravel project. It asserts the boolean true.
The second test creates a new user instance with the User model. It then checks the name of the newly created user instance against the expected value to assert a match.
You can automate this test to run each time you push to your repository.
Go into the root of your project and create a folder named .circleci. Inside this folder, create a file named config.yml.
Here is what you need to do to automate your unit tests:
- Spin up the required environment
- Install dependencies with composer
- Cache dependencies
- Set up a
.envenvironment file for the project - Run the unit tests
Paste this code into your config.yml file:
version: 2.1
orbs:
browser-tools: circleci/browser-tools@1.1
jobs:
build:
docker:
# Specify the version you desire here
- image: cimg/php:7.4.14-browsers
steps:
- browser-tools/install-browser-tools
- checkout
- run:
name: "Prepare Environment"
command: |
sudo apt update
sudo docker-php-ext-install zip
- run:
name: "Create Environment file"
command: |
mv .env.testing .env
# Download and cache dependencies
- restore_cache:
keys:
# "composer.lock" can be used if it is committed to the repo
- v1-dependencies-{{ checksum "composer.json" }}
# fallback to using the latest cache if no exact match is found
- v1-dependencies-
- run:
name: "Install Dependencies"
command: composer install -n --prefer-dist
- save_cache:
key: v1-dependencies-{{ checksum "composer.json" }}
paths:
- ./vendor
- run:
name: "Generate App key"
command: php artisan key:generate
# run tests with phpunit
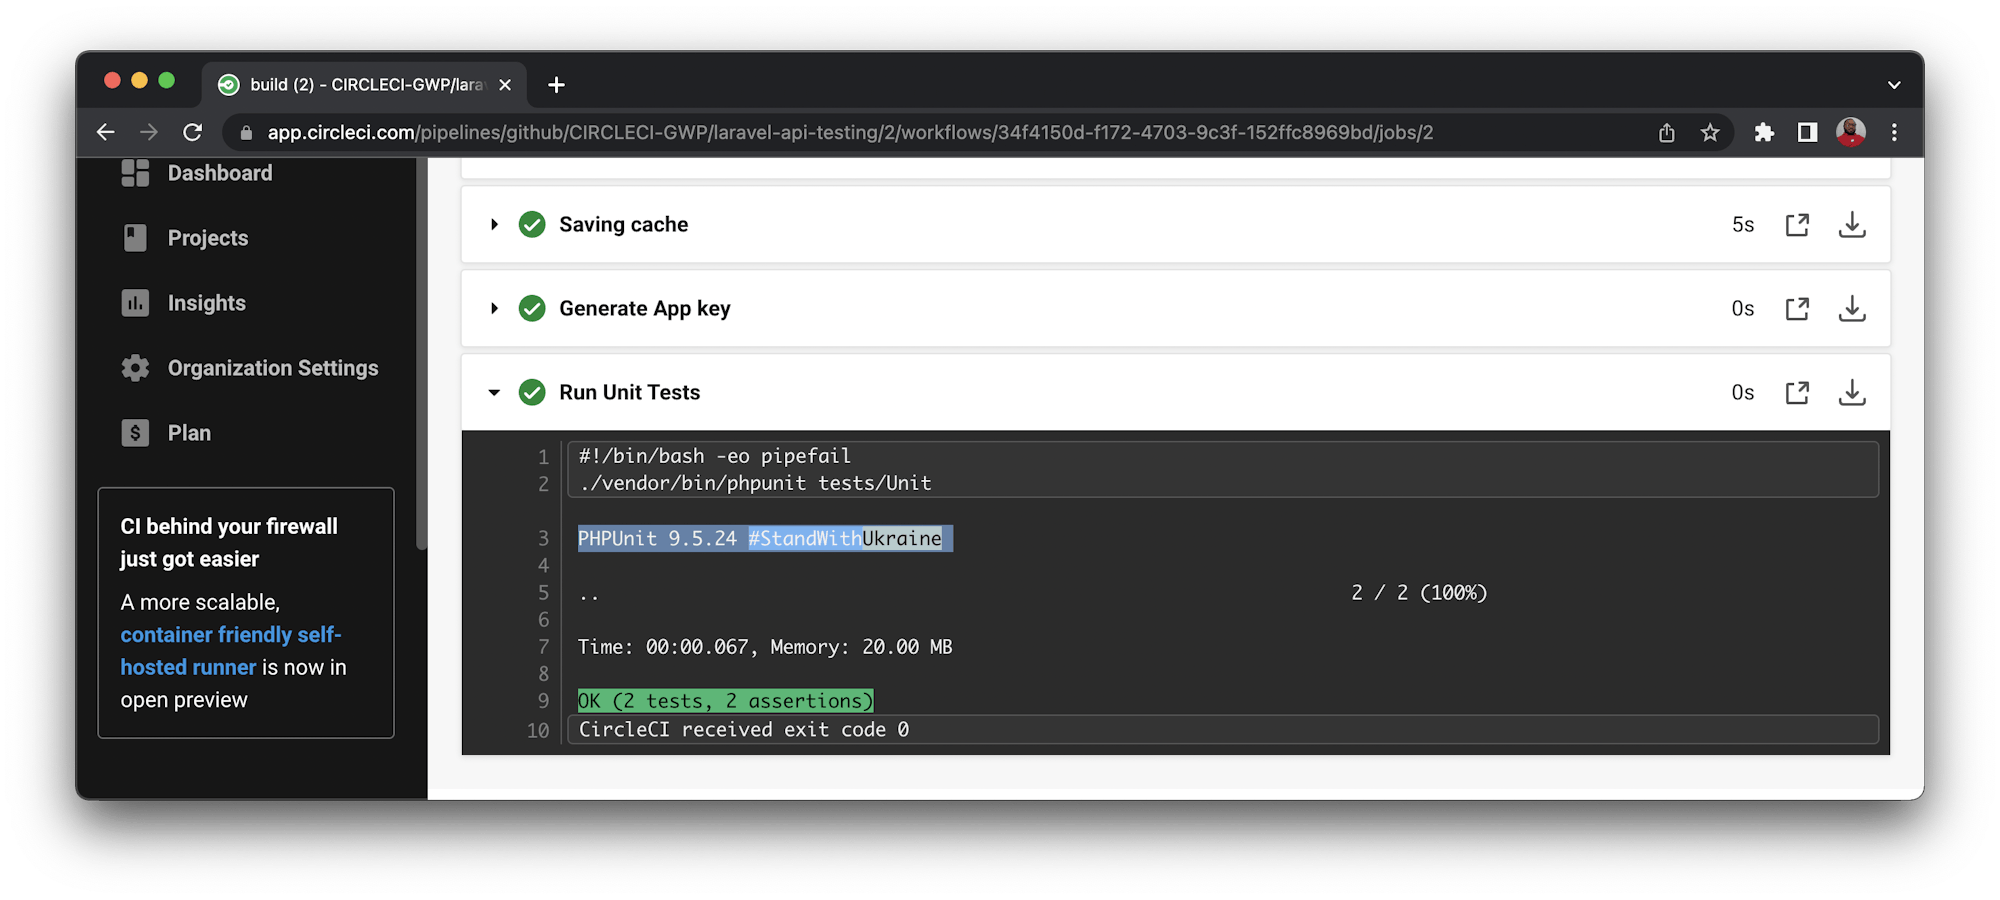
- run:
name: "Run Unit Tests"
command: ./vendor/bin/phpunit tests/Unit
This configuration pulls in a PHP image and checks out your code into the environment. The environment file is created from .env.testing.
jobs:
  build:
    docker:
      # Specify the version you desire here
      - image: circleci/php:7.4-node-browsers

    steps:
      - checkout

      - run:
          name: "Prepare Environment"
          command: |
            sudo apt update
            sudo docker-php-ext-install zip

      - run:
          name: "Create Environment file"
          command: |
            mv .env.testing .env
The artisan command installs dependencies. Now you can generate the application key required by Laravel.
      # Download and cache dependencies
      - restore_cache:
          keys:
            # "composer.lock" can be used if it is committed to the repo
            - v1-dependencies-{{ checksum "composer.json" }}
            # fallback to using the latest cache if no exact match is found
            - v1-dependencies-

      - run:
          name: "Install Dependencies"
          command: composer install -n --prefer-dist

      - save_cache:
          key: v1-dependencies-{{ checksum "composer.json" }}
          paths:
            - ./vendor

      - run:
          name: "Generate App key"
          command: php artisan key:generate
With all required assets in place, run your unit tests in the tests/Unit folder.
      # run tests with phpunit
      - run:
          name: "Run Unit Tests"
          command: ./vendor/bin/phpunit tests/Unit
Good.
Now push your updates to your GitHub repository.
Connecting the API project to CircleCI
Your next task is to set up the project on CircleCI. Go to your CircleCI console. If you have signed up with your GitHub account, all your repositories will be available on your project’s dashboard.
Next, find your laravel-api-test project, and click Set Up Project.

You will be prompted to either write a new configuration file or use an existing one in your project. Select the existing option. Enter the name of the branch where your code is housed on GitHub, then click Set Up Project.
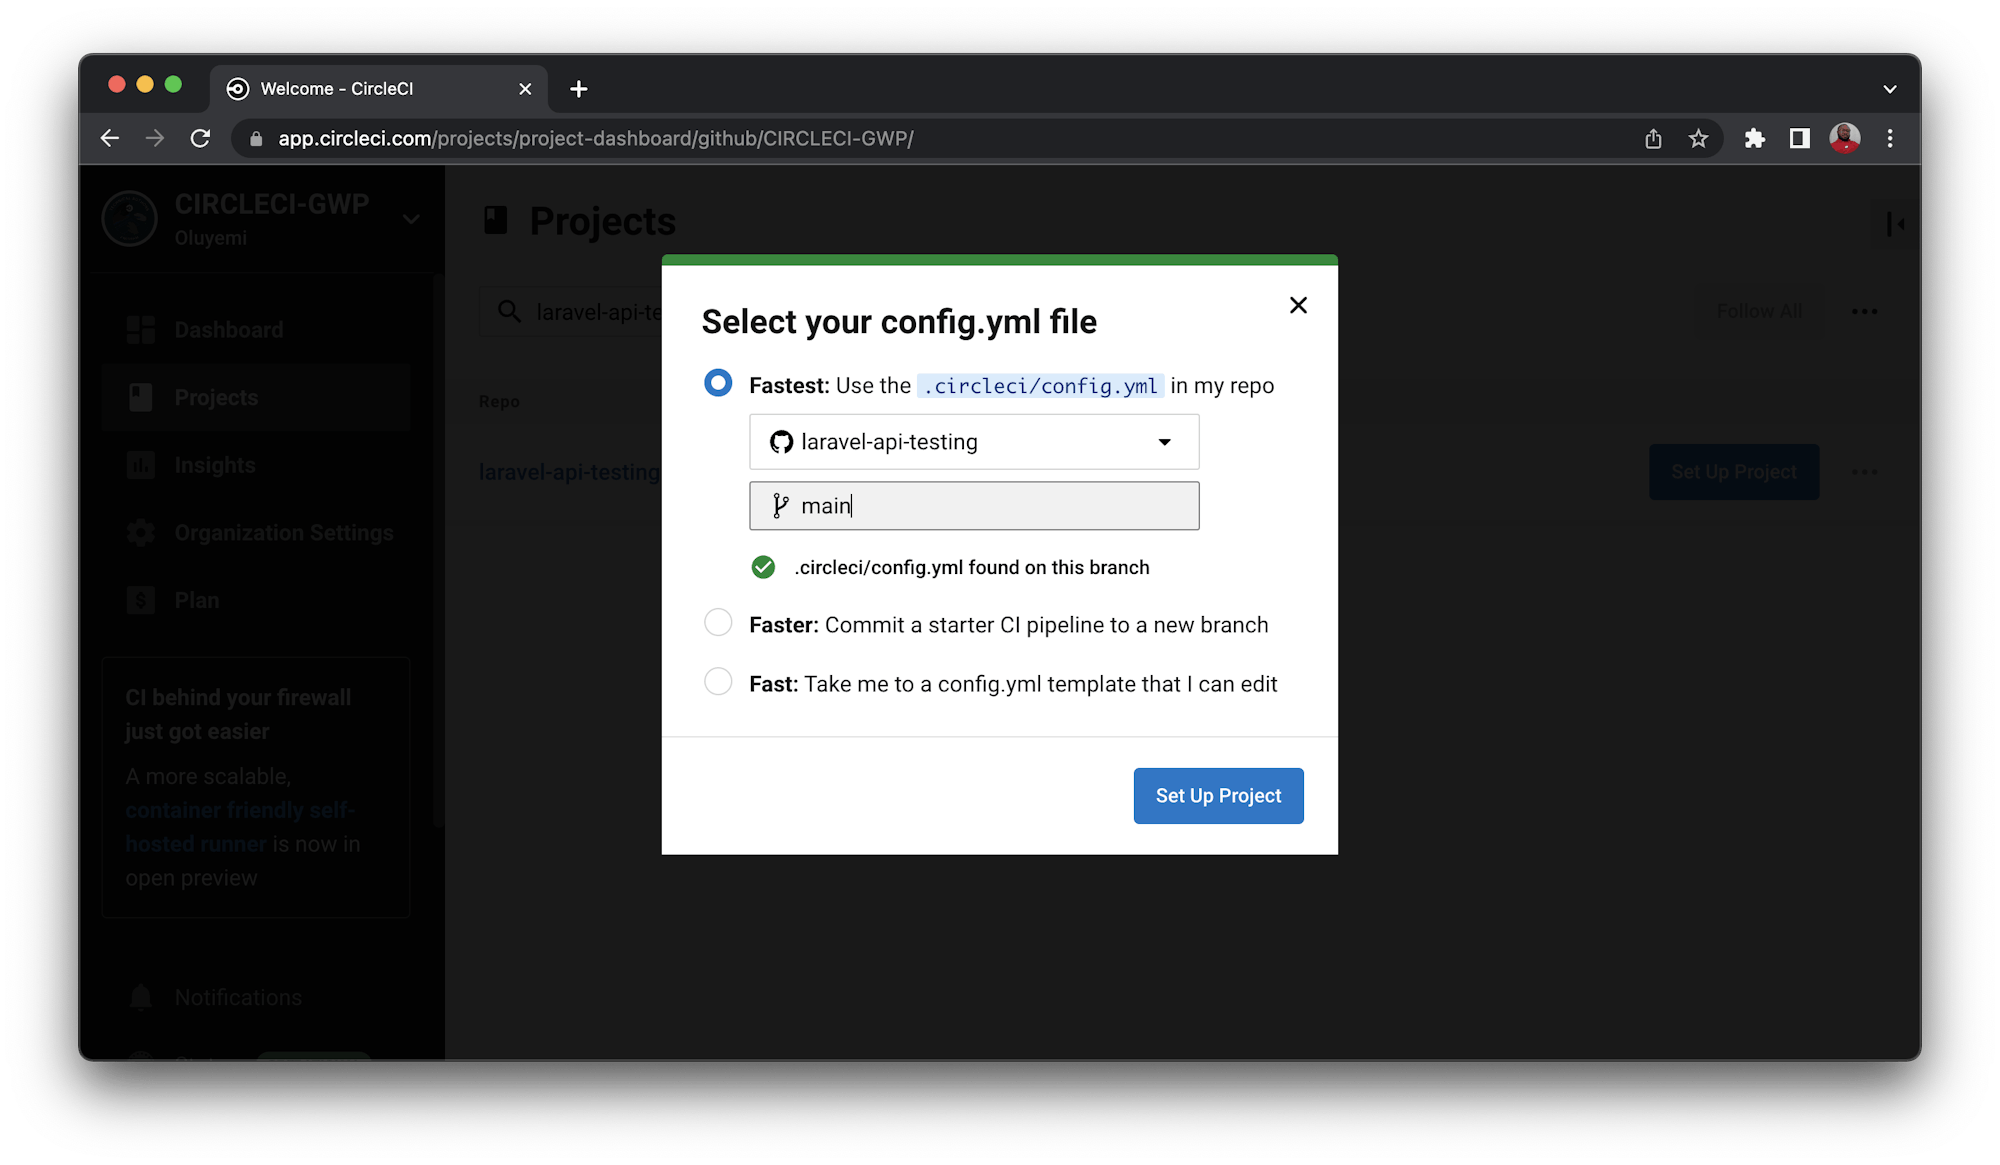
Click Start building.
Adding http tests to CircleCI configuration
The next task to automate is the http tests. The project contains an API route contained in the routes/api.php file.
Route::post('createuser', 'UserController@createUser');
Note: Don’t forget to add the import use App\Http\Controllers\UserController
This route maps to a createUser method in the UserController controller. This method creates a new user in the database and returns a success message: “Successfully created user”. It also returns the status code: 201(Created).
A test has been written for this endpoint to assert the status code and success message for successful user creation. This test is contained in the file tests/Feature/ExampleHttpTest.php.
public function testUserCreationEndpointTest()
{
    $name = $this->faker->name();
    $email = $this->faker->email();
    $password = "mypassword";

    $response = $this->postJson('/api/createuser', [
        'name' => $name,
        'email' => $email,
        'password' => $password,
        'password_confirmation' => $password
    ]);

    $response
        ->assertStatus(201)
        ->assertExactJson([
            'message' => "Successfully created user!",
        ]);
}
This test creates a new dummy user by calling the createuser endpoint. It then checks the response code and response body to see that it matches what is expected.
You can now automate this test in your CircleCI configuration. Here are the steps:
- Create a sqlite database named
database.sqlitein the database folder..env.testinguses the sqlite database for tests. The sqlite configuration inconfig/database.phphas also been defaulted to use this database. - Run migrations
- Run Http tests with PHPUnit
Add these steps to your CircleCI configuration file:
- run:
name: "Install Sqlite"
command: sudo apt-get install php7.4-sqlite3
- run:
name: "Create database and run migration"
command: |
touch database/database.sqlite
php artisan migrate --env=testing
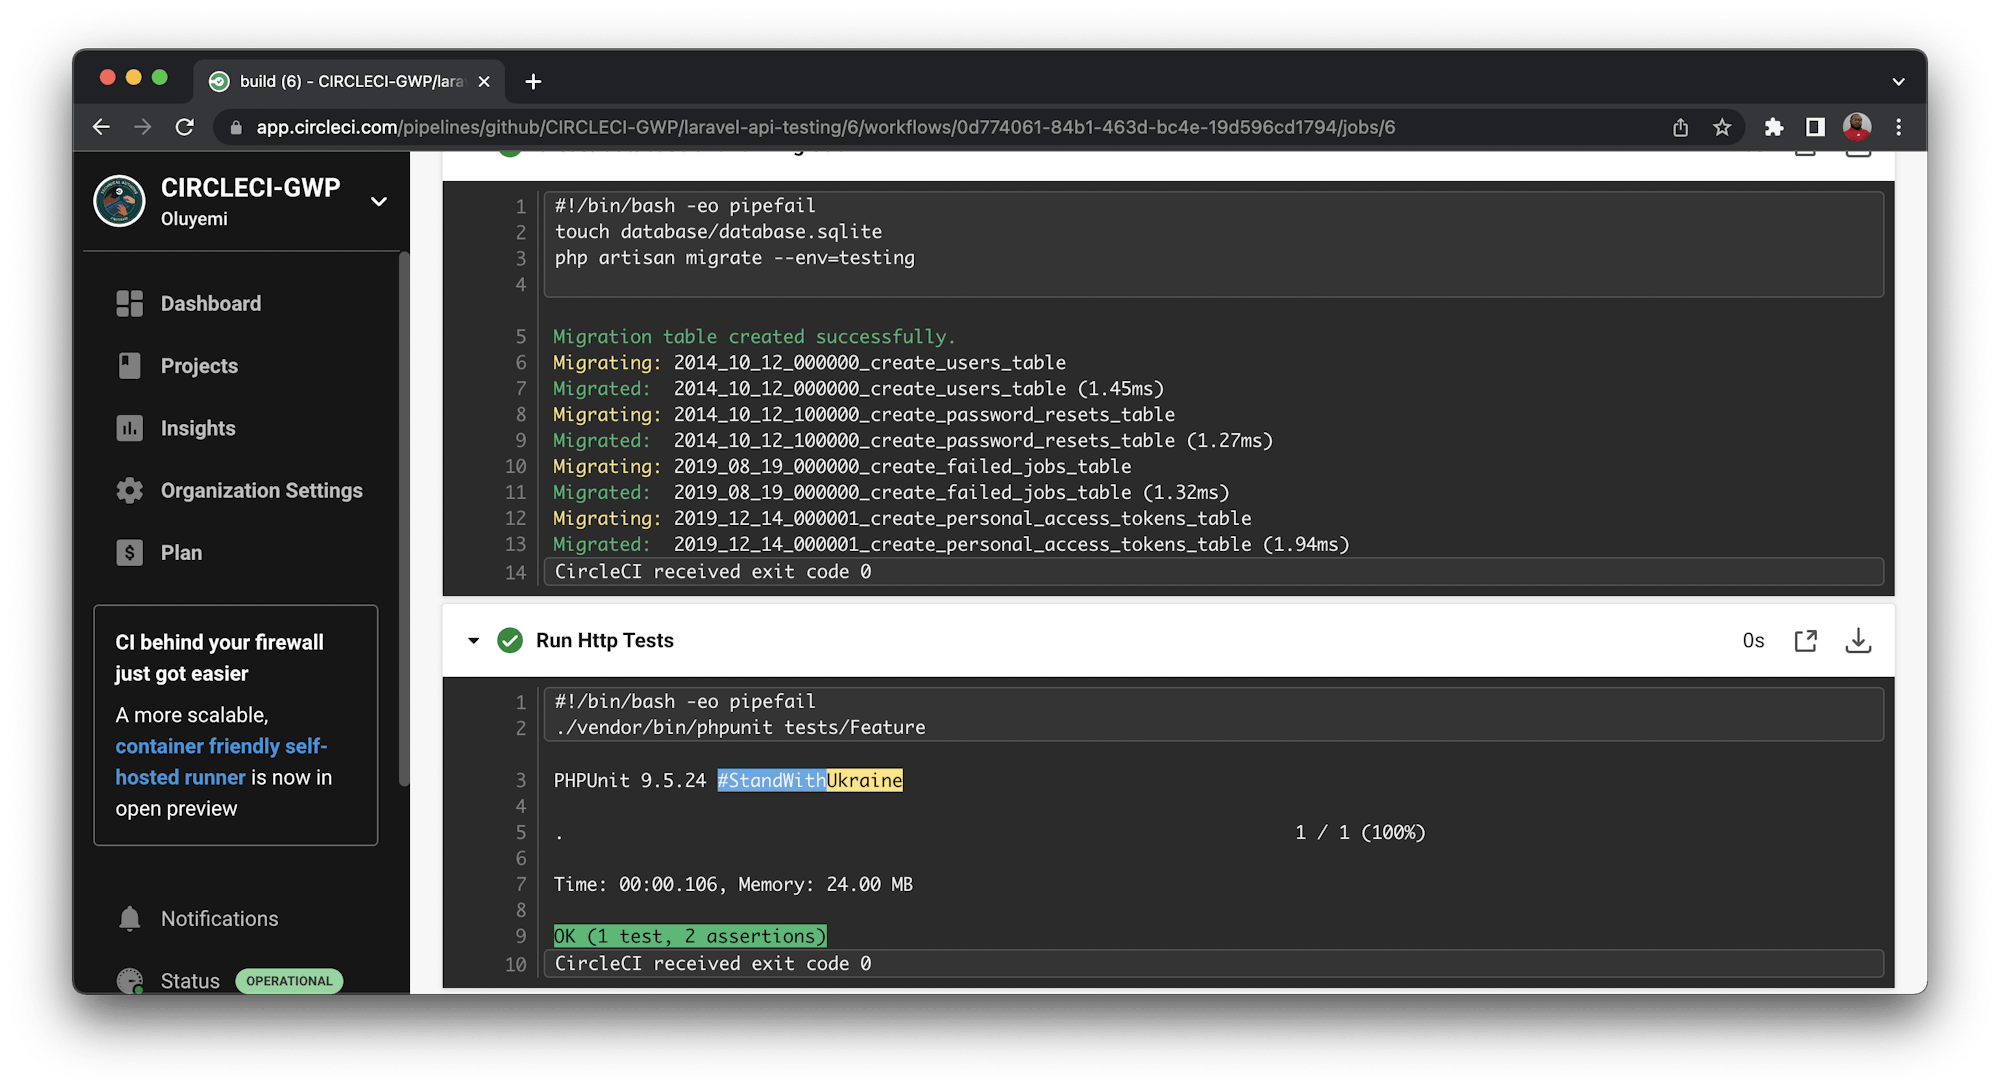
- run:
name: "Run Http Tests"
command: ./vendor/bin/phpunit tests/Feature
These commands install Sqlite, referencing the particular version (7.4) for this tutorial, and then create your database file in the database folder. They then run the migrations, specifying a test environment.
In the second step, the http tests contained in the tests/Feature folder are run.
Save the file and push your changes to your repository. This should trigger the CI/CD pipeline and the tests should run successfully.
Adding browser tests to CircleCI configuration
The last set of tests you will be adding to your configuration is the browser tests.
Laravel uses the laravel/dusk package to run tests directly in your browser. By default, laravel/dusk uses Google Chrome and a standalone ChromeDriver installation to run your browser tests. You can use other browsers if you have your own Selenium server set up.
The Chrome driver already comes along with an installation of the laravel/dusk package so you don’t need to worry about installing it separately.
By default, laravel/dusk tries to start the Chrome driver when the dusk command is run to initiate the browser tests. For this tutorial we need to start the driver manually to be in total control of the process. Comment out the line that starts the Chrome browser automatically in tests/DuskTestCase.php:
public static function prepare()
{
    // static::startChromeDriver();
}
This has already been done in the cloned project so you don’t need to do it yourself.
The DuskTestCase.php file and the tests/Browser directory do not come by default with a new Laravel project. You can create them when laravel/dusk is installed by running:
composer require --dev laravel/dusk
php artisan dusk:install
More details about laravel/dusk and how it operates can be found in the Laravel Documentation page for the package.
We already know that our application has a homepage with a link labeled Click Me. When it is clicked, it redirects to a route that displays the string, “Here is my response”.
Inside the ExampleBrowserTest.php browser test file in the tests/Browser folder, there is a test that asserts this behavior. It also checks to see if the big Laravel label can be found on your homepage.
public function testBasicExample()
{
    $this->browse(function (Browser $browser) {
        $browser->visit('/')
                ->assertSee('Laravel');
    });
}

public function testLink()
{
    $this->browse(function (Browser $browser) {
        $browser->visit('/')
                ->clickLink('Click Me')->assertSee("Here is my response");
    });
}
To run your browser tests, add this to your CircleCI configuration:
- Install the laravel/dusk package.
- Install staudenmeir/dusk-updater package. This package updates your Chrome drivers to the version of the Chrome browser available on the Docker image.
- Start the Chrome driver for your image (in this case Linux).
- Serve the application.
- Run the browser tests.
Add these steps to your CircleCI configuration:
    - run:
        name: "Install Dusk and Update Chrome Drivers"
        command: |
          composer require --dev laravel/dusk
          composer require --dev staudenmeir/dusk-updater
          php artisan dusk:update --detect

    - run:
        name: Start Chrome Driver
        command: ./vendor/laravel/dusk/bin/chromedriver-linux
        background: true

    - run:
        name: Run Laravel Server
        command: php artisan serve
        background: true

    - run:
        name: Run Browser Tests Tests
        command: php artisan dusk
This snippet starts by installing laravel/dusk. Then in installs the staudenmeir/dusk-updater package, which enables you to update our chrome drivers.
Next, it starts the Chrome driver and the Laravel application server in the background, ensuring that they run in the background. background: true is added to both steps.
The last step is running the browser tests by using the dusk command.
Here is the complete config.yml file:
version: 2.1
orbs:
  browser-tools: circleci/browser-tools@1.1
jobs:
  build:
    docker:
      # Specify the version you desire here
      - image: cimg/php:7.4.14-browsers

    steps:
      - browser-tools/install-browser-tools
      - checkout

      - run:
          name: "Create Environment file"
          command: |
            mv .env.testing .env

      # Download and cache dependencies
      - restore_cache:
          keys:
            # "composer.lock" can be used if it is committed to the repo
            - v1-dependencies-{{ checksum "composer.json" }}
            # fallback to using the latest cache if no exact match is found
            - v1-dependencies-

      - run:
          name: "Install Dependencies"
          command: composer install -n --prefer-dist

      - save_cache:
          key: v1-dependencies-{{ checksum "composer.json" }}
          paths:
            - ./vendor

      - run:
          name: "Generate App key"
          command: php artisan key:generate

      # run tests with phpunit
      - run:
          name: "Run Unit Tests"
          command: ./vendor/bin/phpunit tests/Unit

      - run:
          name: "Install sqlite"
          command: sudo apt-get install php7.4-sqlite3

      - run:
          name: "Create database and run migration"
          command: |
            touch database/database.sqlite
            php artisan migrate --env=testing

      - run:
          name: "Run Http Tests"
          command: ./vendor/bin/phpunit tests/Feature

      - run:
          name: "Install Dusk and Update Chrome Drivers"
          command: |
            composer require --dev laravel/dusk
            composer require --dev staudenmeir/dusk-updater
            php artisan dusk:update --detect

      - run:
          name: Start Chrome Driver
          command: ./vendor/laravel/dusk/bin/chromedriver-linux
          background: true

      - run:
          name: Run Laravel Server
          command: php artisan serve
          background: true

      - run:
          name: Run Browser Tests Tests
          command: php artisan dusk
With this in place, push your changes to the repository. The tests will run successfully.
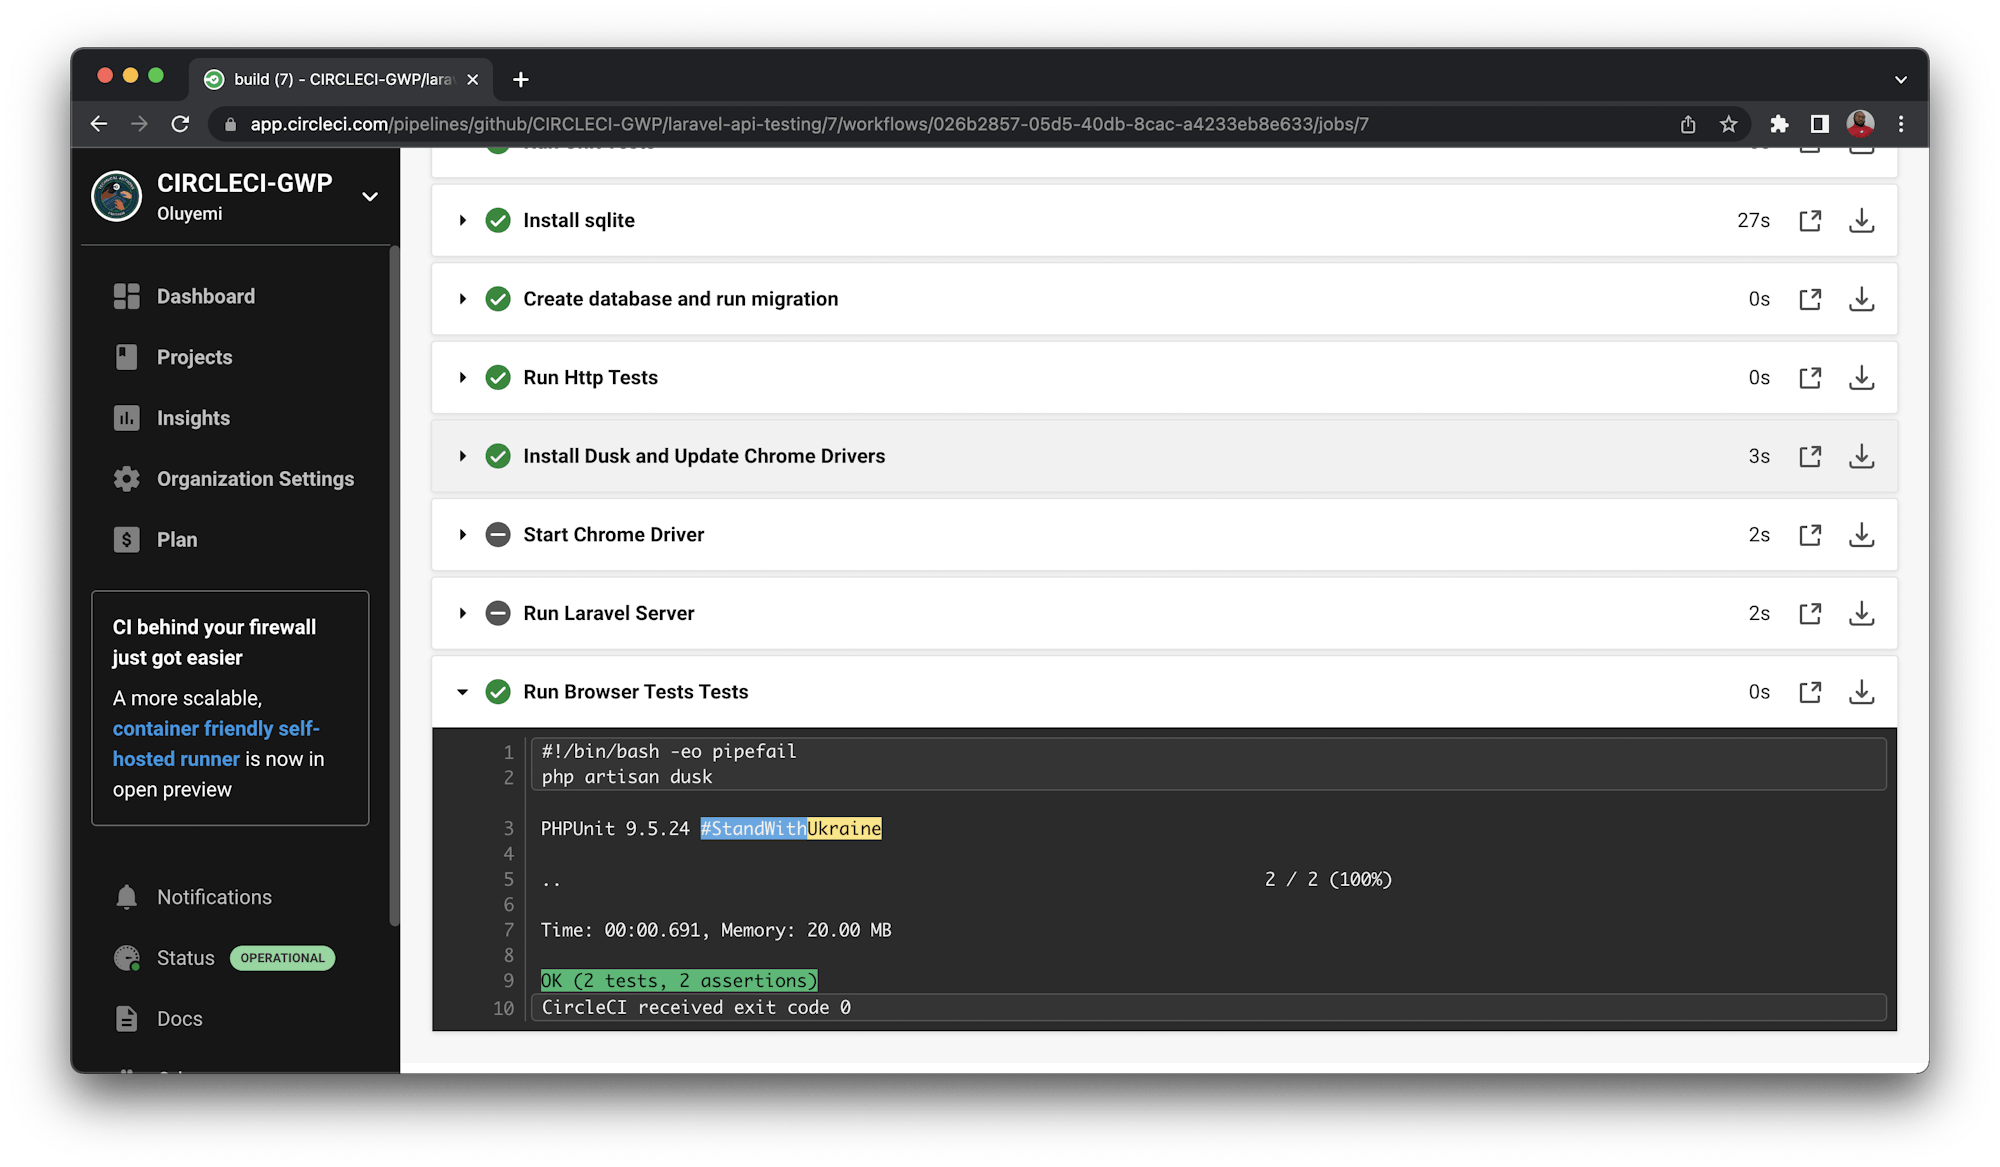
Notice that the circular icons next to Start Chrome Driver and Run Laravel Server are “greyed out”. This indicates that these processes are running in the background as specified in the configuration.
Conclusion
In this post, you have learned how to add different types of Laravel tests to your CircleCI configuration and how CircleCI makes running these tests a breeze. If some of your tests are not successfully running, try to go through the post once again so see if you have missed any steps. I am confident you will be able to find the missing piece. The complete source code can be found here on GitHub.
Wishing you a bugless coding week.
Fikayo Adepoju is a LinkedIn Learning (Lynda.com) Author, Full-stack developer, technical writer, and tech content creator proficient in Web and Mobile technologies and DevOps with over 10 years experience developing scalable distributed applications. With over 40 articles written for CircleCI, Twilio, Auth0, and The New Stack blogs, and also on his personal Medium page, he loves to share his knowledge to as many developers as would benefit from it. You can also check out his video courses on Udemy.


