
GraphQL, a query language for APIs, enables front-end clients to query exactly what they need from the backend, and it is used widely by companies like Pinterest, Intuit, and Postman. In this tutorial, you will learn how to deploy a simple GraphQL server written in Node.js to Heroku via a continuous deployment (CD) pipeline using CircleCI.
Prerequisites
To follow along with this post, you will need the following already set up:
- Node.js installed on your system (you can confirm this by running the command
node -von your terminal to print out your version of Node.js installed) - Git installed on your system (you can confirm this by running the command
giton your terminal; this should print out available git commands) - A Heroku account
- A GitHub account
- A CircleCI account
Scaffolding the GraphQL server project
To begin setting up a GraphQL server, create a new folder for the project by running:
mkdir graphql-server-heroku
Go into the root of the folder. Scaffold a new Node.js project by running:
npm init -y
The -y optional flag allows you to skip confirming the default answers to the questions for creating the package.json file and just accepts them for you.
You will be creating an ExpressJS Node.js application and building the GraphQL server. To do so, you need to install these packages:
express: to create our ExpressJS Node.js applicationgraphql: the GraphQL npm package for Node.jsexpress-graphql: ExpressJS middleware for GraphQL
Install these packages by running:
npm install --save express graphql@15.3 express-graphql
Note: We installed v15.3 of graphQL because the specific version is required as peer dependency for
express-graphqlpackage.
Great!
You now have the packages you need to start putting together your GraphQL server.
Defining the GraphQL schema
Create a folder named src at the root of your project:
mkdir src
Within this folder, create a new file with the name schema.js. Paste in this code:
const { buildSchema } = require("graphql");

const schema = buildSchema(`
    type Query {
        users: [User!]!,
        user(id: Int!): User!
    }

    type Mutation {
        editUser(id: Int!, name: String!, email: String!): User!
    }

    type User {
        id: ID!
        name: String!
        email: String
        posts: [Post!]
    }

    type Post {
        id: ID!
        title: String!
        published: Boolean!
        link: String
    }
`);

module.exports = schema;
This code creates four types, consisting of two built-in types (Query and Mutation) and two custom types (User and Post).
These are the custom types that were defined:
Useris a type representing a user in the application with its respective fields and a relationalpostsfield. This type returns an array of posts created by the user.Postis a type representing a publication created by a user in the application with its respective fields.- The
Querytype defines two pieces of information that can be queried from your GraphQL server:usersis an array ofUsers.useris a singleUserwith the specifiedidin the arguments list.
- The
Mutationtype defines theeditUsermutation. Given theidof the user, this type can be called to edit a user and then update the information (nameandemail).
The schema is created using the buildSchema of the graphql package and exported at the end of the file.
Mocking data
To have results for your queries, you need data. For this tutorial, you will be using MongoDB.
The goal of this post is to demonstrate deploying a simple GraphQL server, so you don’t need to bother with setting up a MongoDB server. Instead, you can use a mocked version using the mongodb-memory-server. This package allows you to create and use an in-memory MongoDB database server.
To set this up, go to the root of your project. Install the required packages by running:
npm install --save mongodb mongodb-memory-server
This installation might take some time, depending on your download speed.
Once the installation is complete, create a new file named data.js in the src folder. This file will export an array of hard-coded user data. Paste this code into the file:
const Users = [
  {
    id: 1,
    name: "Fikayo Adepoju",
    email: "fik4christ@yahoo.com",
    posts: [
      {
        id: 1,
        title: "Creating an Emoji Game with Vue, Auth0, and Google Vision API",
        published: true,
        link: "https://auth0.com/blog/creating-an-emoji-game-with-vue-auth0-and-google-vision-api/",
        author: 1,
      },
      {
        id: 2,
        title: "Electron Tutorial: Building Modern Desktop Apps with Vue.js",
        published: true,
        link: "https://auth0.com/blog/electron-tutorial-building-modern-desktop-apps-with-vue-js/",
        author: 1,
      },
      {
        id: 3,
        title: "State Management with Vuex: a Practical Tutorial",
        published: true,
        link: "https://auth0.com/blog/state-management-with-vuex-a-practical-tutorial/",
        author: 1,
      },
    ],
  },
  {
    id: 2,
    name: "John Doe",
    email: "john@company.com",
    posts: [
      {
        id: 4,
        title: "Build a CI powered RESTful API with Laravel",
        published: true,
        link: "https://circleci.com/blog/build-a-ci-powered-restful-api-with-laravel/",
        author: 2,
      },
      {
        id: 5,
        title: "Automate your Nuxt.js app deployment",
        published: true,
        link: "https://circleci.com/blog/automate-your-nuxt-js-app-deployment/",
        author: 2,
      },
    ],
  },
  {
    id: 3,
    name: "Jane Paul",
    email: "jane@company.com",
    posts: [],
  },
];

module.exports = {
  Users,
};
This code has an array of user objects with their corresponding posts. This information will be used to seed your in-memory database once it is instantiated.
Now, set up your mock MongoDB database server. In the src folder, create a new file named database.js. Paste this code into the file:
const { MongoMemoryServer } = require("mongodb-memory-server");
const { MongoClient } = require("mongodb");
const data = require("./data");

let database = null;

async function startDatabase() {
  const mongo = await MongoMemoryServer.create();
  const mongoDBURL = mongo.getUri();

  const connection = await MongoClient.connect(mongoDBURL, {
    useNewUrlParser: true,
  });

  //Seed Database
  if (!database) {
    database = connection.db();
    await database.collection("users").insertMany(data.Users);
  }

  return database;
}

module.exports = startDatabase;
This code exports a startDatabase function that starts a new (mocked) MongoDB server instance and gets the connection string for the database instance. It then creates a new MongoDB client connection using the connection string.
With the connection to the database, you seed it with the user data exported from the data.js file. A check is made to see if the database reference is null before seeding it with data. This check keeps the data from being entered into the database each time the application starts up.
Finally, the function returns the database reference.
Defining our resolvers
Next up, define resolvers for your GraphQL queries to return the appropriate data for each query operation. You will need to define resolvers for the users and user queries and the editUser mutation.
Create a new file in the src folder named resolvers.js and paste this into it:
const resolvers = {
  users: async (_, context) => {
    const { db } = await context();
    return db.collection("users").find().toArray();
  },
  user: async ({ id }, context) => {
    const { db } = await context();
    return db.collection("users").findOne({ id });
  },
  //Mutation resolvers
  editUser: async ({ id, name, email }, context) => {
    const { db } = await context();

    return db
      .collection("users")
      .findOneAndUpdate({ id }, { $set: { name, email } }, { returnOriginal: false })
      .then((resp) => resp.value);
  },
};

module.exports = resolvers;
You now have resolvers for the three GraphQL requests available on your server. These resolvers fetch and update data using the database reference created earlier by referencing it from the context object of the GraphQL server.
This reference will be added to the context object of the GraphQL server setup in the next section when you put everything together.
Setting up the GraphQL server
Now you can put all the components you built together to set up your GraphQL server.
But first, you need to install one more package. The graphql package comes with the GraphiQL application, which allows you to query your GraphQL endpoint, but you can add a tool that is more robust. Installing the graphql-playground-middleware-express package gives you a fancier interface for querying your GraphQL endpoint.
Run this code to install the package:
npm install --save graphql-playground-middleware-express
You will use this middleware to set up the GraphQL Playground for querying the server.
Set up your server by creating a file named index.js at the root of the project. Add this code to it:
const express = require("express");
const { graphqlHTTP } = require("express-graphql");
const schema = require("./src/schema");
const resolvers = require("./src/resolvers");
const startDatabase = require("./src/database");
const expressPlayground = require("graphql-playground-middleware-express").default;

// Create a context for holding contextual data
const context = async () => {
  const db = await startDatabase();

  return { db };
};

const app = express();

app.use(
  "/graphql",
  graphqlHTTP({
    schema,
    rootValue: resolvers,
    context,
  })
);

//Graphql Playground route
app.get("/playground", expressPlayground({ endpoint: "/graphql" }));

const port = process.env.PORT || "4000";

app.listen(port);

console.log(`🚀 Server ready at http://localhost:4000/graphql`);
This file starts by importing all necessary modules. Then it creates the GraphQL context and returns an object from it containing the reference to your MongoDB instance. Your ExpressJS application is created and the express-graphql middleware is set up with GraphQL schema, resolvers, and context. The GraphQL Playground is set up at the route /playground to load your GraphQL endpoint. Your ExpressJS server is started to listen at port 4000 and print a message to the console.
Querying the GraphQL server
To boot up your server, create a start script in package.json. In the scripts section of the package.json file, add:
...

“scripts” : {
	...,
	“start” : “node index.js”
}
Run npm start to boot up the server.
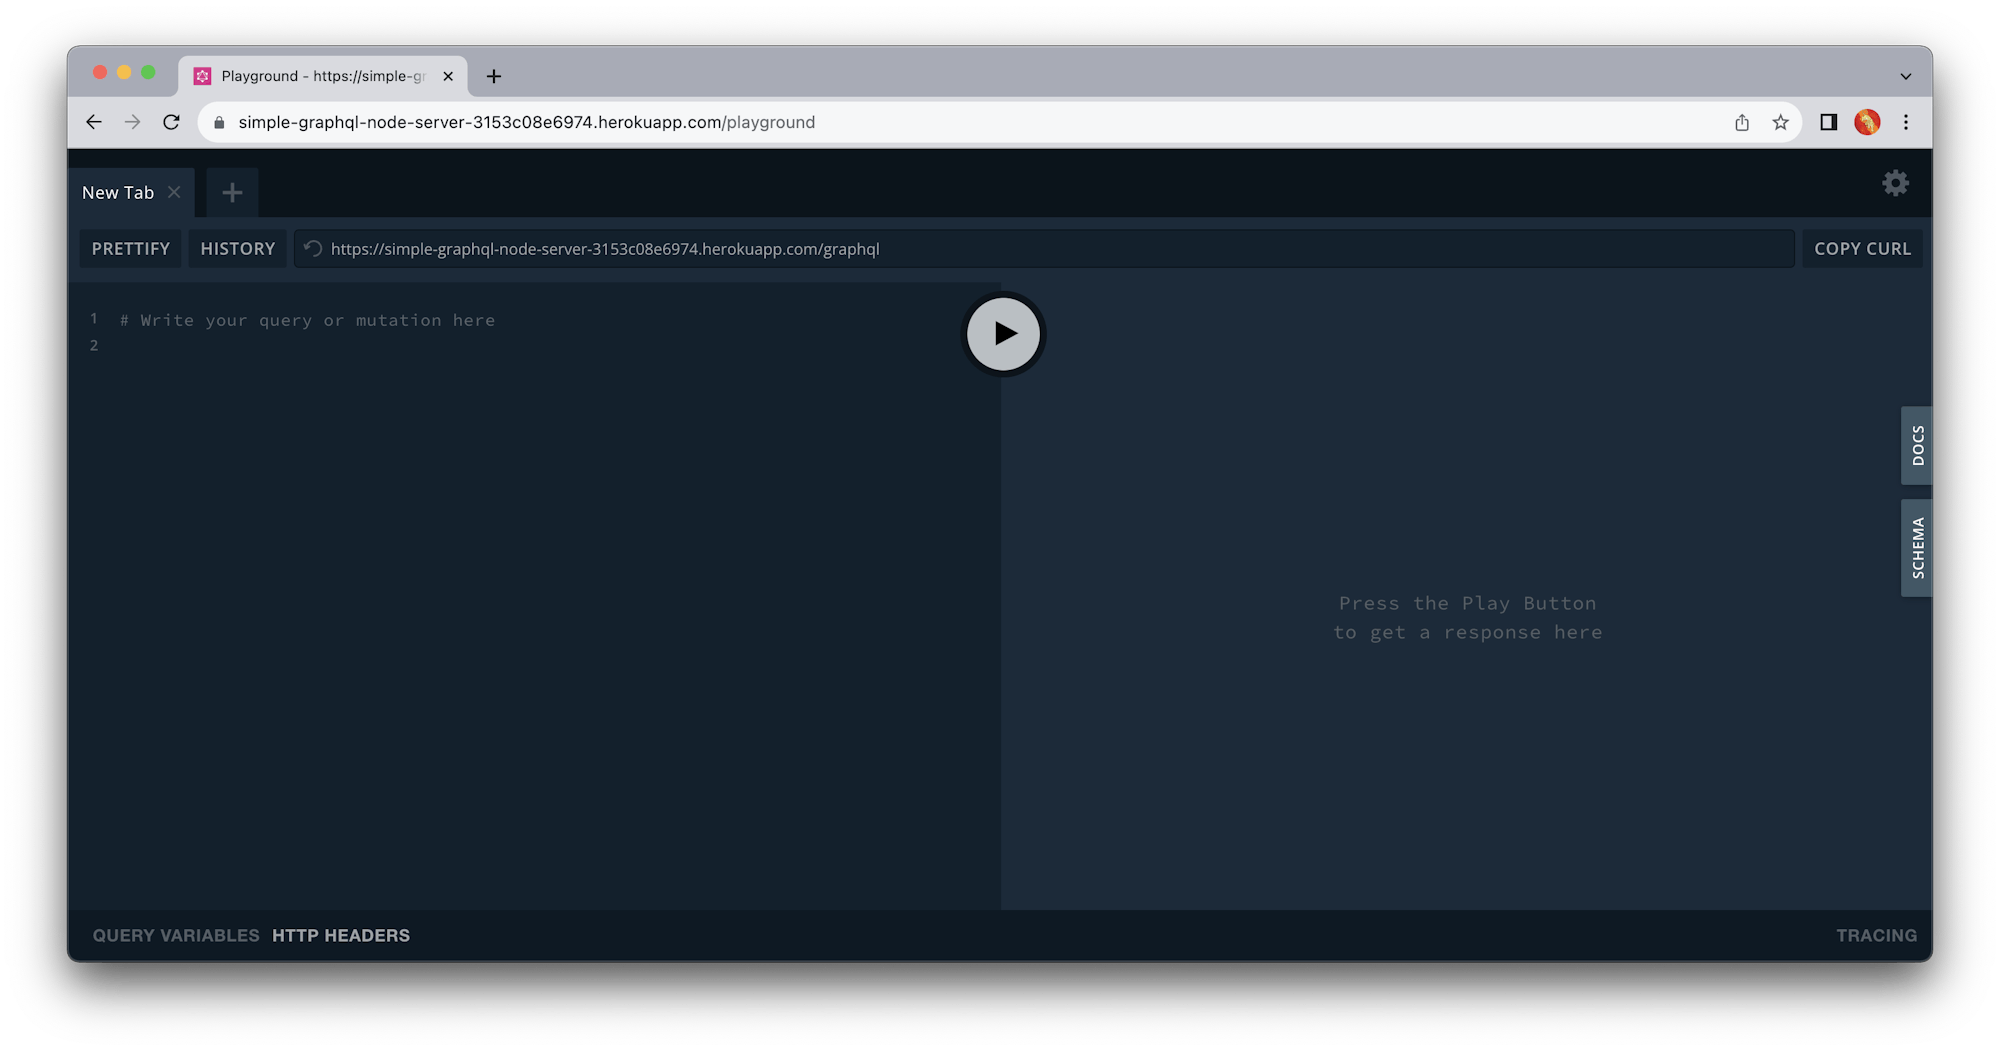
Once the server is up and running, open up your browser and visit http://localhost:4000/playground.
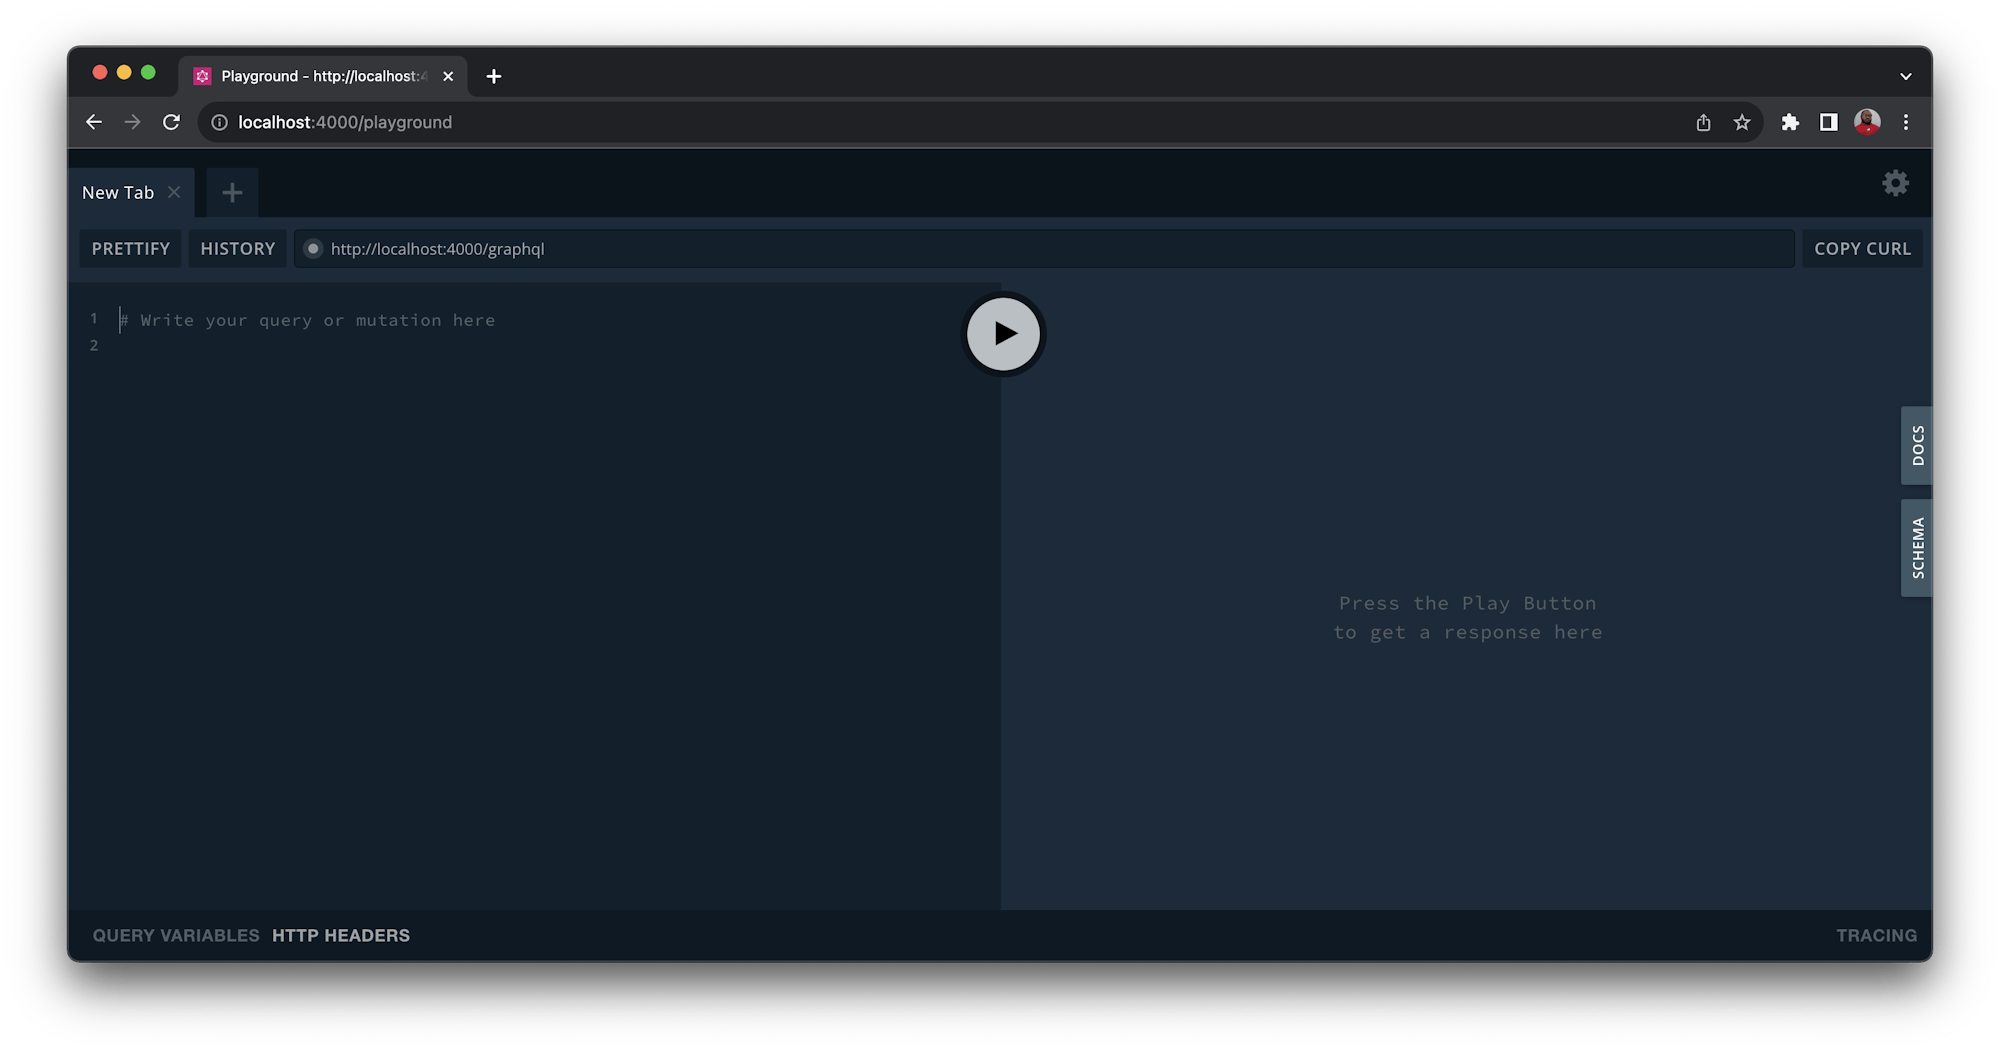
The playground points to your GraphQL endpoint. From here you can write queries against your endpoint and get the results. In the query section of the playground, paste this query and click Play to run it:
{
  users {
    name
    email
    posts {
      title
      published
    }
  }
}
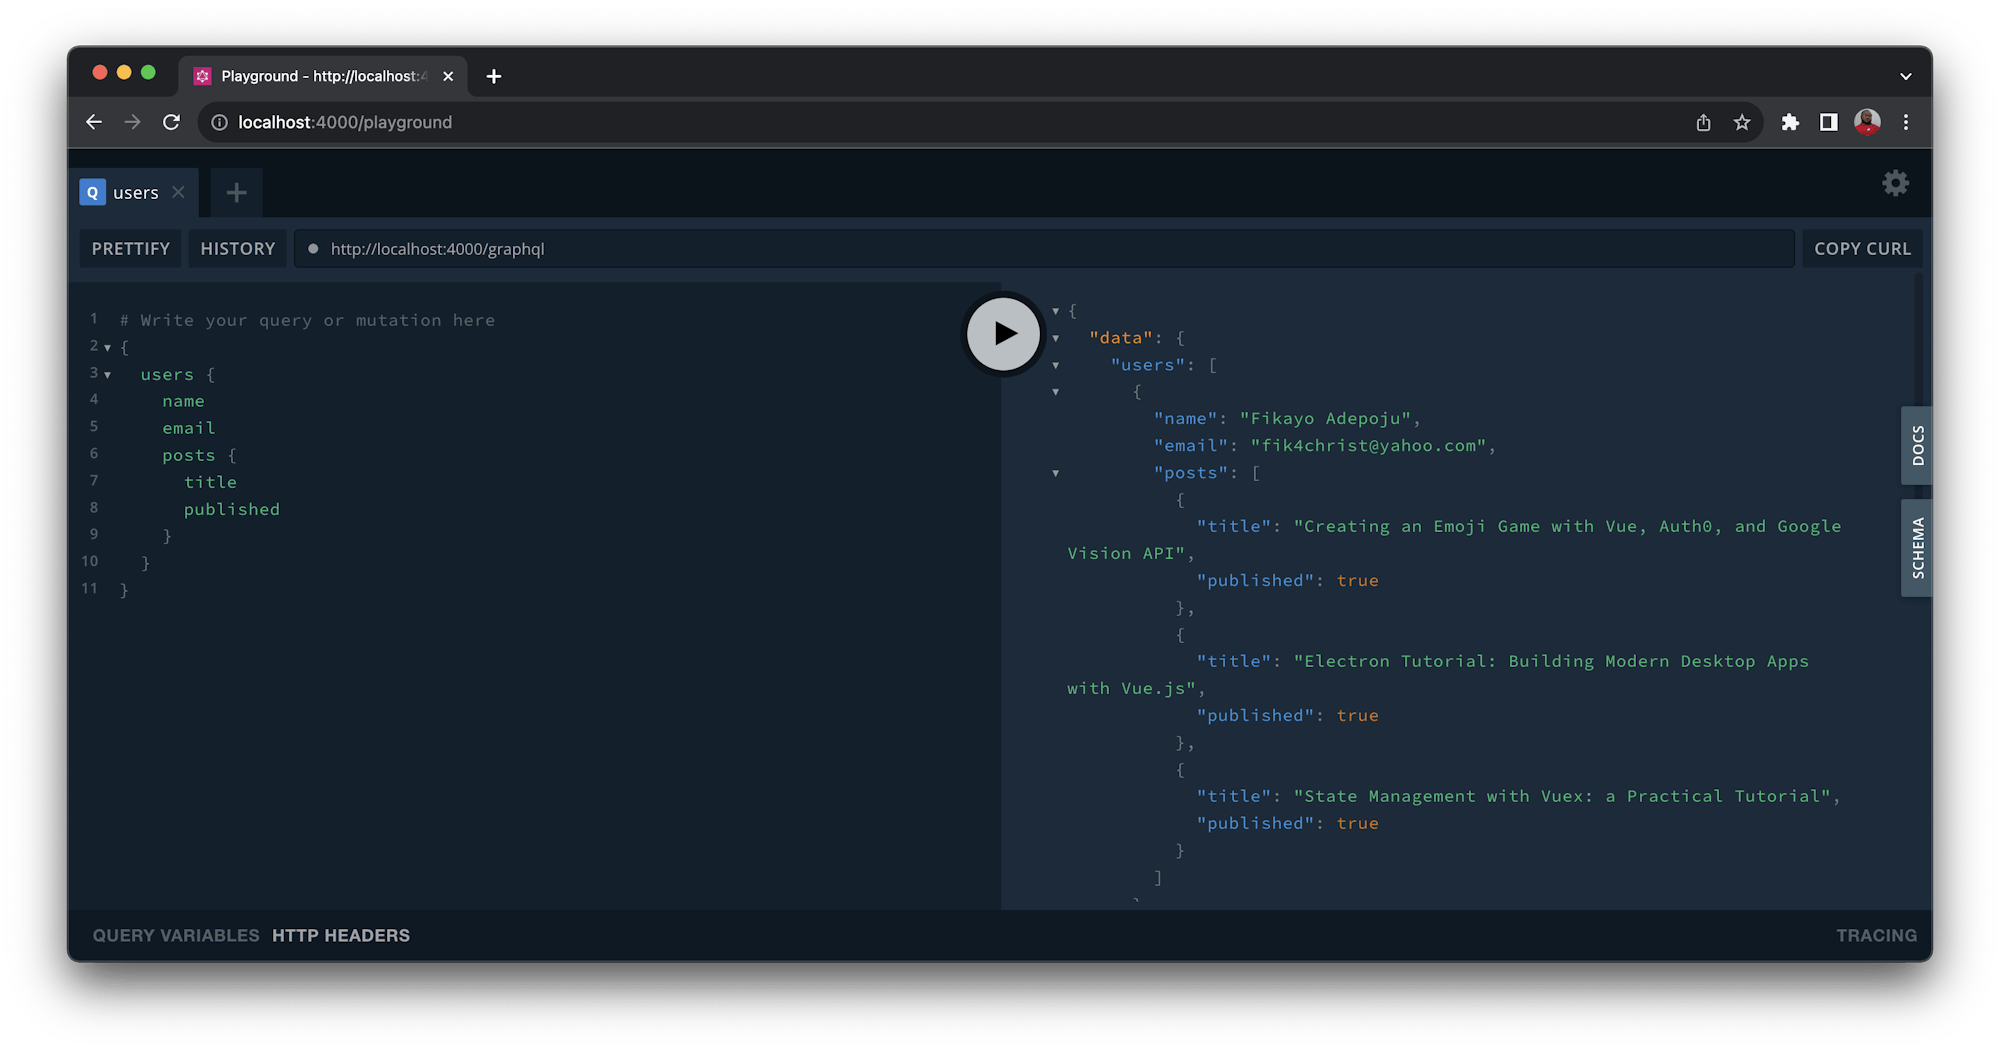
Your GraphQL server is working fine and returning the expected data.
Deploying to Heroku with CircleCI
In this section of the tutorial, you will deploy your GraphQL server through a CD pipeline with CircleCI on the Heroku hosting platform.
To deploy your GraphQL server you need to:
- Create a new Heroku app and get the Heroku API key.
- Write a CircleCI configuration file for deployment to Heroku.
- Connect your project on Github with CircleCI.
- Add your Heroku app name and API key as environment variables to your project on CircleCI.
- Deploy to Heroku as defined in our configuration.
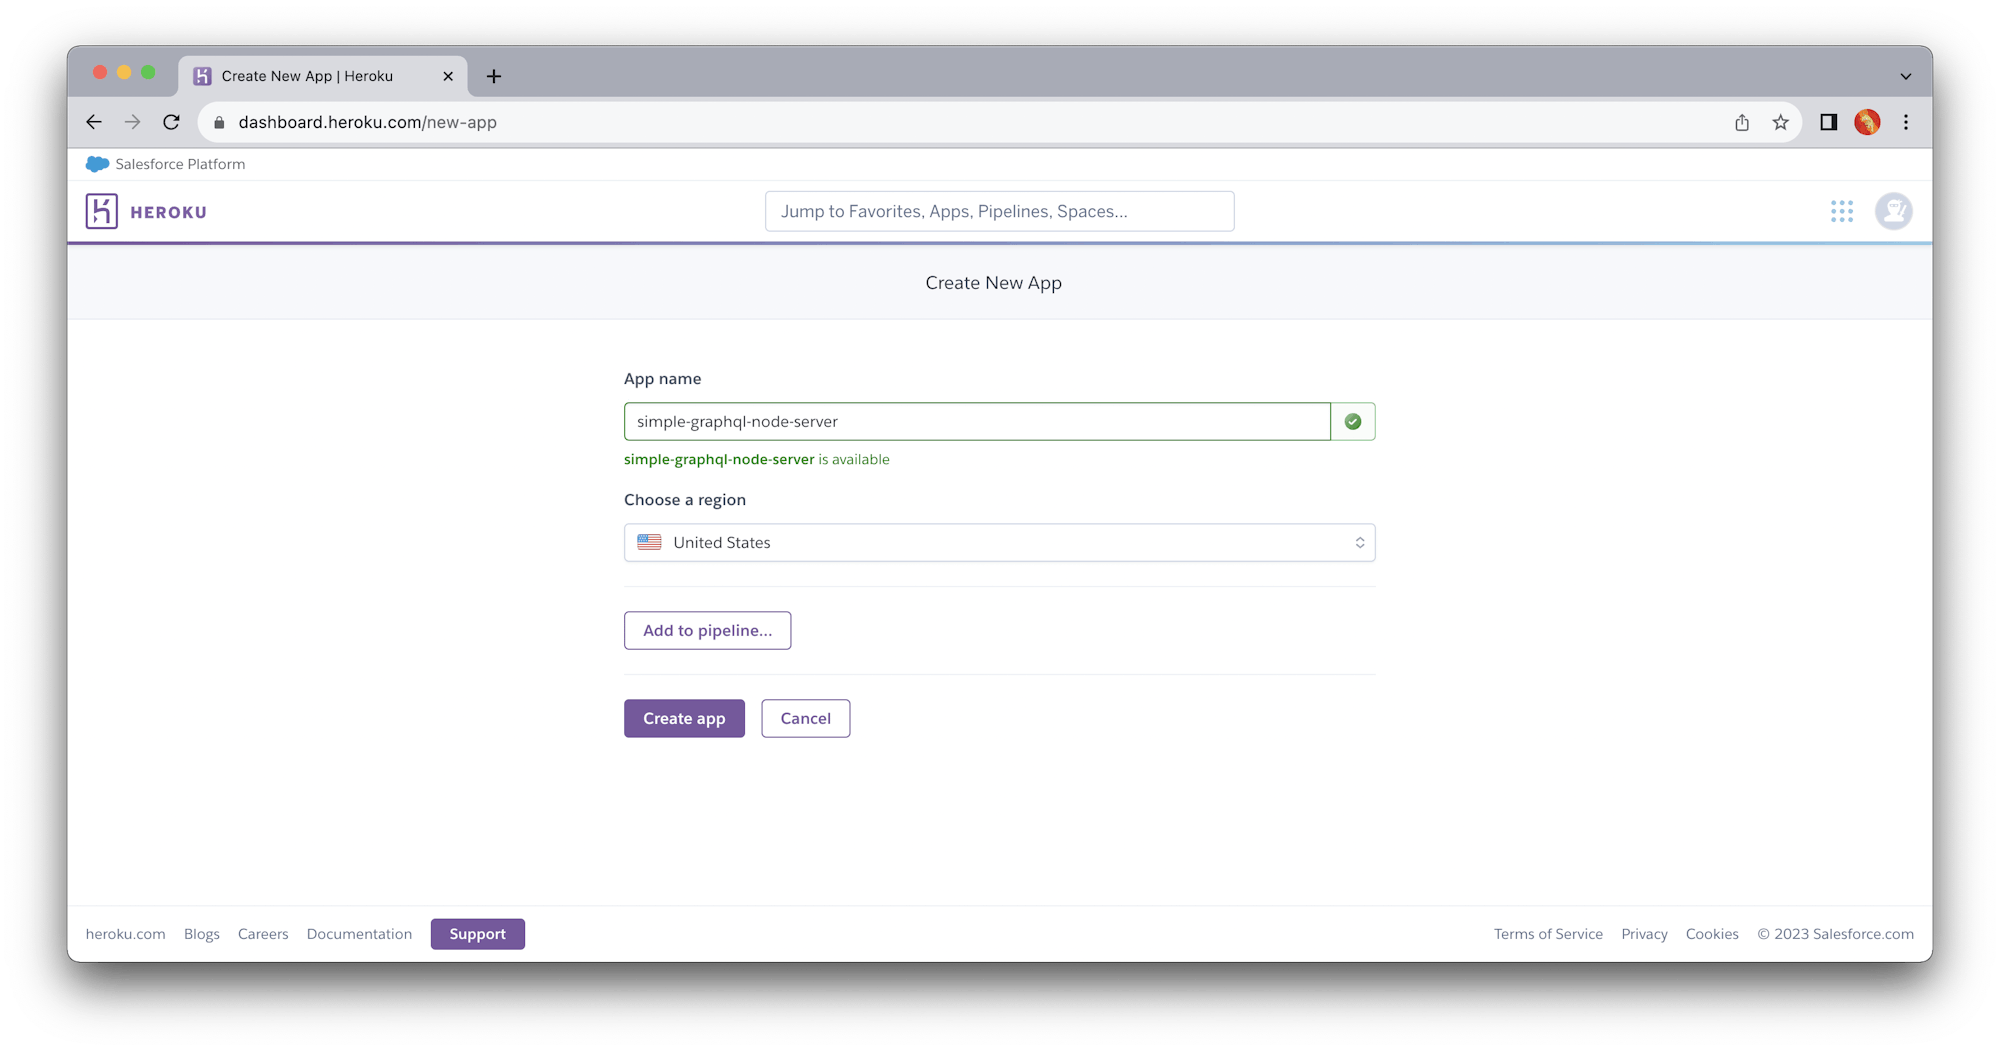
Creating a Heroku application
The name you enter for your Heroku application is the name you will save for it on CircleCI.
Get your Heroku API key by going to Account Settings and scrolling down to the API Key section.
Your CircleCI configuration can use this information to make authenticated deployments to the Heroku platform.
CircleCI configuration
Now write your CircleCI configuration to deploy our GraphQL server to Heroku.
Create a folder with the name .circleci at the root of your project and create a config.yml file inside it. Paste this content into the new file:
version: 2.1

jobs:
  deploy:
    docker:
      - image: cimg/base:2023.09
    steps:
      - checkout
      - run:
          name: Deploy app to Heroku
          command: |
            git push https://heroku:$HEROKU_API_KEY@git.heroku.com/$HEROKU_APP_NAME.git main

workflows:
  build-deploy:
    jobs:
      - deploy
This configuration file uses a Docker convenience image from Circleci to provide a fast deployment of your project to Heroku. The deploy job checked out and deployed your code to Heroku using a git push command.
Next, set up a repository on GitHub and link the project to CircleCI. Review Pushing your project to GitHub for instructions.
Log into your CircleCI account. If you signed up with your GitHub account, all your repositories will be available on your project’s dashboard.
Click Set Up Project next to your graphql-server-heroku project.
Enter the branch where your configuration file is housed and CircleCI will detect the config.yml file for the project. Click Set up Project. Your first workflow will start running, but it will fail!

The deployment process fails because you have not provided your Heroku API key. To fix that, click the Project Settings button, then click the Environment Variables menu option. Add these two new variables:
-
HEROKU_APP_NAMEis the app name you used in Heroku. The name will be eithersimple-graphql-node-serveror a custom name if you created one. -
HEROKU_API_KEYis the Heroku API key that you retrieved earlier from the Account Settings page.
Re-run your workflow from the start, and this time it will run successfully.
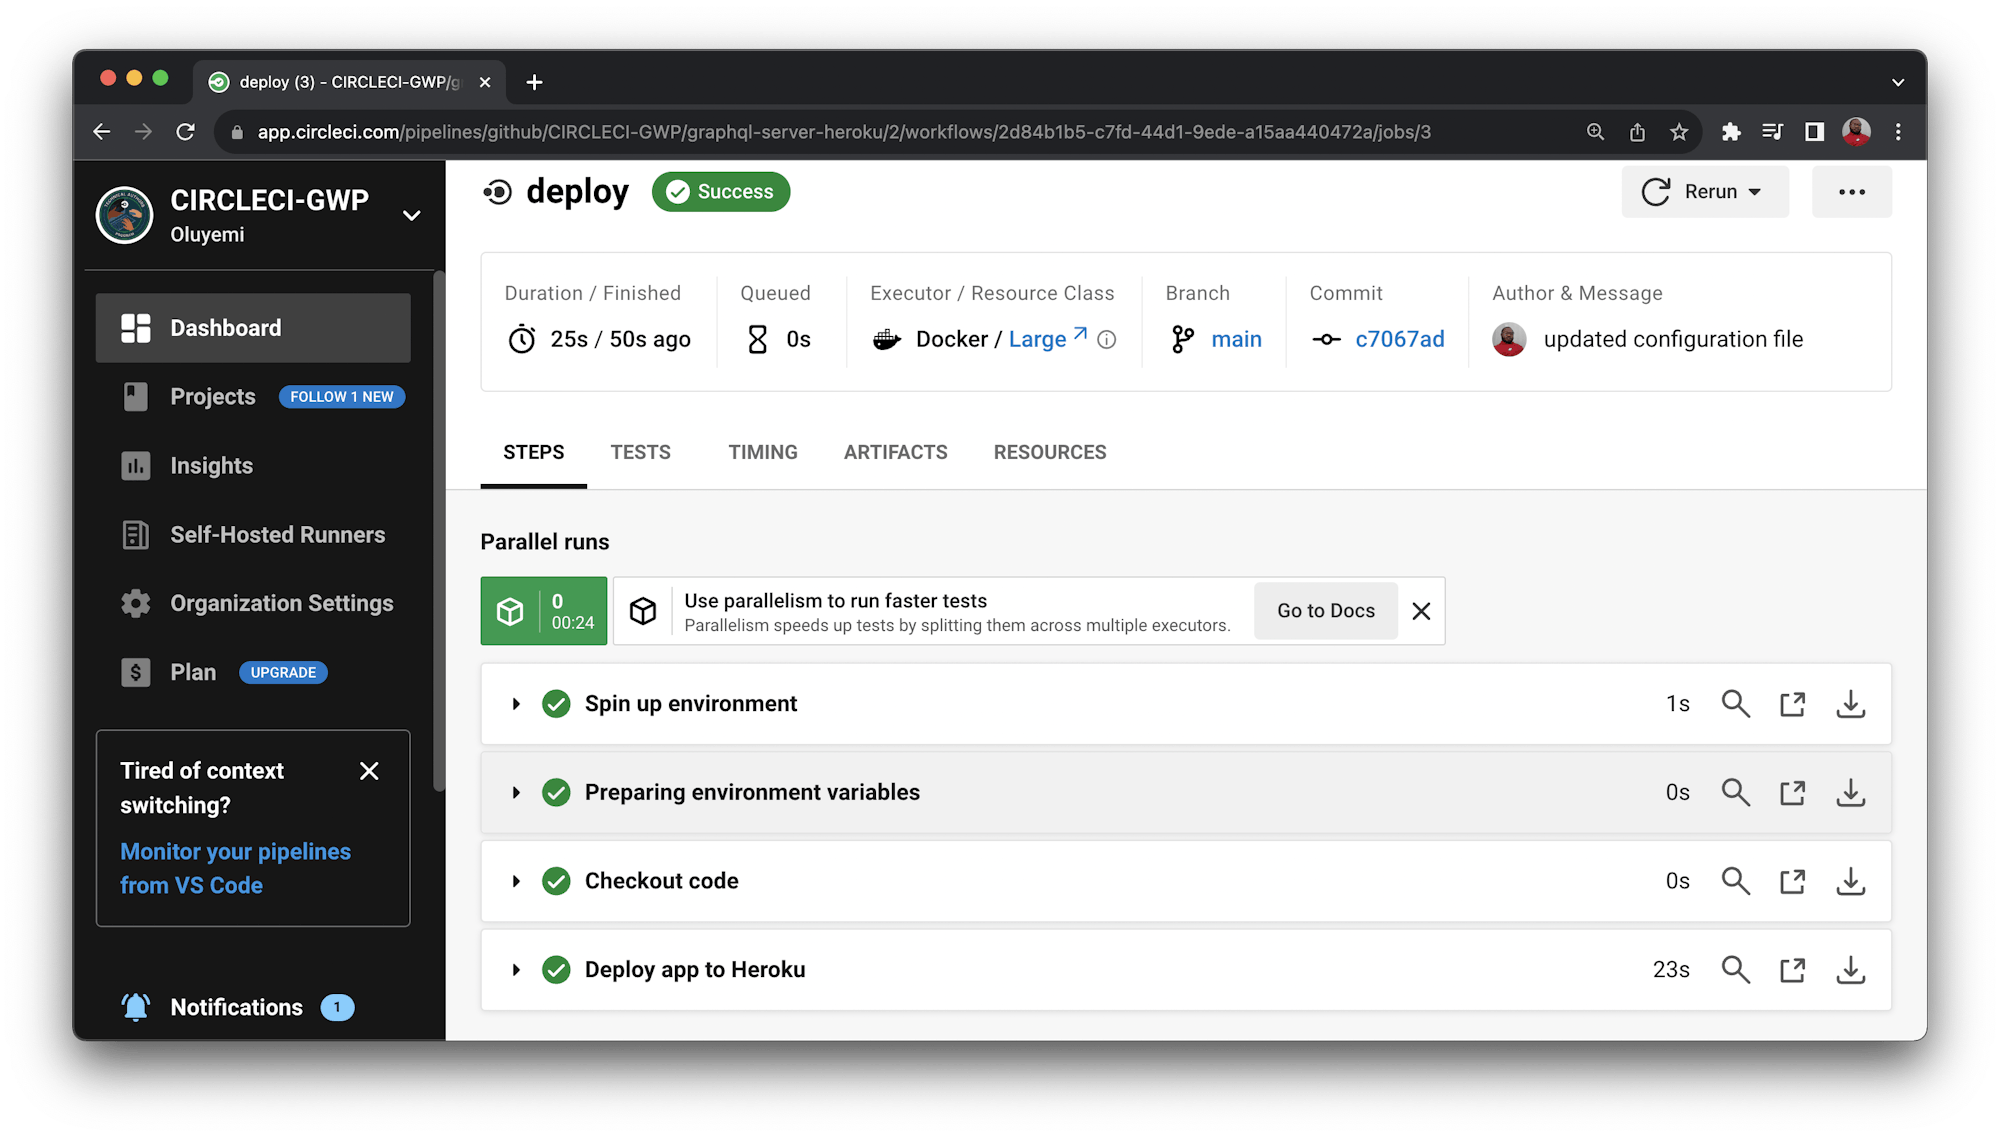
To confirm that your workflow was successful, you can open your newly deployed app in your browser. The URL for your application should be in this format https://<HEROKU_APP_NAME>-<RANDOM_NUMBER>.herokuapp.com/. You can find the generated domain name for your app on the Settings page.
Conclusion
In this tutorial, you have been able to successfully put together a simple GraphQL server and automate its deployment using CircleCI. GraphQL is here to stay and is expected to gain more adoption, since its many benefits make it a worthy tool for high-performing teams.
Happy coding!
Fikayo Adepoju is a LinkedIn Learning (Lynda.com) Author, Full-stack developer, technical writer, and tech content creator proficient in Web and Mobile technologies and DevOps with over 10 years experience developing scalable distributed applications. With over 40 articles written for CircleCI, Twilio, Auth0, and The New Stack blogs, and also on his personal Medium page, he loves to share his knowledge to as many developers as would benefit from it. You can also check out his video courses on Udemy.