
Gatsby is a static website and application generator that makes building powerful React-based frontend applications easy and effective. With over fifty thousand stars on GitHub, Gatsby stands as one of the most widely used React frameworks.
Gatsby is so popular that most hosting platforms offer custom support for the framework. Netlify is one of those platforms. While Netlify’s custom support for Gatsby provides smooth deployments, there is one major drawback: Netlify controls most of the deployment process, which means that your team cannot perform custom tasks like running automated tests.
In this tutorial, you will learn how to take over the deployment process by using CircleCI as your continuous deployment server. With the deployment pipeline you create using this tutorial, you will be able to perform any custom step required in your build process before deploying to Netlify.
Prerequisites
To follow this tutorial, a few things are required:
- Node.js installed on your system (version 12.13 or newer)
- A Netlify account
- A CircleCI account
- A GitHub account
With all these installed and set up, you can begin the tutorial.
Our tutorials are platform-agnostic, but use CircleCI as an example. If you don’t have a CircleCI account, sign up for a free one here.
Creating a new Gatsby site
To create a Gatsby site, you need to install and use the Gatsby CLI. Run this command:
npm install -g gatsby-cli
Once the installation is completed, choose a location for your new site. In that location run:
gatsby new
This command invokes the Gatsby installer and opens an interactive CLI session where you are prompted to answer questions about your project setup. Answer the questions according like this:
- What would you like to call your site: gatsby-netlify-site
- What would you like to name the folder where your site will be created: Press the Enter key to accept the default
- Will you be using a CMS: No (or I’ll add it later)
- Would you like to add a styling system: No (or I’ll add it later)
- Would you like to install additional features with other plugins: Select Done, then press the Enter key
- Shall we do this: Press the Enter key to confirm the Yes option
Here is the CLI output for the project creation process:
What would you like to call your site?
✔ · gatsby-netlify-site
What would you like to name the folder where your site will be created?
✔ circleci/ gatsby-netlify-site
✔ Will you be using JavaScript or TypeScript?
· JavaScript
✔ Will you be using a CMS?
· No (or I'll add it later)
✔ Would you like to install a styling system?
· No (or I'll add it later)

Thanks! Here's what we'll now do:

    🛠  Create a new Gatsby site in the folder gatsby-netlify-site

? Shall we do this? (Y/n) › Yes

✔ Created site from template
✔ Installed Gatsby
✔ Installed plugins
✔ Created site in gatsby-netlify-site
🎉  Your new Gatsby site gatsby-netlify-site has been successfully created
at /Users/yemiwebby/tutorial/circleci/gatsby-netlify-site.
After answering the questions, project creation begins. By the end of the process, you will have a Gatsby project created in the gatsby-netlify-site folder. Use these commands to run the project:
cd gatsby-netlify-site
npm run develop
This boots up the Gatsby site at the local URL: http://localhost:8000. Enter this address in your browser to go to the site.

Setting up the GitHub project
Before pushing your project to GitHub, you need to install the Netlify CLI package as a development dependency in your Gatsby project. This is recommended for deployments in CI environments to avoid breaking changes. At the root of your Gatsby project run this command to install the dependency:
npm install --save-dev netlify-cli
You can now push your project to GitHub. Once your project is on GitHub, create a new Git branch. Give this branch any name you want; for this tutorial I named it netlify-deploy-ignore.
You may be wondering why you need this branch. Netlify needs a project branch to automatically trigger an application’s deployment. When changes are pushed to this branch, Netlify will initiate the deployment process. You want to avoid a situation where both Netlify and your CircleCI pipeline are running two deployment processes in parallel. This new branch acts as a decoy for Netlify to monitor.
Do not push changes to this decoy branch. Its purpose is to “distract” the Netlify deployment process so that you can use CircleCI for deployment. You can make this a protected branch on GitHub so that no one on your team pushes to it by mistake.
Creating the Netlify application
To create a new Netlify application, go to your Netlify dashboard and click the New Site from Git button. Next, select GitHub as your provider and search for the project.
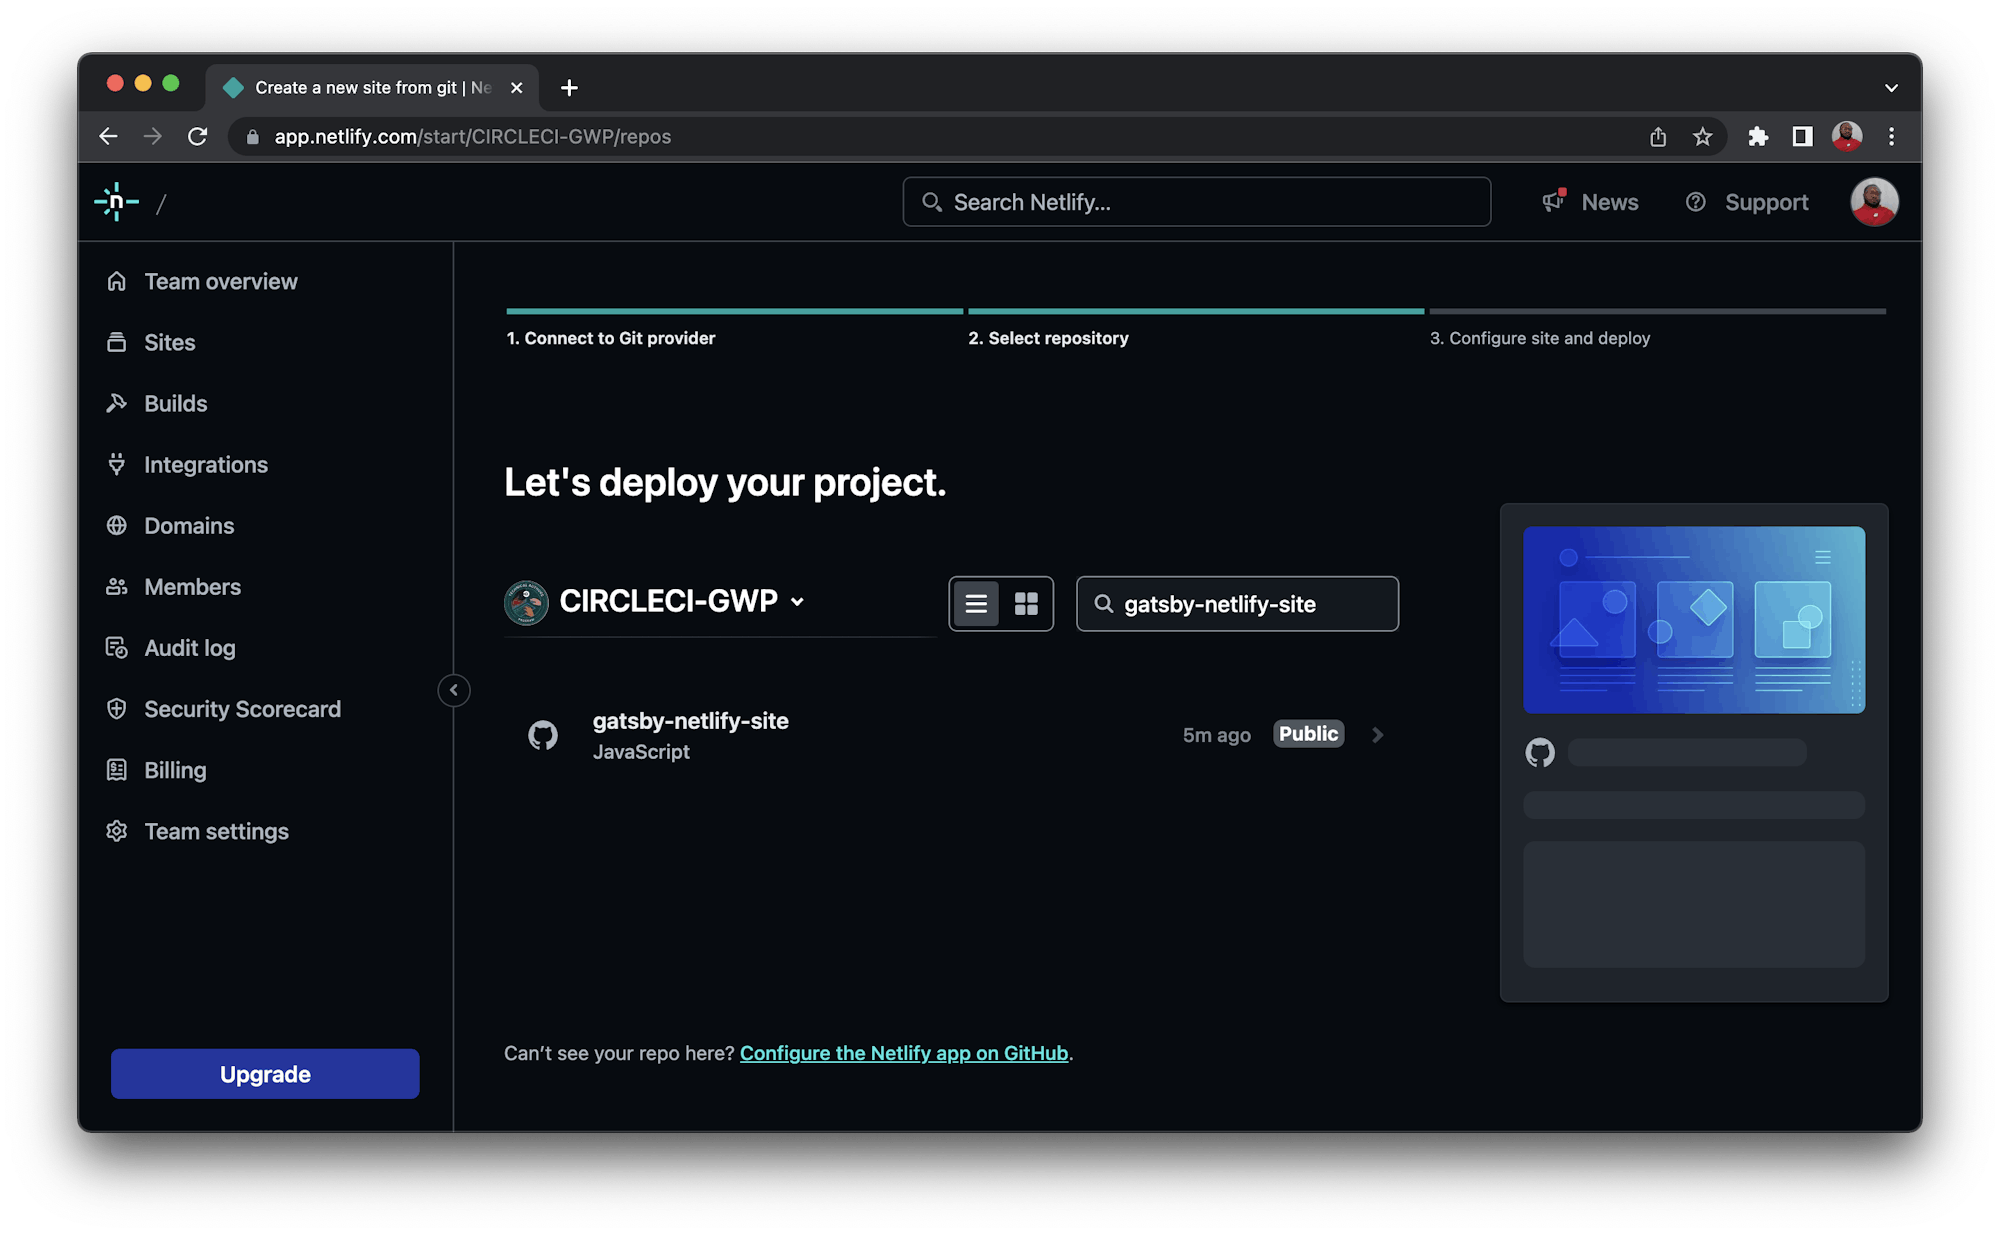
Select the project, then select a branch for Netlify to deploy from. Select your decoy branch.
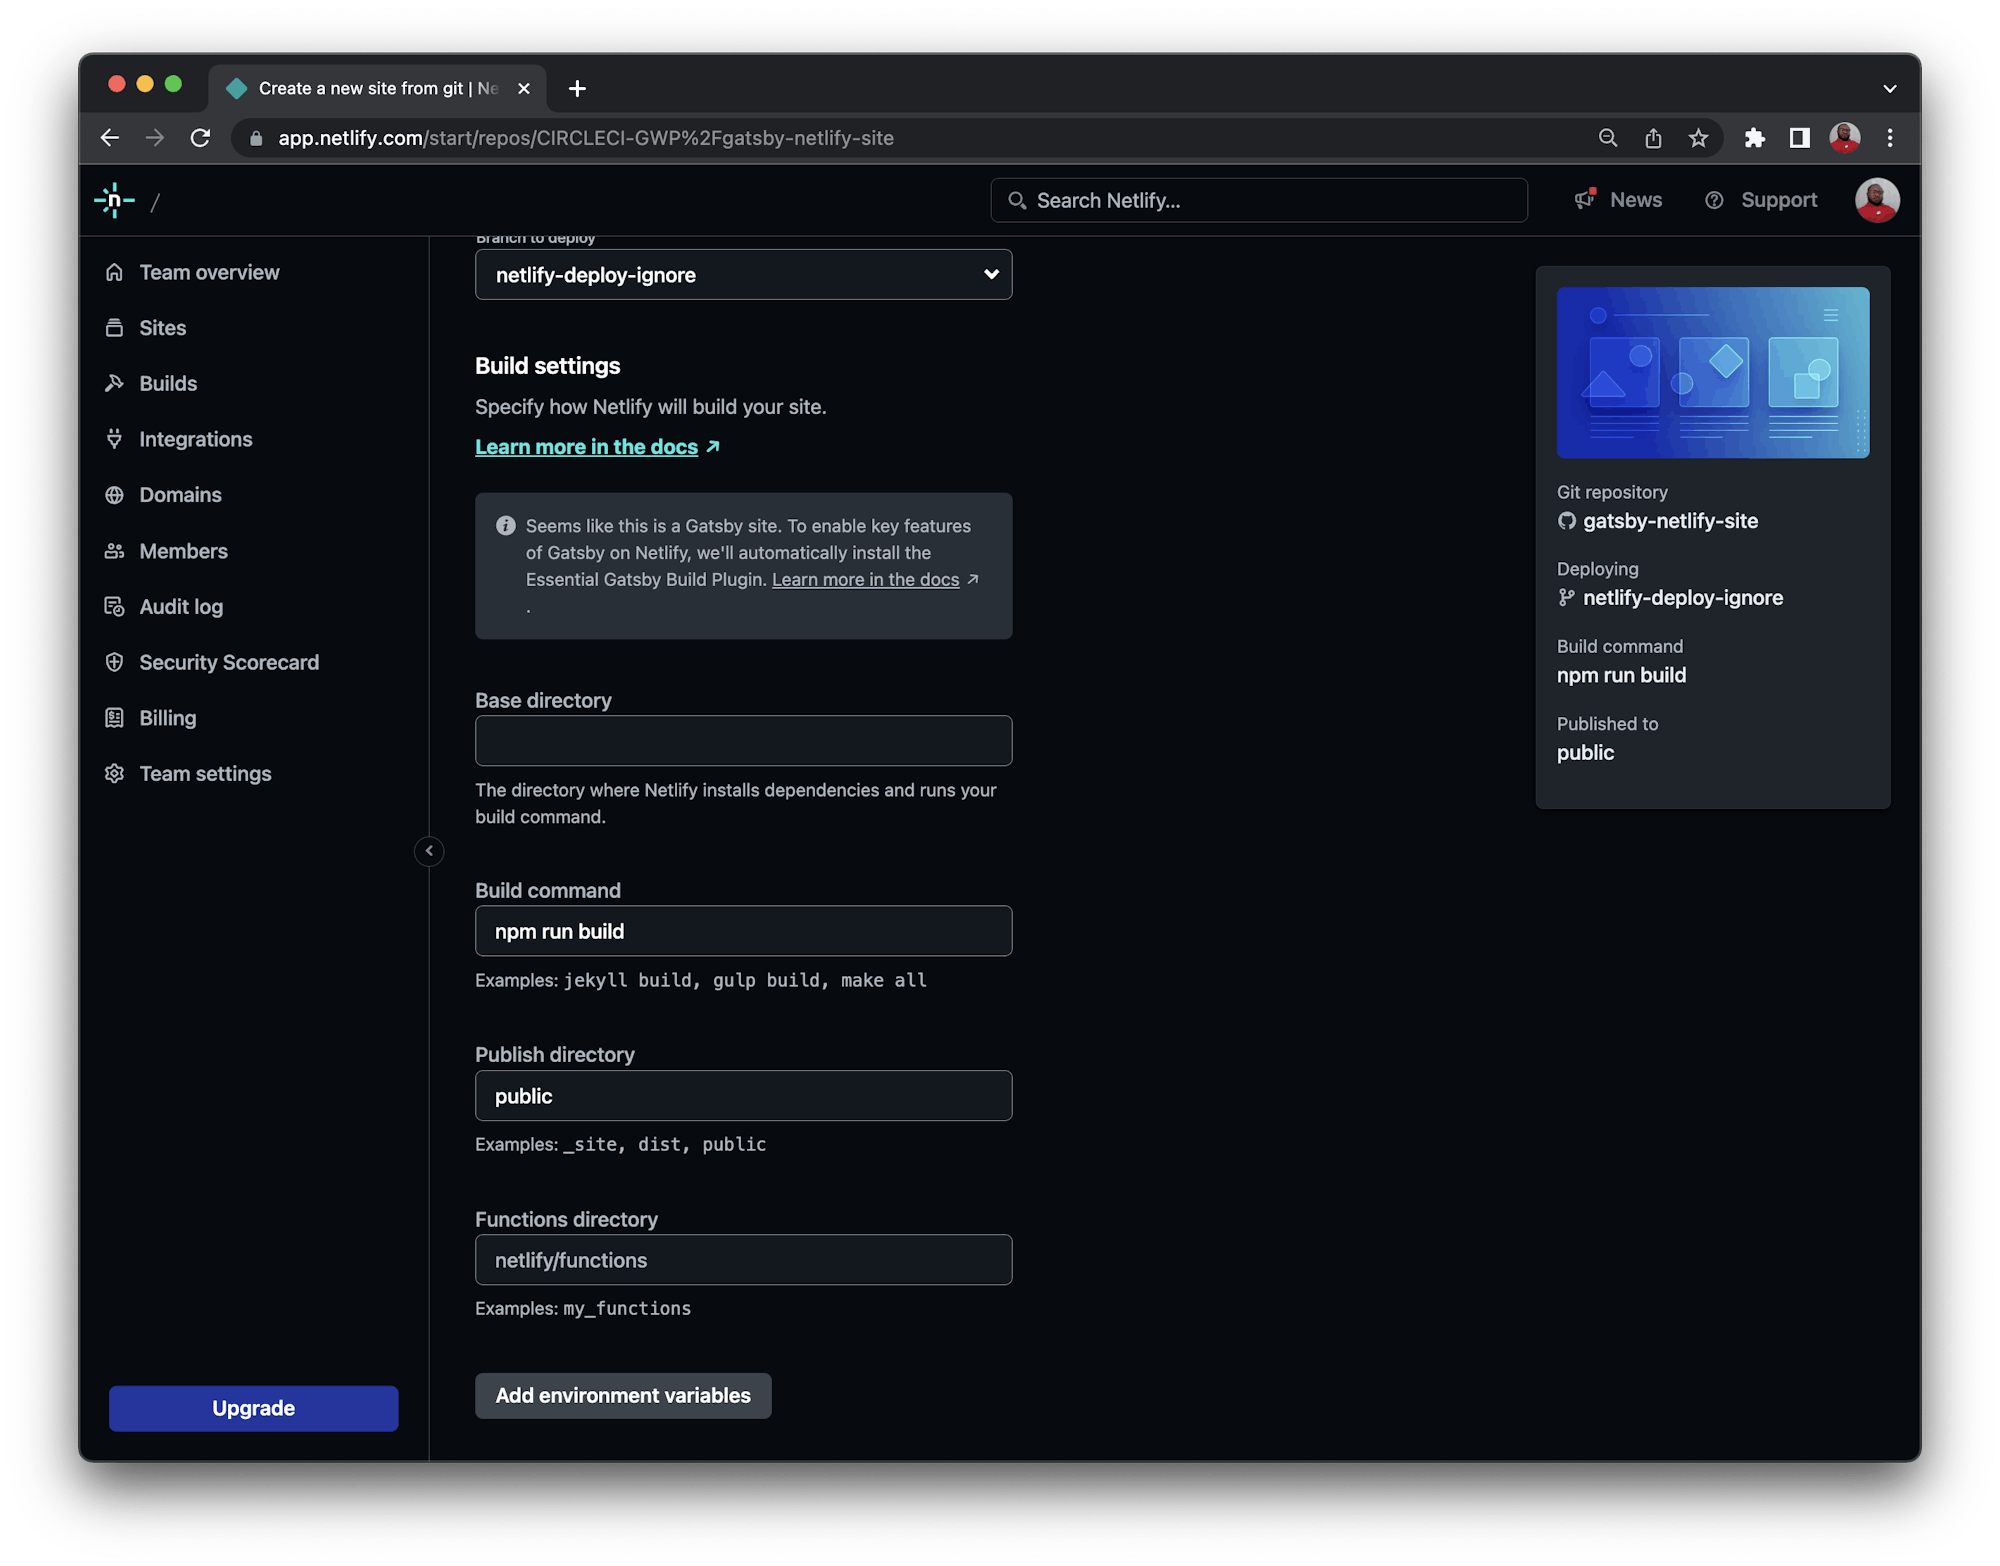
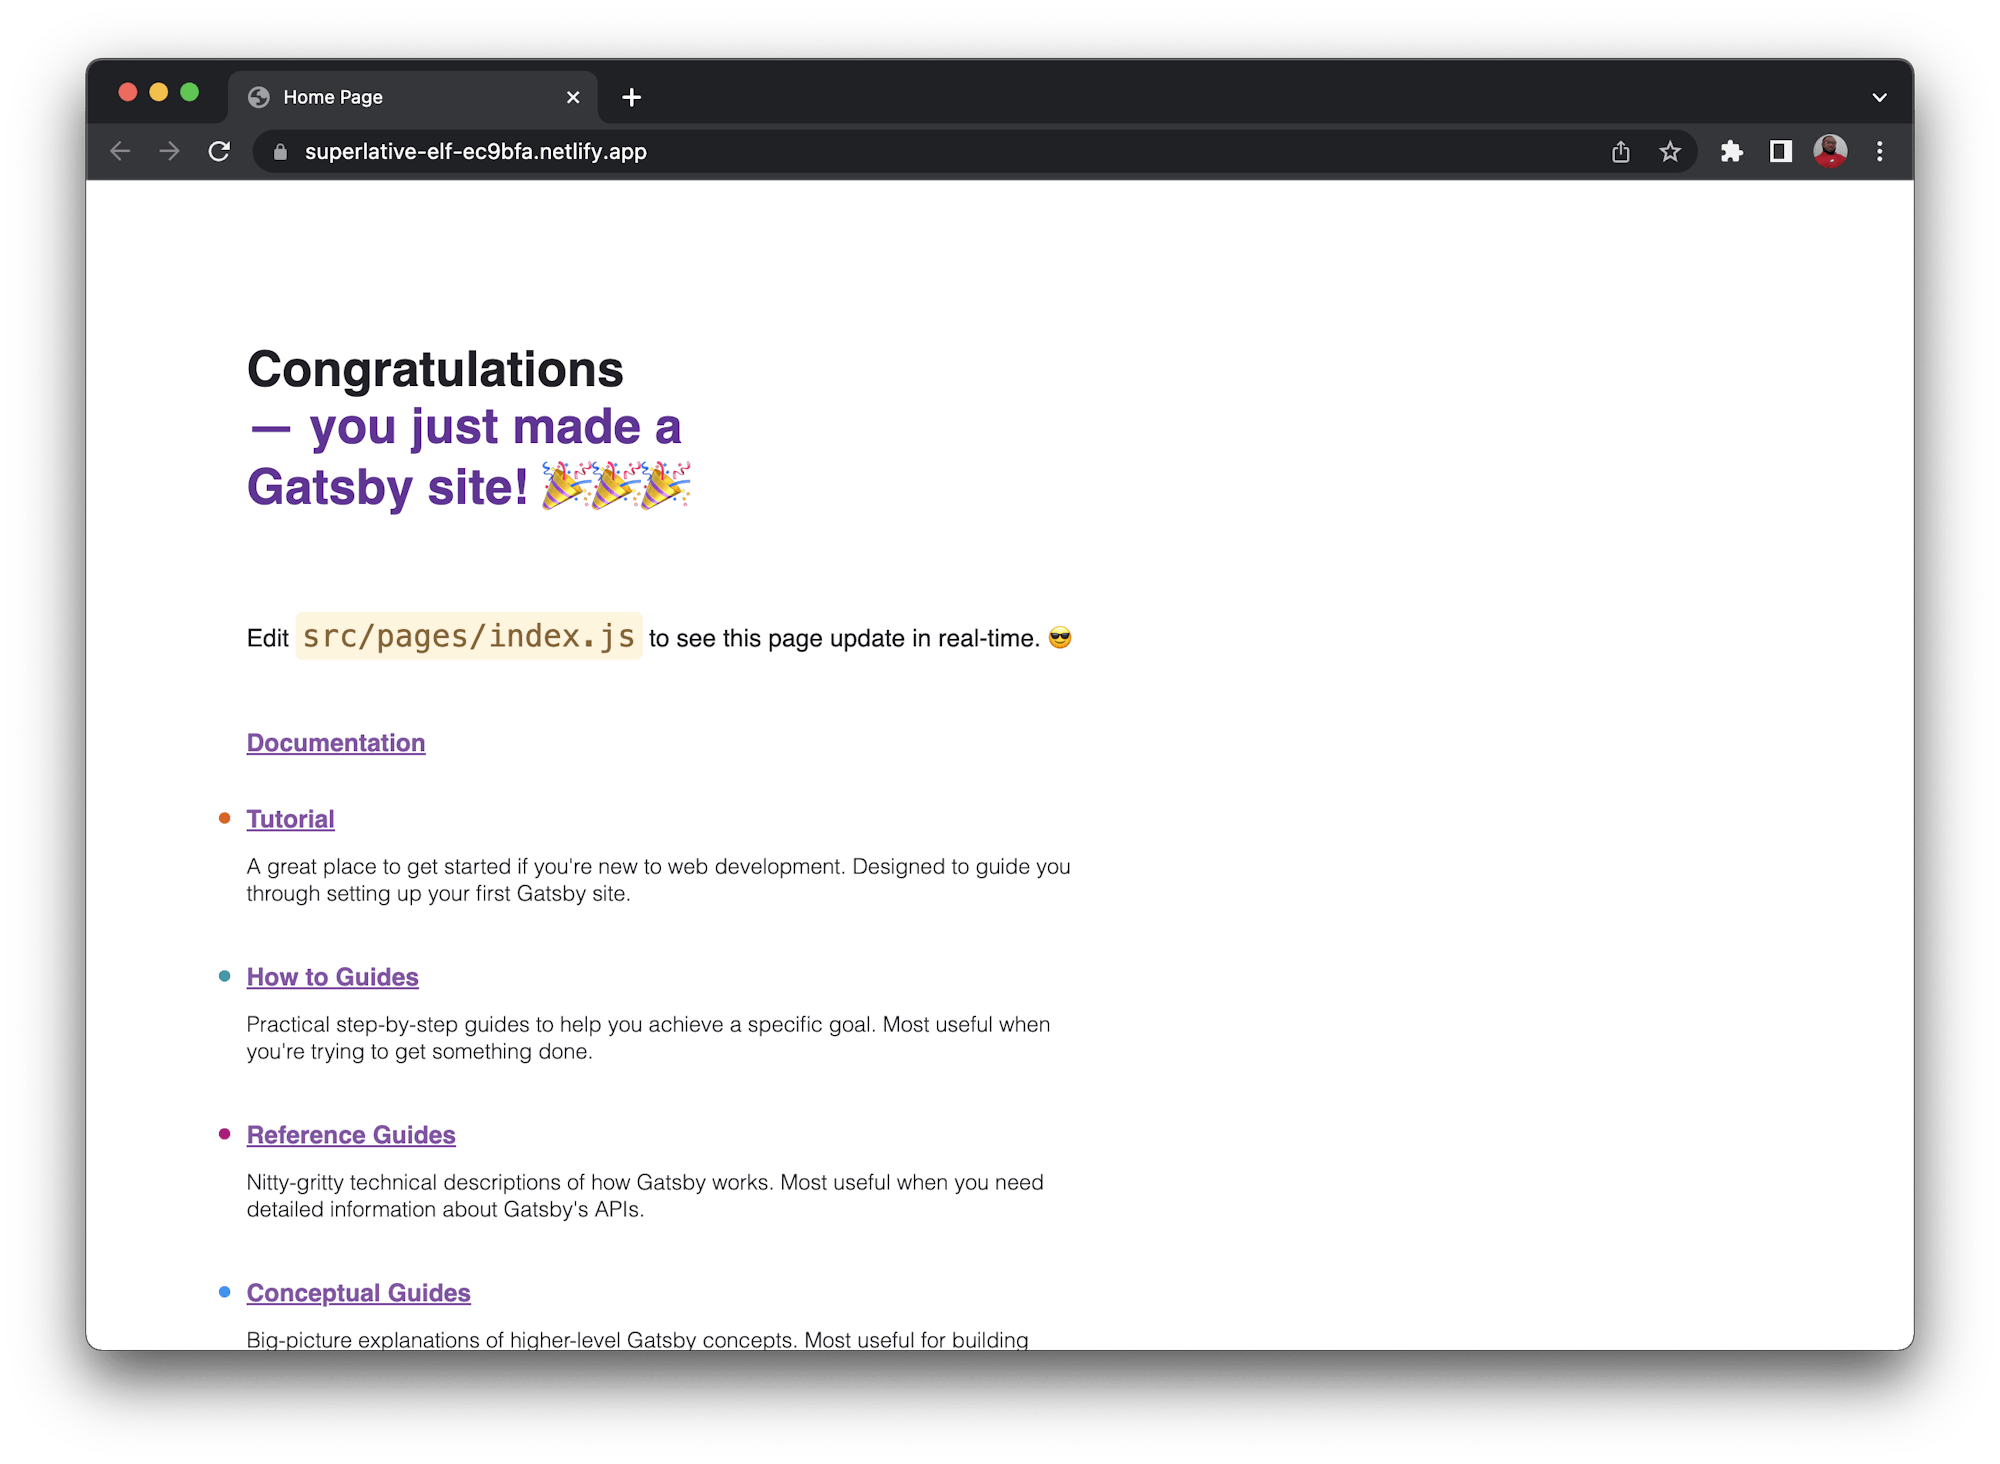
Next, click the Deploy gatsby-netlify-site button so that Netlify performs the very first deployment of your site. Netlify will generate a random name for the deployed application. Click the link as shown on the dashboard. For example, for me the link is https://superlative-elf-ec9bfa.netlify.app/
There are two configuration values you will need to get from your Netlify app and account to perform automated deployments in your CircleCI pipeline.
- The SITE ID for the application you just created can be found in the Site Details section of your Netlify app.
- The Personal Access token allows access to your Netlify account from your deployment pipeline. Generate an access token at
User Settings > Applications.
Save your access token in a secure place. Netlify will not allow you another view of this value after you create it; you will only be able to change it.
Automating the deployment
Time to set up your project on CircleCI. Add the .circleci folder to the root of your project. In it, add a new config.yml file and use this content for it:
version: 2.1
jobs:
  build:
    working_directory: ~/repo
    docker:
      - image: cimg/node:18.16.0
    steps:
      - checkout
      - restore_cache:
          key: dependency-cache-{{ checksum "package-lock.json" }}
      - run:
          name: Install Dependencies
          command: npm install
      - save_cache:
          key: dependency-cache-{{ checksum "package-lock.json" }}
          paths:
            - ./node_modules
      - run:
          name: Gatsby Build
          command: GATSBY_CPU_COUNT=2 npm run build
      - save_cache:
          key: gatsby-public-cache-{{ .Branch }}
          paths:
            - ./public
      - run:
          name: Deploy to Netlify
          command: ./node_modules/.bin/netlify deploy --site $NETLIFY_SITE_ID --auth $NETLIFY_ACCESS_TOKEN --prod --dir=public
workflows:
  version: 2
  build-deploy:
    jobs:
      - build:
          filters:
            branches:
              only:
                - main
In this configuration, the project is checked out of the repository and the project dependencies are installed and cached. After caching the dependencies, the Gatsby build command npm run build runs. This command creates a production build of the application in the public directory at the root of the project. The folder is then cached.
The Netlify CLI then deploys the site using the $NETLIFY_SITE_ID and $NETLIFY_ACCESS_TOKEN variables. The workflow configuration ensures that only the main branch triggers a deployment to Netlify.
Before you push this configuration for CircleCI to deploy the site, go to the src/pages folder of your project. Change the Gatsby message in the index.js file from you just made a Gatsby site to you just deployed a Gatsby site with CircleCI. This new message will show that there has been a change in the deployed application.
This enables you to detect a change in the deployed application.
Finally, commit all your changes and Push to GitHub.
Setting up the project on CircleCI
Log into your CircleCI account. If you signed up with your GitHub account, all your repositories will be available on your project’s dashboard. Search for the gatsby-netlify-site project:
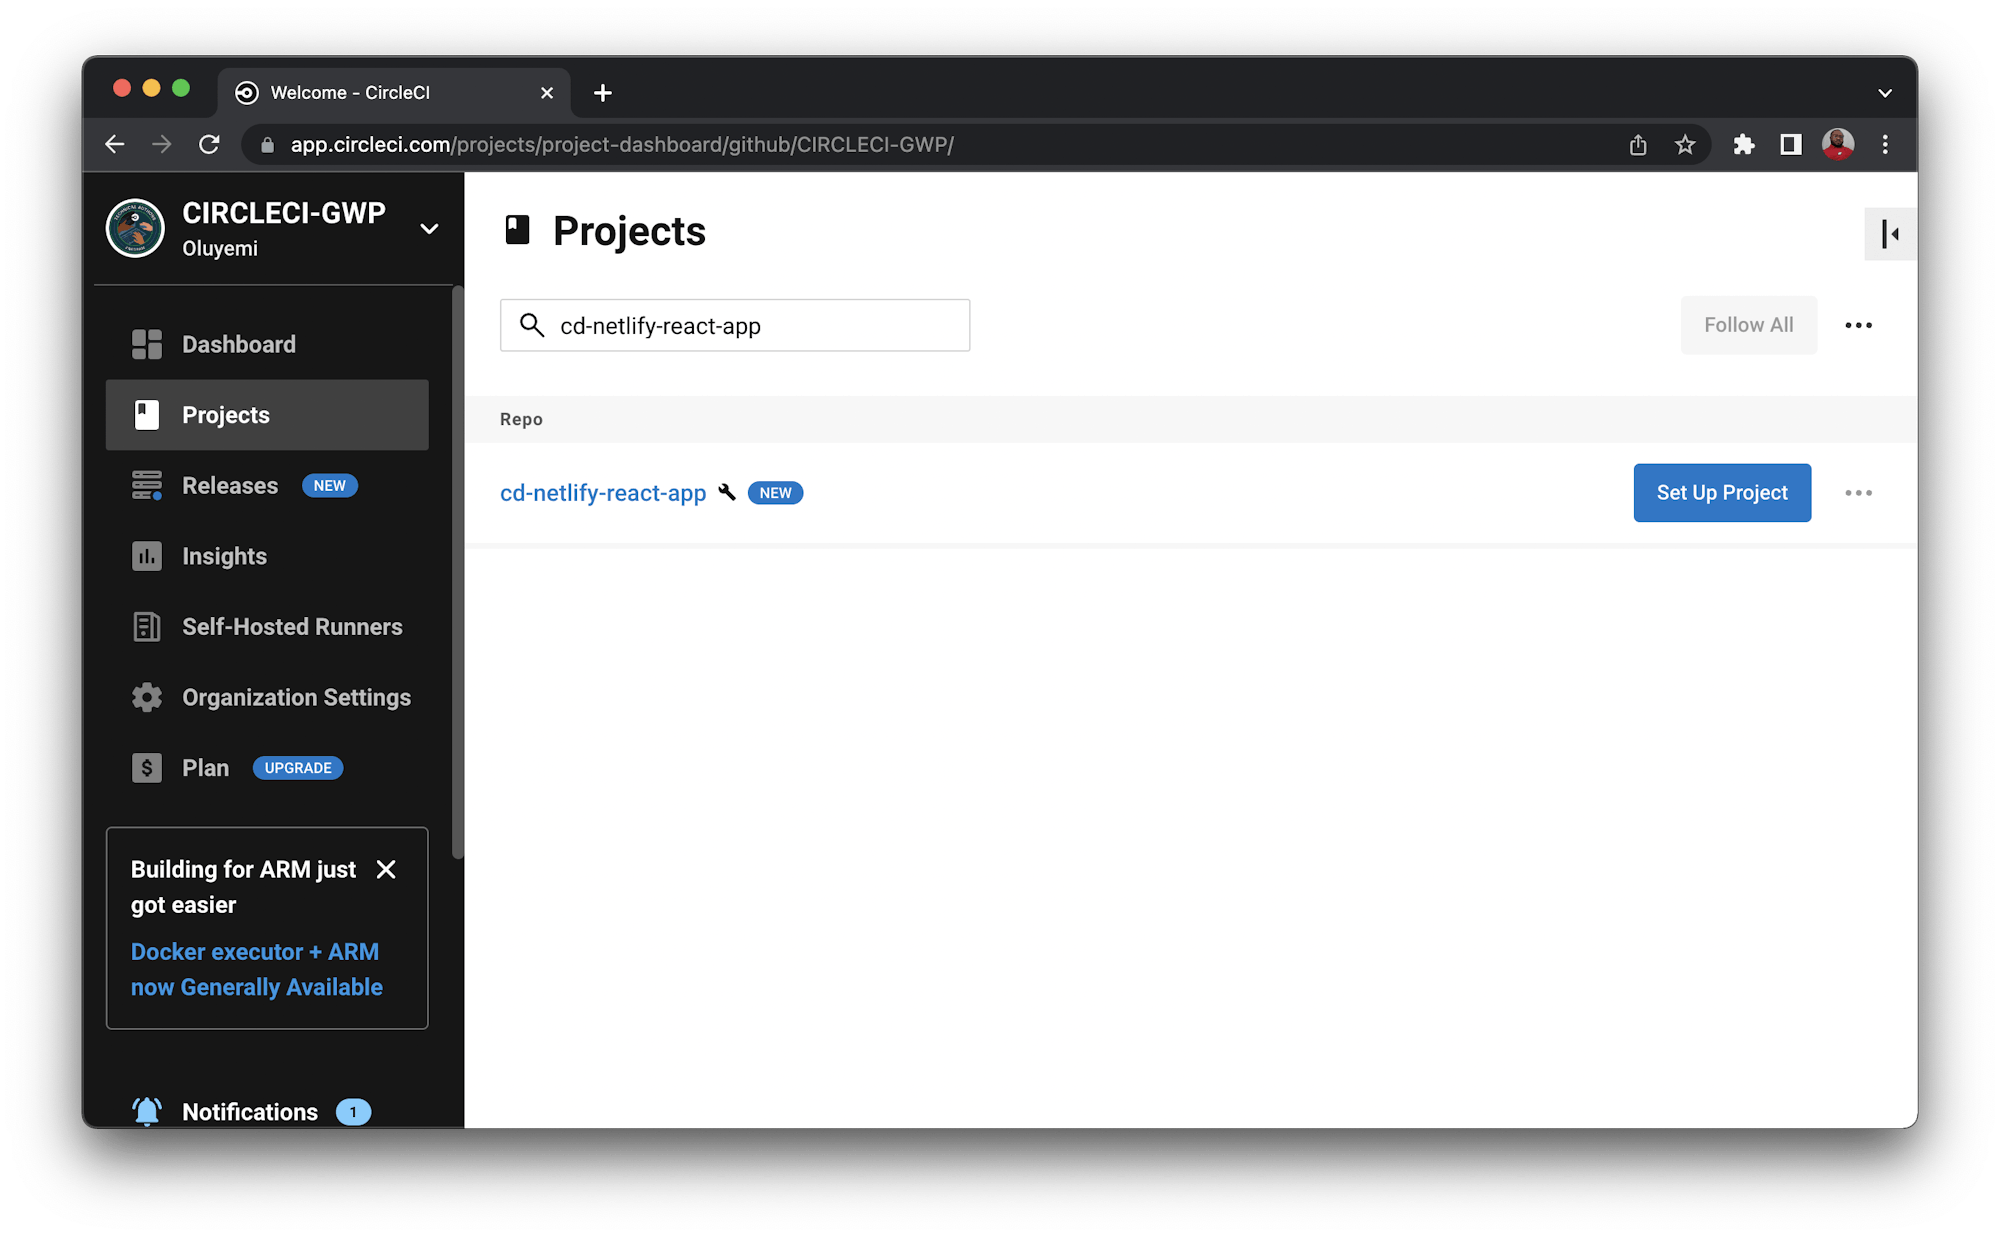
Click Set Up Project. You will be prompted about the configuration file for CircleCI within your project. Enter the branch name (for the tutorial, you are using main). Click Set Up Project to trigger your build pipeline for the first time.
The build will fail because you have not added the Netlify credentials.
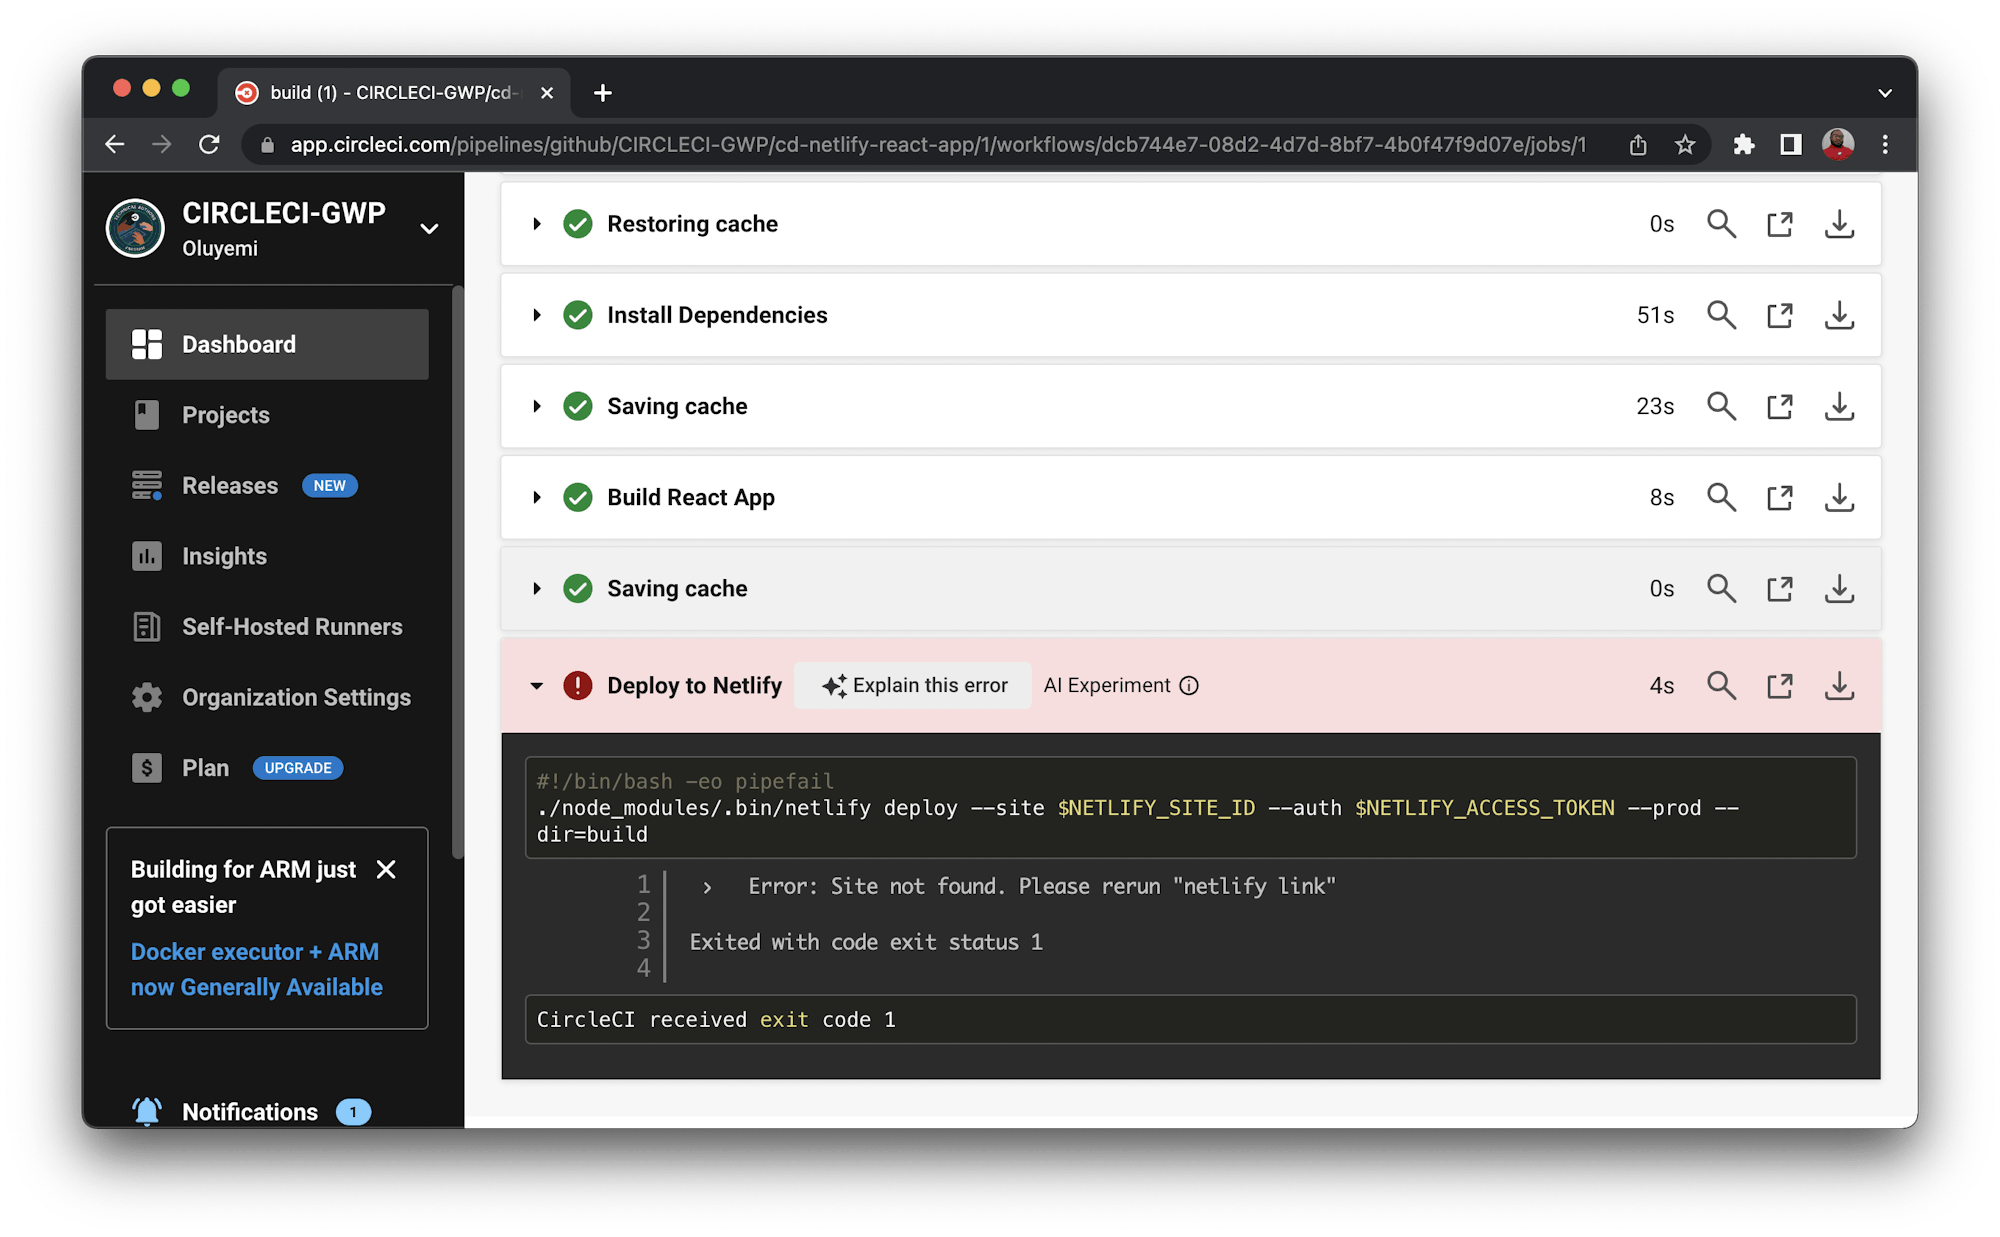
To fix that, click the Project Settings button. On the Settings page, select Environment Variables from the side menu. On this new page, click the Add Environment Variable button and enter this information:
NETLIFY_SITE_ID: The API ID from your Netlify applicationNETLIFY_ACCESS_TOKEN: Your Netlify personal access token.
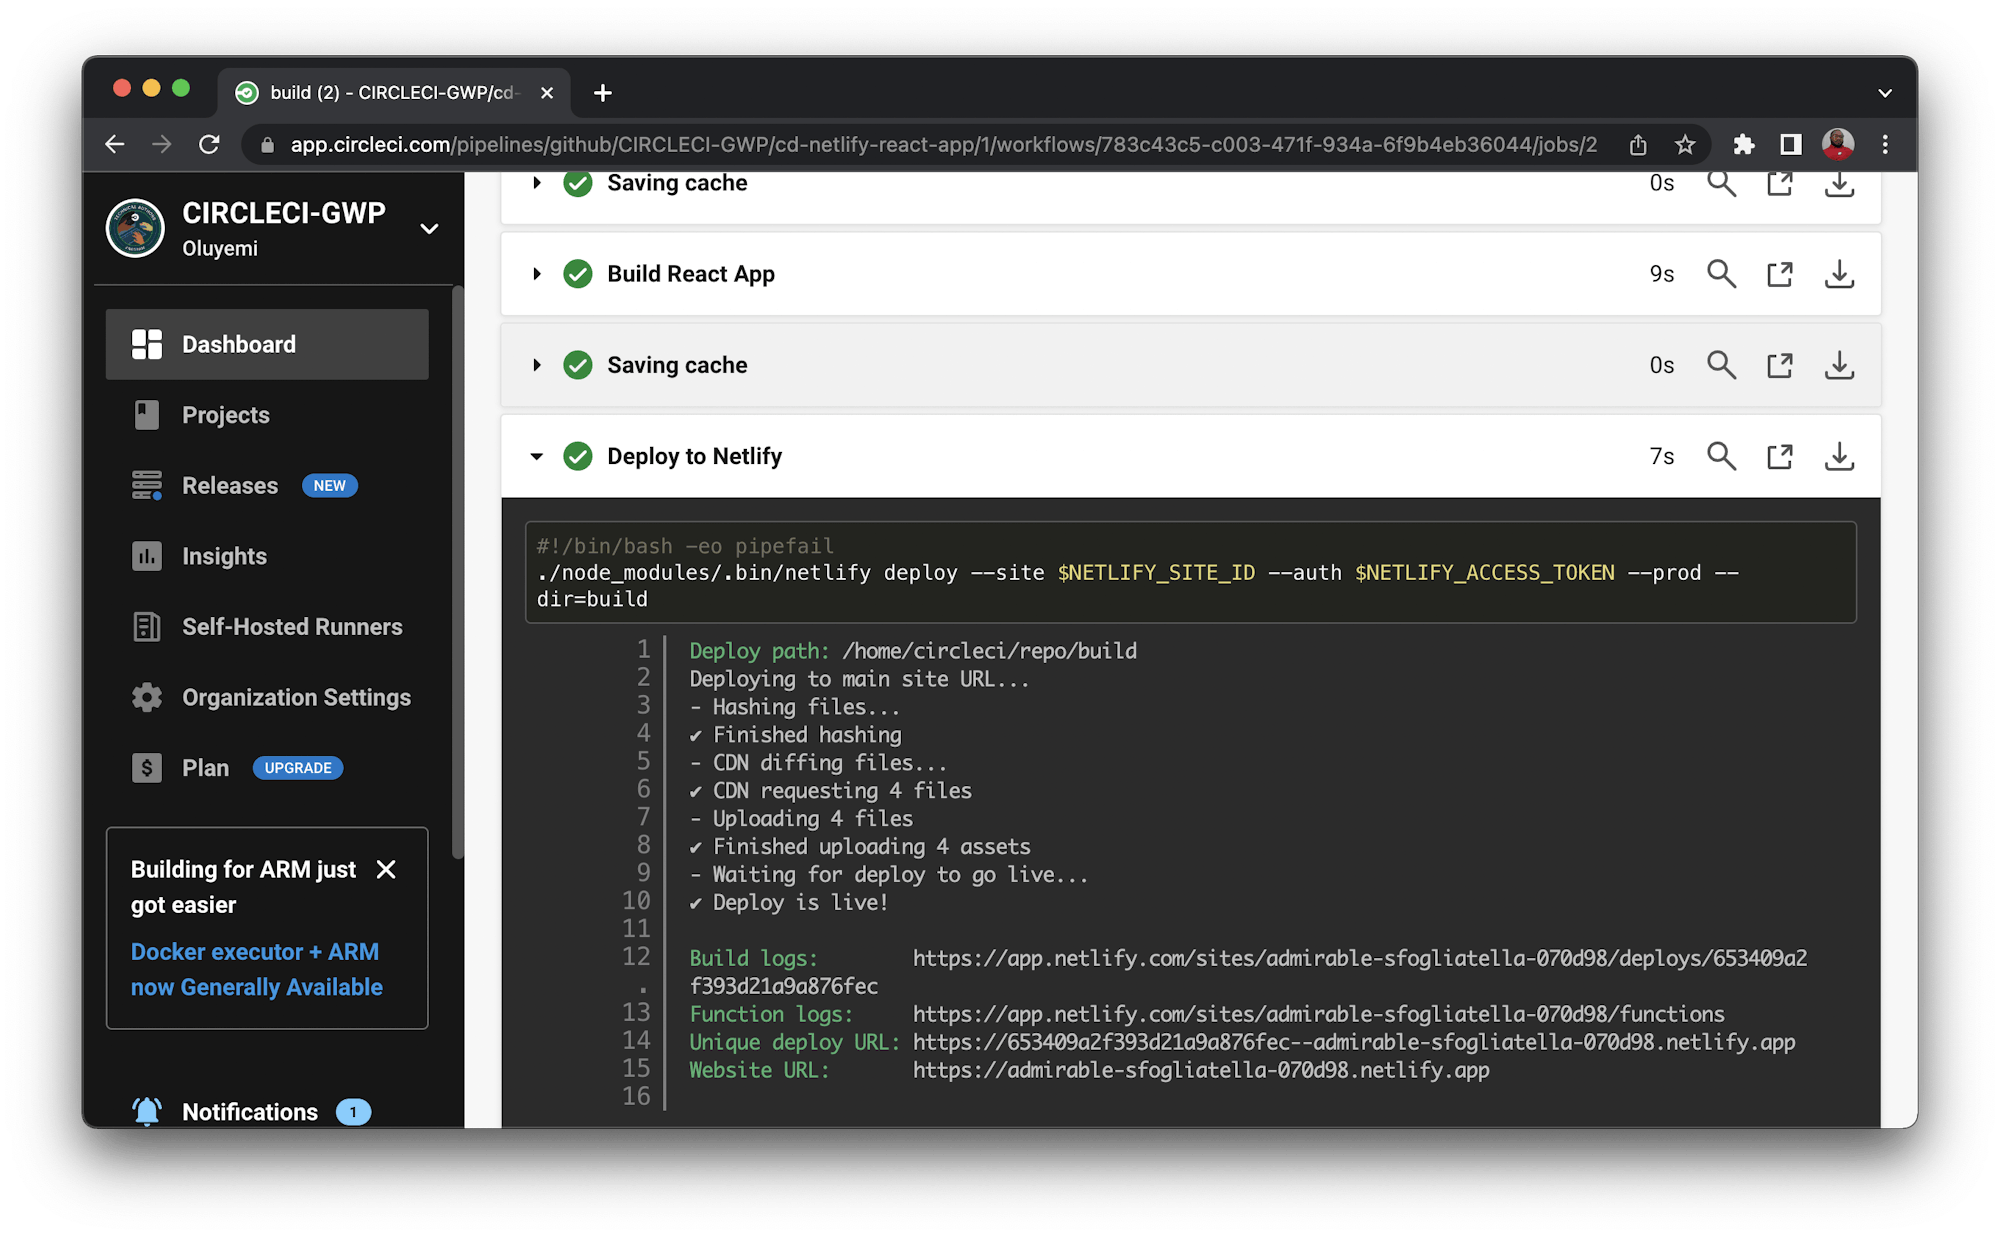
Click Rerun Workflow from Start.
This will trigger the deployment pipeline and a successful build.
Click the build to review the deployment details.
With this successful build, visit your website again to verify the changes you deployed. It should display the new message.

Awesome!
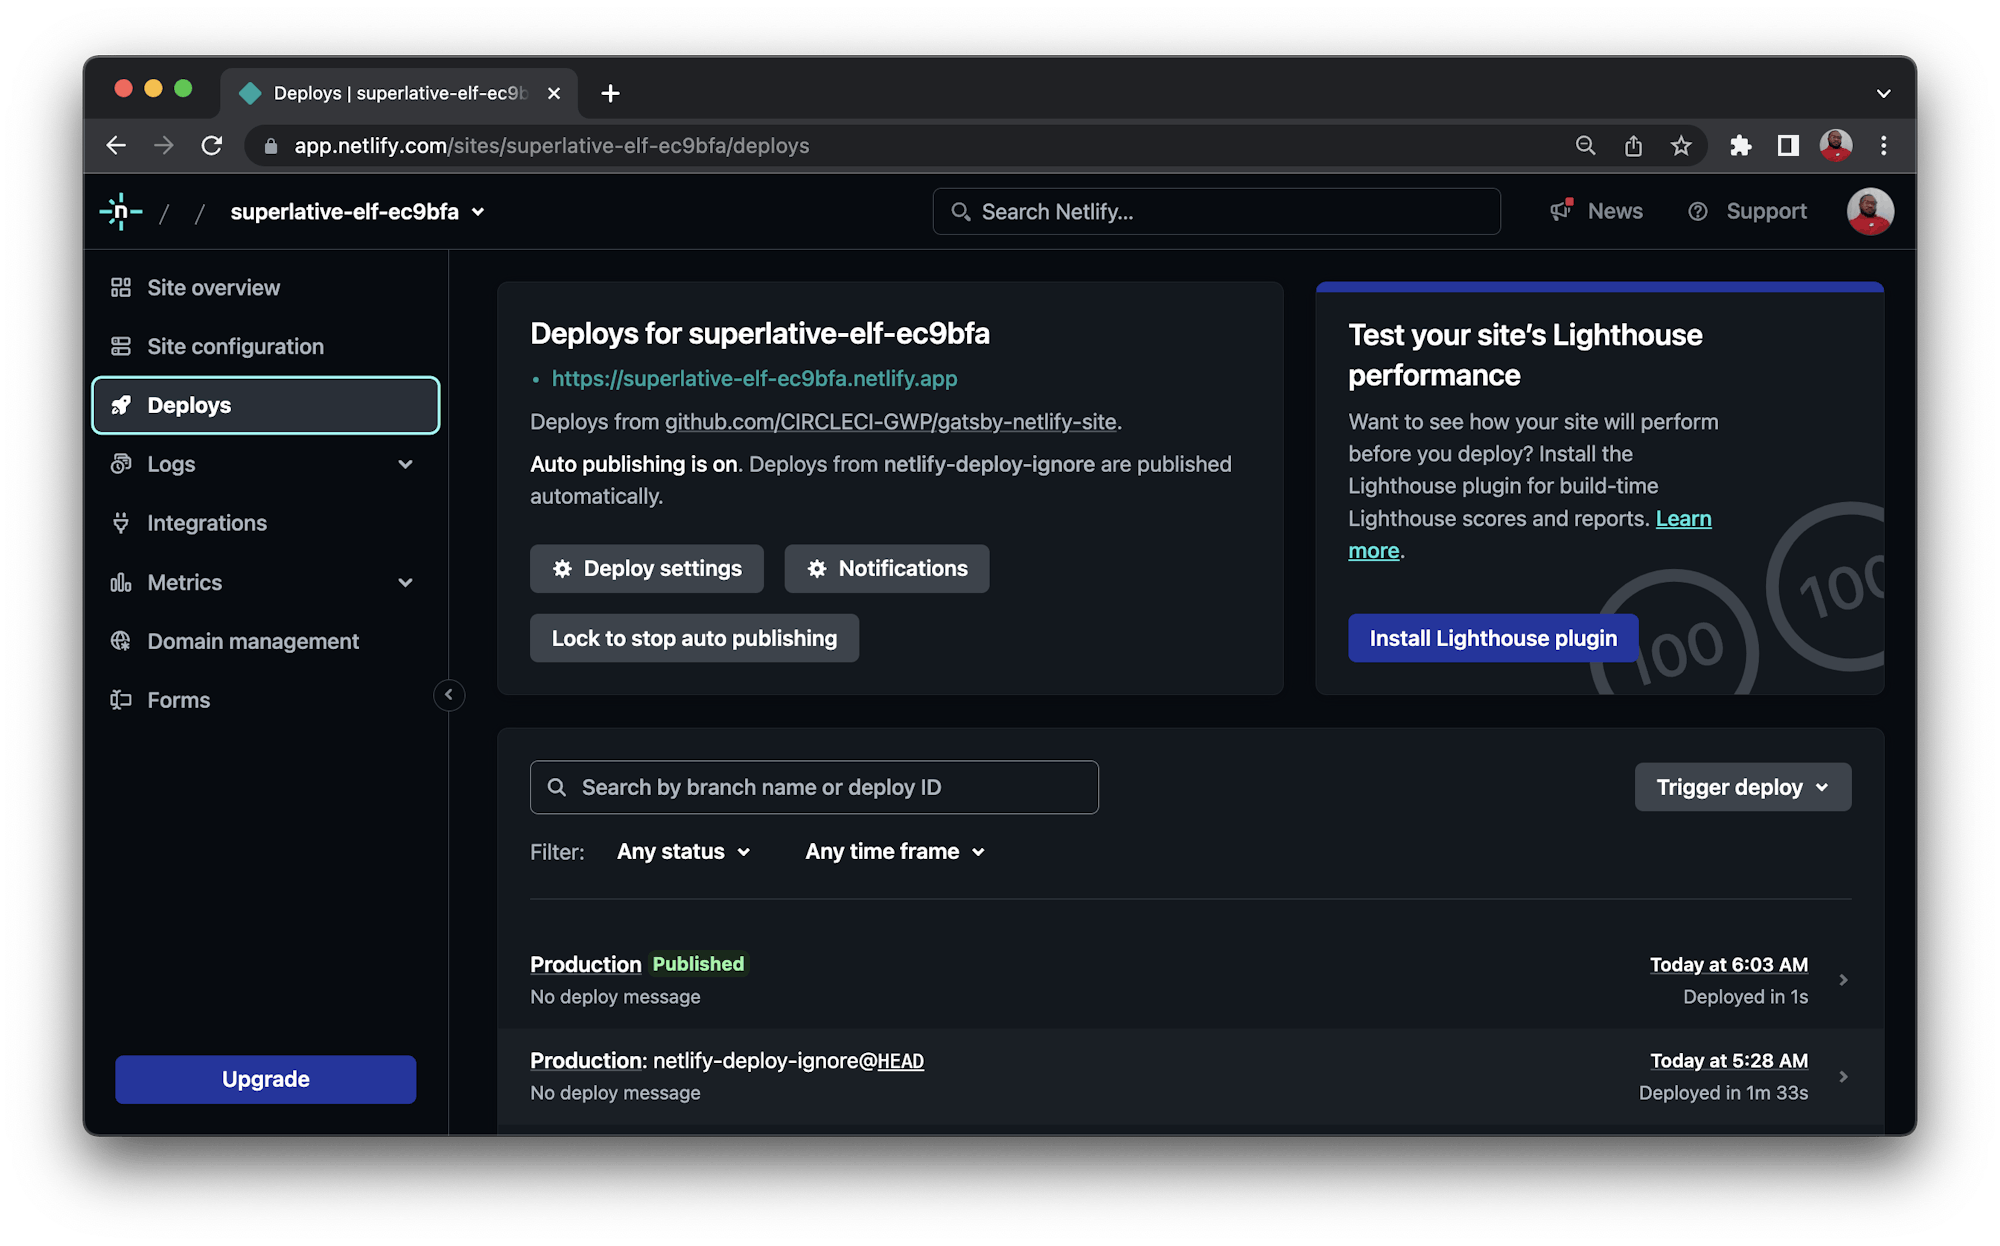
To confirm that Netlify is not running a parallel deployment, check your Netlify deployment logs. There is only one deployment in the Production deploys. It is the first one that was triggered by the branch netlify-deploy-ignore. The rest don’t show a branch because they were triggered by the CircleCI pipeline.
Conclusion
There you have it, custom deployment of a Gatsby site to Netlify using CircleCI. This setup gives your team more control over Gatsby deployments to Netlify and provides the flexibility you need to run more custom steps in the process.
If you prefer Heroku to Netlify as your hosting platform, we also have a tutorial for using CircleCI pipelines for custom deployment to Heroku.
Happy coding!
Fikayo Adepoju is a LinkedIn Learning (Lynda.com) Author, Full-stack developer, technical writer, and tech content creator proficient in Web and Mobile technologies and DevOps with over 10 years experience developing scalable distributed applications. With over 40 articles written for CircleCI, Twilio, Auth0, and The New Stack blogs, and also on his personal Medium page, he loves to share his knowledge to as many developers as would benefit from it. You can also check out his video courses on Udemy.