
Security is a vital part of application development, yet it may be neglected until an attacker takes advantage of a vulnerability in the system. The consequences of a security breach can damage an application’s integrity as well as a company’s reputation and revenue. Software architects and engineers need to pay special attention to securing the systems they work on. The practice of DevSecOps addresses these issues by running security-based tests and automating security into the CI/CD workflow. DevSecOps is an extension of the DevOps methodology into the field of application security.
In this tutorial, I will lead you through automating security checks in an application. I will show you how to run a test on a web form that injects the URL field with malicious domains. The goal of the test is to break the web form. To stop the attack, the web form has been protected with logic that checks to see if a user is trying to enter a malicious domain. I will show you how to use scheduled pipelines to run the security tests on a regular schedule.
Prerequisites
To follow along with this tutorial, you will need these in place:
- Node.js installed on your system (version 12 or greater)
- Git installed on your system
- A Webshrinker account; sign up for a free trial here
- Download and install Chromium on your system using
brew installon Mac OS orapt-get install chromium-browser - A CircleCI account
Our tutorials are platform-agnostic, but use CircleCI as an example. If you don’t have a CircleCI account, sign up for a free one here.
Getting Webshrinker credentials
Webshrinker is an AI-powered domain categorization system. Webshrinker is capable of identifying threat domains and labeling them according to their threat categories. Phishing, malware, and botnet are just three of the threat types Webshrinker can identify. This is the tool you will be using to protect your web form.
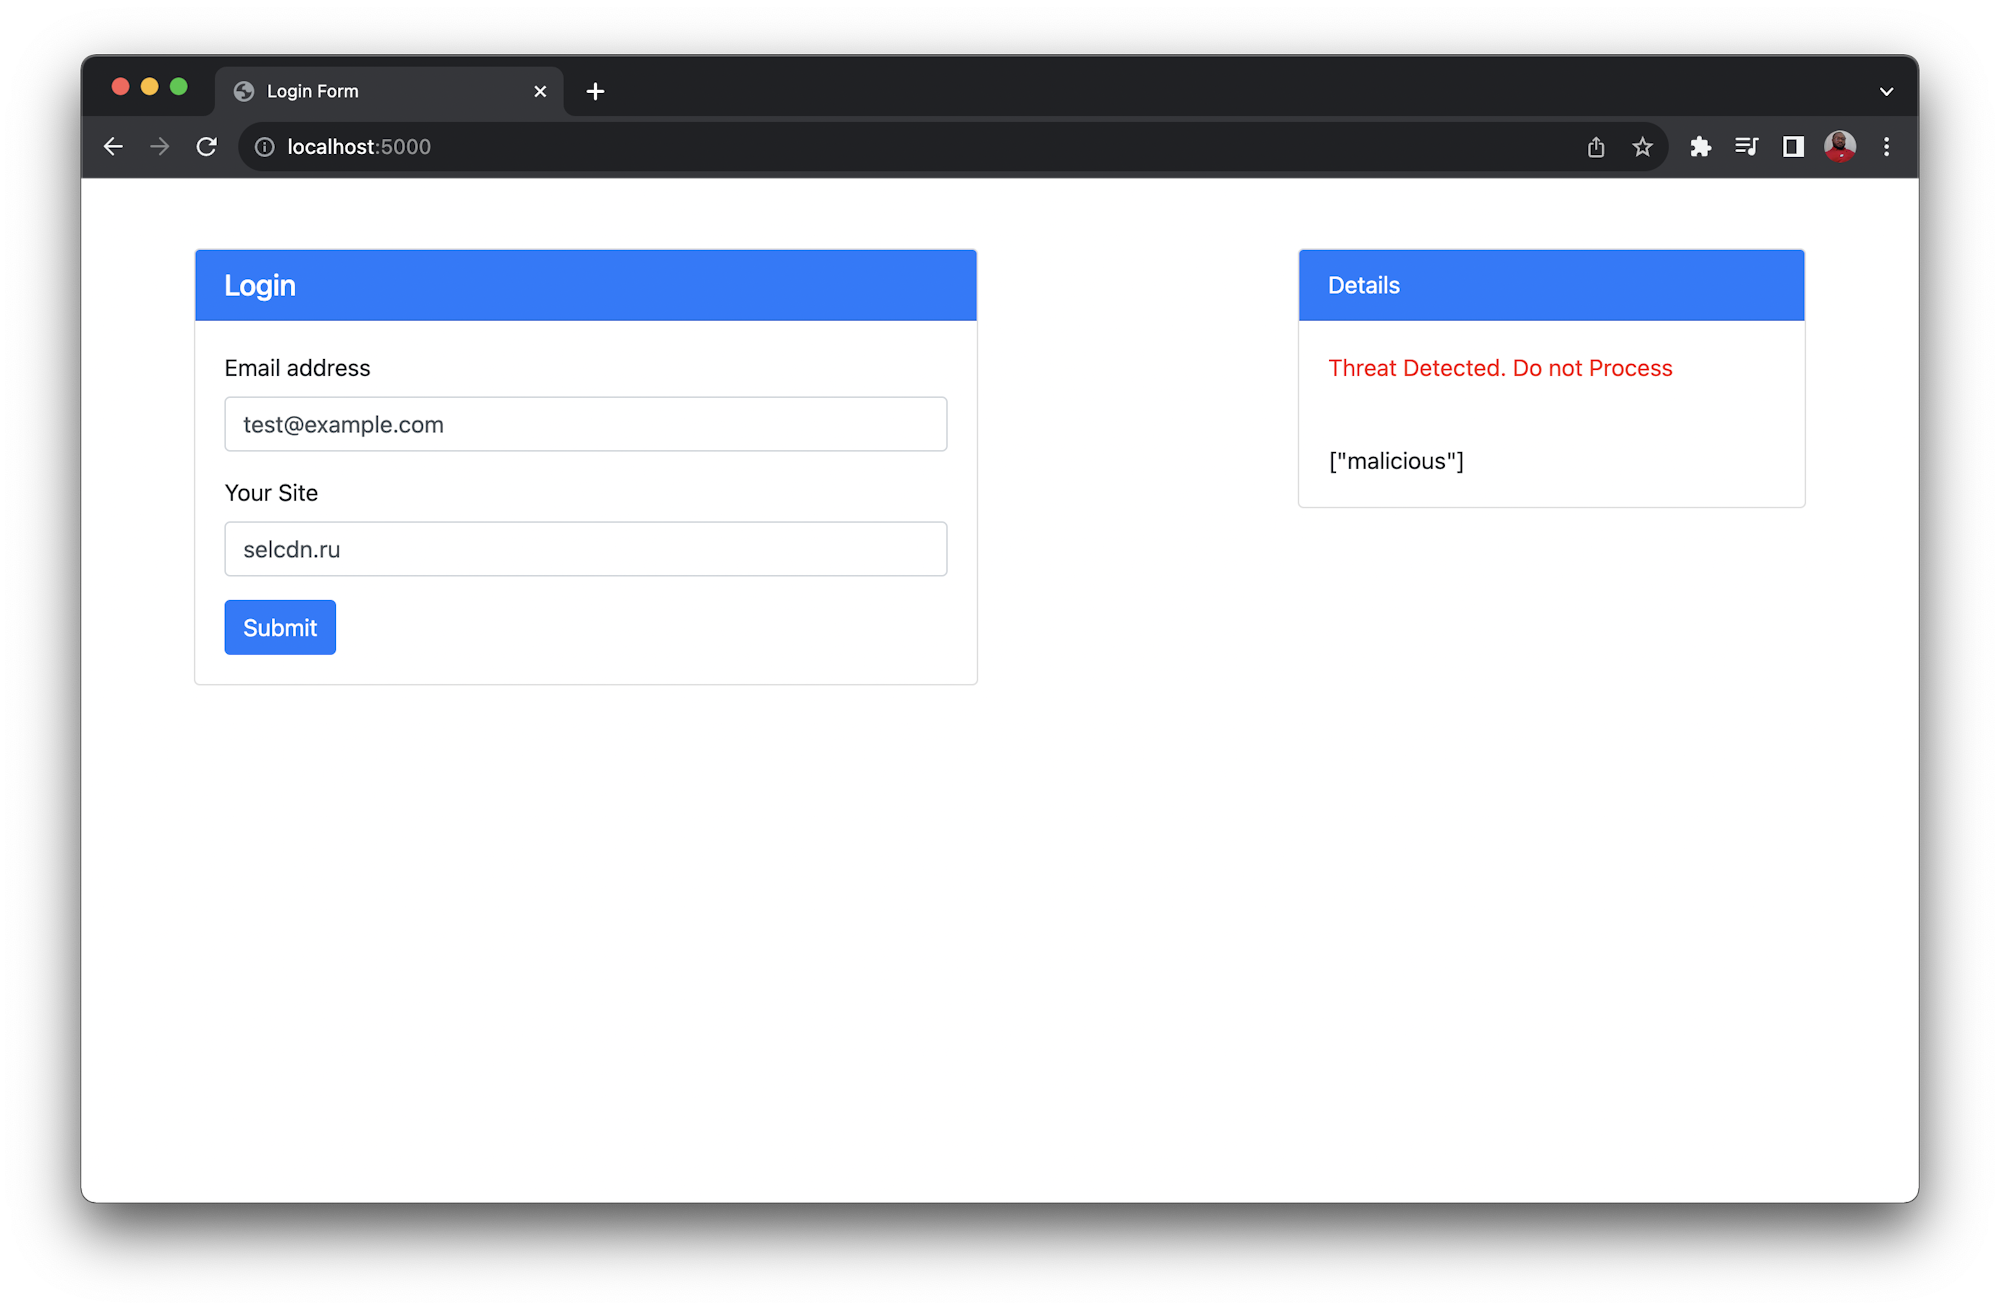
The form you are protecting in the project takes a fully qualified domain name in its URL field. It sends the domain name to the Webshrinker API to be scanned for threats. If the results indicate that it is malicious, Webshrinker returns a threat identifier. The form uses the threat identifier to deny the processing of the domain entry.
You will need an API key and API secret to use Webshrinker for this tutorial. Once you have an account created, you can create new API credentials by going to the API Access Keys page and clicking the Create API Key button. That generates your API secret and token.
You will use your credentials in the next step.
Cloning and running the demo application
The first step is to run the demo web form locally and inspect its behavior. You can clone the code for the form from this repository. Run this command from anywhere on your system:
git clone -b base-project --single-branch https://github.com/CIRCLECI-GWP/schedule-security-scan.git
Once you have the code on your system, install the dependencies by running:
cd schedule-security-scan
npm install
Now go to lines 65 and 66 in the index.html file (at the root of the project). Be sure to replace the placeholders with your newly created API key and API secret.
When the installation of dependencies is complete, run the application:
npm start
The application boots up, and you can view the web form at http://localhost:5000.
Enter an email address into the email field. In the URL field, enter a safe domain like facebook.com and click Submit. You will get a safe response on the right side of the form.

Now, test the URL field of the form using this threat-based domain name: selcdn.ru. Please, do not enter this domain name directly in your browser. You will get a threat alert message.
Adding the security tests
The next step is to write tests that perform the security checks automatically. You will be adding some automated functional tests using Google’s Puppeteer. Puppeteer simulates the way a real-world user would fill the form.
Add a new file named login.test.js at the root of the project. Enter this code:
const puppeteer = require("puppeteer");

const user_email = "test@example.com";
const non_threat_site = "facebook.com";
const malicious_site = "selcdn.ru";
const phishing_site = "mail.glesys.se";
const expected_safe_site_message = "Entry clean, process form";
const expected_threat_site_message = "Threat Detected. Do not Process";

test("Check Non-threat Site Entry", async () => {
  const browser = await puppeteer.launch({
    executablePath: "/opt/homebrew/bin/chromium",
  });

  try {
    const page = await browser.newPage();

    await page.goto("http://localhost:5000");

    await page.type("#userEmail", user_email);
    await page.type("#userSite", non_threat_site);
    await page.click("#submitButton");

    let messageContainer = await page.$("#infoDisplay");
    await page.waitForTimeout(4000);
    let value = await messageContainer.evaluate((el) => el.textContent);

    console.log(value);

    expect(value).toBe(expected_safe_site_message);
  } finally {
    await browser.close();
  }
}, 120000);

test("Check Malicious Site Entry", async () => {
  const browser = await puppeteer.launch({
    executablePath: "/opt/homebrew/bin/chromium",
  });

  try {
    const page = await browser.newPage();

    await page.goto("http://localhost:5000");

    await page.type("#userEmail", user_email);
    await page.type("#userSite", malicious_site);
    await page.click("#submitButton");

    let messageContainer = await page.$("#infoDisplay");
    await page.waitForTimeout(4000);

    let value = await messageContainer.evaluate((el) => el.textContent);

    console.log(value);

    expect(value).toBe(expected_threat_site_message);
  } finally {
    await browser.close();
  }
}, 120000);
Note: You can retrieve the executable path for Chromium using this command which chromium. Be sure to update the path before running the test.
This file contains two test cases. The first checks that non-threat domains like facebook.com are not blocked by the system. This keeps your security implementation from overzealously blocking legitimate domains.
The second test case checks for malicious entries by using a sample malicious domain. If the form blocks this domain, the test passes. If the malicious domain is not blocked, the test fails.
Save the file and go to the root of the project in your terminal. Make sure that the application is running in another shell; the tests need it to run successfully. Run this command:
npm run test
Once the test run is complete, you will have results in your CLI like these:
> xss-attack@1.0.0 test
> jest

  console.log
    Entry clean, process form

      at Object.<anonymous> (login.test.js:27:13)

 PASS  ./login.test.js (11.363 s)
  ✓ Check Non-threat Site Entry (6617 ms)
  ✓ Check Malicious Site Entry (4390 ms)

Test Suites: 1 passed, 1 total
Tests:       2 passed, 2 total
Snapshots:   0 total
Time:        11.743 s
Ran all test suites.
  console.log
    Threat Detected. Do not Process

      at Object.<anonymous> (login.test.js:53:13)
Developers can be tempted to write tests that match their code capabilities. As a best practice, be sure to separate the development and testing teams. This practice lets the testing team write exhaustive tests and protects developers from themselves.
Adding the pipeline configuration script
To automate the testing process, we can build a continuous integration (CI) pipeline using CircleCI.
To set up the CI pipeline, you need a pipeline configuration script. You can add this script into a .circleci/config.yml file. Create the file at the root of the project and enter:
version: 2.1
orbs:
  browser-tools: circleci/browser-tools@1.4.6
jobs:
  build:
    working_directory: ~/repo
    docker:
      - image: cimg/node:18.18.0-browsers
    steps:
      - browser-tools/install-chrome
      - browser-tools/install-chromedriver
      - checkout
      - run:
          name: Install Chromium
          command: |
            wget http://packages.linuxmint.com/pool/upstream/c/chromium/chromium_117.0.5938.132~linuxmint1+victoria_amd64.deb
            sudo apt install ./chromium_117.0.5938.132~linuxmint1+victoria_amd64.deb
      - run:
          name: Update NPM
          command: "sudo npm install -g npm"
      - restore_cache:
          key: dependency-cache-{{ checksum "package-lock.json" }}
      - run:
          name: Install Dependencies
          command: npm install
      - save_cache:
          key: dependency-cache-{{ checksum "package-lock.json" }}
          paths:
            - ./node_modules
      - run:
          name: Run the application
          command: node server.js
          background: true
      - run:
          name: Run tests
          command: npm run test
This configuration script:
- Uses
circleci/browser-tools@1.4.6to install browser tools such as Chrome driver - Pulls in a Docker image with browsers and Node.js installed
- Installs Chromium
- Updates
npmand installs the required project dependencies - Runs the application in the background so that the Cypress tests can load it
- Runs the tests
Before pushing your update to the repository, modify the executablePath for Chromium in login.test.js. Make sure it is the same as your local environment. Check the path here for reference.
Save the file and push the project to GitHub.
Next, add the repository as a CircleCI project.
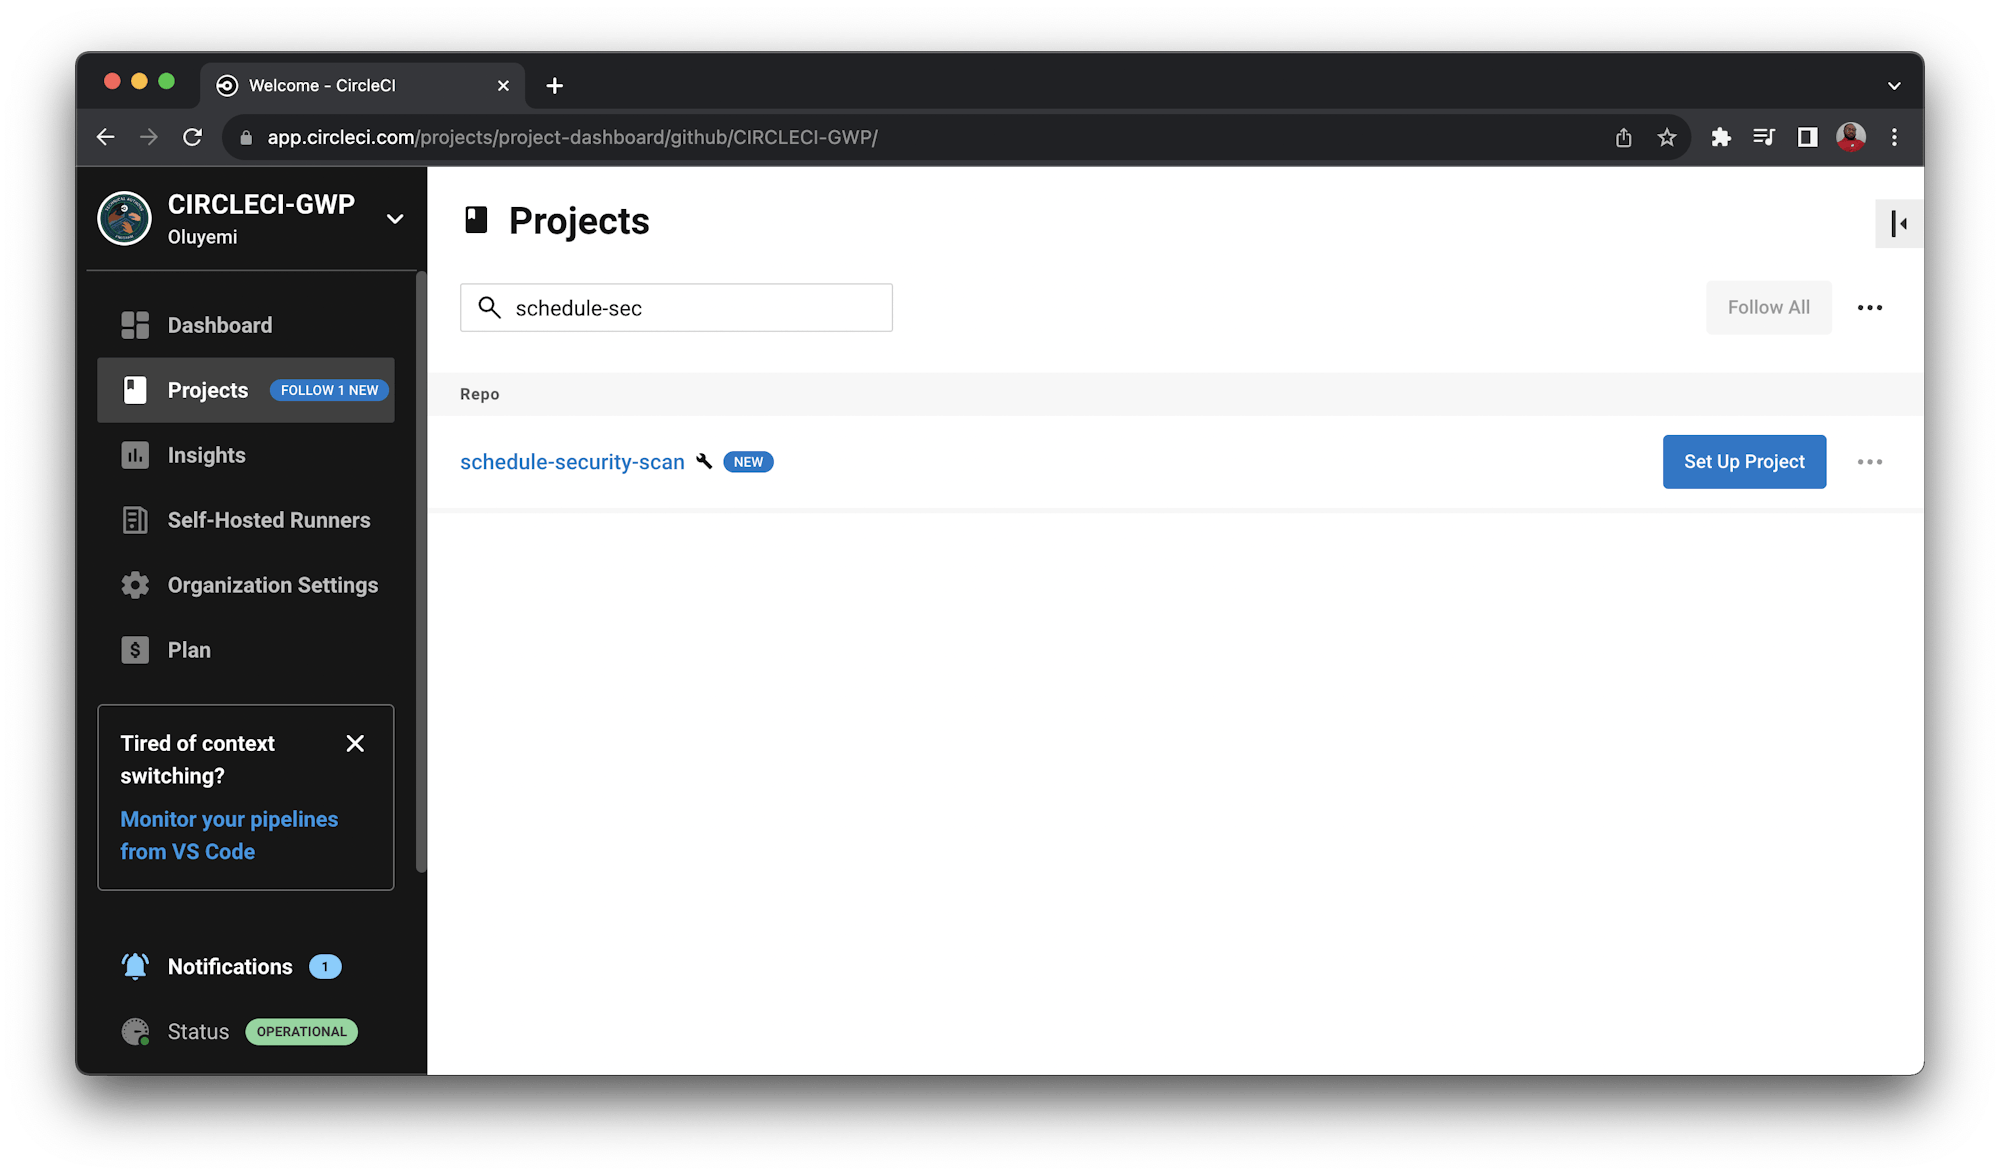
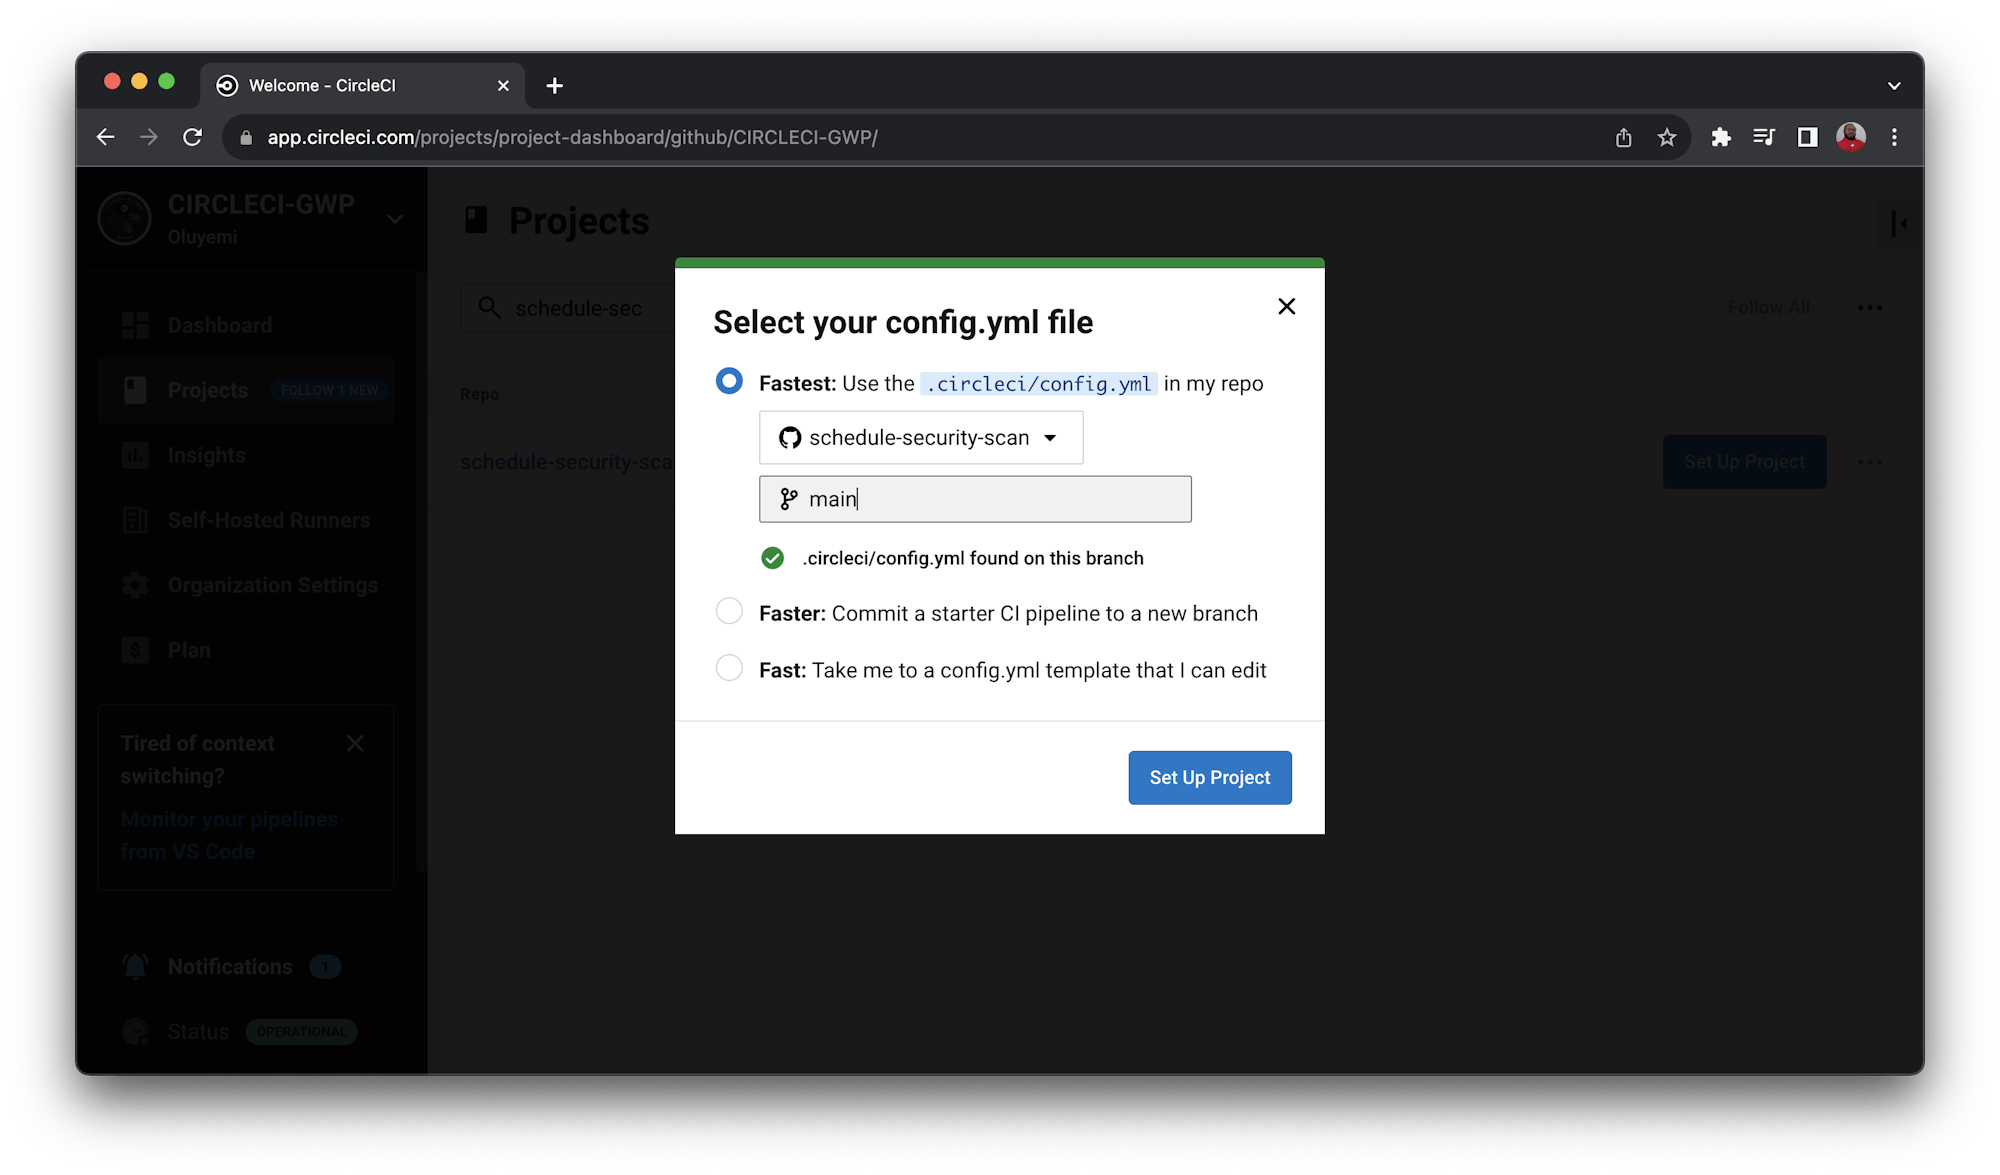
Once the project is set up on CircleCI, the tests run immediately. When the build is done, you will get a successful build status.
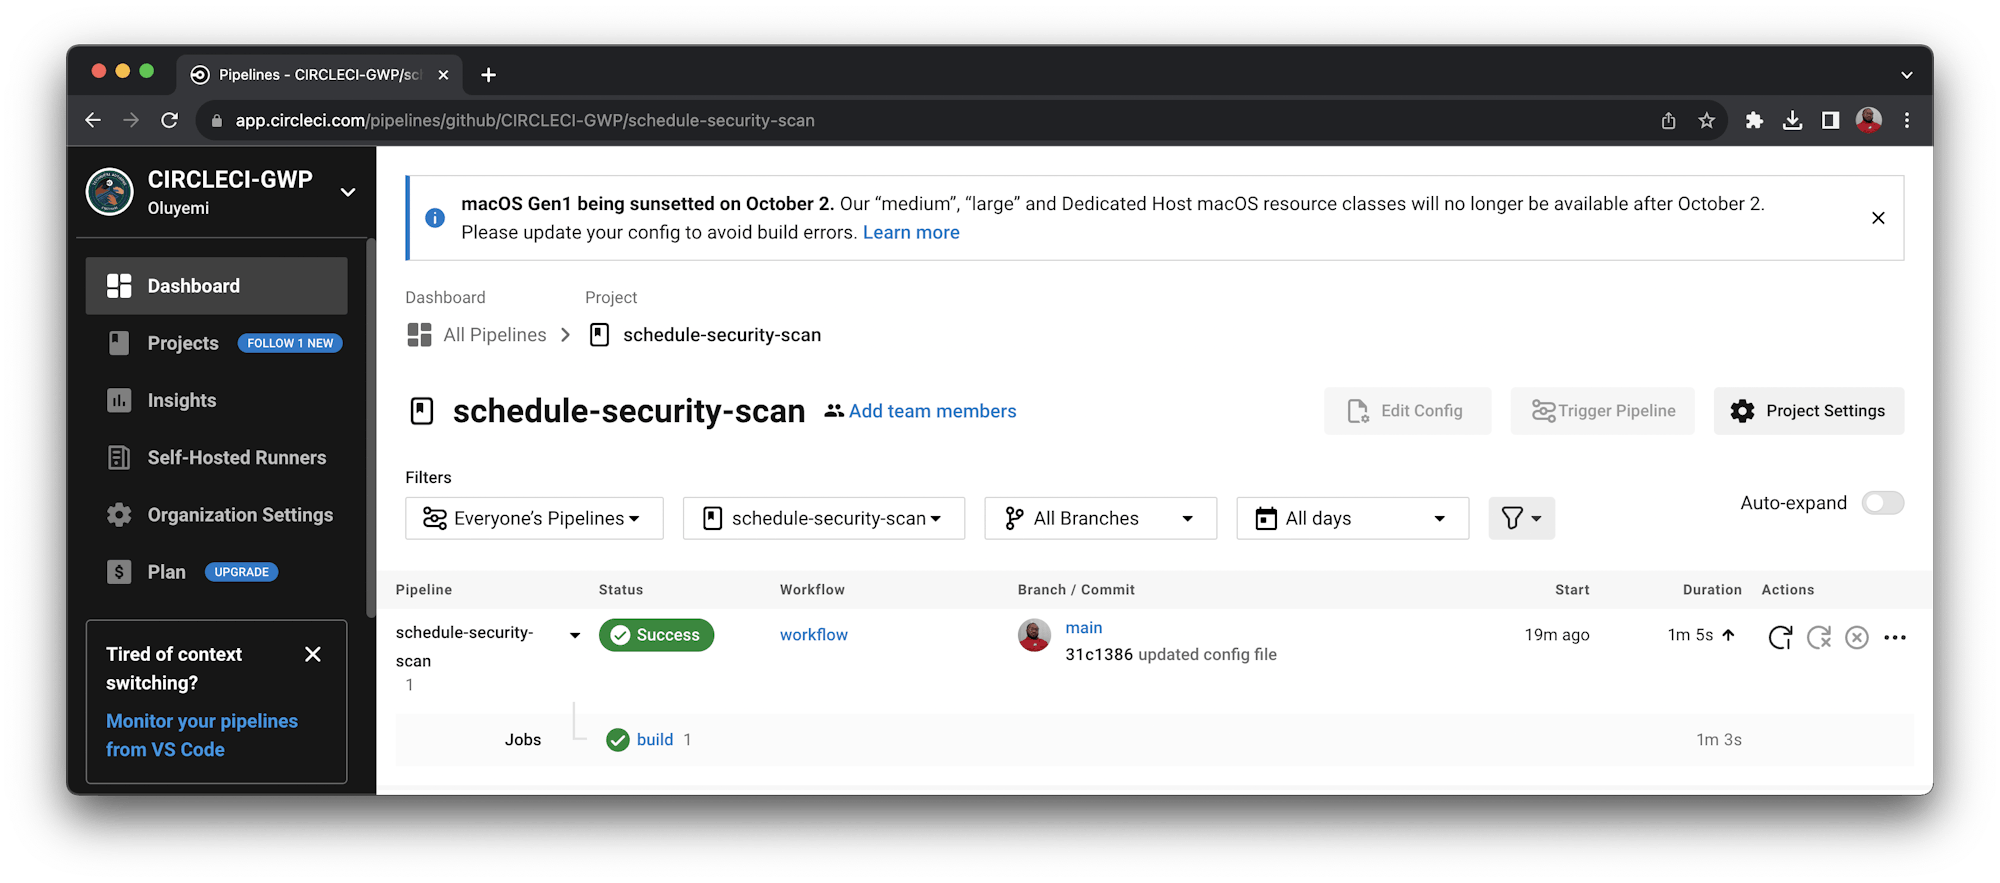
Click the Build link to review the build details.

Setting up a scheduled pipeline on CircleCI
Usually, your CI pipeline runs only when a new commit is made to the remote code repository you used when you set up the pipeline. To get the most from security scans like the tests we have written, the security state of the application should be updated even when no new code has been pushed.
That means your pipeline needs to run at regular intervals, like a cron job, to accurately report the security status of the application. To keep things efficient, it is better not to mix security tests with functionality tests that check for bugs or validate application functions.
With scheduled pipelines on CircleCI, you can configure your pipelines to run on just one specific day or on all days of the week at specific times.
For this tutorial, you will set up your pipeline to run every five minutes every day of the week. The interval set for this project is not based on any real-life situation, detailed consideration, or best practice. It is just to demonstrate the pipeline running periodically during the demo period.
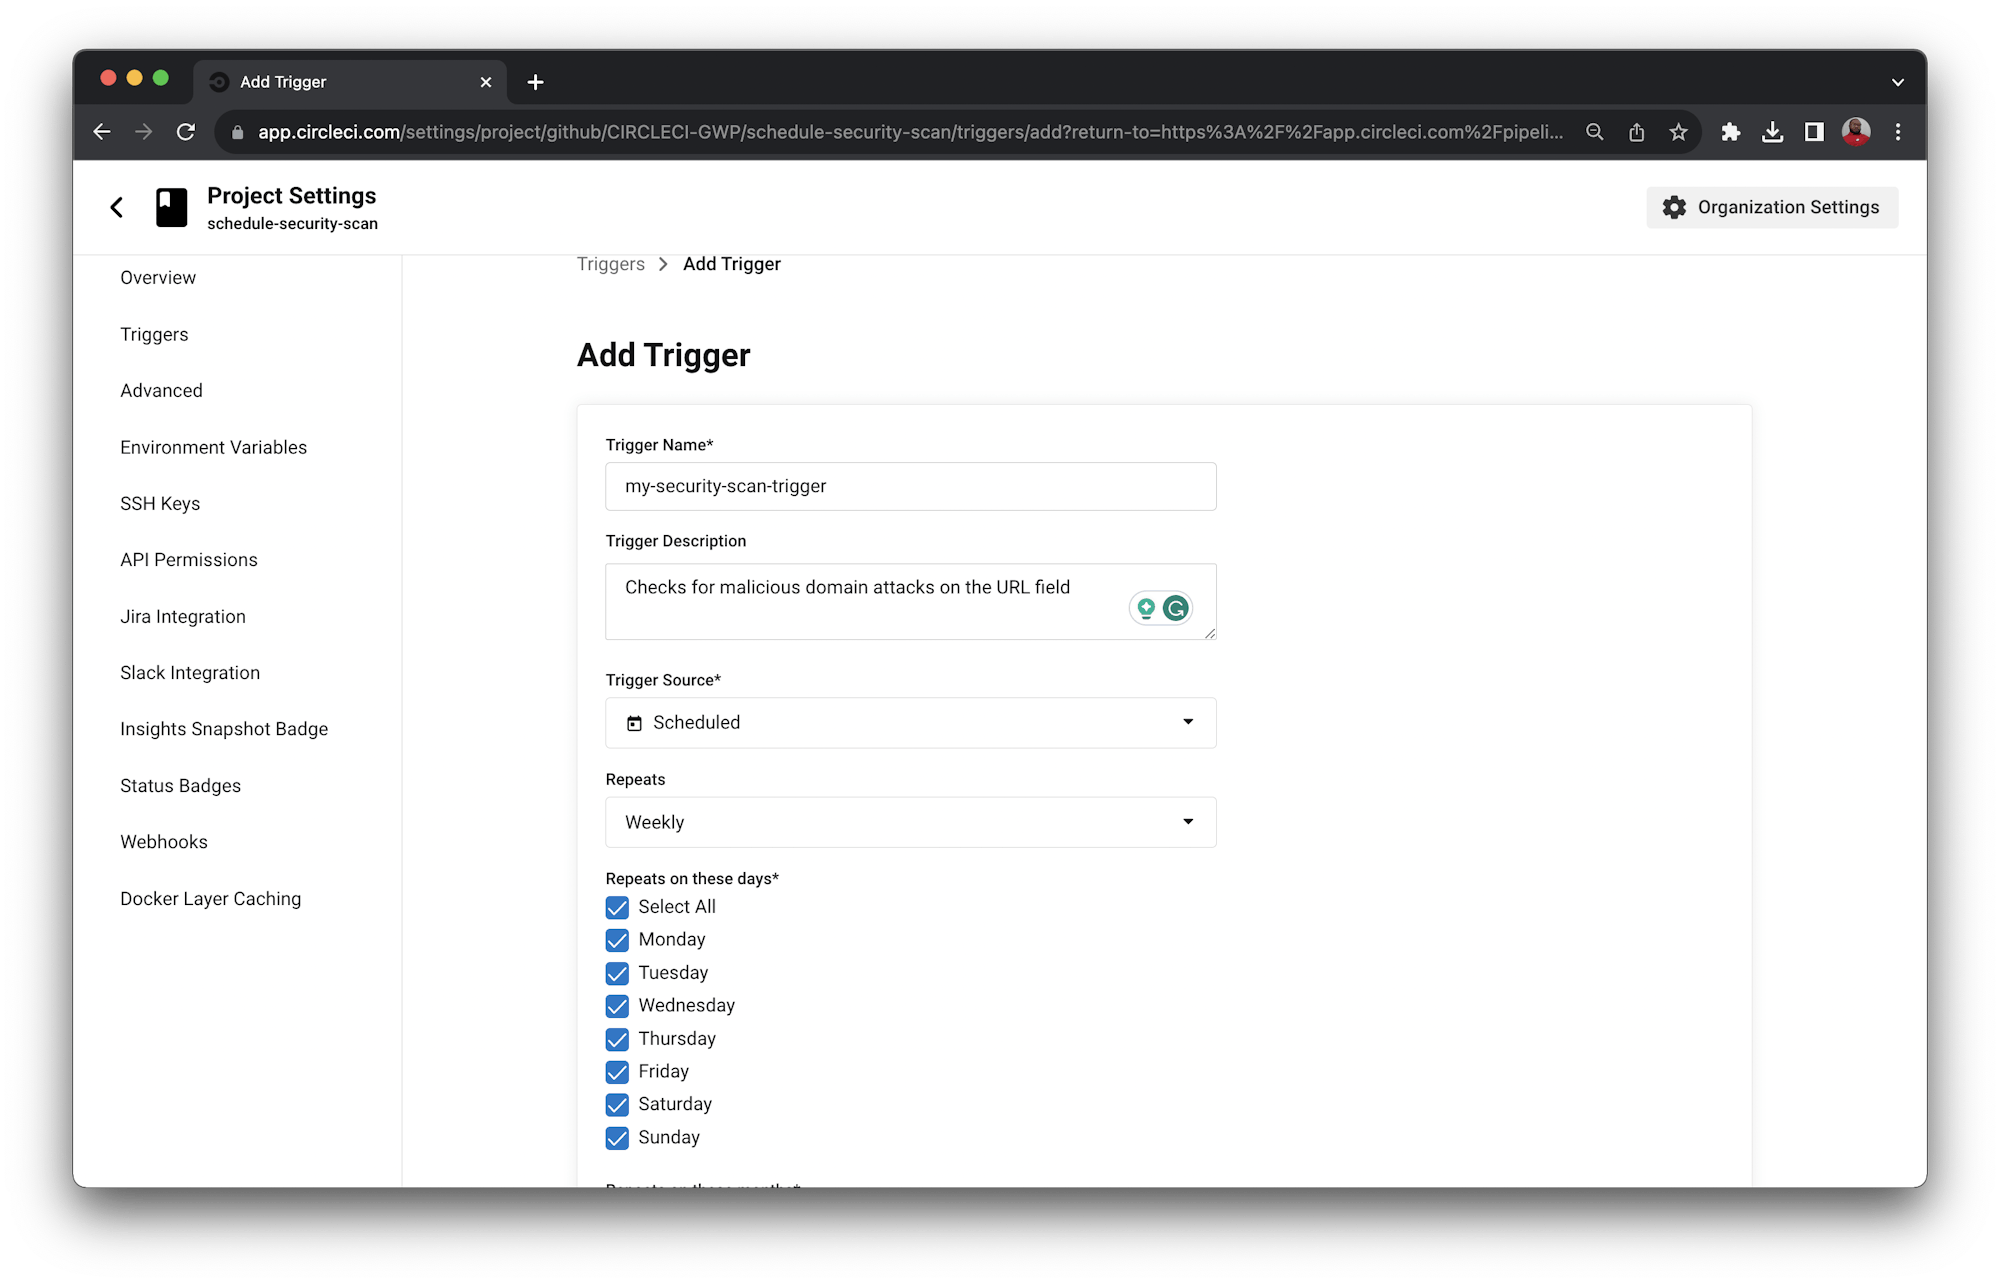
To configure your pipeline to run on a schedule, go to CircleCI and select Project Settings, then Triggers.
On the Triggers page, click Add Triggers to display the Trigger form. Fill in the form to configure the pipeline to run every five minutes, every day.
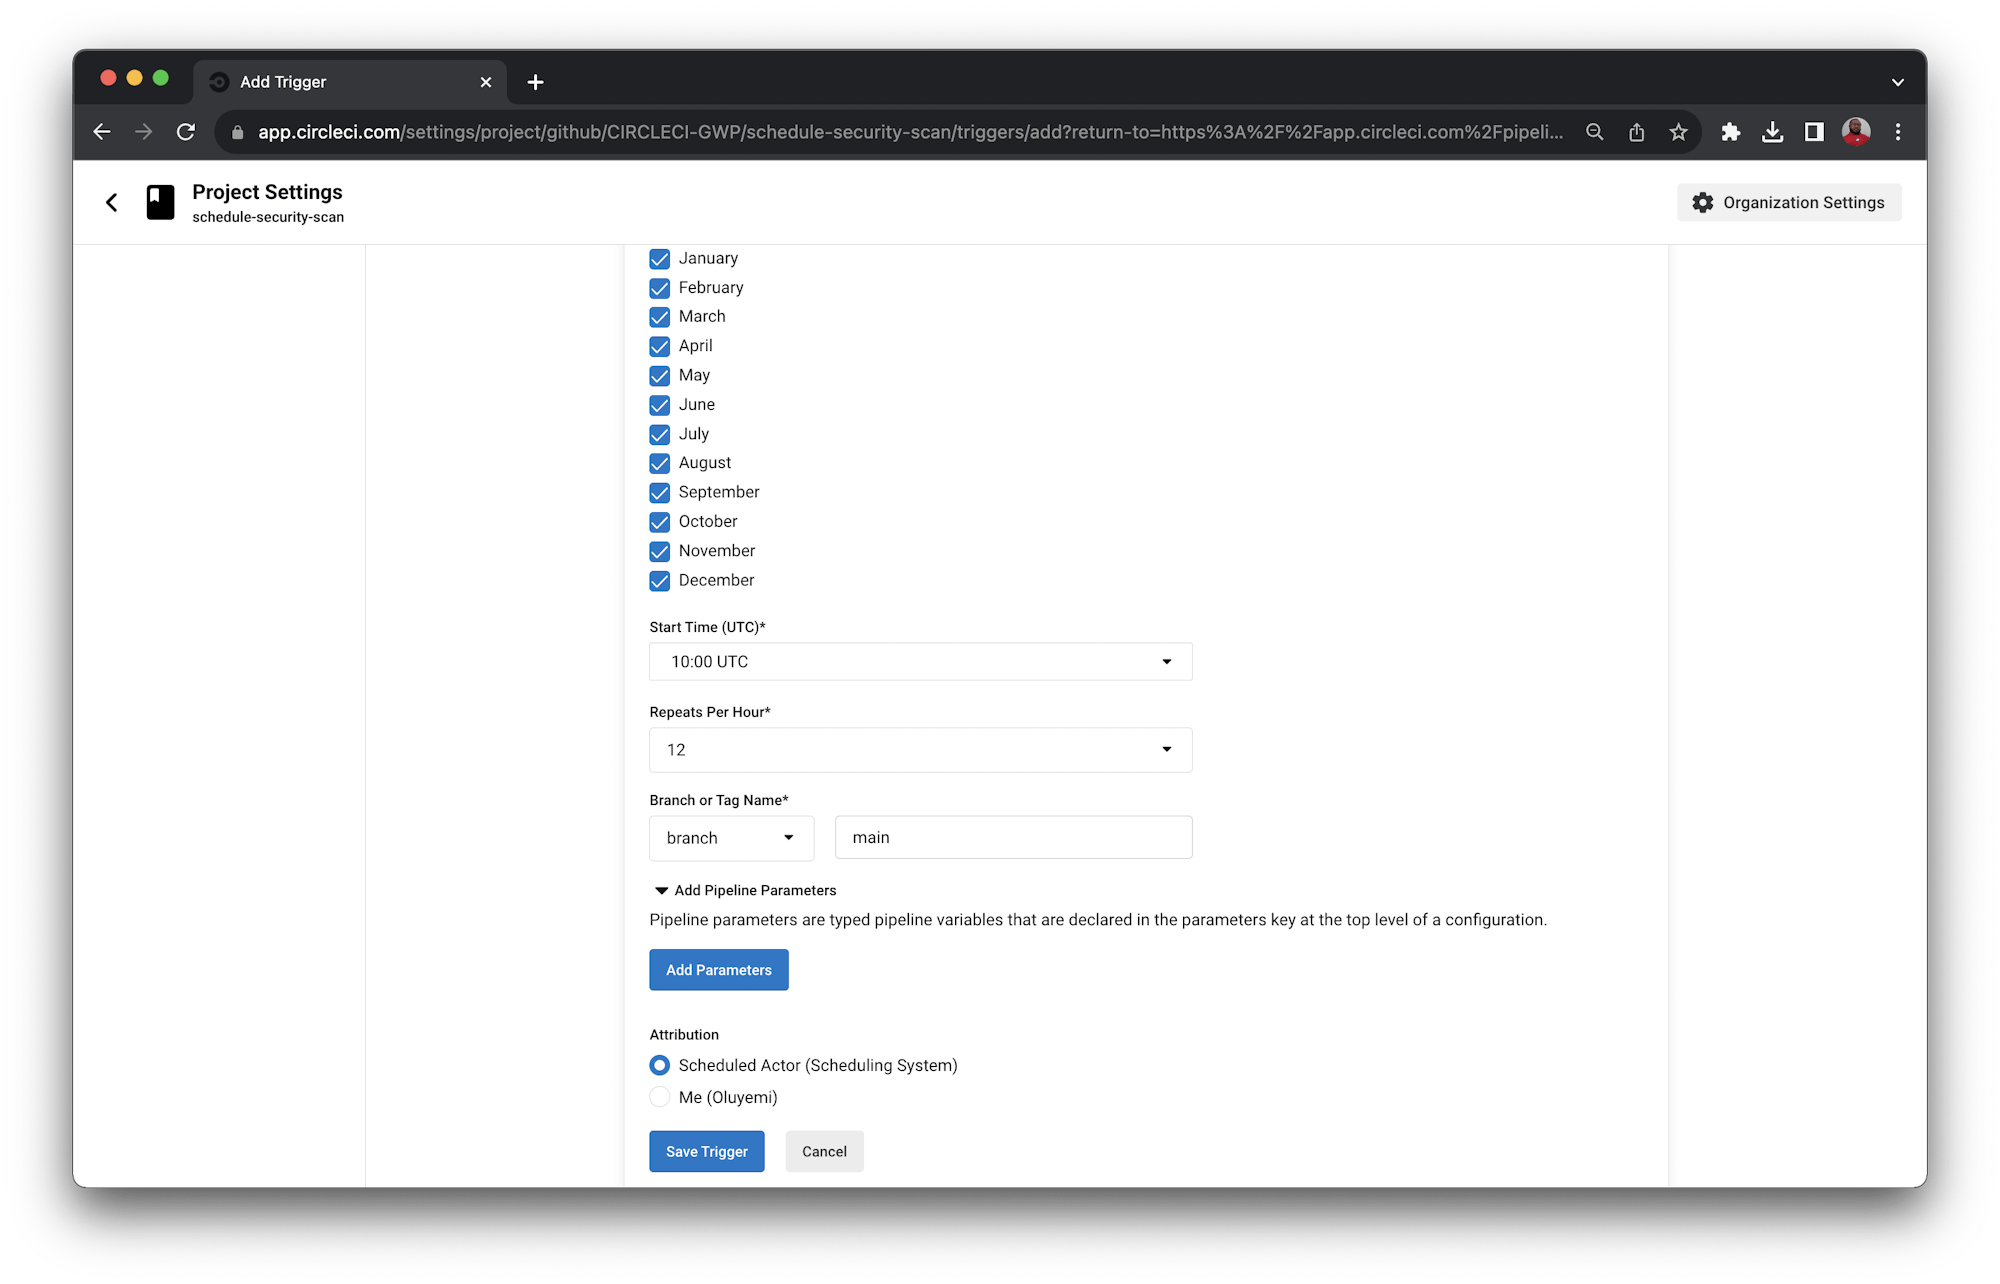
Click Save Trigger and your trigger will be created.
Return to the Pipelines page and wait for at least five minutes. Your pipeline will be triggered by the CircleCI system.
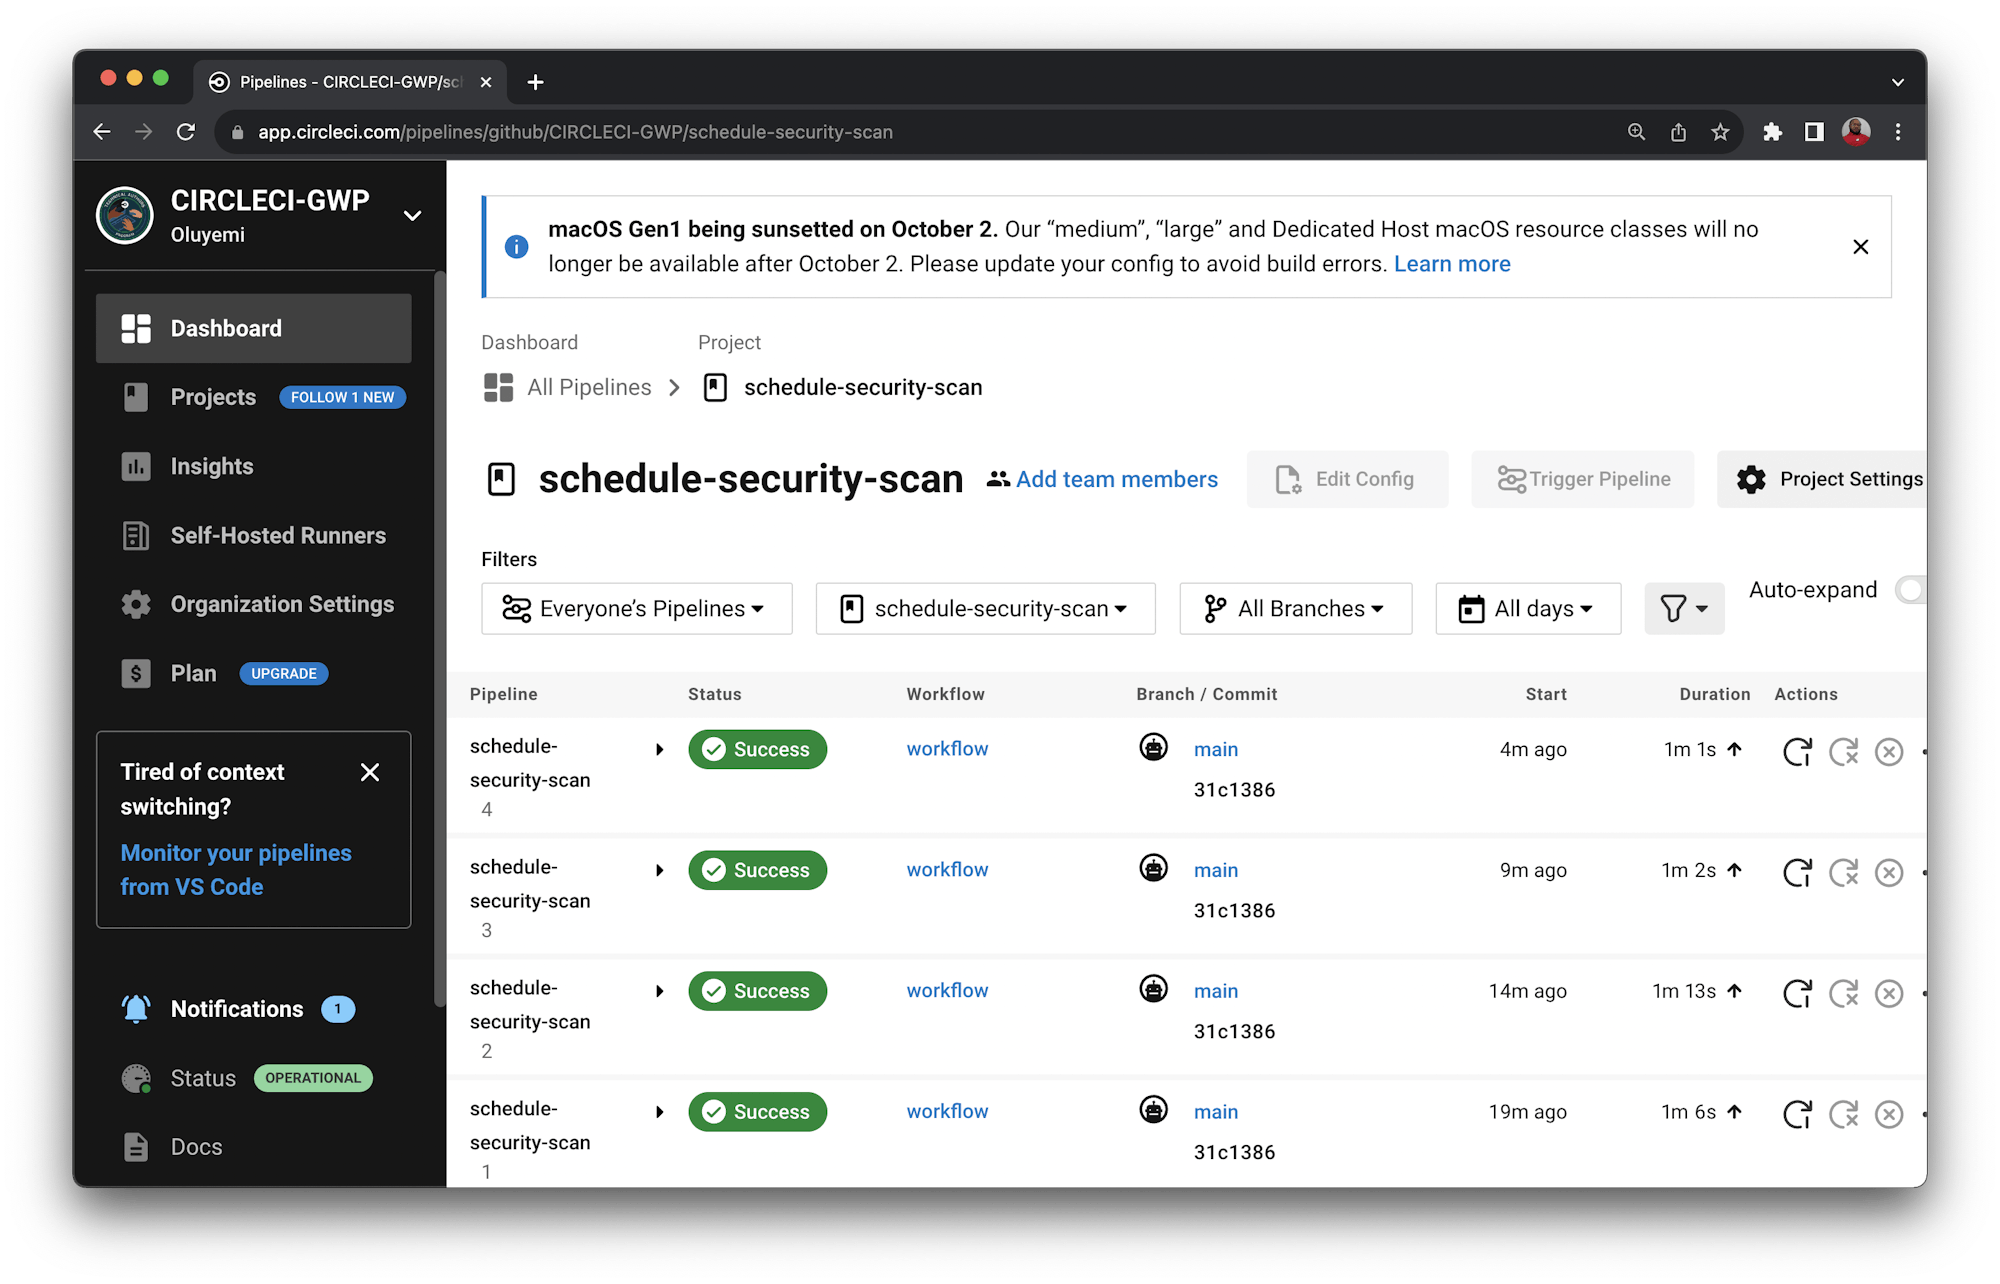
The five-minute intervals between each run indicate that the configuration is in full effect.
Conclusion
In this tutorial, you have learned how to run periodic security scans on your application using CircleCI’s scheduled pipelines. Instead of waiting for new code to build, you can have the system run the security checks regularly and report back when something is broken or vulnerable to a breach.
Security scans are just one of the many uses cases for this kind of automation. Clean-up tasks like log and data archiving are also great candidates for configuring a schedule. Share what you have learned with your team and start experimenting with scheduled pipelines today.
Happy coding!
Fikayo Adepoju is a LinkedIn Learning (Lynda.com) Author, Full-stack developer, technical writer, and tech content creator proficient in Web and Mobile technologies and DevOps with over 10 years experience developing scalable distributed applications. With over 40 articles written for CircleCI, Twilio, Auth0, and The New Stack blogs, and also on his personal Medium page, he loves to share his knowledge to as many developers as would benefit from it. You can also check out his video courses on Udemy.