CircleCI API developer’s guide
On This Page
- API categories
- Authentication and authorization
- Using the API securely with cURL
- Add an API token
- Accept header
- Getting started with the API
- GitHub OAuth and Bitbucket Cloud
- GitHub App, GitLab and Bitbucket Data Center
- Rate limits
- Example end-to-end API request
- Prerequisites
- Steps
- Additional API use cases
- Get project details
- Steps
- Get job details
- Steps
- Download artifacts
- Steps
- Gather insights
- Returning workflow metrics
- Reviewing individual job metrics
- Reference
This guide was written to assist developers in making API calls to CircleCI services to return detailed information about users, pipelines, projects, and workflows. The API v2 Specification itself may be viewed in the Reference documentation.
Using server? If you are using CircleCI server, replace https://circleci.com with your server hostname when interacting with the CircleCI API. |
API categories
The current categories of API v2 endpoints are:
-
Context
-
Insights
-
User
-
Pipeline
-
Job
-
Workflow
-
Webhook
-
OIDC Token Management
-
Policy Management
-
Project
-
Usage
-
Schedule
| Currently, Personal API tokens are the only supported tokens on API v2. Project tokens are not currently supported on API v2. |
Authentication and authorization
The CircleCI API utilizes token-based authentication to manage access to the API server and validate that a user has permission to make API requests. Before you can make an API request, you must first add an API token and then verify that you are authenticated by the API server to make requests. The process to add an API token and have the API server authenticate you is described in the next section.
You can use the token in the request header with the name Circle-Token, as shown in the examples below. You may also use the API token as the username (Base64-encoded) with HTTP Basic Authentication.
Using the API securely with cURL
CircleCI encourages security best practices when using cURL with the API. Visit the Security recommendations page to learn how to mitigate risks and protect your API token and secrets.
Add an API token
To add an API token, perform the steps listed below.
-
Log in to the CircleCI web application
-
Create a personal API token by visiting the Personal API Tokens page, and follow the steps to add an API token
-
To test your token, call the API using the command below. You will need to set your API token as an environment variable before making a cURL call.
export CIRCLE_TOKEN={your_api_token} curl https://circleci.com/api/v2/me --header "Circle-Token: $CIRCLE_TOKEN" -
You should see a JSON response similar to the example shown below.
{
  "id": "string",
  "login": "string",
  "name": "string"
}
All API calls are made in the same way, by making standard HTTP calls, using JSON, a content-type, and your API token. The JSON examples shown in this document are not comprehensive, and may contain additional JSON response fields not shown in the example, based on user input and fields.
Accept header
It is recommended that you specify an Accept header in your API requests. The majority of API endpoints will return JSON by default, but some endpoints (primarily, API v1) return EDN if no accept header is specified.
-
To return formatted JSON, include a
text/plainheader like the example shown below:curl --header "Circle-Token: $CIRCLE_TOKEN" \ --header "Accept: text/plain" \ https://circleci.com/api/v2/project/{project-slug}/pipeline -
To return compressed JSON:
curl --header "Circle-Token: $CIRCLE_TOKEN" \
  --header "Accept: application/json"    \
  https://circleci.com/api/v2/project/{project-slug}/pipeline
Getting started with the API
To interact with CircleCI projects via the API v2 you will use the project slug. The project slug is a unique identifier for a project.
To find your project slug, follow these steps:
-
In the CircleCI web app, select your org from the org cards on your user homepage.
-
Select Projects from the sidebar and locate your project from the list. You can use the search to help.
-
Select the next to your project and select Project Settings.
-
The project slug is listed on the project settings homepage. Use the copy button to copy the slug to your clipboard.
The project_slug is also included in the response payload when looking up a pipeline or workflow by ID. The project slug can then be used to get information about the project.
GitHub OAuth and Bitbucket Cloud
If your integrate your code via the GitHub OAuth app or Bitbucket Cloud, your project slug is in a human readable format: vcs_type/org_name/repo_name (VCS type can be github/bitbucket or gh/bb).
GitHub App, GitLab and Bitbucket Data Center
For GitHub App, GitLab and Bitbucket Data Center project, the project slug is made up org and project identifiers as opaque , for example: circleci/43G3kM5RtfFE7v5sa4nWAU/44n9pujWcTnVZ2b5S8Fnat. A project slug must be treated as an opaque string. The project slug should not be parsed to retrieve the project or organization ID. To retrieve project and organization IDs or names, use the entire slug to fetch project details or organization details. The IDs and names are included in the payload.
Rate limits
The CircleCI API is protected by rate limiting measures to ensure the stability of the system. CircleCI reserves the right to throttle the requests made by an individual user, or the requests made to individual resources in order to ensure a fair level of service to all of our users.
As the author of an API integration with CircleCI, your integration should expect to be throttled, and should be able to gracefully handle failure. There are different protections and limits in place for different parts of the API. In particular, we protect our API against sudden large bursts of traffic, and we protect against sustained high volumes of requests, for example, frequent polling.
For HTTP APIs, when a request is throttled, you will receive HTTP status code 429. If your integration requires that a throttled request is completed, then you should retry these requests after a delay, using an exponential backoff.
In most cases, the HTTP 429 response code will be accompanied by the Retry-After HTTP header. When this header is present, your integration should wait for the period of time specified by the header value before retrying a request.
To understand the current limit, you can inspect other headers that describe the API limits. These will vary slightly depending on the API call you are making, as different services will impose different limits. The following headers are possible:
-
RateLimit-Limit: states your rate limit, which will be in seconds, unless anX-RateLimit-Limitheader exists, in which case that will define the specific time window. -
X-RateLimit-Limit-<TIME>: states the limits for the specified time window.TIMEcan be one ofSecond,Minute,Hour, orDay.
Each RateLimit-Limit or X-RateLimit-Limit header will also have a related RateLimit-Remaining and X-RateLimit-Remaining header that will tell you how much of your allotted usage you have remaining for that time period.
Similarly, there are RateLimit-Reset and X-RateLimit-Reset headers that will give you the number of seconds until the current rate limit window will reset.
As we transition some APIs from one rate limit system to another, a different limit may appear in the RateLimit header compared to the X-RateLimit header. In these cases, the lower limit will be enforced. |
Example end-to-end API request
The following section details the steps you would need, from start to finish, to make an API call. This section includes creating a demo repository called hello-world. Alternatively, you can use a pre-existing repository to follow along if you choose.
Many of the API calls make use of the {project-slug} triplet, described above.
You will get a list of pipelines for your project using GET /project/{project-slug}/pipeline.
Prerequisites
-
A GitHub, Bitbucket, or GitLab account with a repository to set up with CircleCI.
Steps
-
In your VCS, create a repository (or use an existing one if you prefer). The repository for this how-to guide will be called
hello-world. Create a README for your repository so that it is not empty. -
Set up your new project on the CircleCI web app. Refer to the Create a project guide for steps.
After completing the steps for setting up your project, you should have a valid
config.ymlfile in a.circlecifolder at the root of your repository. Something like the following:# Use the latest 2.1 version of CircleCI pipeline process engine. # See: https://circleci.com/docs/configuration-reference version: 2.1 # Define a job to be invoked later in a workflow. # See: https://circleci.com/docs/jobs-steps/#jobs-overview & https://circleci.com/docs/configuration-reference/#jobs jobs: say-hello: # Specify the execution environment. You can specify an image from Docker Hub or use one of our convenience images from CircleCI's Developer Hub. # See: https://circleci.com/docs/executor-intro/ & https://circleci.com/docs/configuration-reference/#executor-job docker: # Specify the version you desire here # See: https://circleci.com/developer/images/image/cimg/base - image: cimg/base:current # Add steps to the job # See: https://circleci.com/docs/jobs-steps/#steps-overview & https://circleci.com/docs/configuration-reference/#steps steps: # Checkout the code as the first step. - checkout - run: name: "Say hello" command: "echo Hello, World!" # Orchestrate jobs using workflows # See: https://circleci.com/docs/workflows/ & https://circleci.com/docs/configuration-reference/#workflows workflows: say-hello-workflow: # This is the name of the workflow, feel free to change it to better match your workflow. # Inside the workflow, you define the jobs you want to run. jobs: - say-hello -
Add an API token to your account from the Personal API Tokens page. Be sure to save your API token in a secure place once you generate it.
-
Find your project slug from the project settings overview page.
-
Now you are ready to test out your API token using
curlto make sure everything works. The following code snippets demonstrate querying all pipelines on a project. Note that in the example below, the values within curly braces ({}) need to be replaced with your values.# First: set your CircleCI token as an environment variable export CIRCLE_TOKEN={your_api_token} curl -X GET https://circleci.com/api/v2/project/{project-slug}/pipeline --header "Accept: application/json" \ --header "Content-Type: application/json" \ --header "Circle-Token: $CIRCLE_TOKEN" \You will likely receive a long string of unformatted JSON. After formatting, it should look like so:
{ "next_page_token": null, "items": [ { "id": "03fcbba0-d847-4c8b-a553-6fdd7854b893", "errors": [], "project_slug": "gh/{YOUR_USER_NAME}/hello-world", "updated_at": "2020-01-10T19:45:58.517Z", "number": 1, "state": "created", "created_at": "2020-01-10T19:45:58.517Z", "trigger": { "received_at": "2020-01-10T19:45:58.489Z", "type": "api", "actor": { "login": "teesloane", "avatar_url": "https://avatars0.githubusercontent.com/u/12987958?v=4" } }, "vcs": { "origin_repository_url": "https://github.com/{YOUR_USER_NAME}/hello-world", "target_repository_url": "https://github.com/{YOUR_USER_NAME}/hello-world", "revision": "ca67134f650e362133e51a9ffdb8e5ddc7fa53a5", "provider_name": "GitHub", "branch": "master" } } ] } -
One of the benefits of the CircleCI API v2 is the ability to remotely trigger pipelines with parameters. The following code snippet triggers a pipeline via
curlwithout any body parameters:If your project code is integrated with CircleCI via the GitHub App, GitLab or Bitbucket Data Center, you will need to use the new Trigger a new pipeline endpoint rather than the endpoint used in this example. curl -X POST https://circleci.com/api/v2/project/{project-slug}/pipeline \ --header "Content-Type: application/json" \ --header "Accept: application/json" \ --header "Circle-Token: $CIRCLE_TOKEN" \This returns:
 {
   "number": 2,
   "state": "pending",
   "id": "e411ea74-c64a-4d60-9292-115e782802ed",
   "created_at": "2020-01-15T15:32:36.605Z"
 }
While this alone can be useful, we want to be able to customize parameters of the pipeline when we send this POST request. By including a body parameter in the
curlrequest (via the-dflag), we can customize specific attributes of the pipeline when it runs: pipeline parameters, the branch, or the git tag. Below, we are telling the pipelines to trigger for "my-branch":curl -X POST https://circleci.com/api/v2/project/{project-slug}/pipeline \ --header "Content-Type: application/json" \ --header "Accept: application/json" \ --header "Circle-Token: $CIRCLE_TOKEN" \ -d '{ "branch": "my-branch" }' -
Let us move on to a more complex example: triggering a pipeline and passing a parameter that can be dynamically substituted into your configuration. In this example, we will pass a Docker image tag to our
dockerexecutor key.
First, we will need to modify the.circleci/config.ymlto be a little more complex than the standard "Hello World" sample provided by the onboarding.version: 2.1 jobs: build: docker: - image: "circleci/node:<< pipeline.parameters.image-tag >>" environment: IMAGETAG: "<< pipeline.parameters.image-tag >>" steps: - run: echo "Image tag used was ${IMAGETAG}" parameters: image-tag: default: latest type: stringYou will need to declare the parameters you expect to receive from the API. In this case, under the
parameterskey, we define animage-tagto be expected in the JSON payload of a POST request to the Trigger a new pipeline endpoint. -
Now we can run a
curlrequest that passes variables in a POST request, similar to the following:curl -u ${CIRCLE_TOKEN}: -X POST --header "Content-Type: application/json" -d '{ "parameters": { "image-tag": "4.8.2" } }' https://circleci.com/api/v2/project/{project-slug}/pipeline
For more detailed information about other endpoints you may wish to call, refer to the CircleCI API v2 Documentation for an overview of all endpoints currently available.
Additional API use cases
Now that you have a general understanding of how the CircleCI API v2 service works through an end-to-end API example request and walkthrough, let us look at a few common tasks and operations you may perform on a regular basis when using the API.
Before trying any of the API calls in this section, make sure you have a personal API token and have been authenticated to make calls to the server.
Get project details
You may often find it helpful to retrieve information about a specific project, including the name of the organization the project belongs to, the version control system (VCS) that hosts the project, and other details. The CircleCI API enables you to return this and other information by making a single GET request to the project/{project-slug} endpoint.
Steps
Make a GET request to the /project/{project-slug} endpoint to return detailed information about a specific project.
Whenever you see curly brackets {}, this represents a variable that you must manually enter in the request. |
To return project details, follow these steps:
-
Find your project slug from the project settings overview page.
-
Run the following
curlrequest, substituting your project slug:curl -X GET https://circleci.com/api/v2/project/{project_slug} \ --header "Content-Type: application/json" \ --header "Accept: application/json" \ --header "Circle-Token: $CIRCLE_TOKEN" \ -
You will receive unformatted JSON. Once formatted it should look similar to the example shown below:
{
  "slug": "gh/CircleCI-Public/api-preview-docs",
  "name": "api-preview-docs",
  "organization_name": "CircleCI-Public",
  "vcs_info": {
    "vcs_url": "https://github.com/CircleCI-Public/api-preview-docs",
    "provider": "GitHub",
    "default_branch": "master"
  }
}
Notice in the example above that you will receive very specific information about your project, including the name of the project, the name of the organization that the project belongs to, and information about the VCS that hosts the project. For a more detailed breakdown of each value returned in this request, refer to the Get Project Details section of the CircleCI API v2 Reference Guide.
Get job details
Much like the Get a project API request described in the previous example, the Get job details API request enables you to return specific job information from the CircleCI API by making a single API request.
Retrieving job information can be very useful when you want information about how your job performed, what resources were used (for example, pipeline, executor type, etc.), and the time it took for the job to finish.
Steps
The GET /project/{project_slug}/job/{job-number} endpoint enables you to return detailed information about a specific job.
Whenever you see curly brackets {}, this represents a variable that you must manually enter in the request. |
To return job details, perform the following steps:
-
Find your project slug from the project settings overview page.
TODO: create tip for finding build/job number . Find your job number
-
Run the following
curlrequest:curl -X GET https://circleci.com/api/v2/project/{project_slug}/job/{job_number} \ --header "Content-Type: application/json" \ --header "Accept: application/json" \ --header "Circle-Token: $CIRCLE_TOKEN" \ -
After passing the parameters and making the API request, you will receive unformatted JSON text similar to the example shown below.
  {
  "web_url": "string",
  "project": {
    "slug": "gh/CircleCI-Public/api-preview-docs",
    "name": "api-preview-docs",
    "external_url": "https://github.com/CircleCI-Public/api-preview-docs"
  },
  "parallel_runs": [{
    "index": 0,
    "status": "string"
  }],
  "started_at": "2020-01-24T11:33:40Z",
  "latest_workflow": {
    "id": "string",
    "name": "build-and-test"
  },
  "name": "string",
  "executor": {
    "type": "string",
    "resource_class": "string"
  },
  "parallelism": 0,
  "status": null,
  "number": 0,
  "pipeline": {
    "id": "string"
  },
  "duration": 0,
  "created_at": "2020-01-13T18:51:40Z",
  "messages": [{
    "type": "string",
    "message": "string",
    "reason": "string"
  }],
  "contexts": [{
    "name": "string"
  }],
  "organization": {
    "name": "string"
  },
  "queued_at": "2020-01-13T18:51:40Z",
  "stopped_at": "2020-01-13T18:51:40Z"
}
Notice in the example above that you will receive very specific information about your job:
-
Project and workflow details for the job
-
Date and time the job started and finished
-
Executor type
-
Current status of the job
-
Duration of the job.
For a more detailed breakdown of each value returned in this request, refer to the Get job details section of the API v2 Reference Guide.
Download artifacts
The following section details the steps you need to follow to download artifacts that are generated when a job is run, first, returning a list of artifacts for a job, and then downloading the full set of artifacts. If you are looking for instructions for downloading the latest artifacts for a pipeline, without needing to specify a job number, see our API v1.1 guide — keep checking back here as this functionality will be added to API v2 in the future.
Steps
-
Ensure your API token is set as an environment variable. You maybe have already done this during authentication, but if not, run the following command in your terminal, substituting your personal API token:
export CIRCLE_TOKEN={your_api_token} -
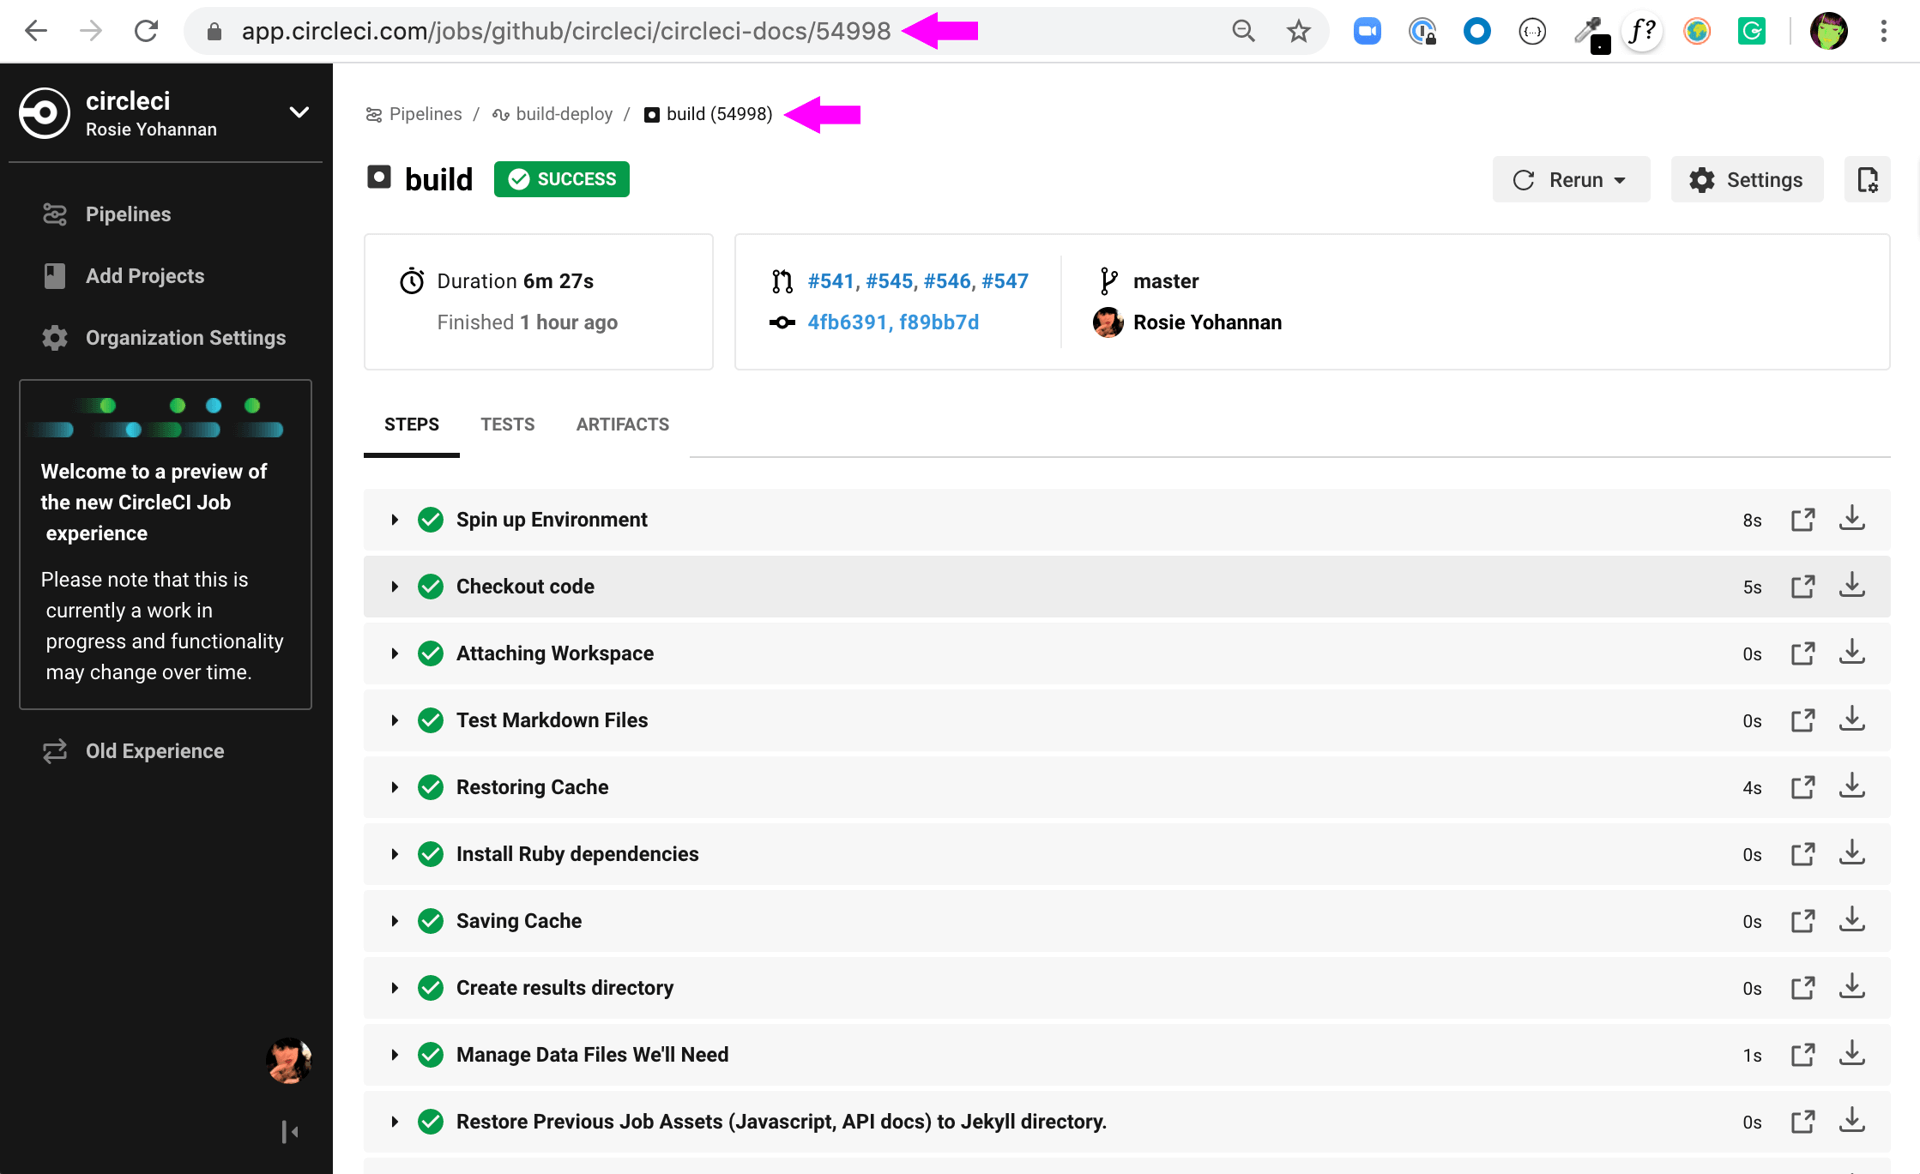
Retrieve the job number for the job you want to get artifacts for. You can find job numbers in the UI - either in the breadcrumbs on the Job Details page, or in the URL.
-
Next, use the
curlcommand to return a list of artifacts for a specific job.curl -X GET https://circleci.com/api/v2/project/{project-slug}/{job_number}/artifacts \ --header "Content-Type: application/json" \ --header "Accept: application/json" \ --header "Circle-Token: $CIRCLE_TOKEN"You should get a list of artifacts back - if the job you selected has artifacts associated with it. Here’s an extract from the output when requesting artifacts for a job that builds these docs:
{ "path": "circleci-docs/assets/img/docs/walkthrough6.png", "node_index": 0, "url": "https://53936-48750547-gh.circle-artifacts.com/0/circleci-docs/assets/img/docs/walkthrough6.png" }, { "path": "circleci-docs/assets/img/docs/walkthrough7.png", "node_index": 0, "url": "https://53936-48750547-gh.circle-artifacts.com/0/circleci-docs/assets/img/docs/walkthrough7.png" }, { "path": "circleci-docs/assets/img/docs/walkthrough8.png", "node_index": 0, "url": "https://53936-48750547-gh.circle-artifacts.com/0/circleci-docs/assets/img/docs/walkthrough8.png" }, -
Next, you may extend this API call to download the artifacts. Navigate to the location you would like to download the artifacts to, and run the following command, remembering to substitute your own values in the request:
curl -X GET https://circleci.com/api/v2/project/{project-slug}/{job_number}/artifacts \ --header "Content-Type: application/json" \ --header "Accept: application/json" \ --header "Circle-Token: $CIRCLE_TOKEN" \ | grep -o 'https://[^"]*' \ | wget --header="Circle-Token: $CIRCLE_TOKEN" -v -i -grepis used to locate all the URLs for downloading the job artifacts, whilewgetis used to perform the download.
Gather insights
The CircleCI API v2 also includes several endpoints that enable you to retrieve detailed insights into your workflows and individual jobs. Read the Using Insights page to learn more about insights data.
The example below describes how you can return information about a single workflow containing information about metrics and credit usage.
Returning workflow metrics
To return aggregated data for an individual workflow, perform the steps listed below.
Whenever you see curly brackets {}, this represents a variable that you must manually enter in the request. |
-
For this GET API call, under the
parameterskey, define theproject_slugin yourcurlrequest as follows:curl -X GET https://circleci.com/api/v2/insights/{project-slug}/workflows --header "Content-Type: application/json" --header "Accept: application/json" --header "Circle-Token: $CIRCLE_TOKEN" -
After you have defined the
project-slugand made the API request, you will receive unformatted JSON text similar to the example shown below.
{
	"next_page_token": null,
	"items": [{
		"name": "build",
		"metrics": {
			"success_rate": 0.5975609756097561,
			"total_runs": 82,
			"failed_runs": 33,
			"successful_runs": 49,
			"throughput": 11.714285714285714,
			"mttr": 46466,
			"duration_metrics": {
				"min": 8796,
				"max": 20707,
				"median": 11656,
				"mean": 12847,
				"p95": 18856,
				"standard_deviation": 3489.0
			},
			"total_credits_used": 16216608
		},
		"window_start": "2020-01-15T03:20:24.927Z",
		"window_end": "2020-01-21T23:23:04.390Z"
	}, {
		"name": "docker_build",
		"metrics": {
			"success_rate": 1.0,
			"total_runs": 1,
			"failed_runs": 0,
			"successful_runs": 1,
			"throughput": 1.0,
			"mttr": 0,
			"duration_metrics": {
				"min": 1570,
				"max": 1570,
				"median": 1570,
				"mean": 1570,
				"p95": 1570,
				"standard_deviation": 0.0
			},
			"total_credits_used": 5154
		},
		"window_start": "2020-01-19T15:00:16.032Z",
		"window_end": "2020-01-19T15:26:26.648Z"
	}, {
		"name": "ecr_gc",
		"metrics": {
			"success_rate": 1.0,
			"total_runs": 167,
			"failed_runs": 0,
			"successful_runs": 167,
			"throughput": 23.857142857142858,
			"mttr": 0,
			"duration_metrics": {
				"min": 31,
				"max": 96,
				"median": 46,
				"mean": 49,
				"p95": 72,
				"standard_deviation": 11.0
			},
			"total_credits_used": 3482
		},
		"window_start": "2020-01-15T01:45:03.613Z",
		"window_end": "2020-01-21T23:46:25.970Z"
	}]
}
Notice that in this JSON response, you will receive detailed metrics for the set of workflows that were run, including:
-
success_rate- The ratio of successful runs (only those with a "success" status) over the total number of runs (any status) in the aggregation window. -
total_runs- The total number of runs that were performed. -
failed_runs- The number of runs that failed. -
successful_runs- The number of runs that were successful. -
throughput- The average number of builds per day. -
mttr- The Mean Time to Recovery (MTTR). This is the average time it takes, when a CI build fails, to get it back to a "success" status. -
duration_metrics- A collection of specific metrics and measurements that provide the duration of the workflow, which includesmin,max,median,mean,p95, andstandard_deviation. -
total credits used- The total number of credits that were used during the build. -
windows_start & windows_end- The time the build was initiated, and then completed.
| The above example only shows a small number of builds. When you run this command, you may receive up to 250 individual builds that you can review in much more detail. |
Reviewing individual job metrics
Now that you have retrieved aggregated data for up to 250 different jobs, you will most likely want to review specific information about a single job, or smaller number of jobs, to ensure that your jobs are running efficiently. To review an individual job, follow the steps below.
-
Using your
project-slugfrom the previous API call you made to return workflow data, make a GET API call to the following Insights endpoint:curl -X GET https://circleci.com/api/v2/insights/{project-slug}/workflows/builds --header "Content-Type: application/json" --header "Accept: application/json" --header "Circle-Token: $CIRCLE_TOKEN" -
Once you call this Insights endpoint, you will receive a JSON output similar to the example shown below.
{
  "items" : [ {
    "id" : "08863cb6-3185-4c2f-a44e-b517b7f695a6",
    "status" : "failed",
    "duration" : 9263,
    "created_at" : "2020-01-21T20:34:50.223Z",
    "stopped_at" : "2020-01-21T23:09:13.953Z",
    "credits_used" : 198981
  }, {
    "id" : "2705482b-40ae-47fd-9032-4113e976510f",
    "status" : "failed",
    "duration" : 9075,
    "created_at" : "2020-01-21T20:14:00.247Z",
    "stopped_at" : "2020-01-21T22:45:15.614Z",
    "credits_used" : 148394
  }, {
    "id" : "65e049ee-5949-4c30-a5c6-9433ed83f96f",
    "status" : "failed",
    "duration" : 11697,
    "created_at" : "2020-01-21T20:08:06.950Z",
    "stopped_at" : "2020-01-21T23:23:04.390Z",
    "credits_used" : 122255
  }, {
    "id" : "b7354945-32ee-4cb5-b8bf-a2f8c115b955",
    "status" : "success",
    "duration" : 9230,
    "created_at" : "2020-01-21T19:31:11.081Z",
    "stopped_at" : "2020-01-21T22:05:02.072Z",
    "credits_used" : 195050
  }, {
    "id" : "7e843b39-d979-4152-9868-ba5dacebafc9",
    "status" : "failed",
    "duration" : 9441,
    "created_at" : "2020-01-21T18:39:42.662Z",
    "stopped_at" : "2020-01-21T21:17:04.417Z",
    "credits_used" : 192854
  }, {
    "id" : "8d3ce265-e91e-48d5-bb3d-681cb0e748d7",
    "status" : "failed",
    "duration" : 9362,
    "created_at" : "2020-01-21T18:38:28.225Z",
    "stopped_at" : "2020-01-21T21:14:30.330Z",
    "credits_used" : 194079
  }, {
    "id" : "188fcf84-4879-4dd3-8bf2-4f6ea724c692",
    "status" : "failed",
    "duration" : 8910,
    "created_at" : "2020-01-20T03:09:50.448Z",
    "stopped_at" : "2020-01-20T05:38:21.392Z",
    "credits_used" : 193056
  },
The following information is returned for each job:
-
id- The ID associated with the individual job. -
status- The status of the job. -
duration- The total time of the job, in seconds. -
created_at- The time the job started. -
stopped_at- The time the job ended. -
credits_used- The number of credits used during the job.
Reference
-
Refer to API V2 Introduction for high-level information about the CircleCI V2 API.
-
Refer to API V2 Reference Guide for a detailed list of all endpoints that make up the CircleCI V2 API.