This tutorial guides you on how to use the Amazon SageMaker Orb to orchestrate model deployment to endpoints across different environments. It also shows how to use the CircleCI platform to monitor and manage promotions and rollbacks. It will use an example project repository to walk you through every step, from training a new model package version to deploying your model across multiple environments.
Setting up a release integration token
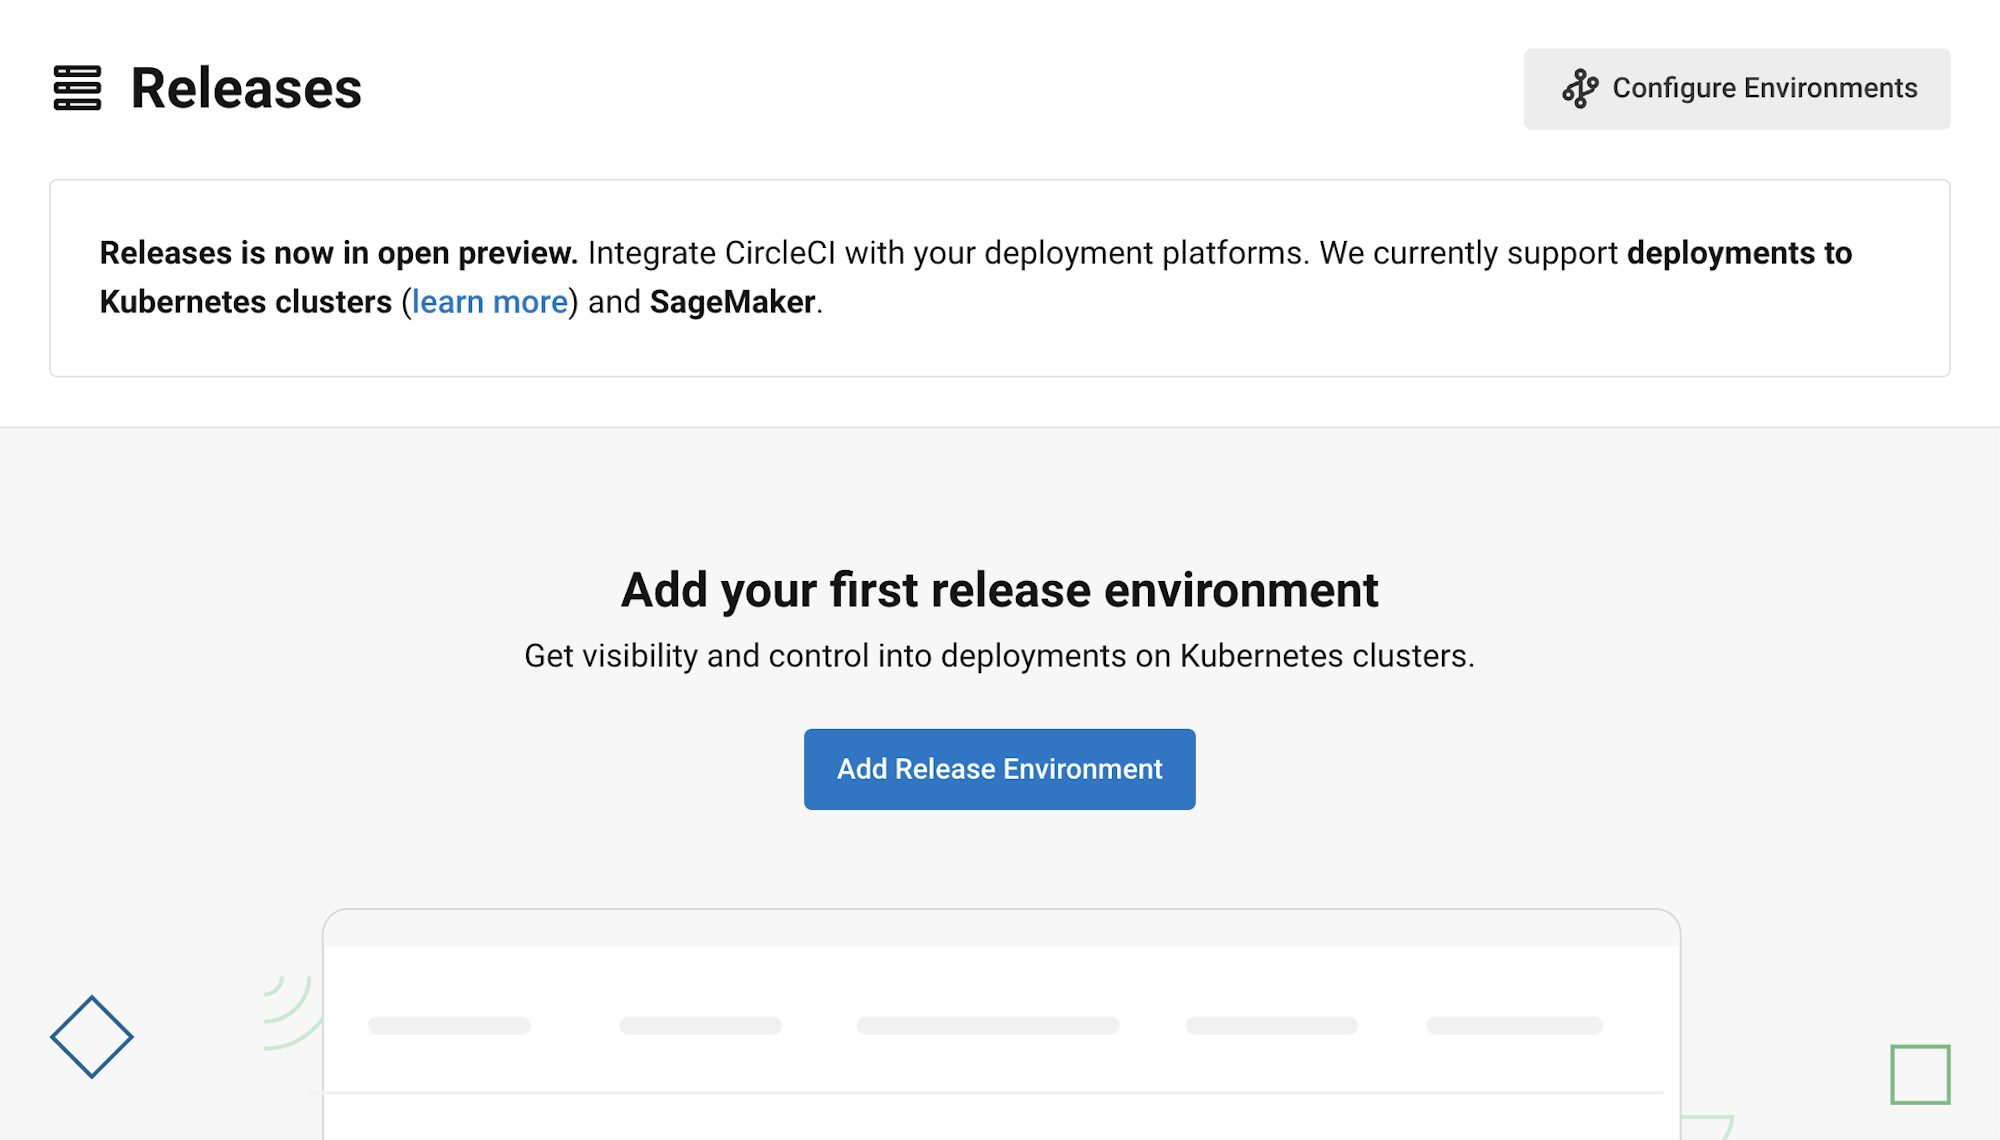
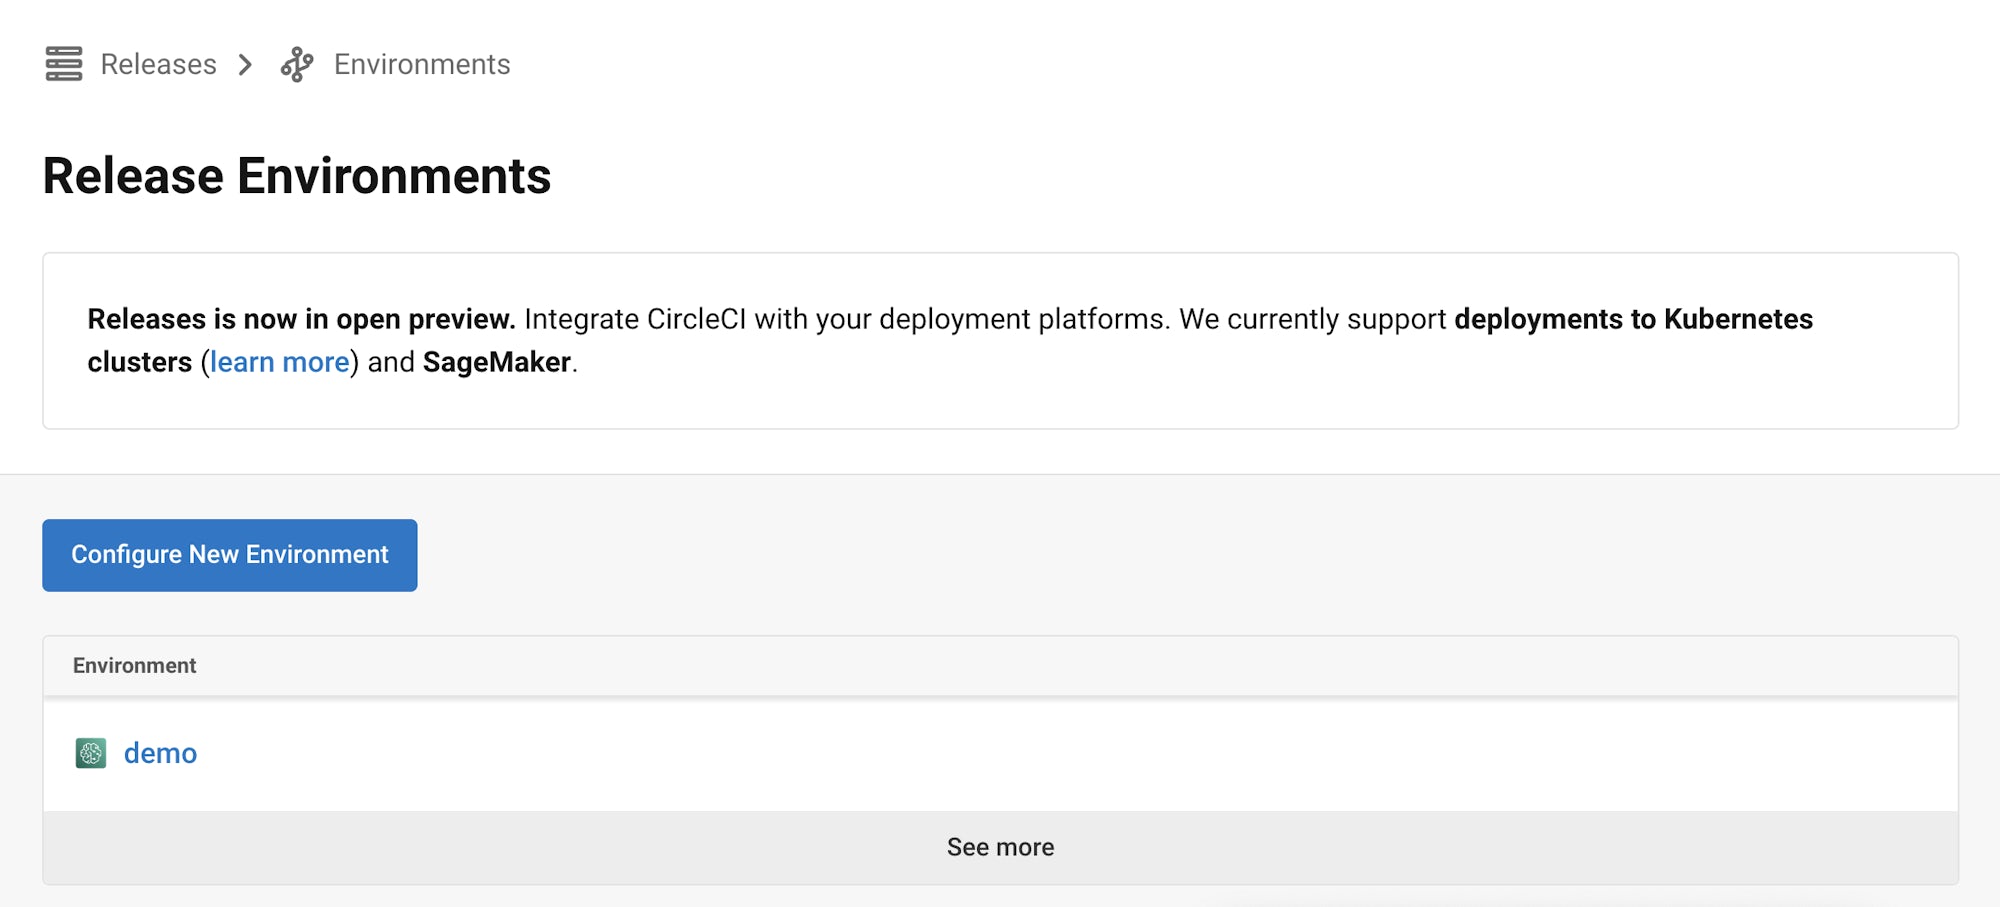
First you’ll want to set up a Release Integration token, so you can leverage the CircleCI UI to monitor your releases. (Please note that you must be an org admin to do this.) Navigate to the Releases section. Select Add Release Environment.
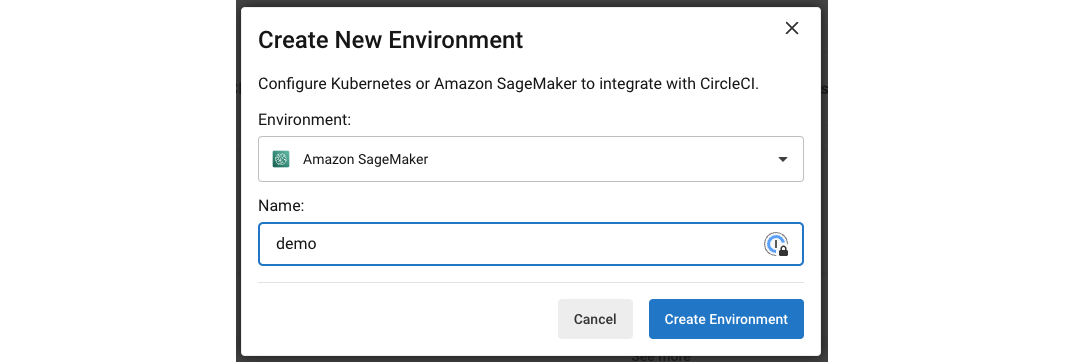
Select Amazon SageMaker as your environment, add a name, and click Create Environment.
Select your environment:
Then navigate to your environment settings and click Create New Token.
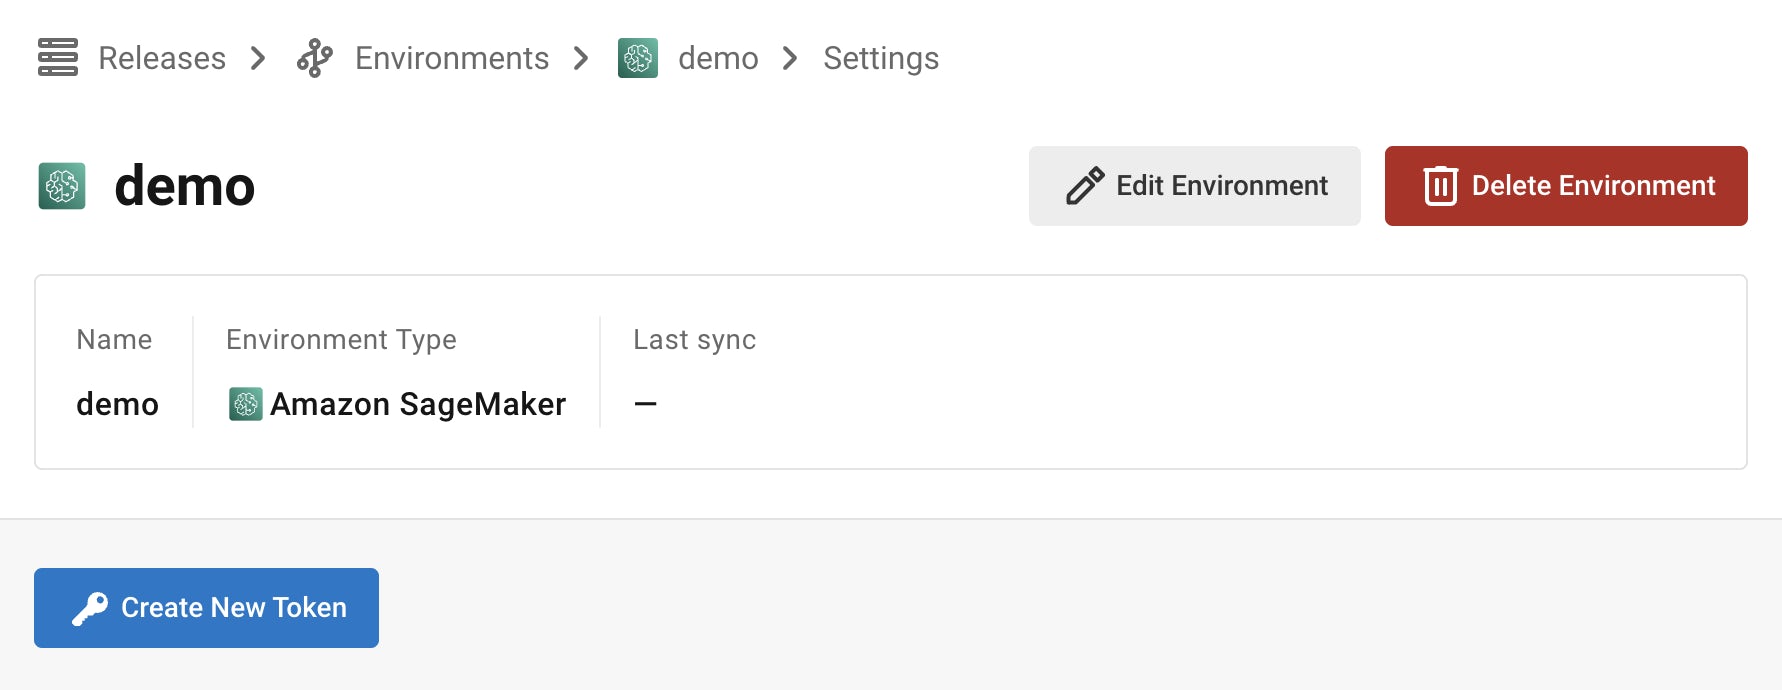
Make sure to save this token for later – we’ll pop it into an environment variable.
Setting up Amazon SageMaker access
OIDC — identity provider
The Amazon SageMaker Orb uses OIDC. If you are not familiar with setting that up, no worries! Let’s walk through it.
Skip this section if you already have this set up.
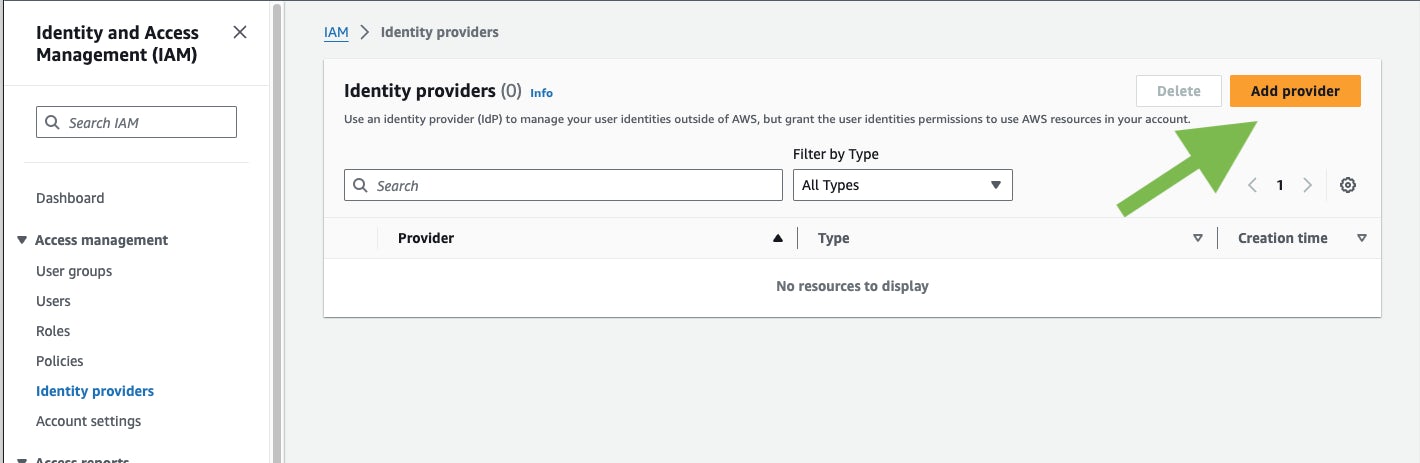
First we create an IAM > Identity Provider in your AWS IAM for CircleCI OIDC Provider.
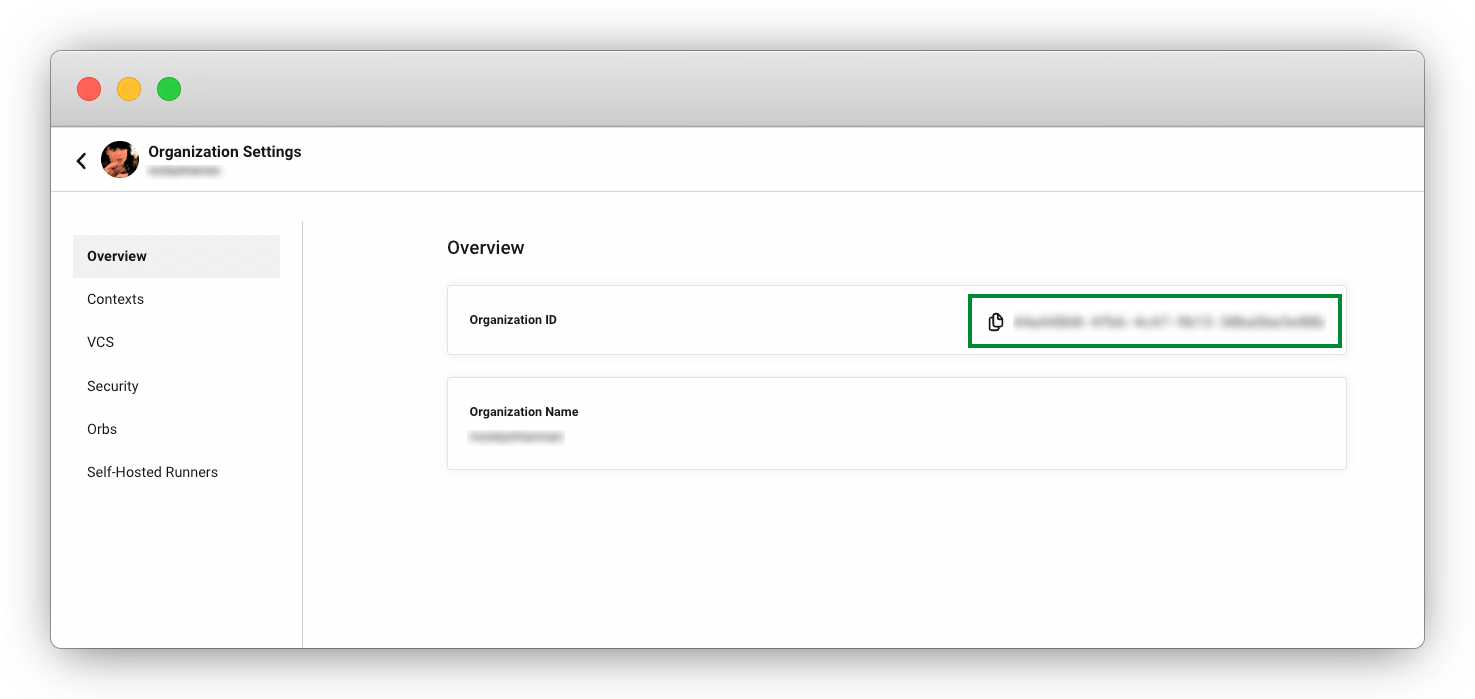
To do that, you will need your CircleCI organization ID. Go to your Organization Settings in CCI and copy your organization ID.
Now go to your AWS Management Console. Go to IAM > Access management > Identity providers. Select Add Provider.
Enter your provider URL and audience:
-
Provider URL: Enter
https://oidc.circleci.com/org/<your-organization-id>, whereyour-organization-idis the ID of your CircleCI organization. -
Audience: Enter your organization ID.
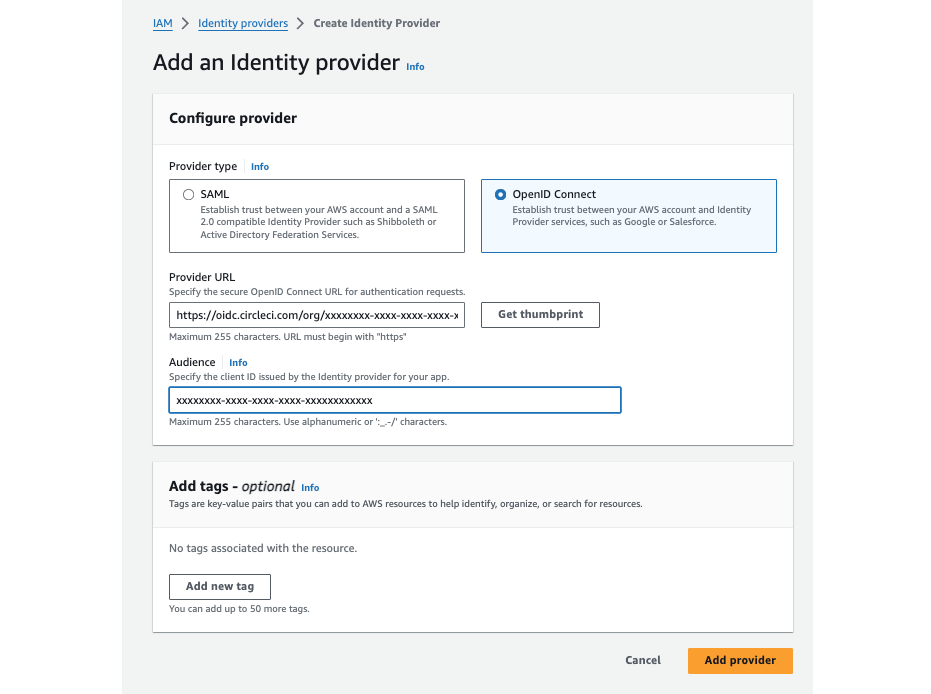
Click Get Thumbprint then Add Provider.
If you are interested in more details around our OIDC functionality, see the guide on Using OIDC tokens in jobs for a deeper dive.
Next, let’s tackle making a role.
Role
You will need an IAM > Role with the following permissions policy.
Note: We have organized the permissions into two groups:
- The OrbPermissions and S3Access statements are used for the deployment of the model to the endpoints.
- The S3AccessTrainModel and SageMakerTrainModel statements are needed if you want to train the demo model we provide.
Update the S3 bucket information to match your setup. (That means create a bucket if one doesn’t exist!)
{
    "Version": "2012-10-17",
    "Statement": [
        {
            "Sid": "OrbPermissions",
            "Effect": "Allow",
            "Action": [
                "sagemaker:AddTags",
                "sagemaker:CreateEndpoint",
                "sagemaker:CreateEndpointConfig",
                "sagemaker:CreateModel",
                "sagemaker:DescribeEndpoint",
                "sagemaker:DescribeEndpointConfig",
                "sagemaker:InvokeEndpoint",
                "sagemaker:ListEndpoints",
                "sagemaker:ListModelPackages",
                "sagemaker:ListTags",
                "sagemaker:UpdateEndpoint",
                "iam:PassRole"
            ],
            "Resource": "*"
        },
        {
            "Sid": "S3Access",
            "Effect": "Allow",
            "Action": [
                "s3:GetObject",
                "s3:ListBucket"
            ],
            "Resource": [
                "arn:aws:s3:::<S3-BUCKET-FOR-SAGEMAKER-PIPELINE>/*"
            ]
        },
        {
            "Sid": "S3AccessTrainModel",
            "Effect": "Allow",
            "Action": [
                "s3:GetObject",
                "s3:ListBucket",
                "s3:PutObject"
            ],
            "Resource": [
                "arn:aws:s3:::sagemaker-sample-files/*",
                "arn:aws:s3:::<S3-BUCKET-FOR-SAGEMAKER-PIPELINE>",
                "arn:aws:s3:::<S3-BUCKET-FOR-SAGEMAKER-PIPELINE>/*"
            ]
        },
        {
            "Sid": "SageMakerTrainModel",
            "Effect": "Allow",
            "Action": [
                "sagemaker:CreateTrainingJob",
                "sagemaker:DescribeTrainingJob",
                "logs:DescribeLogStreams",
                "sagemaker:ListModelPackageGroups",
                "sagemaker:CreateModelPackage",
                "sagemaker:CreateModelPackageGroup",
                "sagemaker:UpdateModelPackage"
            ],
            "Resource": "*"
        }
    ]
}
Then set up the trust relationship between the role and the CircleCI OIDC provider. Here is an example policy:
{
	"Version": "2012-10-17",
	"Statement": [
        {
            "Effect": "Allow",
            "Principal": {
                "Federated": "arn:aws:iam::<AWS-ACCOUNT-ID>:oidc-provider/oidc.circleci.com/org/<CIRCLECI-ORG-ID>"
            },
            "Action": "sts:AssumeRoleWithWebIdentity",
            "Condition": {
                "StringLike": {
                    "oidc.circleci.com/org/<CIRCLECI-ORG-ID>:sub": "org/<CIRCLECI-ORG-ID>/project/<CIRCLECI-PROJECT-ID>/user/*"
                }
            }
        },
        {
			"Effect": "Allow",
			"Principal": {
				"Service": "sagemaker.amazonaws.com"
			},
			"Action": "sts:AssumeRole"
		}

    ]
}
Note: You must replace the placeholders <CIRCLECI-ORG-ID> and <CIRCLECI-PROJECT-ID> with your proper info.
Go copy the role ARN.
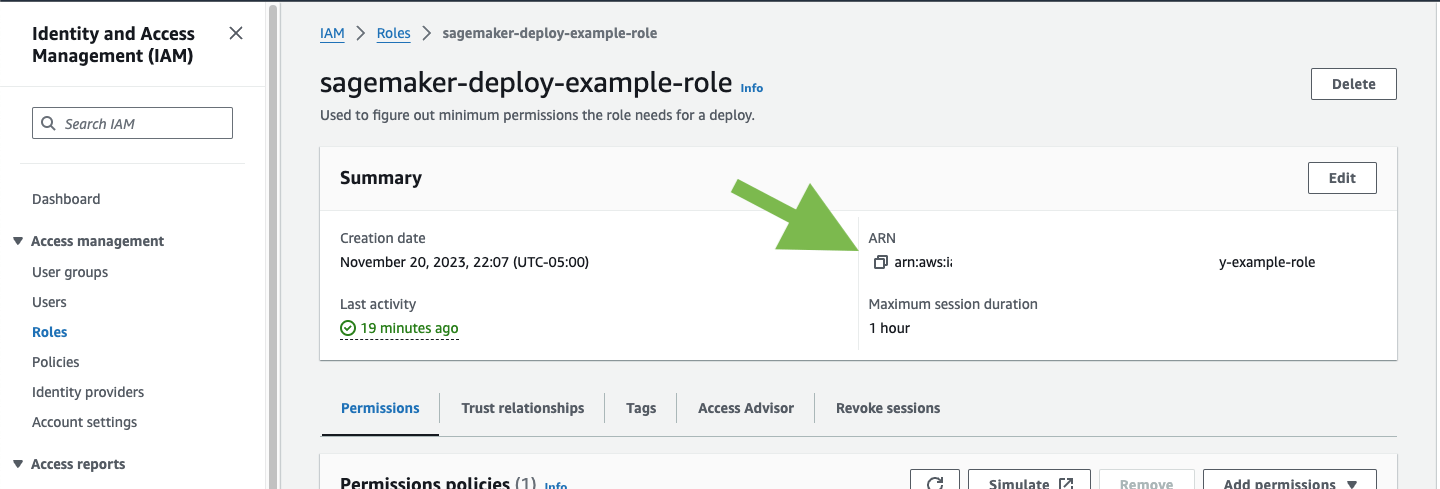
We’ll need that next.
Adding environment variables
There are some required environment variables for the orb to function. (Which is exactly what we want, so let’s go add them.)
Go to your project’s settings, click Environment Variables, then click Add Variable to enter a name and value of the new environment variable. The orb will use these when you run the workflow. For more information, check out the Guide on setting environment variables in CircleCI.
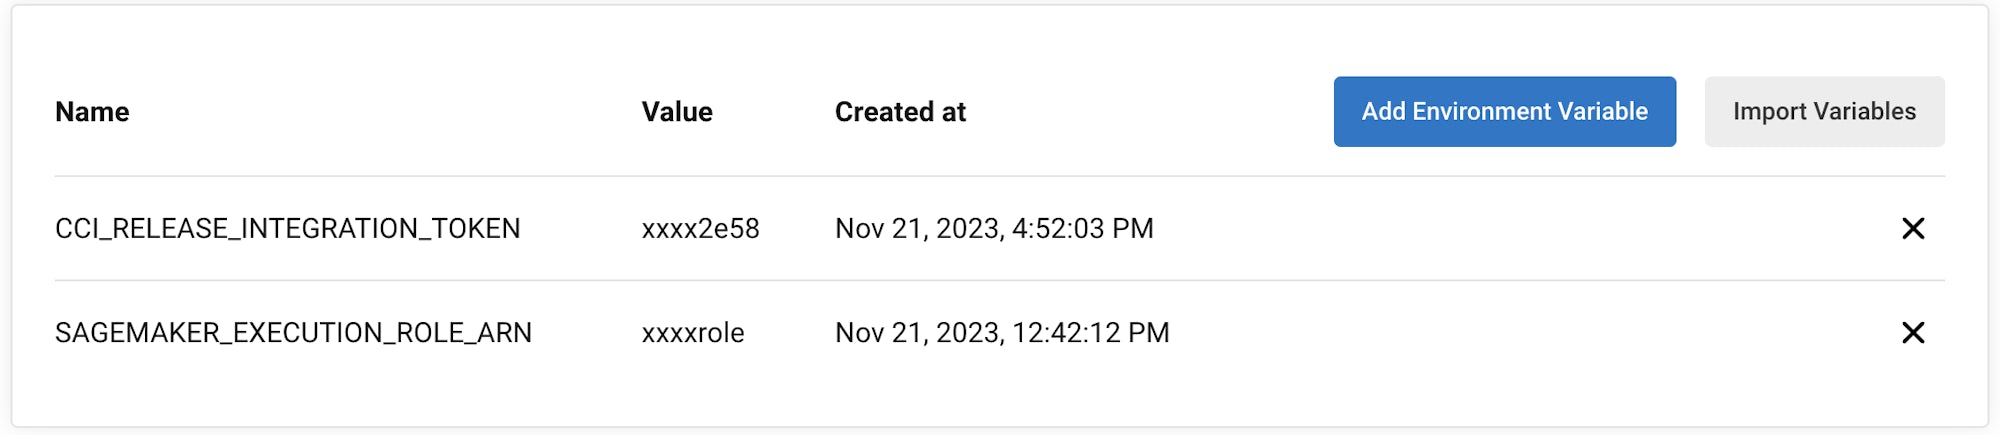
Let’s look at the two environment variables added above:
-
CCI_RELEASE_INTEGRATION_TOKEN: The orb also works with CircleCI Releases. This will give you visibility into the endpoint configuration updates, and what is currently active. -
SAGEMAKER_EXECUTION_ROLE_ARN: This is the role you have configured with the necessary SageMaker permissions and has the OIDC trust relationship set up.
Setting up our config.yml
Now we go look at our .circleci/config.yml and set some parameters. You will update the defaults for each parameter.
parameters:
  bucket:
    type: string
    default: <BUCKET_FOR_MODEL_ASSETS> # You set this up in the Role Policy
  model_desc:
    type: string
    default: "<Description about your Model.>"
  model_name:
    type: string
    default: <MODEL_NAME> # This is the name of the model, model package.
  project_id:
    type: string
    default: "<CIRCLECI_PROJECT_ID>" #found on the Project Settings page in CCI
  region_name:
    type: string
    default: <REGION> #eg: us-east-1
Selecting models
For this tutorial, we’ve taken a model commonly found in AWS documentation, Abalone, and renamed it.
If you already have your own model, feel free to adapt the configuration file to use that one instead. Update the model_name parameter and you should be good to go.
If you don’t have your own model, you too can use the example model used in this tutorial. Assuming you are using our example repo, we have a workflow configured to run on the branch model-train. So checkout that branch, push it up to git, and this workflow will make a new model package version in the model registry. If the model package doesn’t already exist, it will create it.
Every time you run this workflow, it will create a new model version.
Using the orb
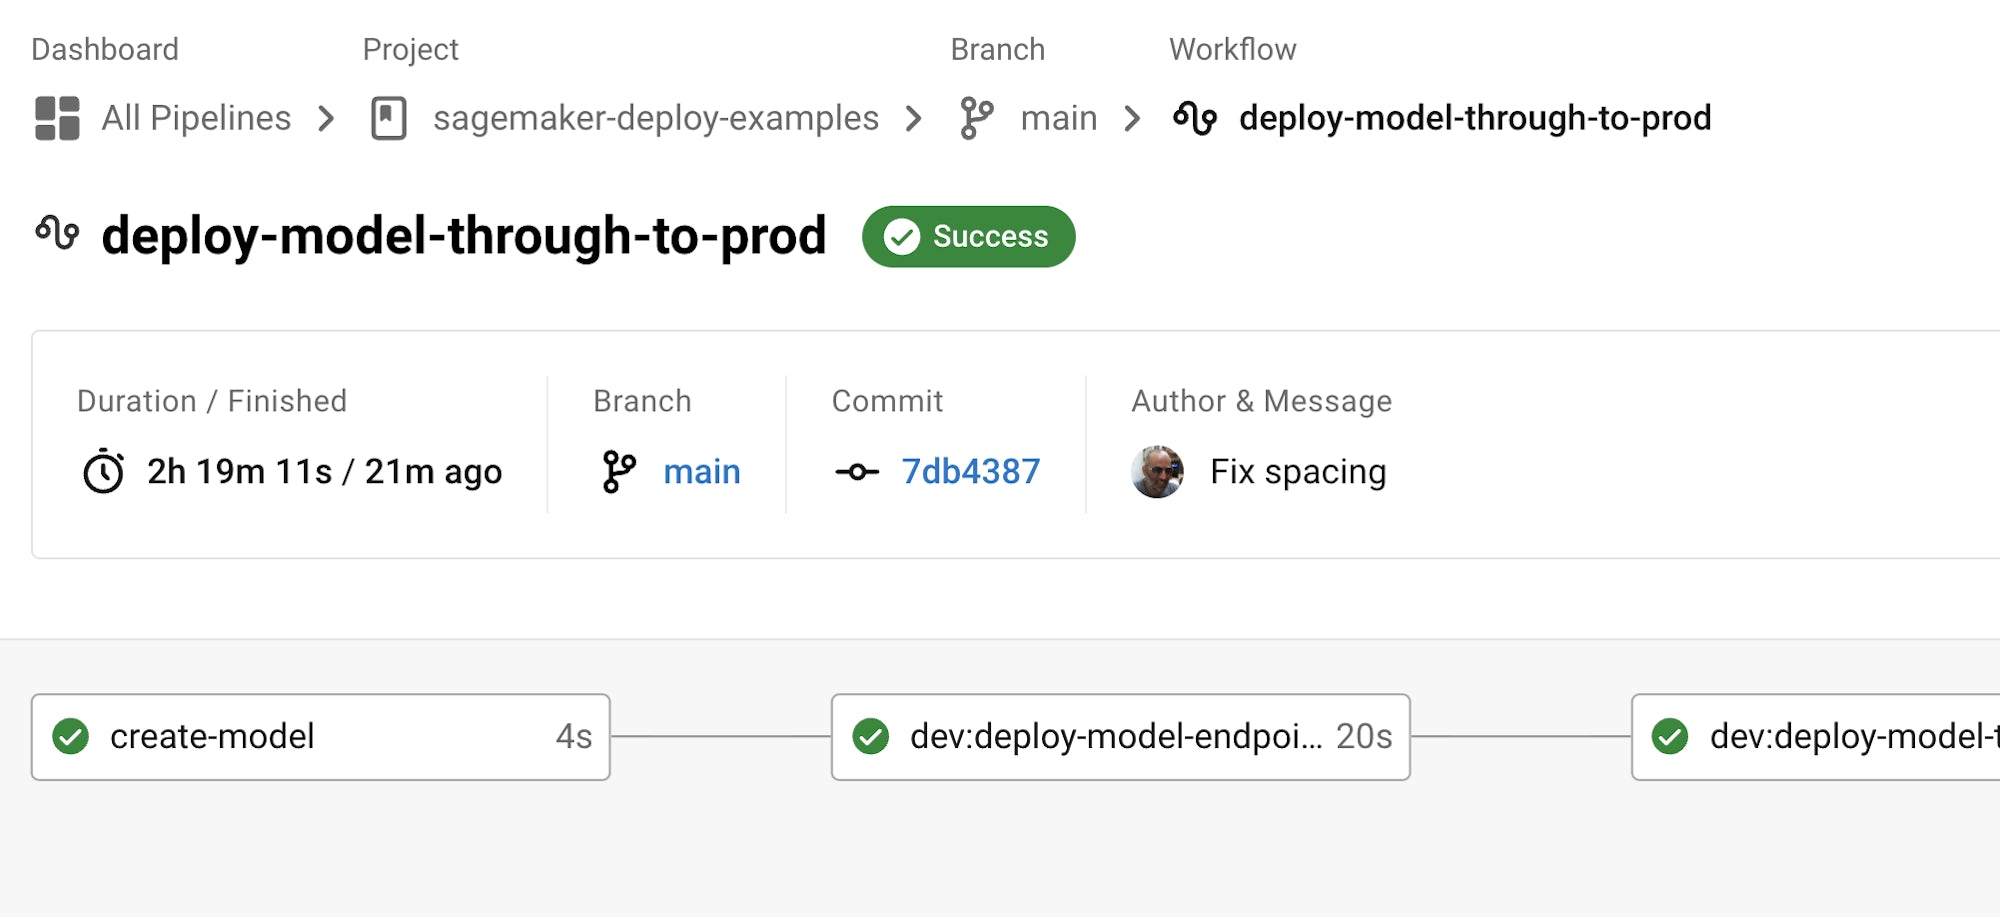
Let’s break down the deploy-model-through-to-prod workflow. Our first job is:
- aws-sagemaker/create_model:
    # job name that will show in Workflow DAG
    name: create-model
    # s3 bucket where asset will be stored
    bucket: << pipeline.parameters.bucket >>
    # Name of the model in SageMaker that we will be deploying.
    model_name: << pipeline.parameters.model_name >>
    # We use the pipeline.id as the unique identifier for some of the configs we create
    circle_pipeline_id: << pipeline.id >>
    # Region where we are deploying to
    region_name: << pipeline.parameters.region_name >>
    filters: *main-branch-only
This step creates a model from your latest Model Package in the registry. This will be what we then deploy to the inference endpoints.
Some things to notice: Aside from name and filters, all other parameters are passed in from our pipeline parameters.
name controls the name of this job on the DAG. filters allows you to control what branch the job runs on.
In general, create-model just needs to be called one time at the beginning of your workflow.
Next, we have to create the endpoint configuration. Lucky us! We have a command for that too.
- aws-sagemaker/create_endpoint_configuration:
    name: dev:create-model-endpoint-config
    bucket: << pipeline.parameters.bucket >>
    deploy_environment: dev
    model_name: << pipeline.parameters.model_name >>
    circle_pipeline_id: << pipeline.id >>
    circle_project_id: << pipeline.parameters.project_id >>
    region_name: << pipeline.parameters.region_name >>
    requires:
        - create-model
    filters: *main-branch-only
Aha! A new parameter enters the battle — deploy_environment. This is basically an arbitrary string you can use to bucket your model releases into, for example dev, staging, testing, prod. In our example config, you can see we are only using two: dev and prod.
Last but not least, we need to push out this updated configuration.
    - aws-sagemaker/deploy_endpoint:
        name: dev:deploy-model-to-endpoint
        bucket: << pipeline.parameters.bucket >>
        deploy_environment: dev
        model_name: << pipeline.parameters.model_name >>
        # Description for the model. q: can we make it optional?
        model_desc: << pipeline.parameters.model_desc >>
        pipeline_id: << pipeline.id >>
        # You can find this value in the Project Settings in CircleCI
        project_id: << pipeline.parameters.project_id >>
        region_name: << pipeline.parameters.region_name >>
        requires:
            - dev:create-model-endpoint-config
        filters: *main-branch-only
No surprises here, we have an aws-sagemaker/deploy_endpoint job in the orb. The only thing to set here is also the deploy_environment so we know what endpoint_configuration to use. This will deploy your endpoint configuration.
We then throw in an approval job, which will stop our workflow from deploying to production without a human approving it.
- promote-model-to-prod-endpoint:
        type: approval
    requires:
        - dev:deploy-model-to-endpoint
    filters: *main-branch-only
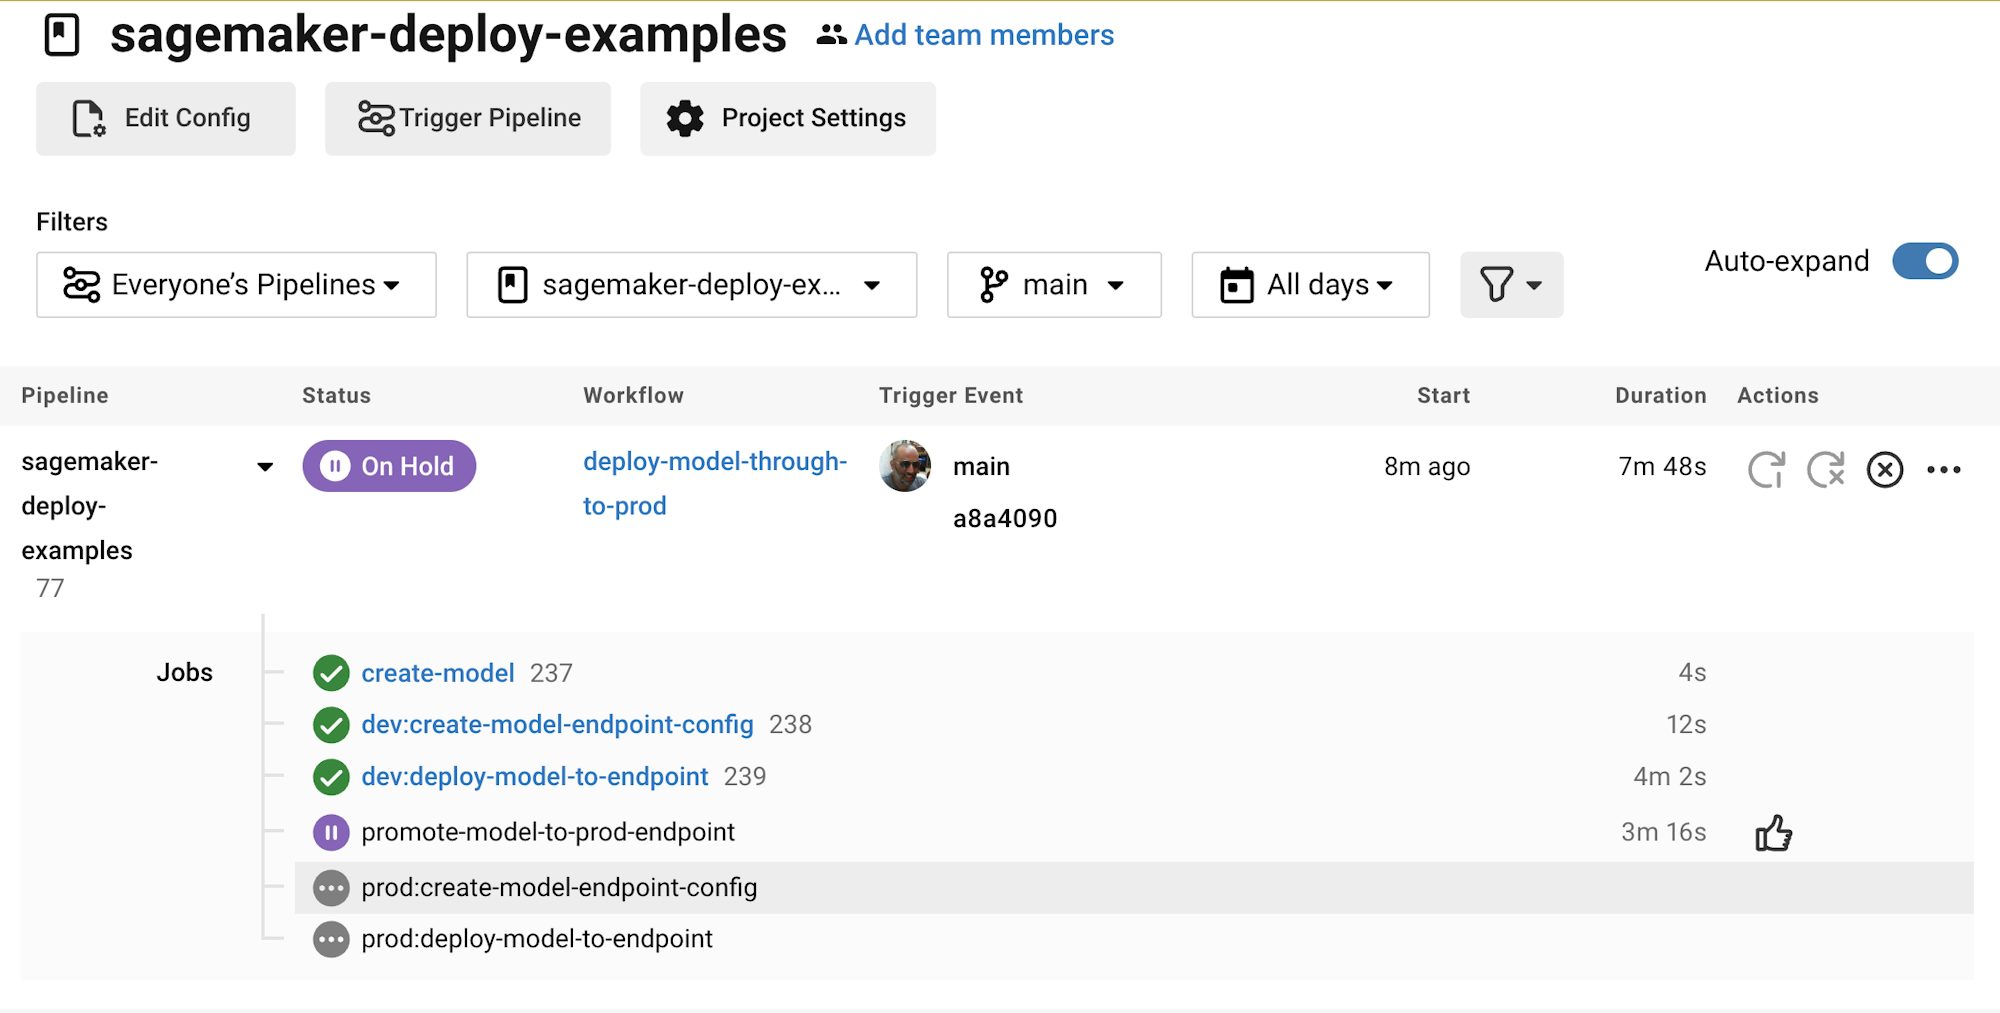
At which point, we then repeat the above steps of aws-sagemaker/create_endpoint_configuration and aws-sagemaker/deploy_endpoint but with deploy_environment set to prod.
Checking in on your model release
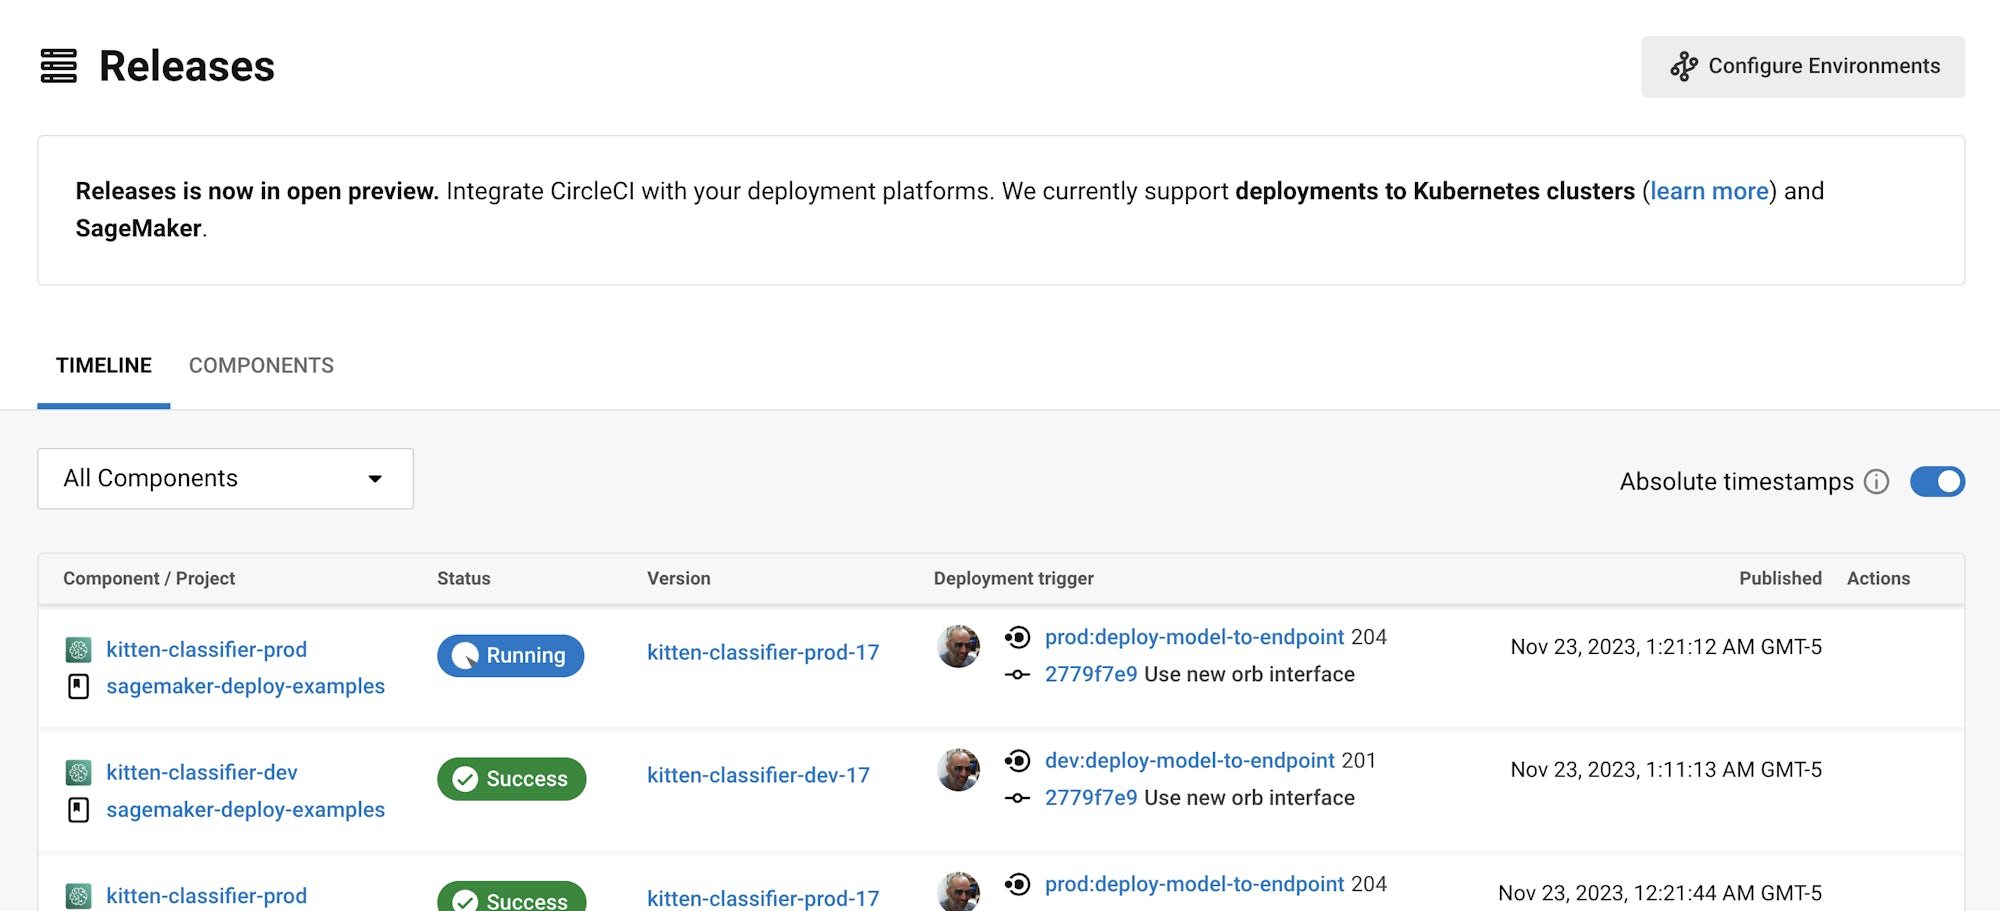
The CircleCI Releases page offers you a single pane of glass to monitor all your deployments across environments. You can view deployment progress in real time, see what versions are currently deployed, and navigate easily to the SageMaker console.
If you navigate to the Releases section, you should now see something along the lines of the below images.
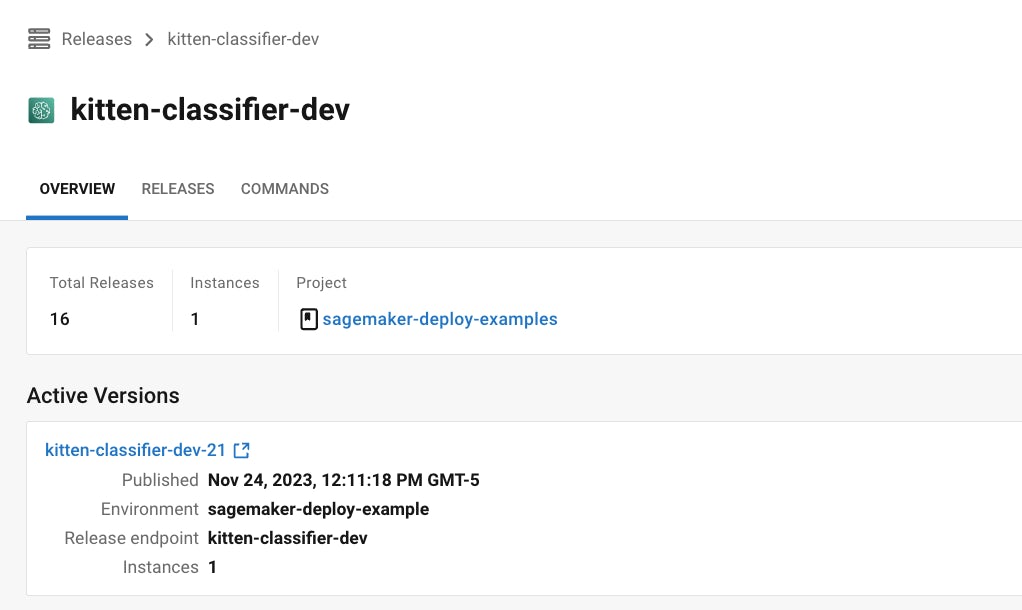
Click on the component name, and it will fetch some details about the component, including the number of instances deployed. From this interface, you can easily navigate to SageMaker for more live information on your endpoint.
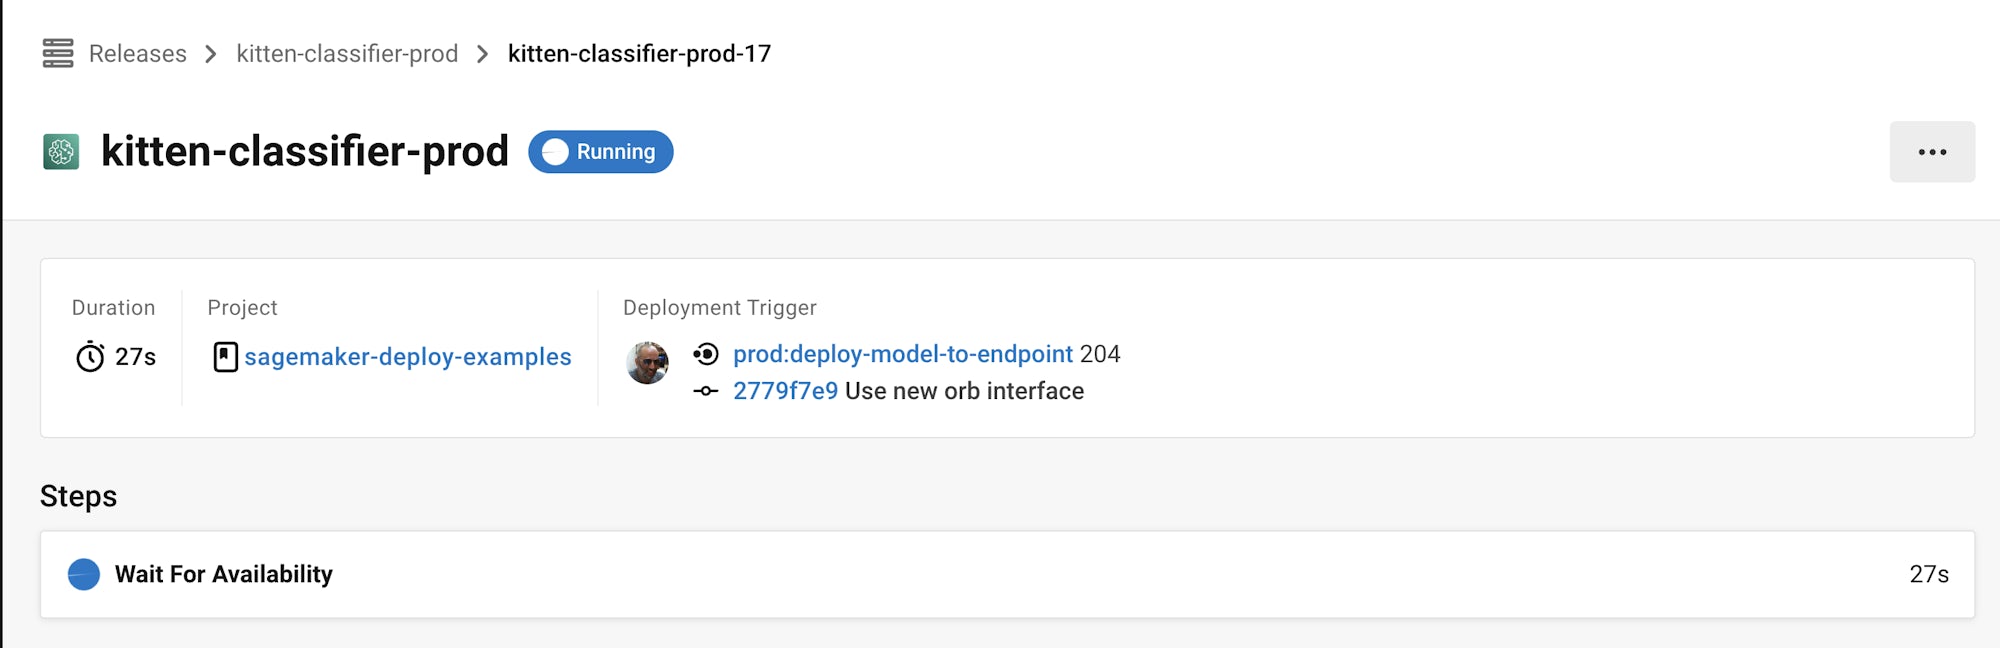
If you select the Version, you will see the details page about this version being released.
Clicking on the specific versions lets you monitor in real time the release progress.
Coming soon: One-click model rollbacks
One-click rollback from the CircleCI platform is going to become available very soon.

This feature will let you revert to a previous version of your model simply by clicking a button in the Releases page. For more information and to sign up for the beta release, click the link below.
Support
Stuck? Need help? Visit our forums, contact us directly at sagemaker-integration-feedback@circleci.com, or come visit on Discord.