Automating API load testing with ApacheBench

Fullstack Developer and Tech Author

Load testing is an integral part of the software application lifecycle, especially when it comes to ensuring the reliability and performance of your APIs. API load tests subject your application to production-like pressures to make sure that your app does not dip below performance thresholds.
In most cases, new applications perform pretty well. But as the user base grows and usage increases, an app can outgrow its infrastructure. Users can start experiencing performance issues. Latency increases and bandwidth and memory get exhausted quickly. Some code architectures start to fail because they do not scale well with the increased amount of user activity.
This is not an unexpected issue; infrastructure and application architecture are meant to scale with increased usage. The risk is not knowing ahead of time when the application will break or when the infrastructure will go down because of increased load on the server. This issue can lead to big losses, in both financial terms and customer confidence.
In this tutorial, you will learn how to load test a simple Node.js API using ApacheBench (ab), a load testing and benchmarking tool for HTTP servers. You will use a CircleCI continuous integration and continuous deployment (CI/CD) pipeline to automatically deploy and load test updates to your API.
Prerequisites
To follow this tutorial, a few things are required:
- Basic knowledge of JavaScript
- Node.js installed on your system (version >= 18)
- A Heroku account
- A CircleCI account
- A GitHub account
Setting up Heroku for API hosting
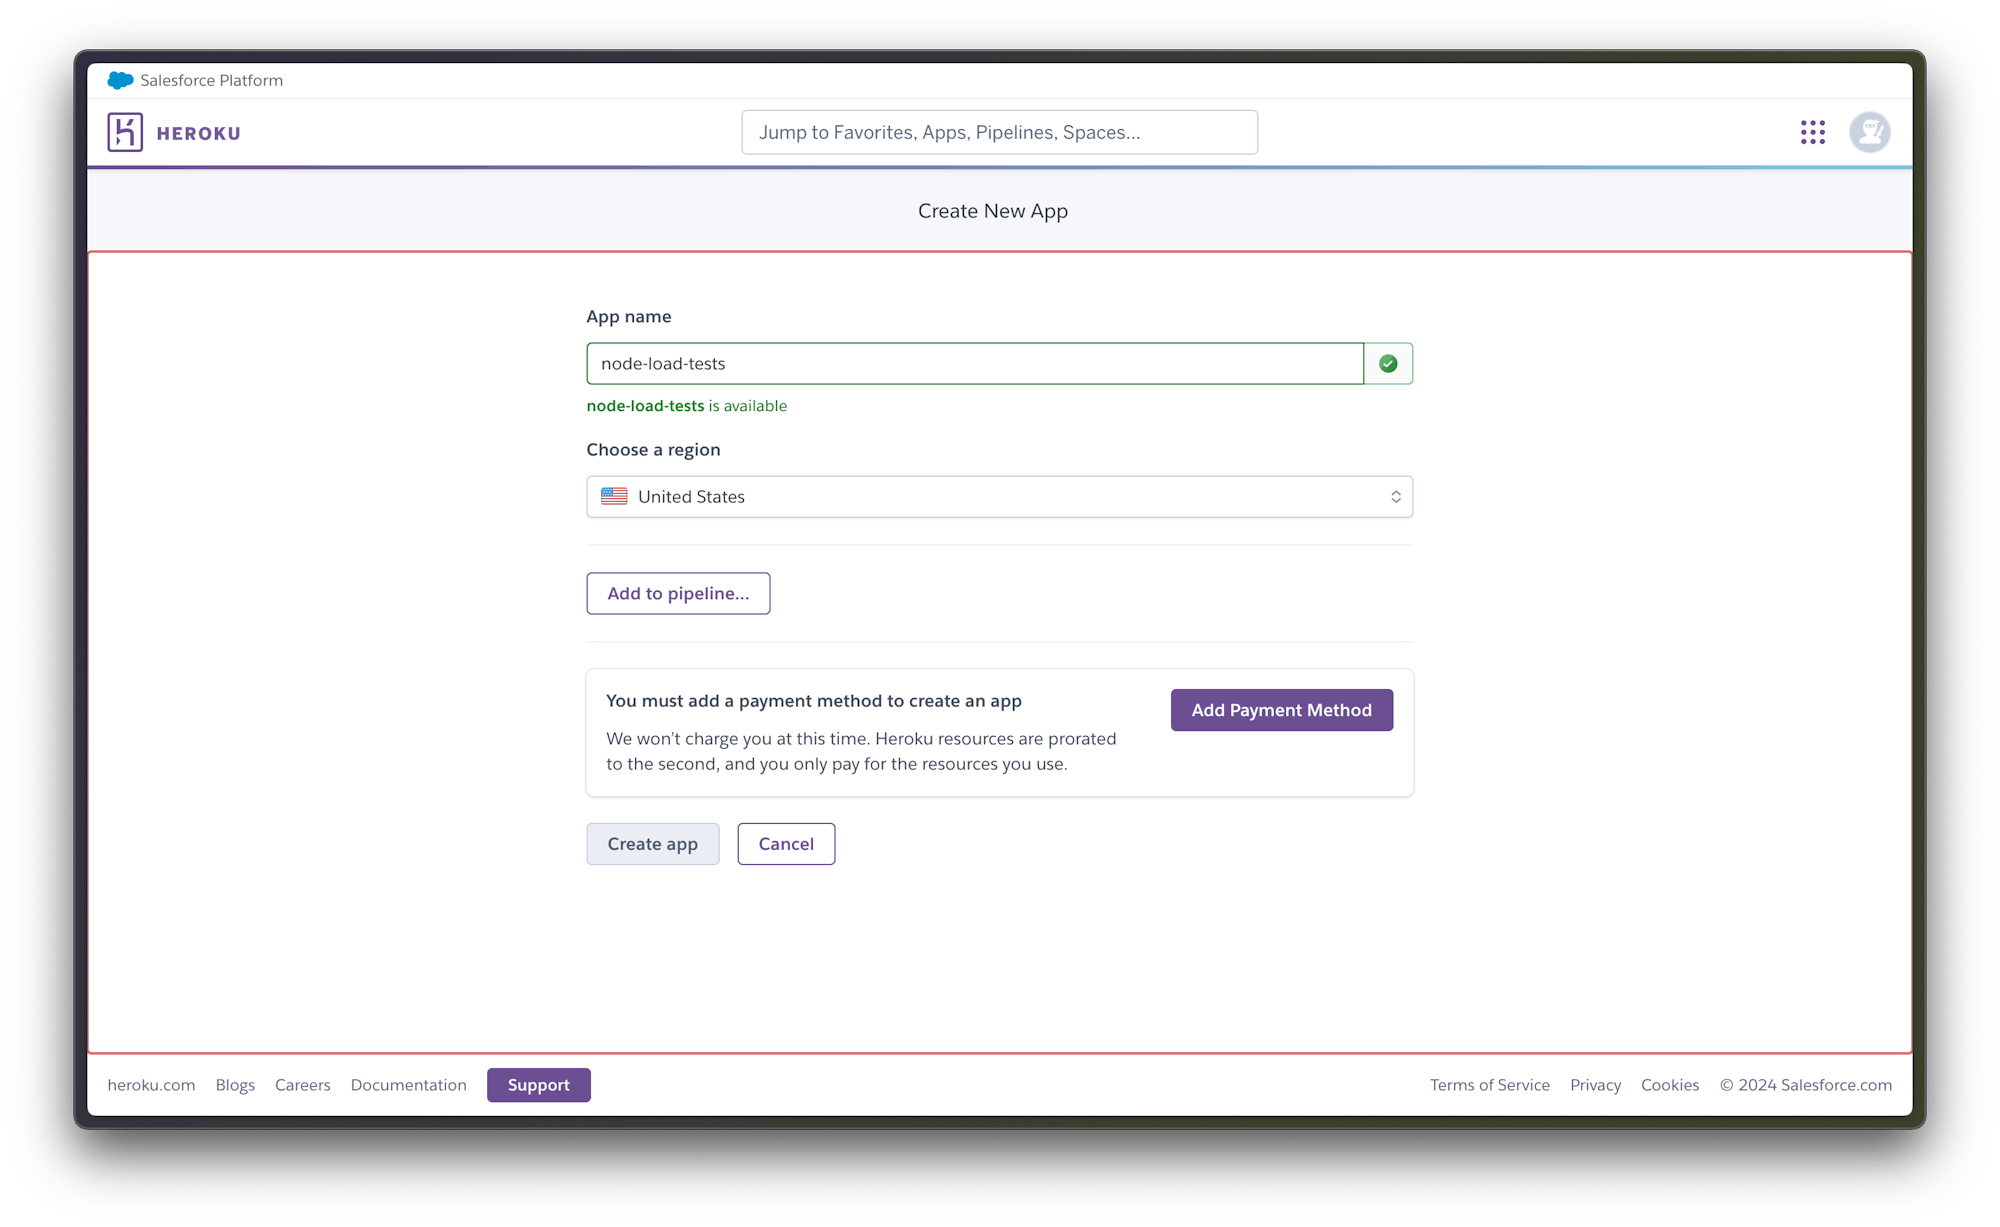
The first step is to set up a Heroku application to host your API. Go to your Heroku apps dashboard. Click New, then Create new app. Decide on a name, then create the new app. If you haven’t already uploaded a payment method, you’ll need to do so here.

Take note of the app name (node-load-tests in this example) you just entered. You will need this later on during the tutorial.
Next, locate your Heroku API Key in the Account Settings section of your dashboard.
You will also need to copy your API Key from this page later in the tutorial.
Cloning the test API
For the next step, you will need to clone the API project. The API you are using for this example is a simple Node.js API application with a root endpoint and another endpoint for fetching a collection of users. Clone the project by running this command:
git clone https://github.com/CIRCLECI-GWP/load-tests-node-apis.git
Once the cloning process is complete, go into the root of the project and install the dependencies:
cd load-tests-node-apis
npm install
When the installation is complete, run the application:
npm start
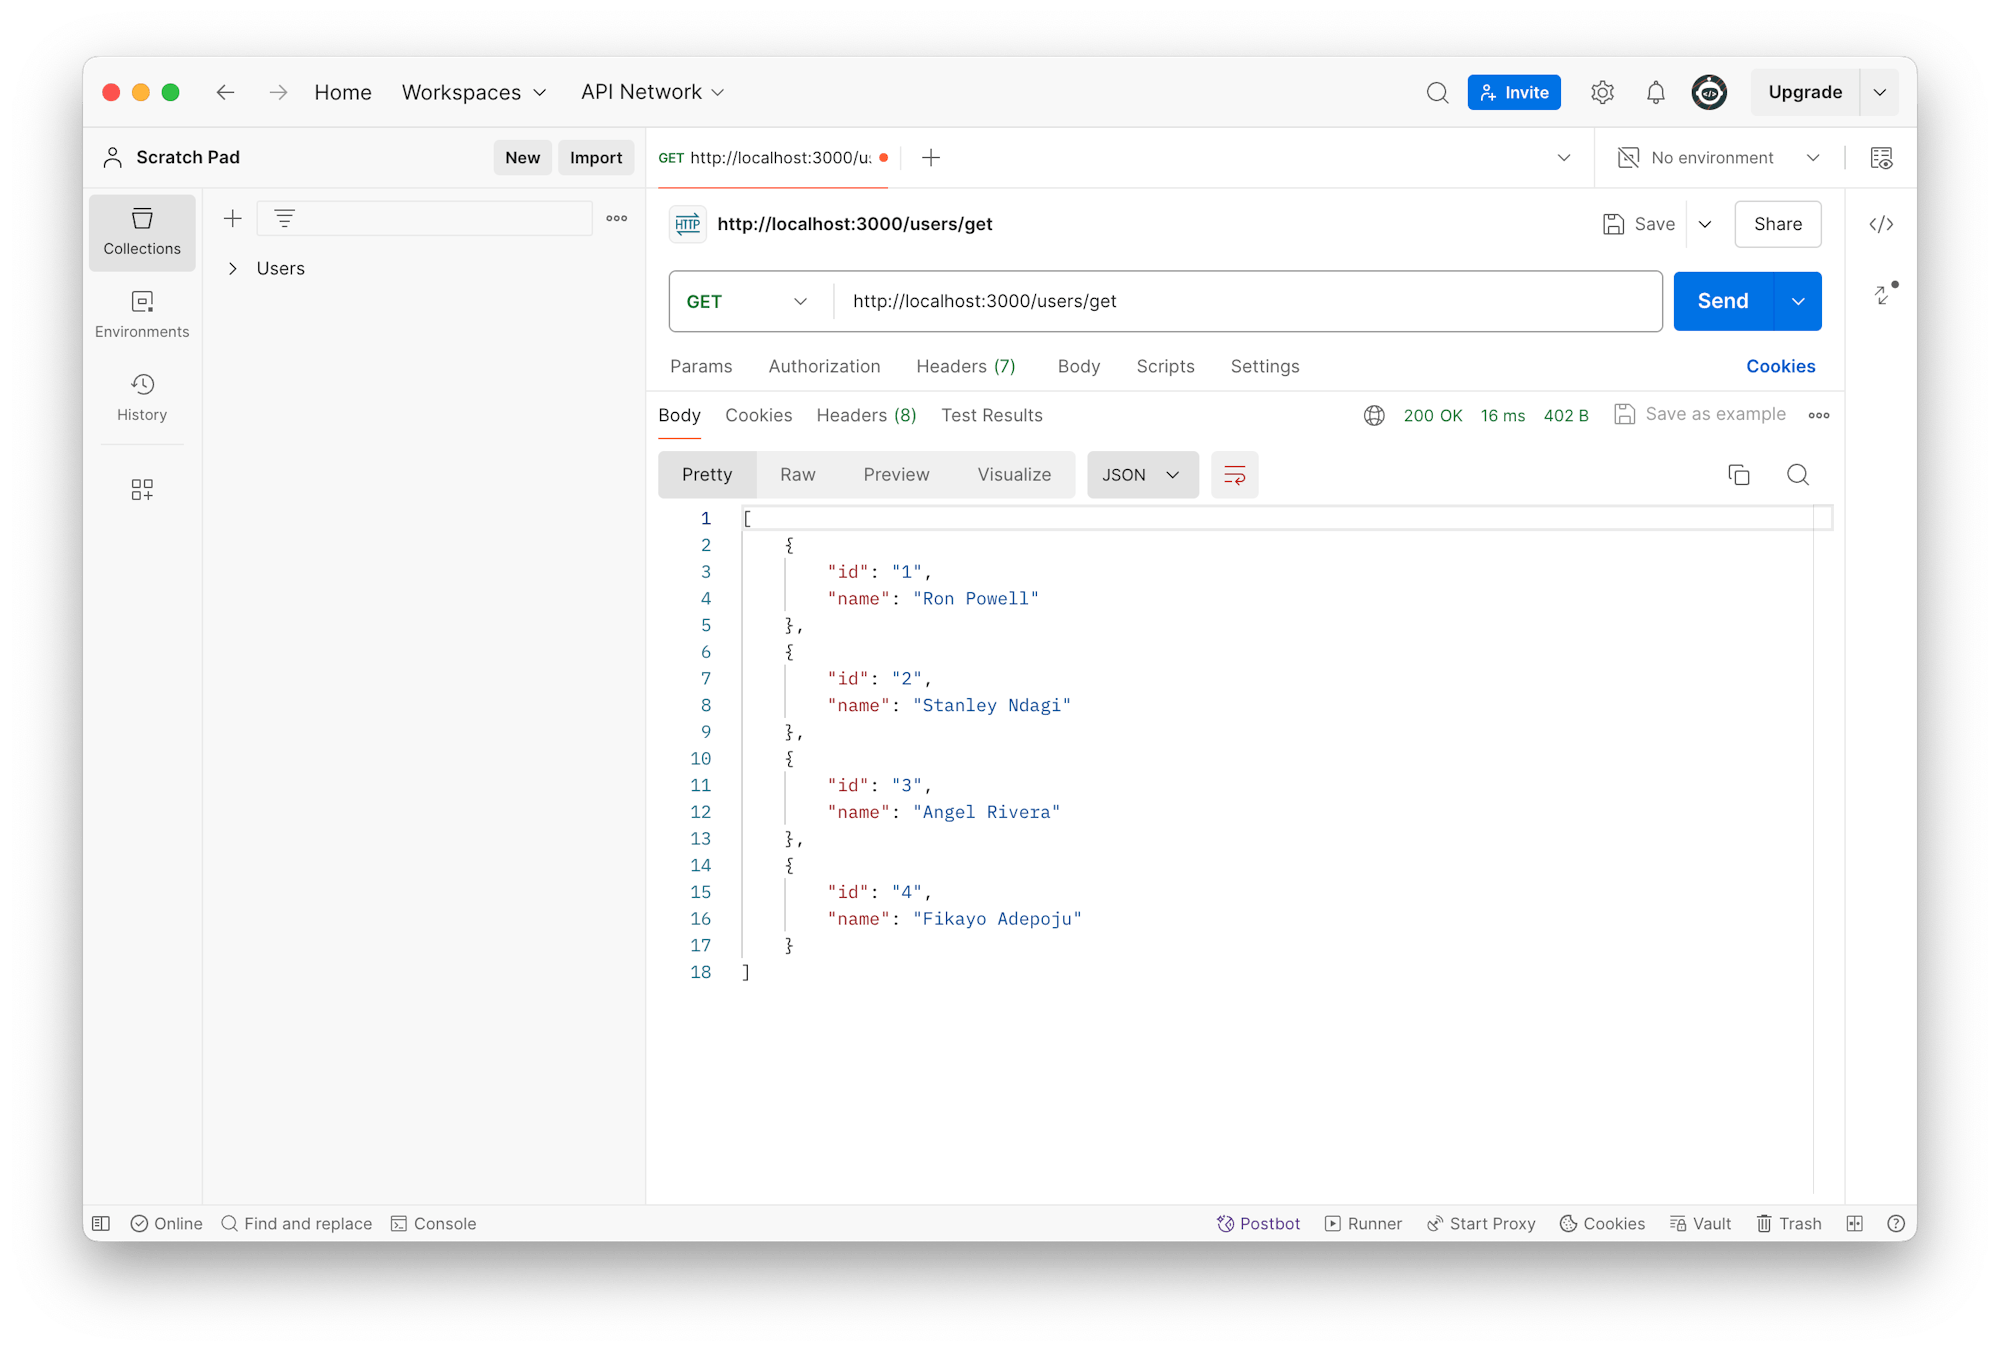
The application will start listening on port 3000. Open up Postman and make a GET request to the http://localhost:3000/users/get endpoint or check that link using your favorite browser. This should return an array of users.

Configuring an API load testing pipeline
In this next step, you will configure a CI/CD pipeline that will automatically deploy your application to Heroku and load test the API’s /users/get endpoint every time you make a change to your application code.
At the root of your project, create a folder named .circleci and a file named config.yml within it. Inside config.yml, enter this code:
version: 2.1

orbs:
  node: circleci/node@5.1.1
jobs:
  build-and-deploy:
    docker:
      - image: "cimg/base:stable"
    steps:
      - checkout
      - node/install
      - run:
          command: npm install
          name: Install dependencies
      - run:
          name: Deploy app to Heroku
          command: |
            git push https://heroku:$HEROKU_API_KEY@git.heroku.com/$HEROKU_APP_NAME.git main

  load-test-api:
    docker:
      - image: "cimg/base:stable"
    steps:
      - run:
          name: Run Load Test
          command: |
            sudo apt-get update
            sudo apt-get install apache2-utils
            ab -k -c 20 -n 250 your-heroku-app-url/users/get

workflows:
  deploy:
    jobs:
      - build-and-deploy
      - load-test-api:
          requires:
            - build-and-deploy
In the configuration you just created, there are two jobs:
- The
build-and-deployjob uses Git to deploy the API project from the GitHub repository to the Heroku app created on the hosting platform. - Once the API is deployed, the
load-test-apijob installs the ApacheBench tool then uses it to send250requests to the/users/getendpoint using a concurrency of20and aKeep-Aliveconnection type for a persistent connection with the-kflag.
Because you structured the worklow to make the load-test-api step dependent on the build-and-deploy step, the load-test-api job will not run until the build-and-deploy job is complete. This ensures that you do not run the load test until the API is successfully deployed.
Note: Replace your-heroku-app-url with your Heroku app URL. This can be found in the “Domains” section of the app settings.
Setting up API load testing on CircleCI
Now that you’ve configured your pipeline, your next task is to set it up as a project on CircleCI. Begin by pushing your project to GitHub.
Next, log into your CircleCI account. If you signed up with your GitHub account, all your repositories will be available on your project’s dashboard.
Click Set Up Project next to your load-tests-node-apis project.

You will be prompted to enter the name of the branch your configuration file is on. Click Set Up Project once you are done. This will trigger your first workflow, which will fail.
The deployment process fails because you have not provided your Heroku API key. To fix that, click the Project Settings button, then click Environment Variables. Add these two new variables:
- For
HEROKU_APP_NAME, add the app name you used in Heroku. The name will be eithernode-load-testsor a custom name if you created one. - For
HEROKU_API_KEYenter the Heroku API key that you retrieved earlier from the account settings page.
Re-run your workflow from the start, and this time your workflow will run successfully.

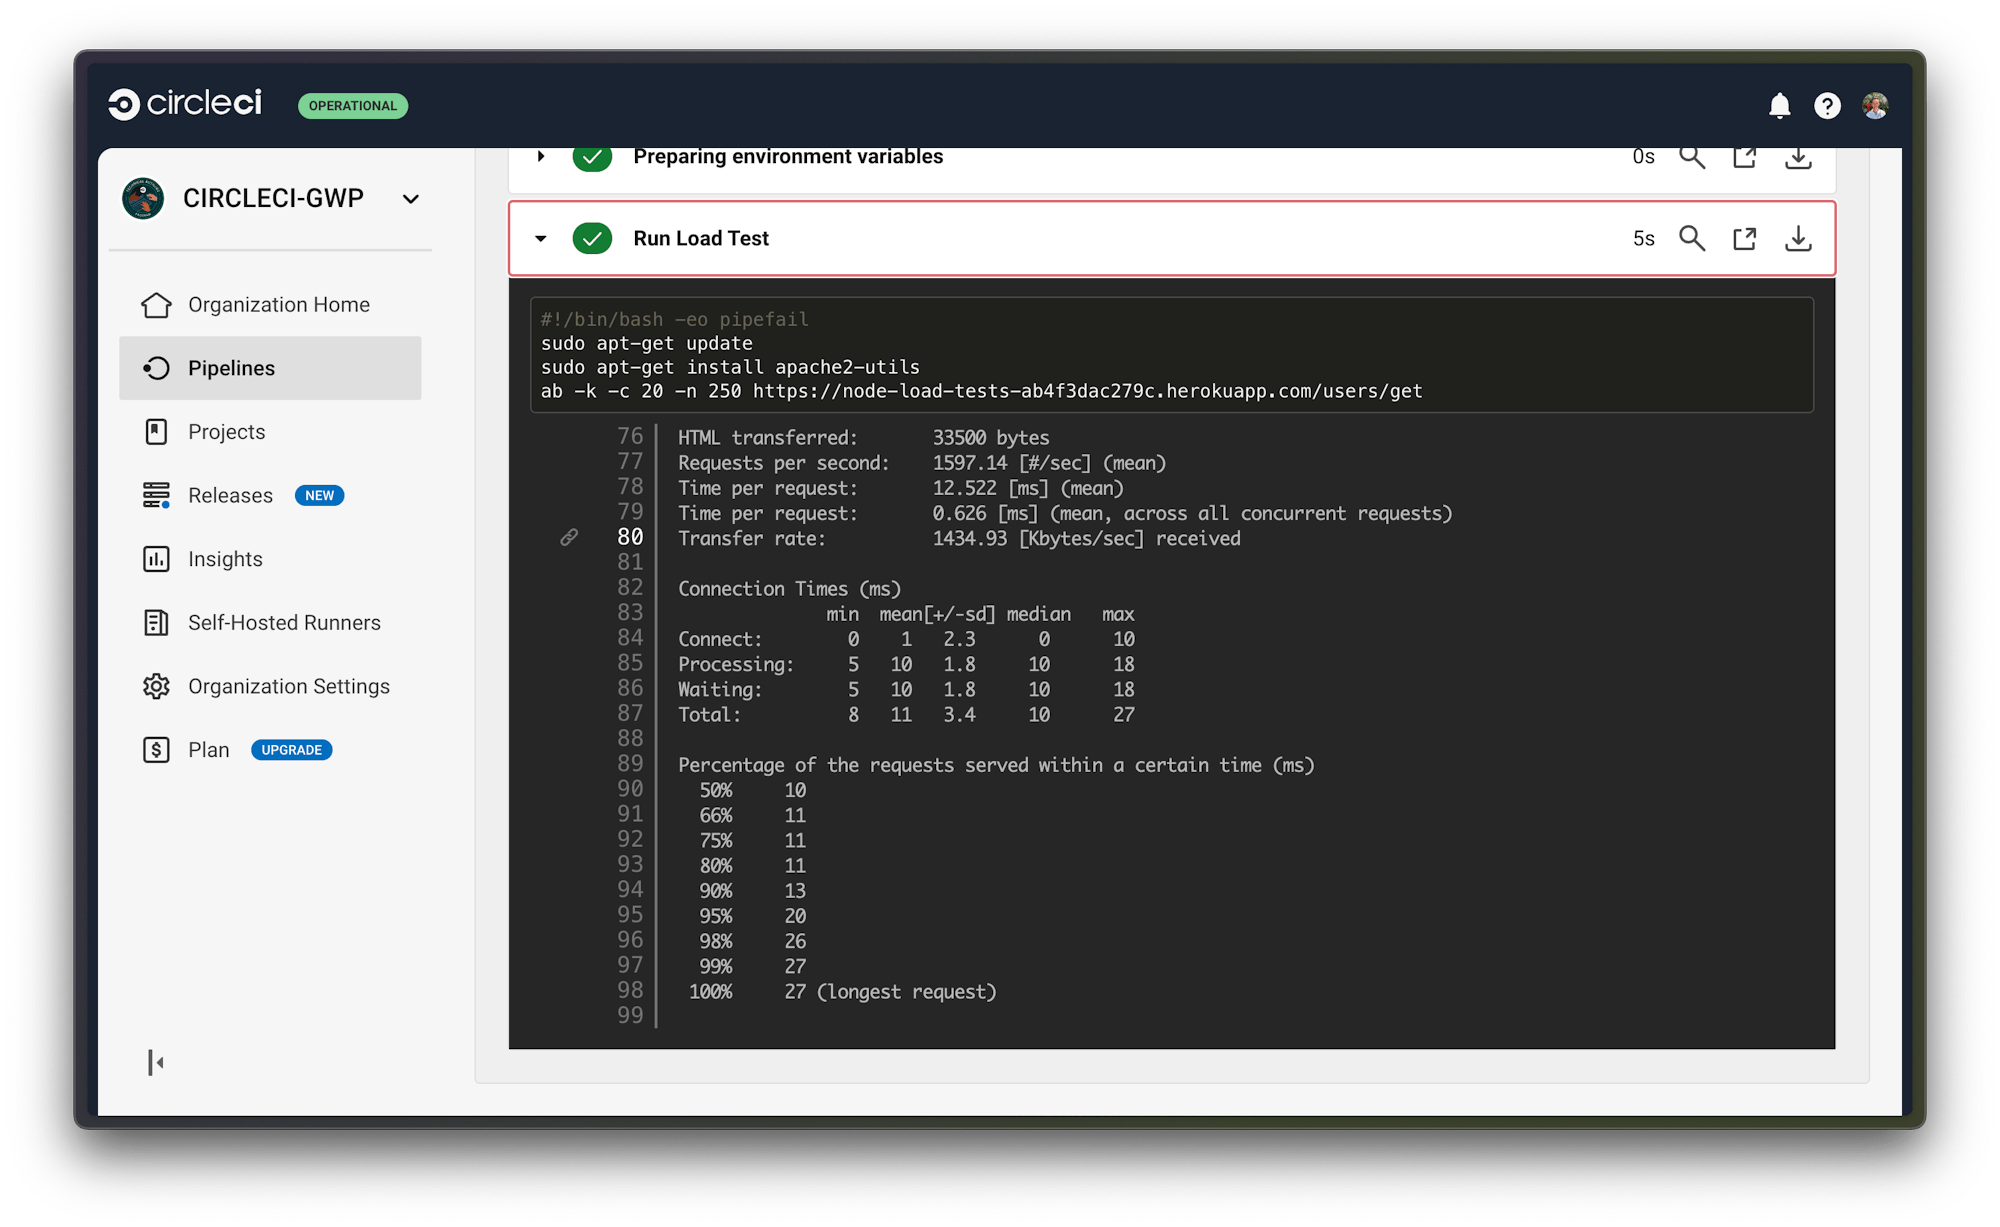
Click the loadtestapi job in the workflow to review the results of the load test.

The results show that all 250 requests were served within 0.165 seconds. Whether this is a good result or not depends on the performance metrics set for your application. Other data is shown that details how the tests ran. These details can be useful in tuning your application architecture to better scale for thousands to millions of users on your application.
Conclusion
Any enterprise or startup organization serving software to users should take load tests seriously. Load testing enables you to avoid the consequences of user downtime while customers are engaged in critical work or important fun.
In this tutorial, you have learned to deploy an API and immediately run a load test to verify its ability to handle web traffic. There are many ways to extend these load tests using ApacheBench. There are also specialized tools that can be plugged into the process or used as a replacement for ApacheBench, like k6. For an example, check out API performance testing with k6.


