Using contexts
On This Page
- Overview
- Quickstart: Create and use a context
- Contexts and environment variable constraints
- Context naming for CircleCI server
- Combine contexts
- Restrict a context
- Run workflows with a restricted context
- Approve jobs that use restricted contexts
- Delete a context
- Security group restrictions
- Restrict a context to a security group or groups
- Make changes to security group context restrictions
- Remove groups from contexts
- Add and remove users from teams and groups
- Add and remove environment variables from restricted contexts
- Project restrictions
- Run workflows with a project restricted context
- Restrict a context to a project
- Remove project restrictions from contexts
- Expression restrictions
- Set an expression restriction
- Examples
- Variables
- Errors
- Operators
- Precedence
- Literals
- Numbers
- Strings
- Booleans
- Evaluation
- Context management with the CLI
- Environment variable usage
- Add an environment variable to a context
- Remove an environment variable from a context
- Rotate environment variables with the CLI or API
- Secrets masking
- See also
Contexts provide a mechanism for securing and sharing environment variables across projects. The environment variables are defined as name/value pairs and are injected at runtime. This document describes creating and using contexts in CircleCI.
If you have existing contexts (or environment variables) and you would like to rename your organization or repository, follow the Rename organizations and repositories guide to make sure you do not lose access to contexts or environment variables in the process.
Overview
Manage contexts on the Organization Settings page of the CircleCI web app, or via the API. You must be an organization member to view, create, or edit contexts.
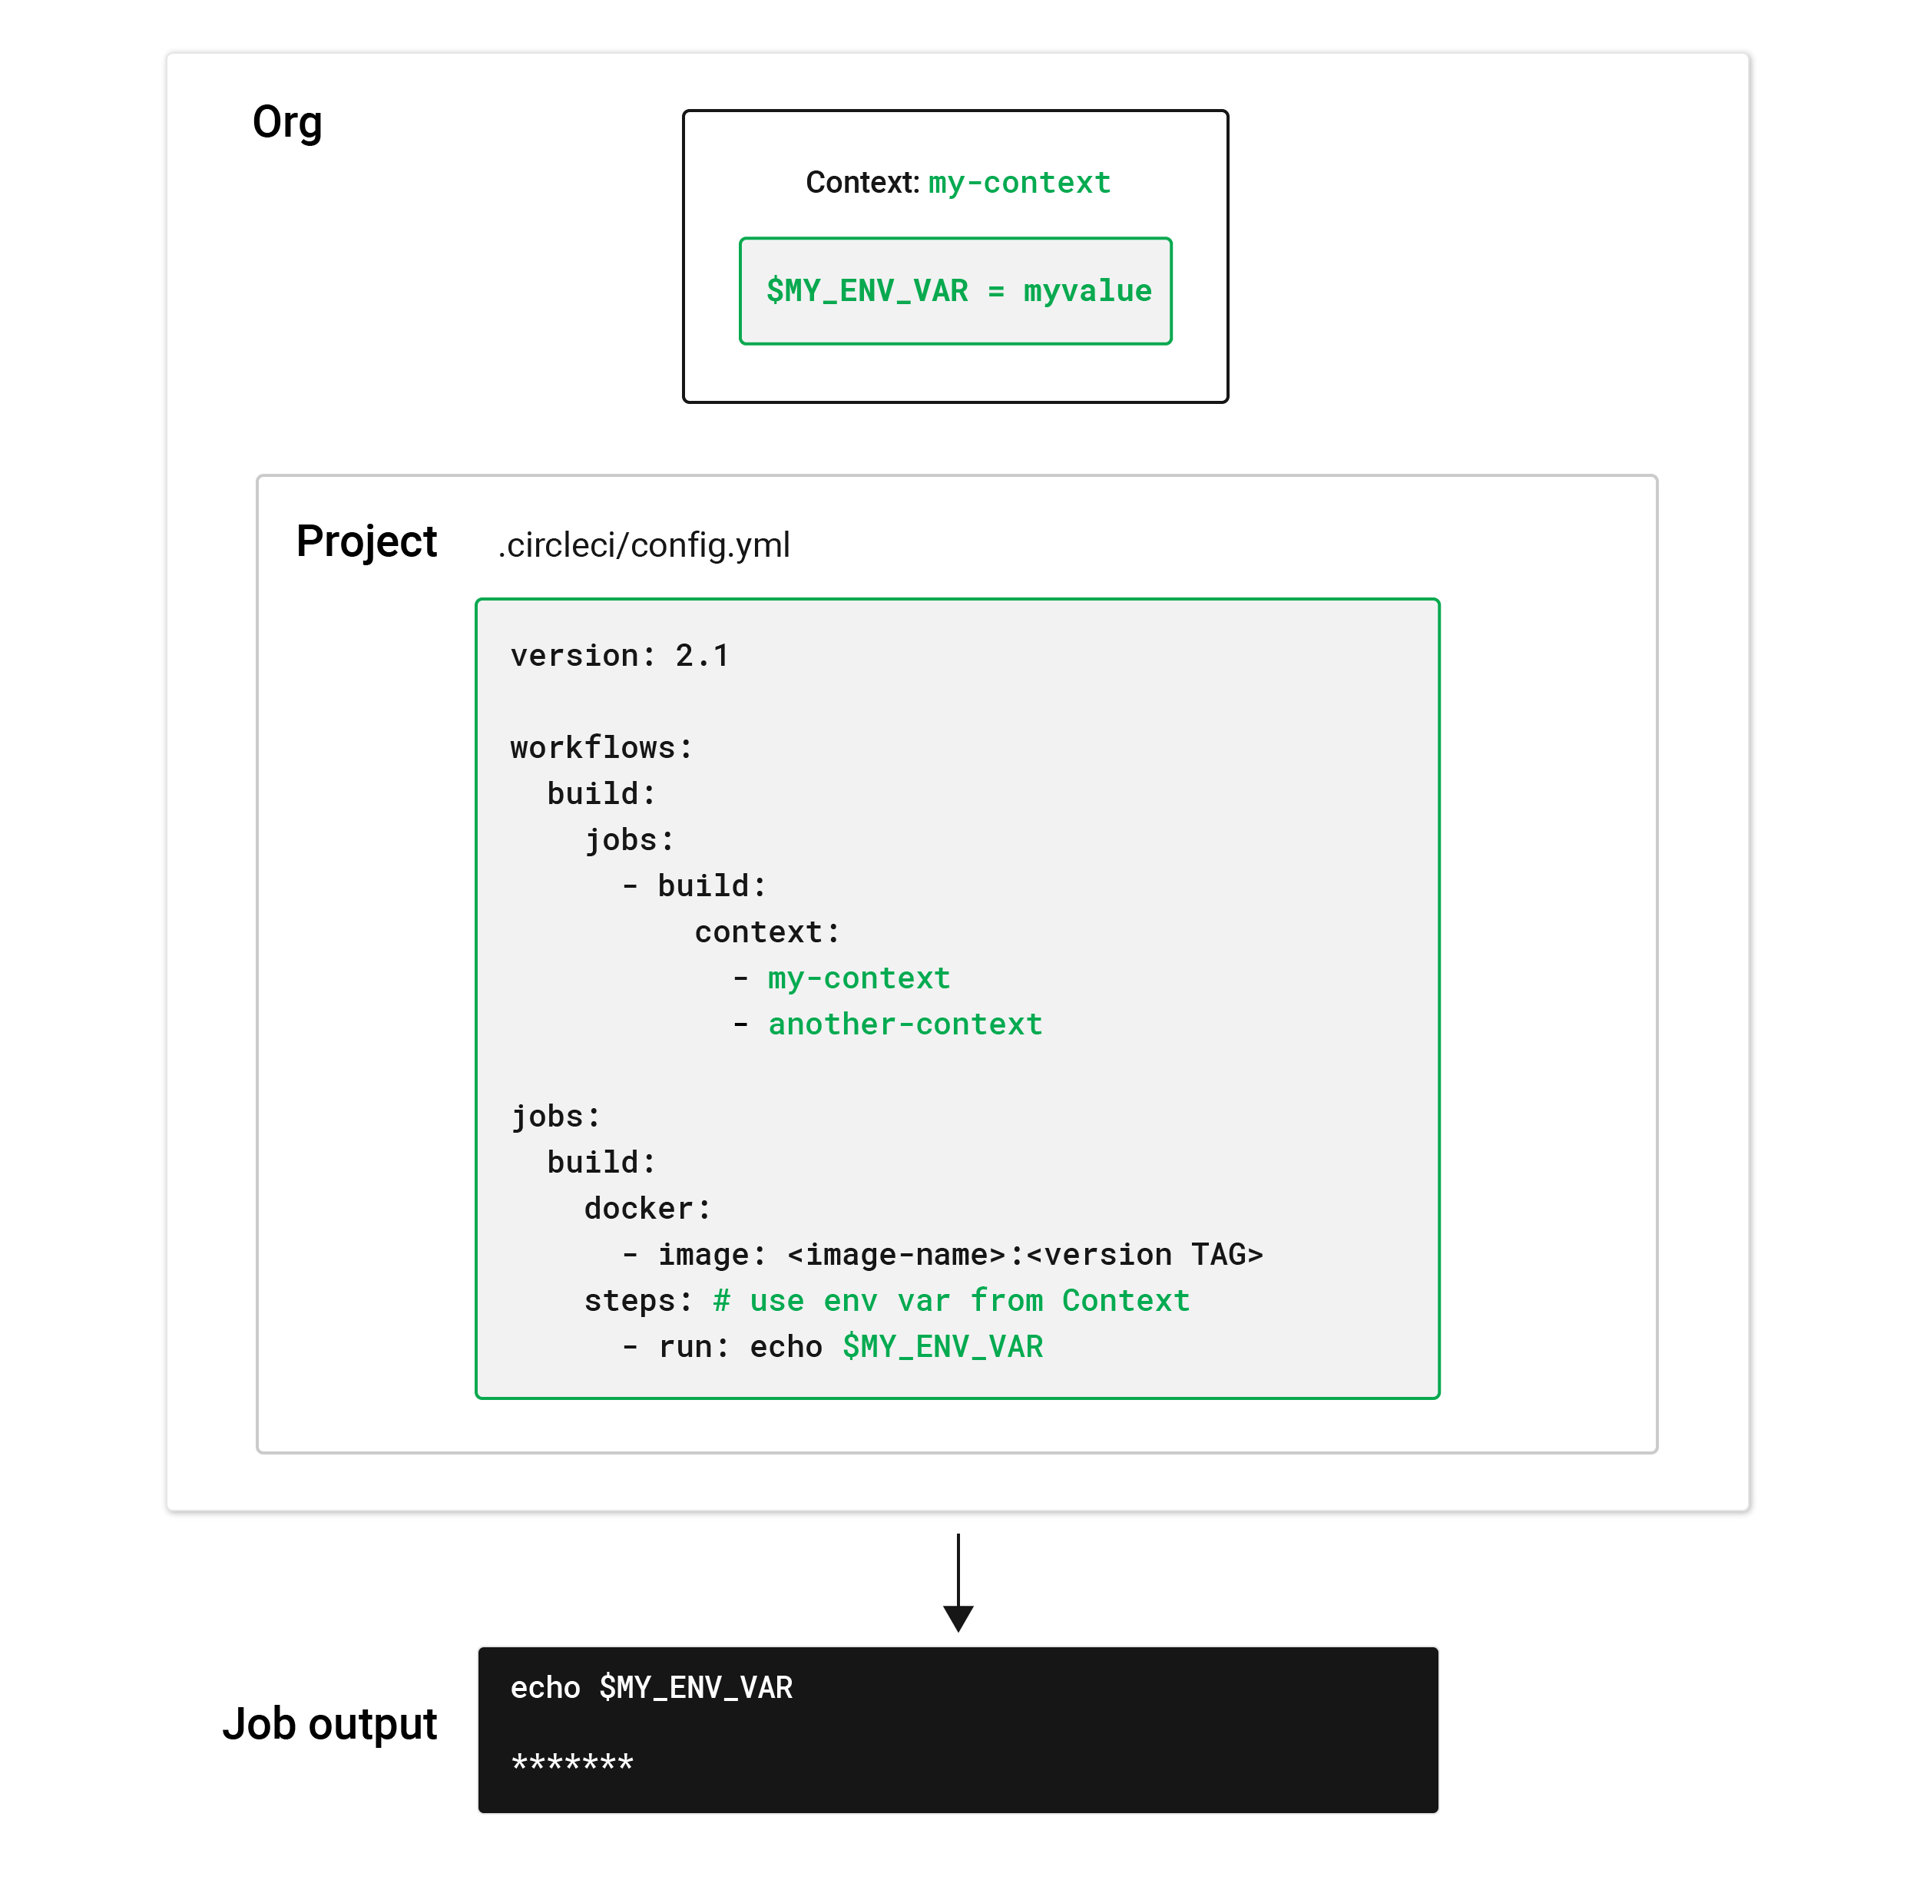
Create a context and then add environment variables to it. You can use the context key in the workflows section of a project’s .circleci/config.yml file to give any job(s) access to the environment variables associated with the context, as shown in the image below.
To use environment variables set within a context, the person running the workflow must be a member of the organization for which the context is set.
Context names must be unique for each VCS organization. The default name for a context is org-global. Contexts created with the initial default name of org-global will continue to work. |
Quickstart: Create and use a context
-
Using the CircleCI web app, select on the left side navigation.
Be aware that organization members can create contexts, but only organization administrators can restrict them using security groups. The one exception to this case is Bitbucket organizations, which require a user to have the
create repositoriesworkspace permission, regardless of their other permissions on the workspace or the repositories it contains.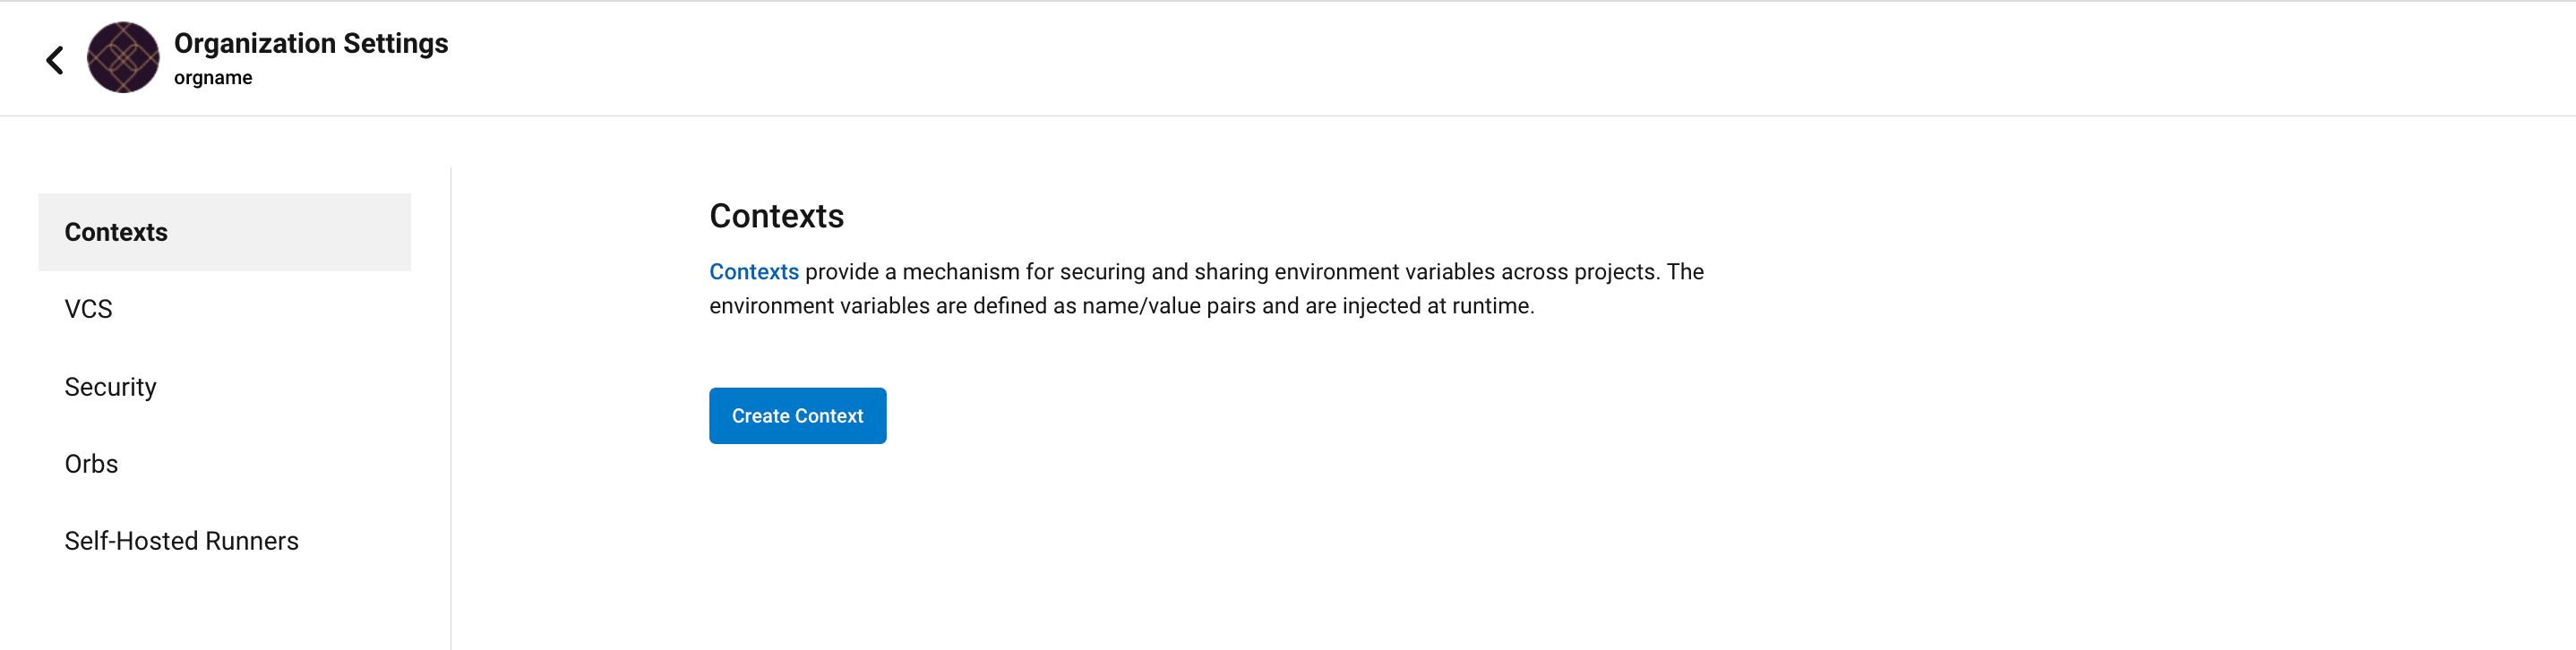
-
Select Create Context, add a unique name for your context and select Create Context in the modal to finalize. The new context will appear in a list with security set to
All membersto show that anyone in your organization can access this context at runtime. -
You can now select any context created in your list to add environment variables. Once you have a context selected, select Add Environment Variable to enter the variable name and value. Select Add Environment Variable in the modal to finalize.
-
To allow a job to access the environment variables stored in a context, add a context key to that job’s entry in the
workflowssection of the.circleci/config.ymlfile. For example, in the following example, therun-testsjob has access to the environment variables set in theorg-globalandmy-contextcontexts.version: 2.1 workflows: my-workflow: jobs: - run-tests: context: - org-global - my-context jobs: run-tests: docker: - image: cimg/base:2020.01 steps: - checkout - run: name: "echo environment variables from org-global context" command: echo $MY_ENV_VAR
| If you move your repository to a new organization, you must also have the context with that unique name set in the new organization. |
Contexts and environment variable constraints
When creating contexts and environment variables, note the following:
-
The context name must be:
-
200 or fewer characters
-
Must contain at least one non-whitespace character
-
Must not contain leading, trailing, or vertical whitespace
-
-
The environment variable name must be:
-
300 or fewer characters
-
Begin with an alpha (a-z, A-Z) or
_as the first character, and use alphanumeric or_for the remaining characters
-
-
An environment variable value must have 32k or fewer characters.
-
An empty environment variable is considered valid.
-
Each context is limited to 100 environment variables.
-
Each organization is limited to 500 contexts.
Context naming for CircleCI server
For any VCS enterprise installation that includes multiple organizations, the context names across those organizations must be unique. For example, if your GitHub Enterprise installation is named Kiwi and includes two organizations, you cannot add a context called deploy to both organizations. That is, the deploy context name cannot be duplicated in two organizations that exist in the same GitHub Enterprise installation for the Kiwi account. Duplicate contexts within an account will fail with an error.
Combine contexts
You can combine several contexts for a single job by adding them to the context list. Contexts are applied in order, so in the case of overlaps, later contexts override earlier ones. This way, you can scope contexts to be as small and granular as you like.
Restrict a context
| Bitbucket repositories do not provide an API that allows CircleCI contexts to be restricted, only GitHub OAuth app accounts support security group restrictions. To find out which GitHub account type you have, refer to the GitHub OAuth integration page. |
CircleCI enables you to restrict contexts at run time in the following ways:
-
Using security groups
-
Using project restrictions
-
Using expression restrictions
Only organization administrators may add restrictions to new or existing contexts.
Security groups are your organization’s VCS teams. After a security group is added to a context, only members of that security group who are also CircleCI users may access the context and use the associated environment variables. The default security group is All members, and enables any member of the organization who uses CircleCI to use the context.
Organization administrators have read/write access to all projects and have unrestricted access to all contexts.
Run workflows with a restricted context
To invoke a job that uses a restricted context, a user must be a member of one of the security groups or projects assigned to the context, or the expressions assigned to the context must be true. If the user running the workflow does not have access to the context or an expression evaluates to false, the workflow will fail with the Unauthorized status.
Approve jobs that use restricted contexts
Adding an approval job to a workflow gives the option to require manual approval of the use of a restricted context. To restrict running of jobs that are downstream from an approval job, add a restricted context to those downstream jobs, as shown in the example below:
version: 2.1

# Jobs declaration for build, test and deploy not displayed

workflows:
  jobs:
    build-test-deploy:
      - build
      - test:
          context: my-restricted-context
          requires:
            - build
      - hold:
          type: approval # presents manual approval button in the UI
          requires:
            - build
      - deploy:
          context: deploy-key-restricted-context
          requires:
            - build
            - hold
            - test
In this example, the jobs test and deploy are restricted, and deploy will only run if the user who approves the hold job is a member of the security group assigned to the context and deploy-key-restricted-context. When the workflow build-test-deploy runs, the jobs build and test will run, then the hold job will run, which will present a manual approval button in the CircleCI application. This approval job may be approved by any member of the project, but the deploy job will fail as unauthorized if the approver is not part of the restricted context security group.
Delete a context
If the context is restricted with a group other than All members, you must be a member of that security group to complete this task. To delete a context, follow the steps below:
-
Navigate to the in the CircleCI web app.
-
Select the X icon in the row of the context you want to delete. A confirmation dialog box will appear.
-
Type "DELETE" in the field and then select Delete Context. The context and all associated environment variables will be deleted.
| If a deleted context is used in a job, the job will fail and show an error. |
Security group restrictions
Restrict a context to a security group or groups
You must be an organization administrator to complete the following task.
| Restricting a context to a security group is supported for orgs integrated through the GitHub OAuth app and not supported for orgs that integrate with CircleCI’s GitHub App, GitLab, or Bitbucket. |
-
Navigate to in the CircleCI web app to see the list of contexts. The default security group is
All members, and allows all users in the organization to invoke jobs with that context. -
Select Create Context if you wish to use a new context, or select the name of an existing context (if using an existing context, you will need to remove the
All memberssecurity group before adding a new one). -
Select Add Security Group button to view the dialog box.
-
Make your choices in the dialog box and then select the Add Security Group or Add Project Restriction button to finalize. Contexts will now be restricted to the selections you have made.
-
Select Add Environment Variables to add environment variables to the context if none exist, fill out your desired name and value in the dialogue box, then select the Add Environment Variables button to finalize. Use of the environment variables for this context is now limited to members of the security groups.
-
Navigate back to in the CircleCI app. The security groups appear in the Security column for the context.
Only members of the selected groups may now use the context in their workflows or add or remove environment variables for the context.
Make changes to security group context restrictions
Changes to security group restrictions for contexts might not take effect immediately due to caching. To make sure settings are applied immediately, it is best practice for the organization administrator to refresh permissions once the change has been made. The Refresh Permissions button can be found on the Account Integrations page.
Administrators of CircleCI server installations can find the Refresh Permissions button at <circleci-hostname>/account.
Remove groups from contexts
To make a context available only to the administrators of the organization, you may remove all of the groups associated with a context. All other users will lose access to that context.
Add and remove users from teams and groups
GitHub OAuth app users: CircleCI syncs GitHub team and LDAP groups every few hours. If a user is added or removed from a GitHub team or LDAP group, it can take up to a few hours to update the CircleCI records and remove access to the context.
Add and remove environment variables from restricted contexts
Addition and deletion of environment variables from a restricted context is limited to members of the context groups.
Project restrictions
CircleCI enables you to restrict secret environment variables by adding project restrictions to contexts. Only organization admins may add or remove project restrictions to a new or existing context. After a project restriction is added to a context, only workflows associated with the specified project(s) will have access to the context and its environment variables.
| API support for project restricted contexts is coming soon. |
Organization Admins have read/write access to all projects, and have unrestricted access to all contexts.
Run workflows with a project restricted context
To invoke a workflow that uses a restricted context, the workflow must be part of the project the context is restricted to. If the workflow does not have access to the context, the workflow will fail with the Unauthorized status.
Restrict a context to a project
You must be an organization admin to restrict a context though the method detailed below.
-
Navigate to the page of your organization in the CircleCI web app. The list of contexts will be visible.
-
Select the name of an existing context, or select Create Context if you want to use a new context.
-
Select Add Project Restriction to view the dialog box.
-
Select the project name to add to the context, and select Add. Use of the context is now limited to the specified project. Currently, multiple projects must be added individually.
-
You should now see a list of the defined project restrictions on the context page.
-
If you have environment variables, they should appear on the page. If there are none, you can select Add Environment Variables to add them to the context. Then select Add to finish. Use of the environment variables for this context is now limited to the specified projects.
Only workflows under the specified projects may now use the context and its environment variables.
Remove project restrictions from contexts
You must be an organization admin to remove projects from contexts though the method detailed below.
-
Navigate to page in the CircleCI web app. The list of contexts will be visible.
-
Select the name of the existing context for which you would like to modify restrictions.
-
Select X next to the project restriction you would like to remove. The project restriction will be removed for the context.
-
If there are no longer any project restrictions for the context, the context and its environment variables are now effectively unrestricted.
Expression restrictions
Restrict contexts by setting up expression restrictions. Expression restrictions are rules that pipeline values must match. Using expression restrictions allows you to create arbitrary constraints on the circumstances in which a context is available for use. For example, you may have a context containing credentials that should only be used for deploying your code from your protected main branch:
pipeline.git.branch == "main" and not job.ssh.enabled and not (pipeline.config_source starts-with "api"")Tabs and new lines are considered whitespace so can be used to break long lines, but have no other significance. For example, the snippet above could also be written:
pipeline.git.branch == "main"
and not job.ssh.enabled
and not (pipeline.config_source starts-with "api")
You can set up expression restrictions using the context restriction API, or via the Context page () in the CircleCI web app.
Rules are expressed in a small language that supports equality checks, numeric comparisons, and boolean and, or, and not operators.
Set an expression restriction
| You must be an organization administrator to set an expression restriction. |
Follow these steps to set an expression restriction on a context:
Examples
Allow the context only on the project’s main branch:
pipeline.git.branch == "main"Allow the context only on the project’s main branch, or branches starting with integration-test:
pipeline.git.branch == "main" or pipeline.git.branch starts-with "integration-test"Restrict a context to the main branch, disallow use in an SSH rerun, and disallow use with pipelines triggered with unversioned configuration:
pipeline.git.branch == "main" and not job.ssh.enabled and not (pipeline.config_source starts-with "api")Variables
Pipeline values can be used as variables in an expression restriction. The exception to this is that pipeline.trigger_parameters.* pipeline values cannot be used. Pipeline parameters cannot be used in expression restrictions.
Job-specific variables are also available to use in expressions, as follows:
| name | type | description |
|---|---|---|
| boolean |
|
If an expression references a variable that has no value set in the pipeline, the expression will fail closed and prevent use of the context.
Errors
Any errors evaluating an expression will fail closed and prevent use of the context. Errors include the following:
-
Using a variable that does not exist
-
Using a non-numeric value as an operand to the numeric comparison operators
-
Using a non-string value as an operand to the starts-with operator
Operators
The operators you can use are described in the following table. You can also group sub-expressions with parentheses (, ). as in the example above.
| Operator type | Operators | Description |
|---|---|---|
Logical |
| These are short-circuiting boolean operators. |
Equality |
| String, numeric, and boolean equality. If the operands are of different types then |
Equality |
| String prefix equality, |
Numeric comparison |
| Numeric comparisons. It is an error to use a non-numeric type as an operand. |
Negation |
| Boolean negation. Note that
|
Precedence
The following table shows operator precedence table, from weakest to strongest binding.
All operators are left associative. In practice, you should avoid operator chaining for anything other than and or or. This is because evaluation may cause type mismatches for other operators (see Evaluation). |
| Operator | Associativity |
|---|---|
| left |
| left |
| left |
| |
| left |
|
Literals
Numbers
Numeric literals are whole integers (longs). For example, 1 or 768.
Strings
String literals are enclosed within double-quotes " ". The \ character is used to escape an embedded quote, or to escape an embedded \.
For example, "the quick brown fox", "You can embed \" and \\ characters"
Booleans
The boolean literals are true and false.
Evaluation
An expression is evaluated to produce a single boolean true or false value.
Other than the boolean value false, all values ultimately evaluate as true.
A variable evaluates to the variable’s value. If the variable does not exist then the expression is immediately considered to have evaluated as false. In other words, expression evaluation will fail closed when it encounters an unknown variable.
As an expression is evaluated, the result of an operator is effectively embedded "in place" as the evaluation continues. For example, to evaluate the following:
pipeline.git.branch == "main"
and not job.ssh.enabled
and not (pipeline.config_source starts-with "api")where the values are:
-
pipeline.git.branchis"main" -
job.ssh.enabledisfalse -
pipeline.config_sourceis"api"-
Variable lookup: replace
pipeline.git.branchwith its value:-
"main" == "main" and not job.ssh.enabled and not (pipeline.config_source starts-with "api")
-
-
Evaluate
"main" == "main":-
true and not job.ssh.enabled and not (pipeline.config_source starts-with "api")
-
-
Variable lookup: replace
job.ssh.enabledwith its value:-
true and not false and not (pipeline.config_source starts-with "api")
-
-
Evaluate
not false:-
true and true and not (pipeline.config_source starts-with "api")
-
-
Evaluate
true and true:-
true and not (pipeline.config_source starts-with "api")
-
-
Variable lookup: replace
pipeline.config_sourcewith its value:-
true and not ("api" starts-with "api")
-
-
Evaluate
("api" starts-with "api")-
true and not true
-
-
Evaluate
not true:-
true and false
-
-
Evaluate
true and false:-
false
-
-
The result is
false
-
Context management with the CLI
You can use the CircleCI CLI to manage contexts, as an alternative to the web app and the API. With the CLI, you can execute several context-oriented commands.
-
create- Create a new context -
delete- Delete a named context -
list- List all contexts -
remove-secret- Remove an environment variable from the named context -
show- Show a context -
store-secret- Store a new environment variable in the named context
The above list are "sub-commands" in the CLI, which would be executed like so:
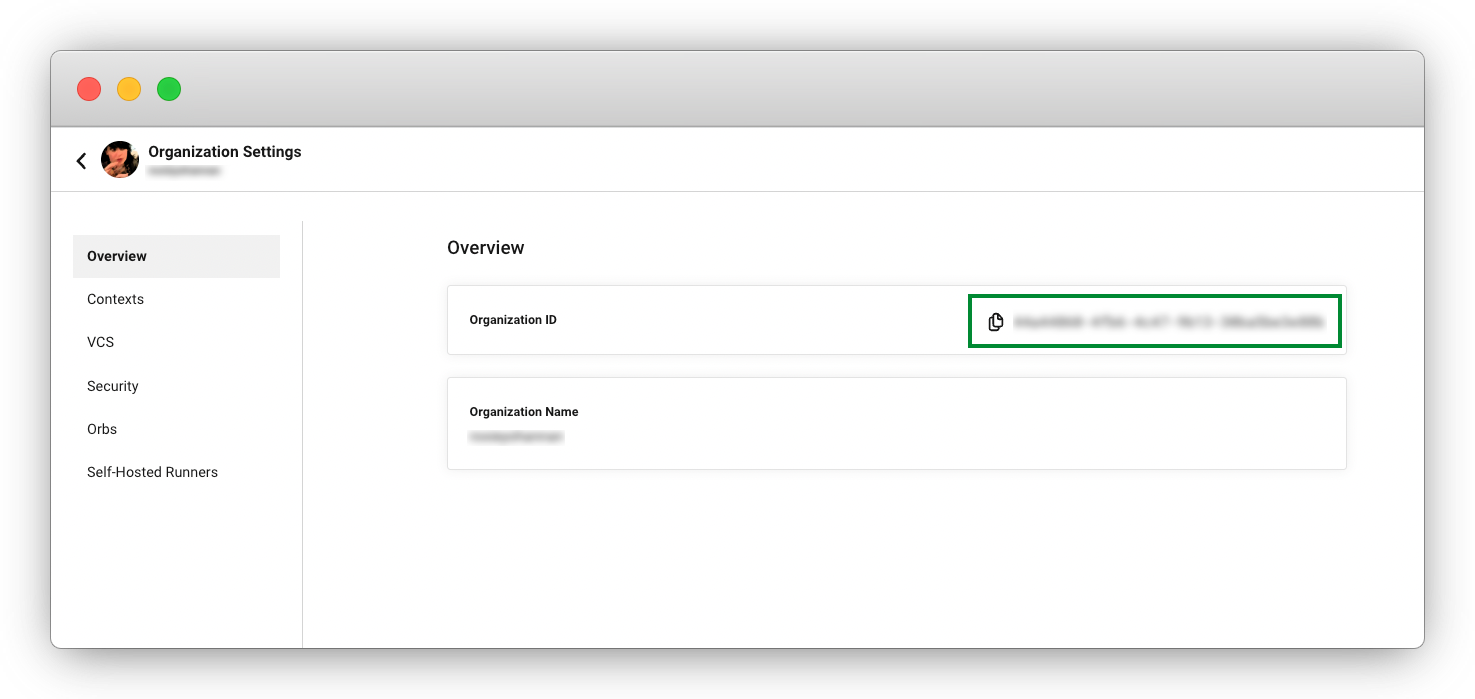
circleci context create --org-id <org-id> <context-name> [flags]Refer to the CLI docs for full details for each command. Many commands require that you include additional information as indicated by parameters delimited by < >. For example, when running circleci context create, you will need to provide a name for the context and your org ID.
| To find your organization/user ID, select Organization Settings in the CircleCI web app side bar.
|
Environment variable usage
Environment variables are used according to a specific precedence order, as follows:
-
Environment variables declared inside a shell command in a
runstep, for exampleFOO=bar make install. -
Environment variables declared with the
environmentkey for arunstep -
Environment variables set with the
environmentkey for a job. -
Special CircleCI environment variables defined on the Project values and variables page.
-
Context environment variables (assuming the user has access to the context).
-
Project-level environment variables set on the Project Settings page in the web app.
Environment variables declared inside a shell command run step, for example FOO=bar make install, will override environment variables declared with the environment and contexts keys. Environment variables added on the contexts page will take precedence over variables added on the Project Settings page.
Add an environment variable to a context
Remove an environment variable from a context
Removing an environment variable from a context deletes the environment variable from your account.
Rotate environment variables with the CLI or API
Rotation refers to the process of updating a secret’s value without deleting it or changing its name.
Because environment variables can be shared, passed around between employees and teams, and exposed inadvertently, it is good practice to periodically rotate secrets. You can automate this process, for example, running a script when an employee leaves the company, or when a secret may have been compromised.
Context environment variables can be rotated using CircleCI’s CLI or API.
Secrets masking
Environment variables and contexts may hold project secrets or keys that perform crucial functions for your applications. Secrets masking provides added security within CircleCI by obscuring environment variables in the job output when echo or print is used.
Secrets masking is applied to environment variables set within Project Settings or Contexts in the web app.
The value of the environment variable or context will not be masked in the job output if:
-
the value of the environment variable is less than 4 characters
-
the value of the environment variable is equal to one of
true,True,false, orFalse
Secrets masking will only prevent values from appearing in your job output. Invoking a bash shell with the -x or -o xtrace options may inadvertently log unmasked secrets (refer to Using shell scripts). If your secrets appear elsewhere, such as test results or artifacts, they will not be masked. Additionally, values are still accessible to users debugging builds with SSH. |
| The secrets masking feature exists as a preventative measure to catch unintentional display of secrets at the output. Best practice is to avoid printing secrets to the output. The are many ways that secrets masking could be bypassed, either accidentally or maliciously. For example, any process that reformats the output of a command or script could remove secrets masking. |