In a traditional DevOps implementation, you automate the build, test, release, and deploy process by setting up a CI/CD workflow that runs whenever a change is committed to a code repository. This approach is also useful in MLOps: If you make changes to your machine learning logic in your code, it can trigger your workflow. But what about changes that happen outside of your code repository?
Even if you’re using the same code, you might want to create a new model when the training data is updated. In this case, you will need to test the updated model with the existing test data. Additionally, you may want to evaluate new test data with the existing model. To automate these processes, you will need to trigger workflows based on events happening in your dataset or model registry.
In this article, I’ll demonstrate how you can use CircleCI’s inbound webhooks to trigger workflows from events outside of your code repository. As a basic example, I’ll explain how you can trigger model evaluations any time a new version of your model is published in Hugging Face.
Model testing in the CircleCI GPU environment
For demonstration purposes, let’s assume you have built an image-detection model based on Ultralytics’ YOLOv8. You’ve trained the model to detect whether individuals are wearing masks using the Roboflow Mask Wearing Image Dataset.
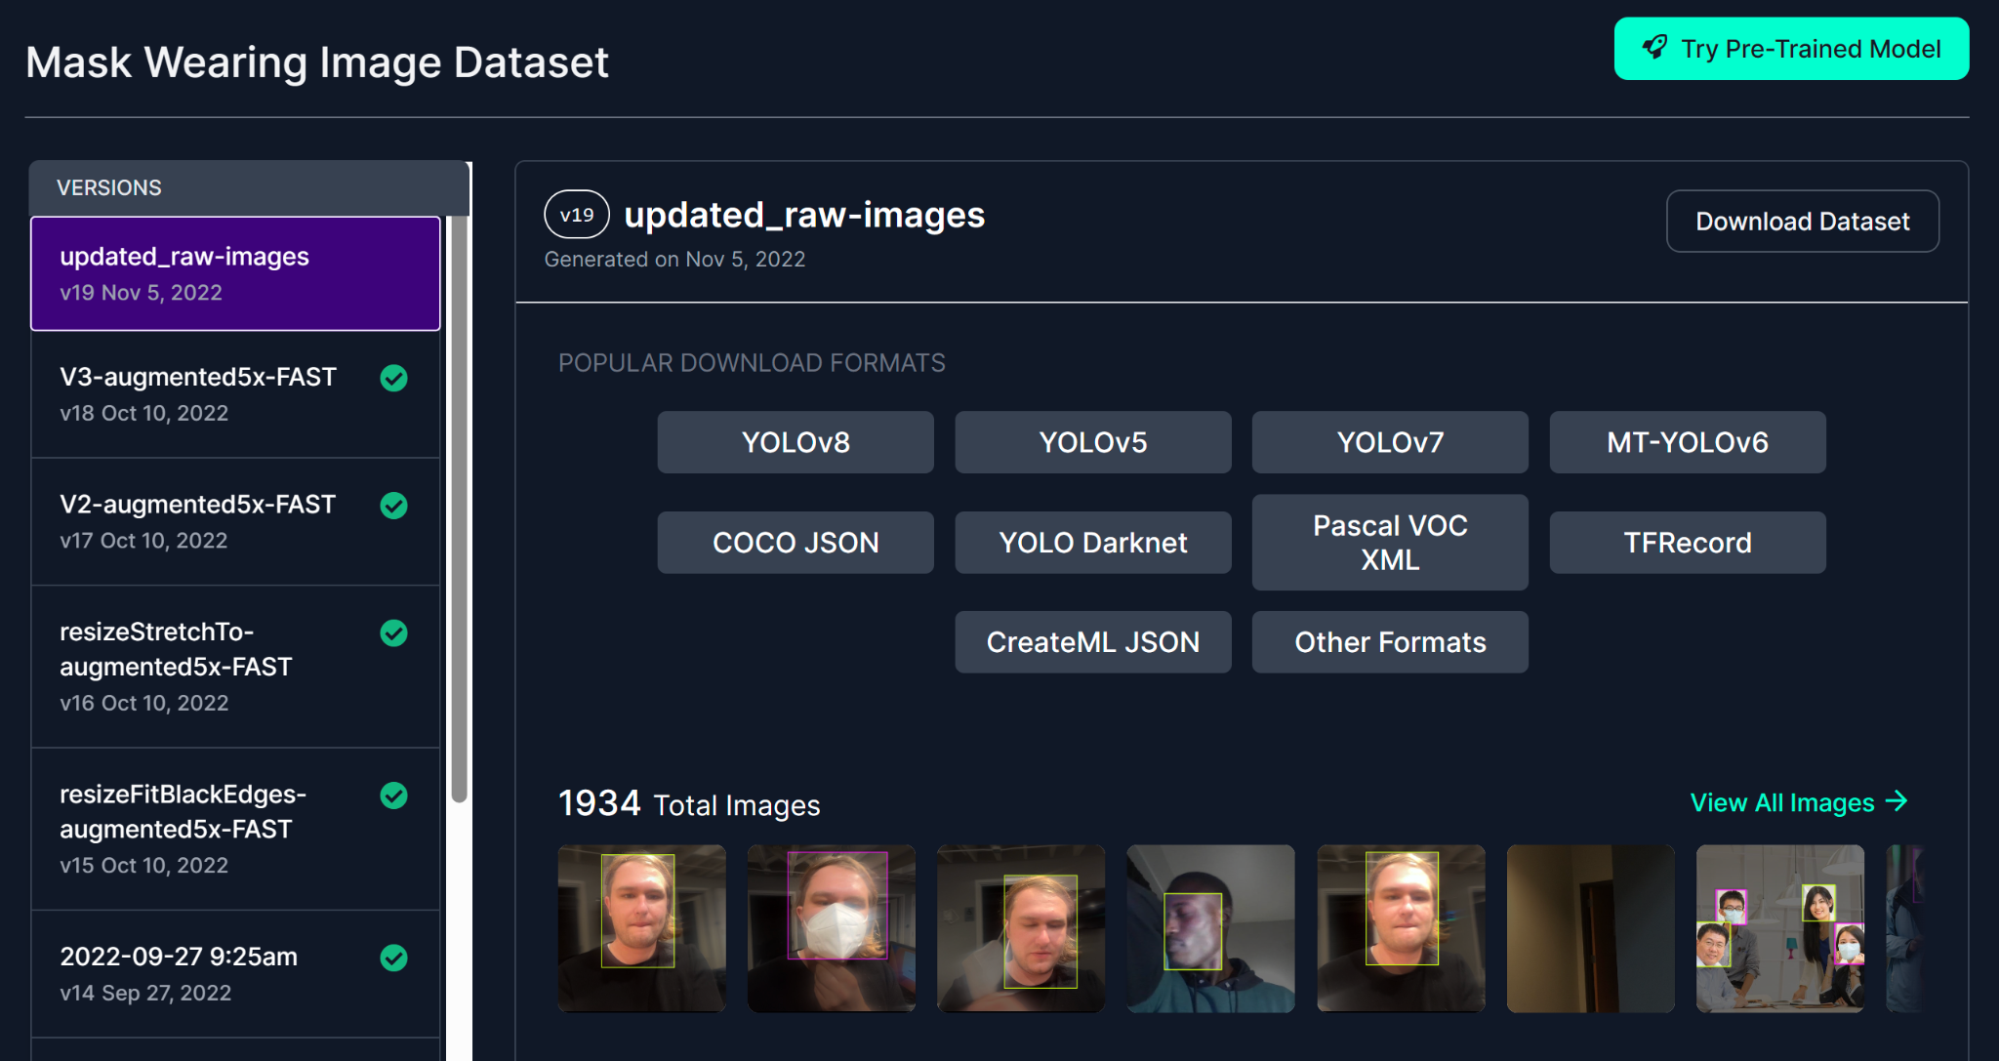
When the model is ready, you publish it to your Hugging Face repository.
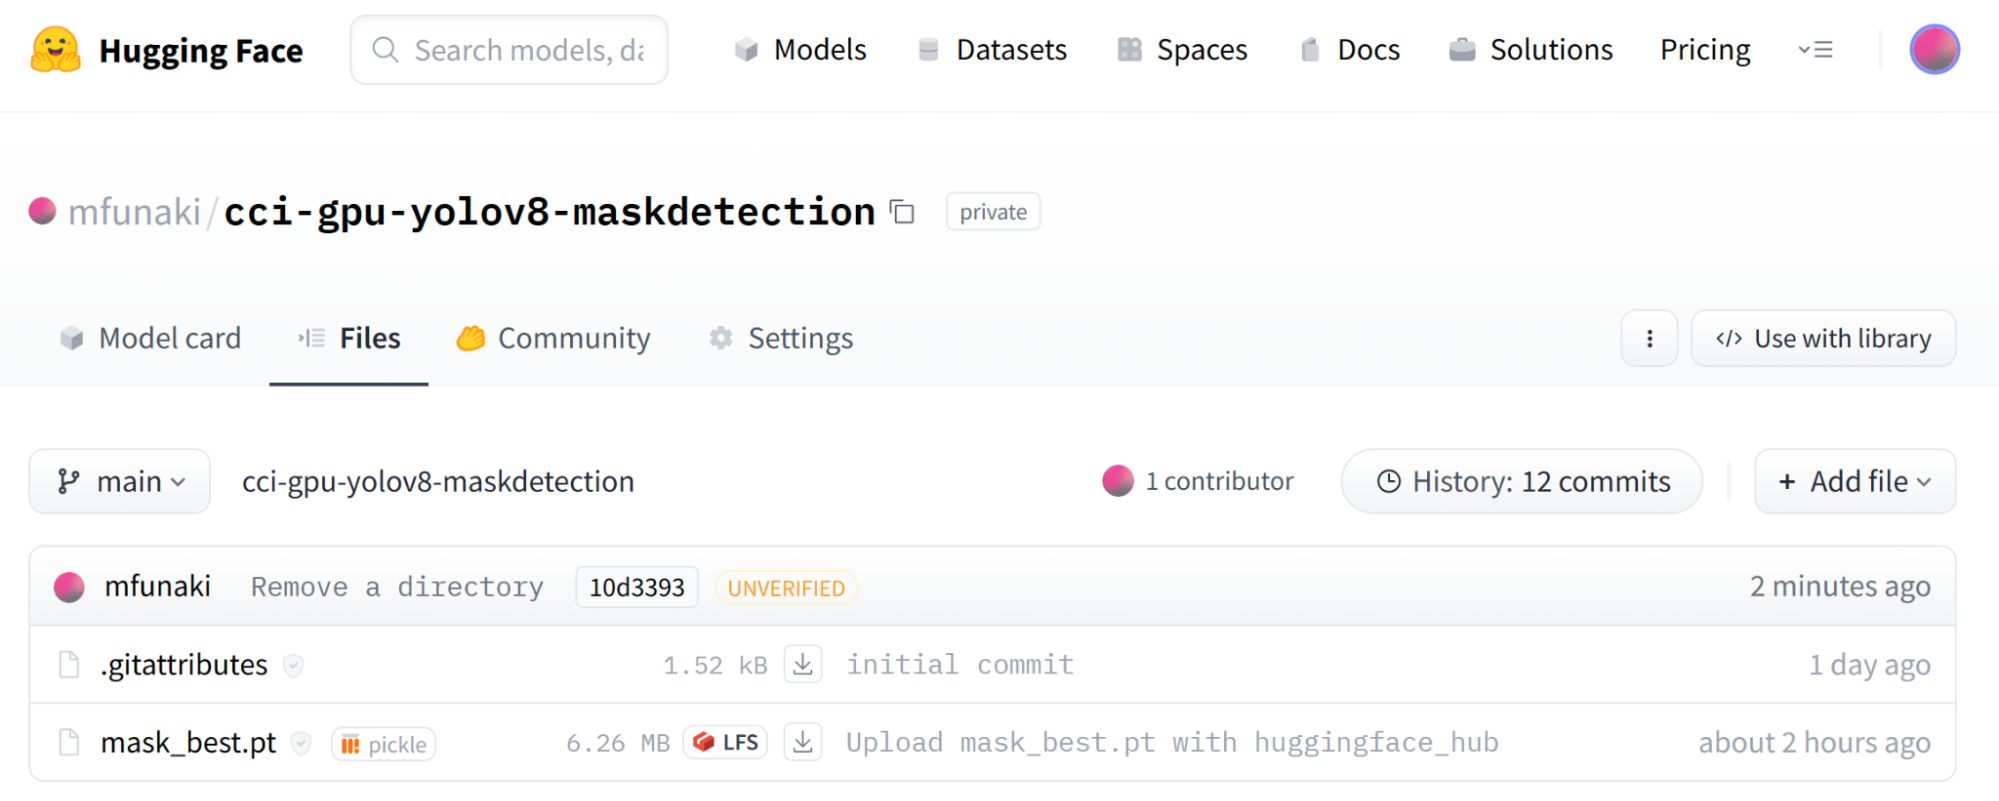
Every time you update your model in Hugging Face, you’ll likely want to execute a comprehensive test set to gauge the model’s performance — whether it’s superior or inferior to its previous versions. To do that in an automated and easily scalable way, you can set up a CI/CD pipeline to run a testing workflow.
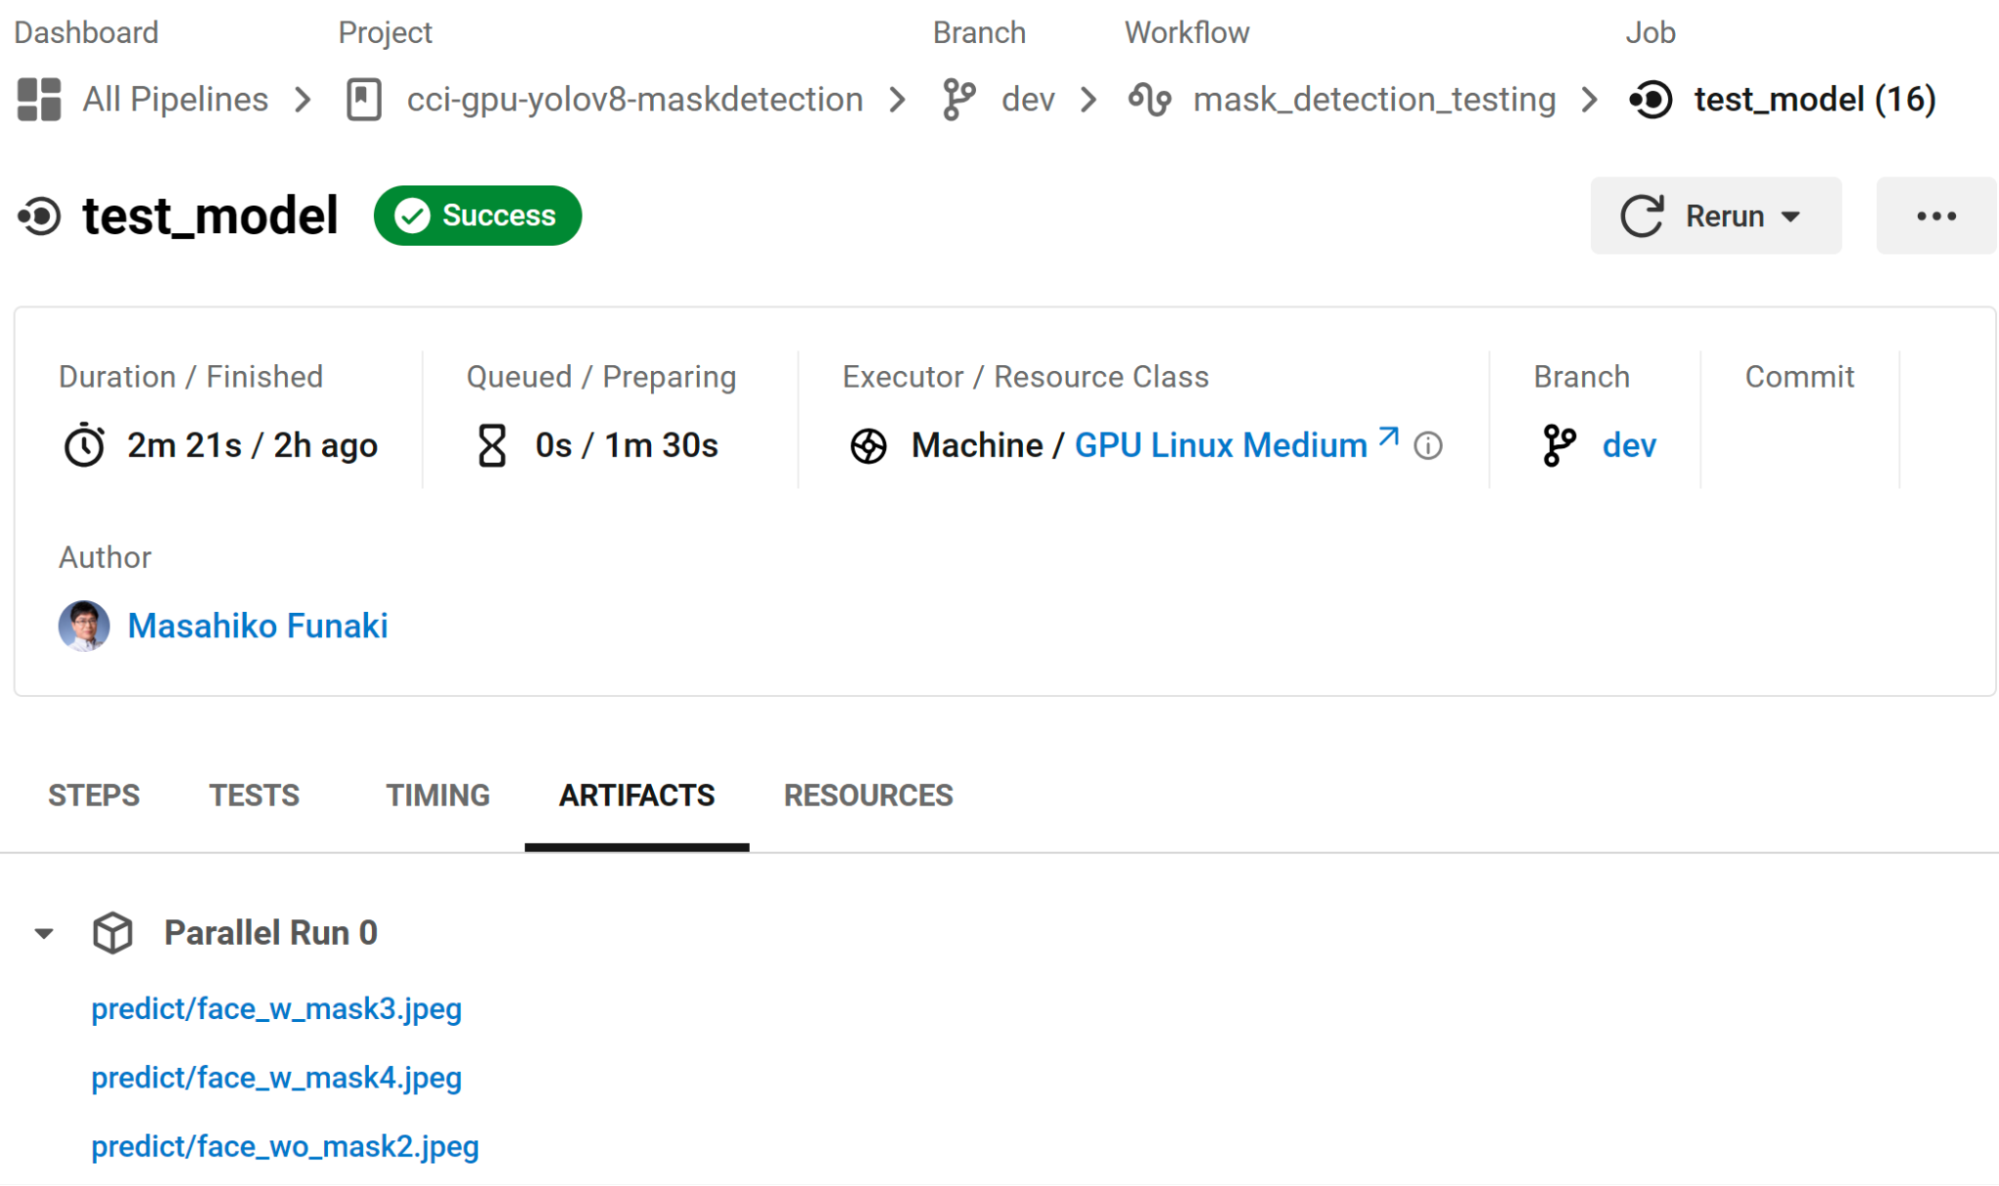
In our case, we want to set up a pipeline to test with a collection of image files. The pipeline will consist of a single test_model job configured to run on CircleCI’s hosted GPU resource class.
Here’s the complete config file, which we’ll be discussing below.
version: 2.1

jobs:
  test_model:
    machine:
      resource_class: gpu.nvidia.medium
      image: linux-cuda-11:default
    steps:
      - checkout
      - run:
          name: Check GPU status
          command: nvidia-smi
      - run:
          name: Set up Hugging Face CLI
          command:  pip3 install -U "huggingface_hub[cli]"
      - run:
          name: Set up a model from Hugging Face
          command: |
            cd /opt/circleci
            mkdir datasets; cd datasets
            huggingface-cli login --token $HUGGINGFACE_TOKEN
            huggingface-cli download mfunaki/cci-gpu-yolov8-maskdetection \
              mask_best.pt \
              --local-dir /opt/circleci/.pyenv/runs/detect/train/weights
      - run:
          name: Test the model
          command: |
            pip3 install ultralytics
            yolo task=detect mode=predict \
              model=/opt/circleci/.pyenv/runs/detect/train/weights/mask_best.pt \
              source=~/project/images
      - store_artifacts:
          path: /opt/circleci/.pyenv/runs/detect/predict
          destination: predict

workflows:
  mask_detection_testing:
    jobs:
      - test_model:
          context:
            - docker
Let’s break this down into individual steps. After setting up the Hugging Face CLI, our model file (mask_best.pt) is retrievable. It will then be stored under the directory /opt/circleci/.pyenv/runs/detect/train/weights to be employed by YOLOv8.
- run:
    name: Set up a model from Hugging Face
    command: |
      cd /opt/circleci
      mkdir datasets; cd datasets
      huggingface-cli login --token $HUGGINGFACE_TOKEN
      huggingface-cli download mfunaki/cci-gpu-yolov8-maskdetection \
        mask_best.pt \
        --local-dir /opt/circleci/.pyenv/runs/detect/train/weights
Subsequently, the model can be tested with image files stored in the images directory of this project’s repository.
- run:
    name: Test the model
    command: |
      pip3 install ultralytics
      yolo task=detect mode=predict \
        model=/opt/circleci/.pyenv/runs/detect/train/weights/mask_best.pt \
        source=~/project/images
The test results will be stored under the /opt/circleci/.pyenv/runs/detect/predict directory, so we will ensure these artifacts are housed in CircleCI.
- store_artifacts:
    path: /opt/circleci/.pyenv/runs/detect/predict
    destination: predict
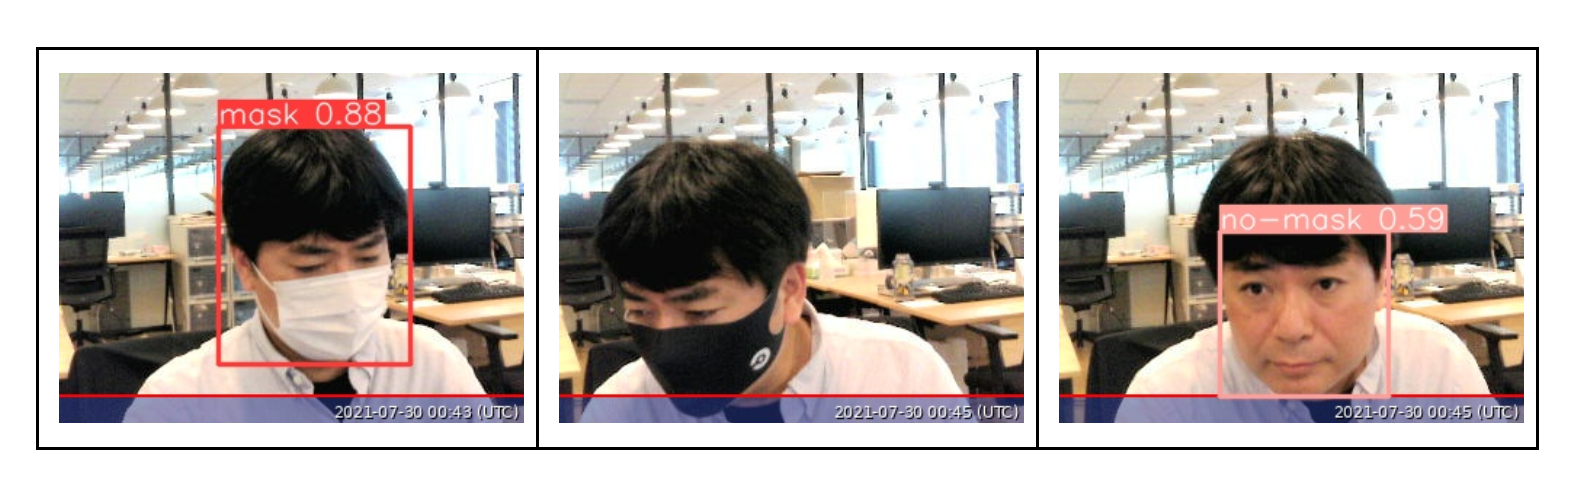
After they’re stored, you have the option to download the detection results for each image file and review them.
Upon review, you’ll notice my face both with a white mask and without a mask were accurately detected, while my face with a black CircleCI mask was not detected.
Using webhooks to extend your MLOps automation
So far, we’ve set up a pipeline with a workflow consisting of our test_model job to evaluate model performance. Now we want to trigger our pipeline when the model is updated on Hugging Face.
Traditionally, you would need to trigger your pipeline manually, as there would be no way to detect changes to your Hugging Face repository. However, now with support for inbound webhooks in CircleCI, you can monitor and trigger pipelines from any source of change that can send a webhook or run a curl command.
To set this up for our example project, we’ll start by configuring a new webhook trigger in CircleCI. Navigate to Project Settings > Triggers and select Add Trigger. Select Inbound Webhook and fill in the details of your trigger source and trigger description.

When you complete the setup, you’ll have a webhook endpoint URL and secret you can use to set up webhook triggers from external sources.

Next you’ll need to set up the webhook on your trigger source. Navigate to the Hugging Face webhooks settings page. You will see the following fields:
-
Target Repositories: Which Hugging Face repositories to watch for updates
-
Webhook URL and Secret: The CircleCI endpoint that Hugging Face should call when your target repositories are updated
-
Triggers: Which events in Hugging Face will trigger your webhook
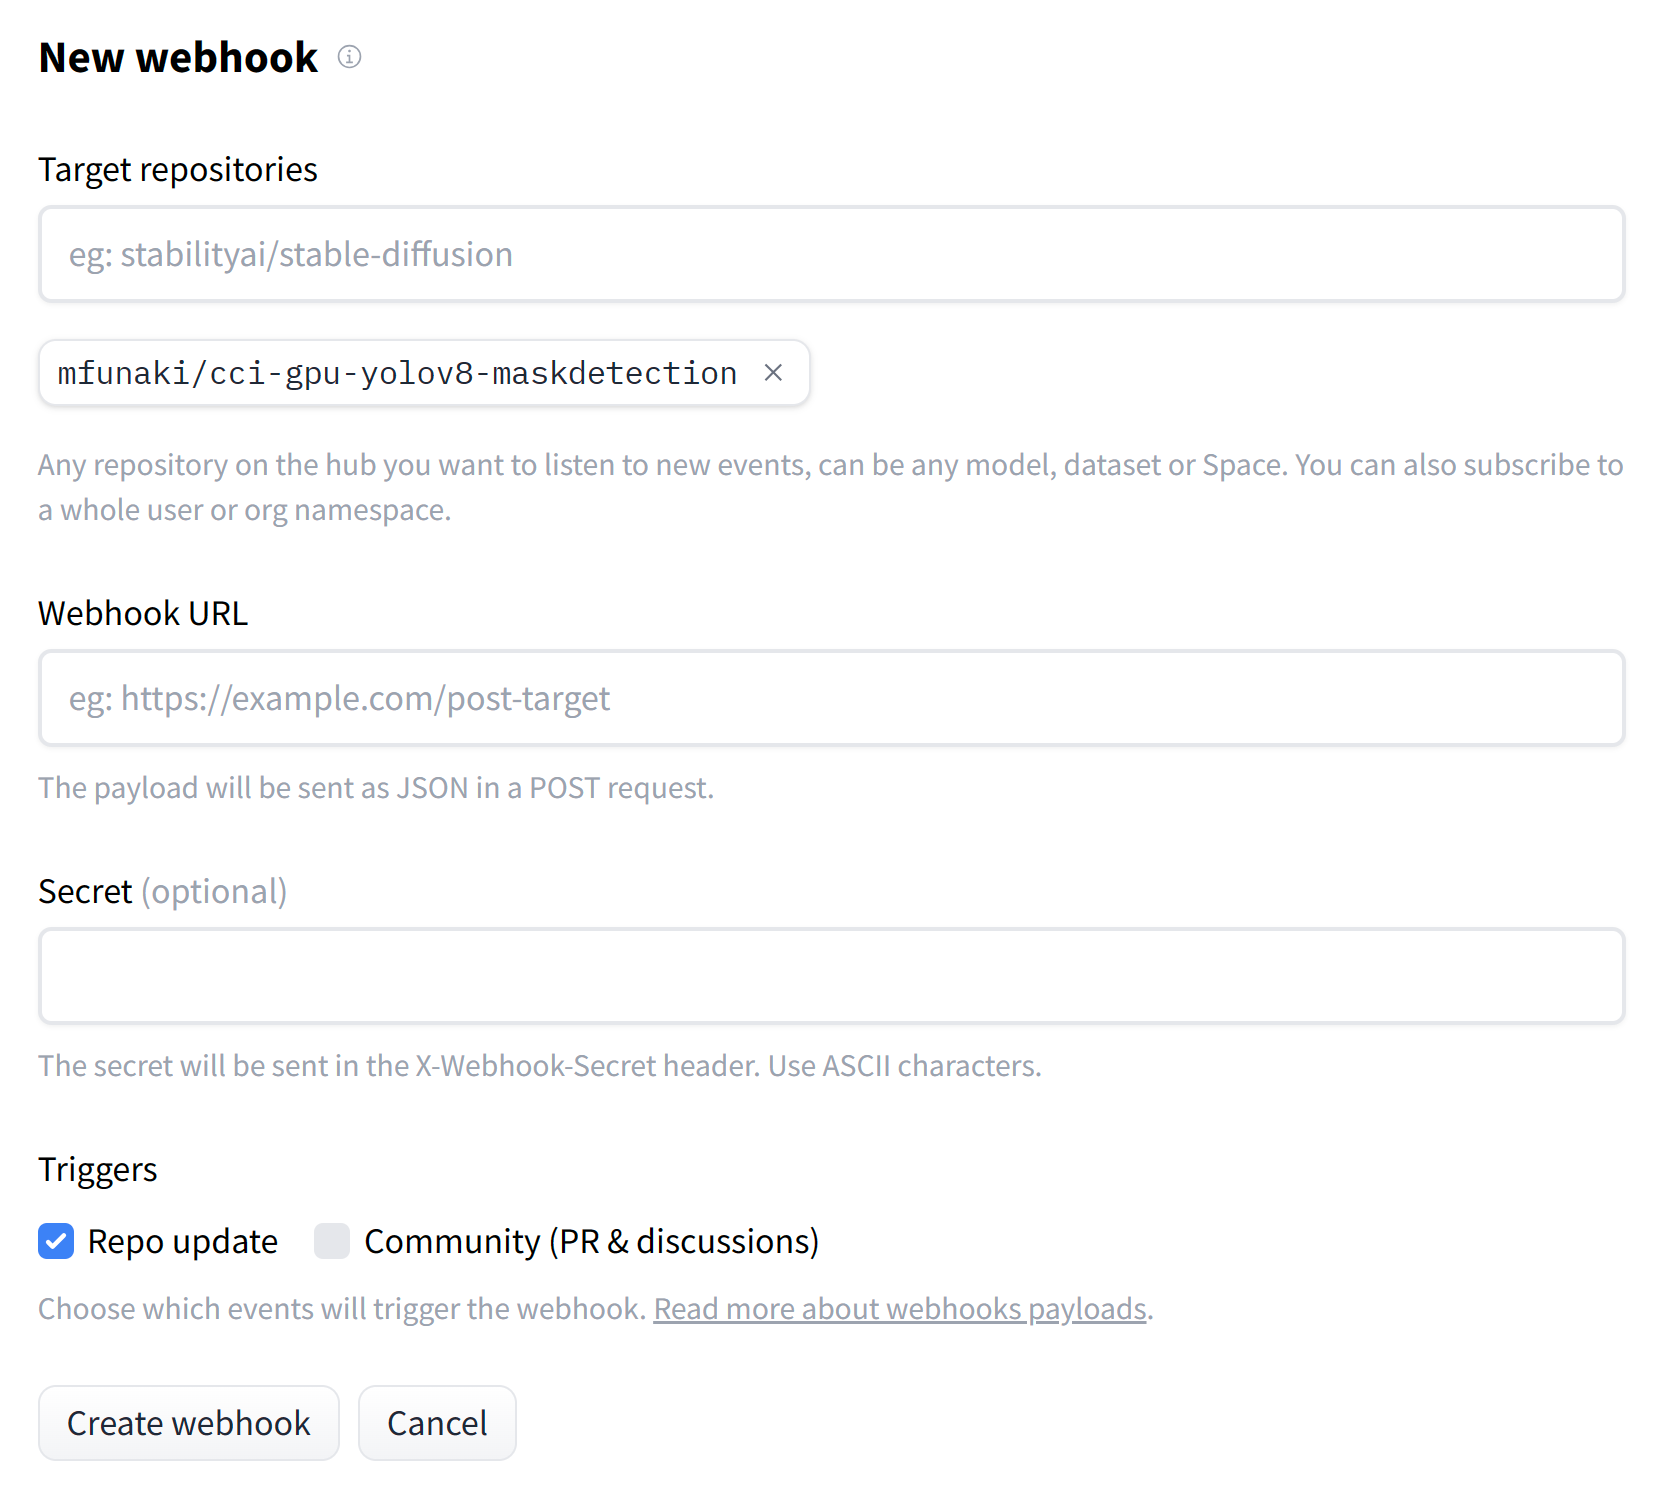
Select your model repository, fill in your CircleCI webhook URL and secret, and that’s it! Now any time you deploy an update to Hugging Face, your webhook will trigger a new run of your testing workflow in CircleCI. By eliminating the need for manual pipeline triggers, you can achieve faster fastback loops and more efficient model delivery.
Conclusion
As software and software delivery practices continue to evolve, the old repo-centric model is no longer sufficient. To keep pace, your CI/CD platform should be responsive to the changes happening all throughout your software ecosystem.
With CircleCI’s support for inbound webhooks, you can trigger pipelines from anywhere, giving you better flexibility and control in managing your CI/CD pipelines. To try them out, sign up for a free account and start creating custom triggers based on the events that are most relevant to your development and deployment process.
Open preview for inbound webhooks begins on Friday, November 17, and will be available to users who authenticate via GitHub apps.