Phase 2 - Configure object storage
On This Page
- 1. Create buckets in MinIO
- a. Create a circleci-data bucket.
- b. Configure the circleci-data bucket.
- 2. Copy the CircleCI build agent
- a. Extract the pinned agent version from the Helm chart
- b. Create a release.txt file and copy to MinIO
- c. Retrieve the pinned agent binary
- d. Create a release directory in the circleci-data bucket
- e. Upload the checksums.txt file to the newly created directory.
- f. Create two new subdirectories in the release directory
- g. Copy the downloaded circleci-agent file
- Next steps
1. Create buckets in MinIO
CircleCI server supports MinIO for air-gapped object storage. MinIO is used in the air-gapped environment as a replacement for cloud-based object storage, such as GCP GCS or AWS S3. With an air-gapped MinIO instance installed, complete the steps outlined in the next sections.

a. Create a circleci-data bucket.
Create a new bucket in MinIO named circleci-data.
This bucket can be given a different name, but references to it will need to be updated in the Helm values.yaml file. |

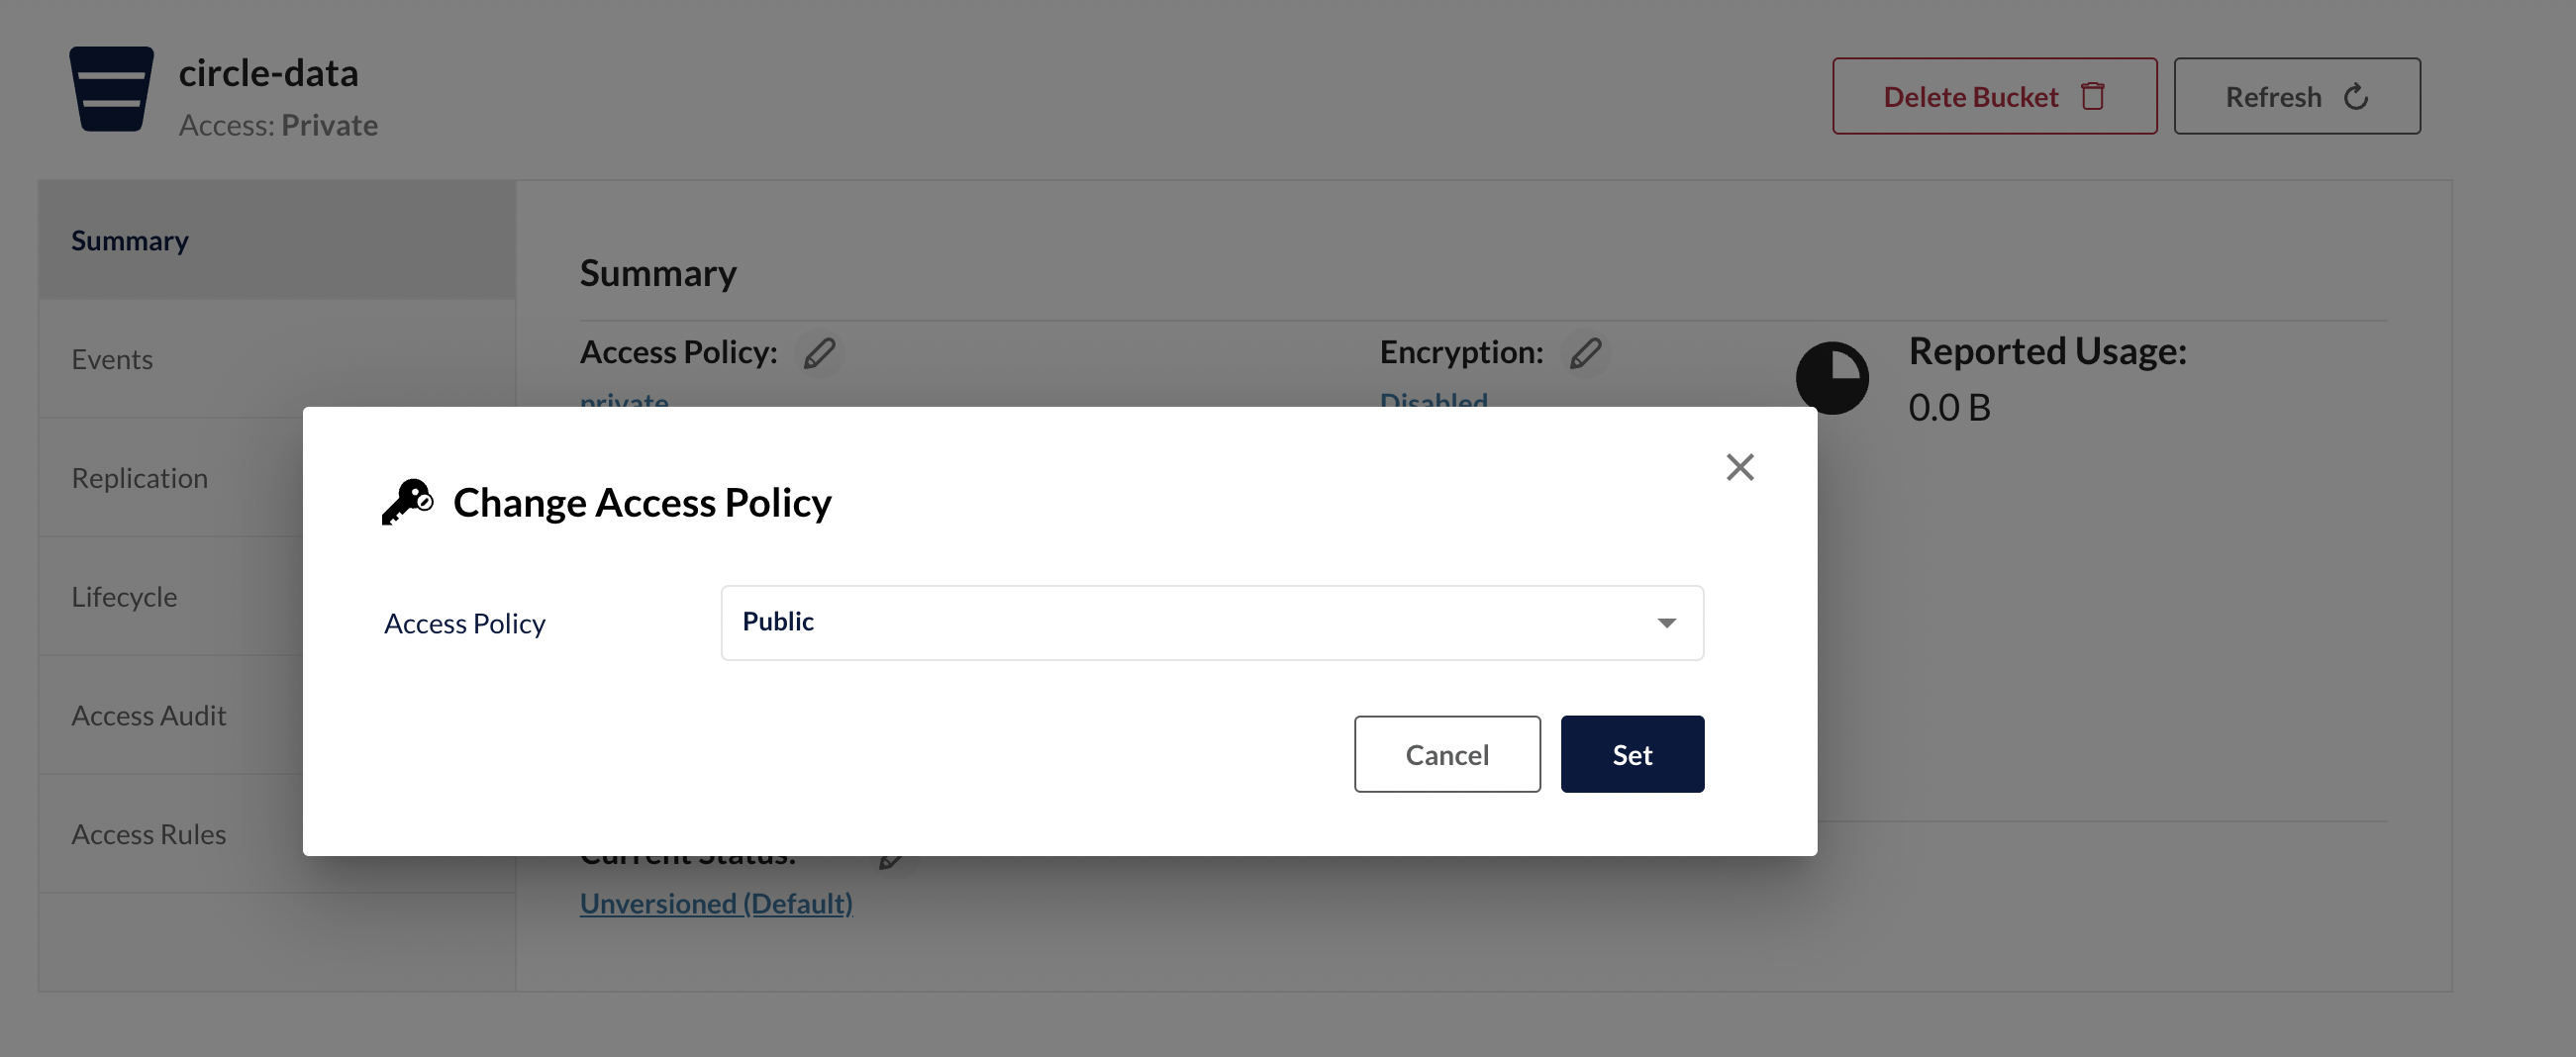
b. Configure the circleci-data bucket.
In the settings for the circleci-data bucket, change the access policy to public.
2. Copy the CircleCI build agent
Follow the steps in this section to copy the pinned CircleCI build agent into MinIO within your air-gapped environment.
a. Extract the pinned agent version from the Helm chart
Fetch the circleci-server Helm chart and extract the pinned agent version from it. Set this to the environment variable $CIRCLE_AGENT_VERSION so that it can be referenced in later steps.
# Fetch the Helm chart for inspection. Replace `<version>` with the full version of CircleCI server.
helm fetch oci://cciserver.azurecr.io/circleci-server --version <version> --untar

# Set `$CIRCLE_AGENT_VERSION` to the value of `circleci/picard` in `images.yaml`.
export CIRCLE_AGENT_VERSION=$(grep 'circleci/picard:' ./circleci-server/images.yaml | cut -d' ' -f2)

# Verify `$CIRCLE_AGENT_VERSION` is set. The value should be similar in form to `1.0.217358-0b5336a7`.
echo $CIRCLE_AGENT_VERSION
b. Create a release.txt file and copy to MinIO
Create a release.txt file with the value of $CIRCLE_AGENT_VERSION. Copy this file to your air-gapped environment and place it in the root of the circleci-data bucket in MinIO.
c. Retrieve the pinned agent binary
Retrieve and download the pinned circleci-agent release and checksums from the CircleCI binary releases public bucket.
# Download circleci-agent
curl -O --compressed https://circleci-binary-releases.s3.amazonaws.com/circleci-agent/$CIRCLE_AGENT_VERSION/linux/amd64/circleci-agent

# Download checksums
curl -O https://circleci-binary-releases.s3.amazonaws.com/circleci-agent/$CIRCLE_AGENT_VERSION/checksums.txt
d. Create a release directory in the circleci-data bucket
Using the version specified by release.txt, create a new directory in the root of the circleci-data bucket with the name of that release. In the following examples, a directory is created at the root of circleci-data in MinIO with the name $CIRCLE_AGENT_VERSION. Note $CIRCLE_AGENT_VERSION is not a literal string, but the value of the environment variable we set earlier.
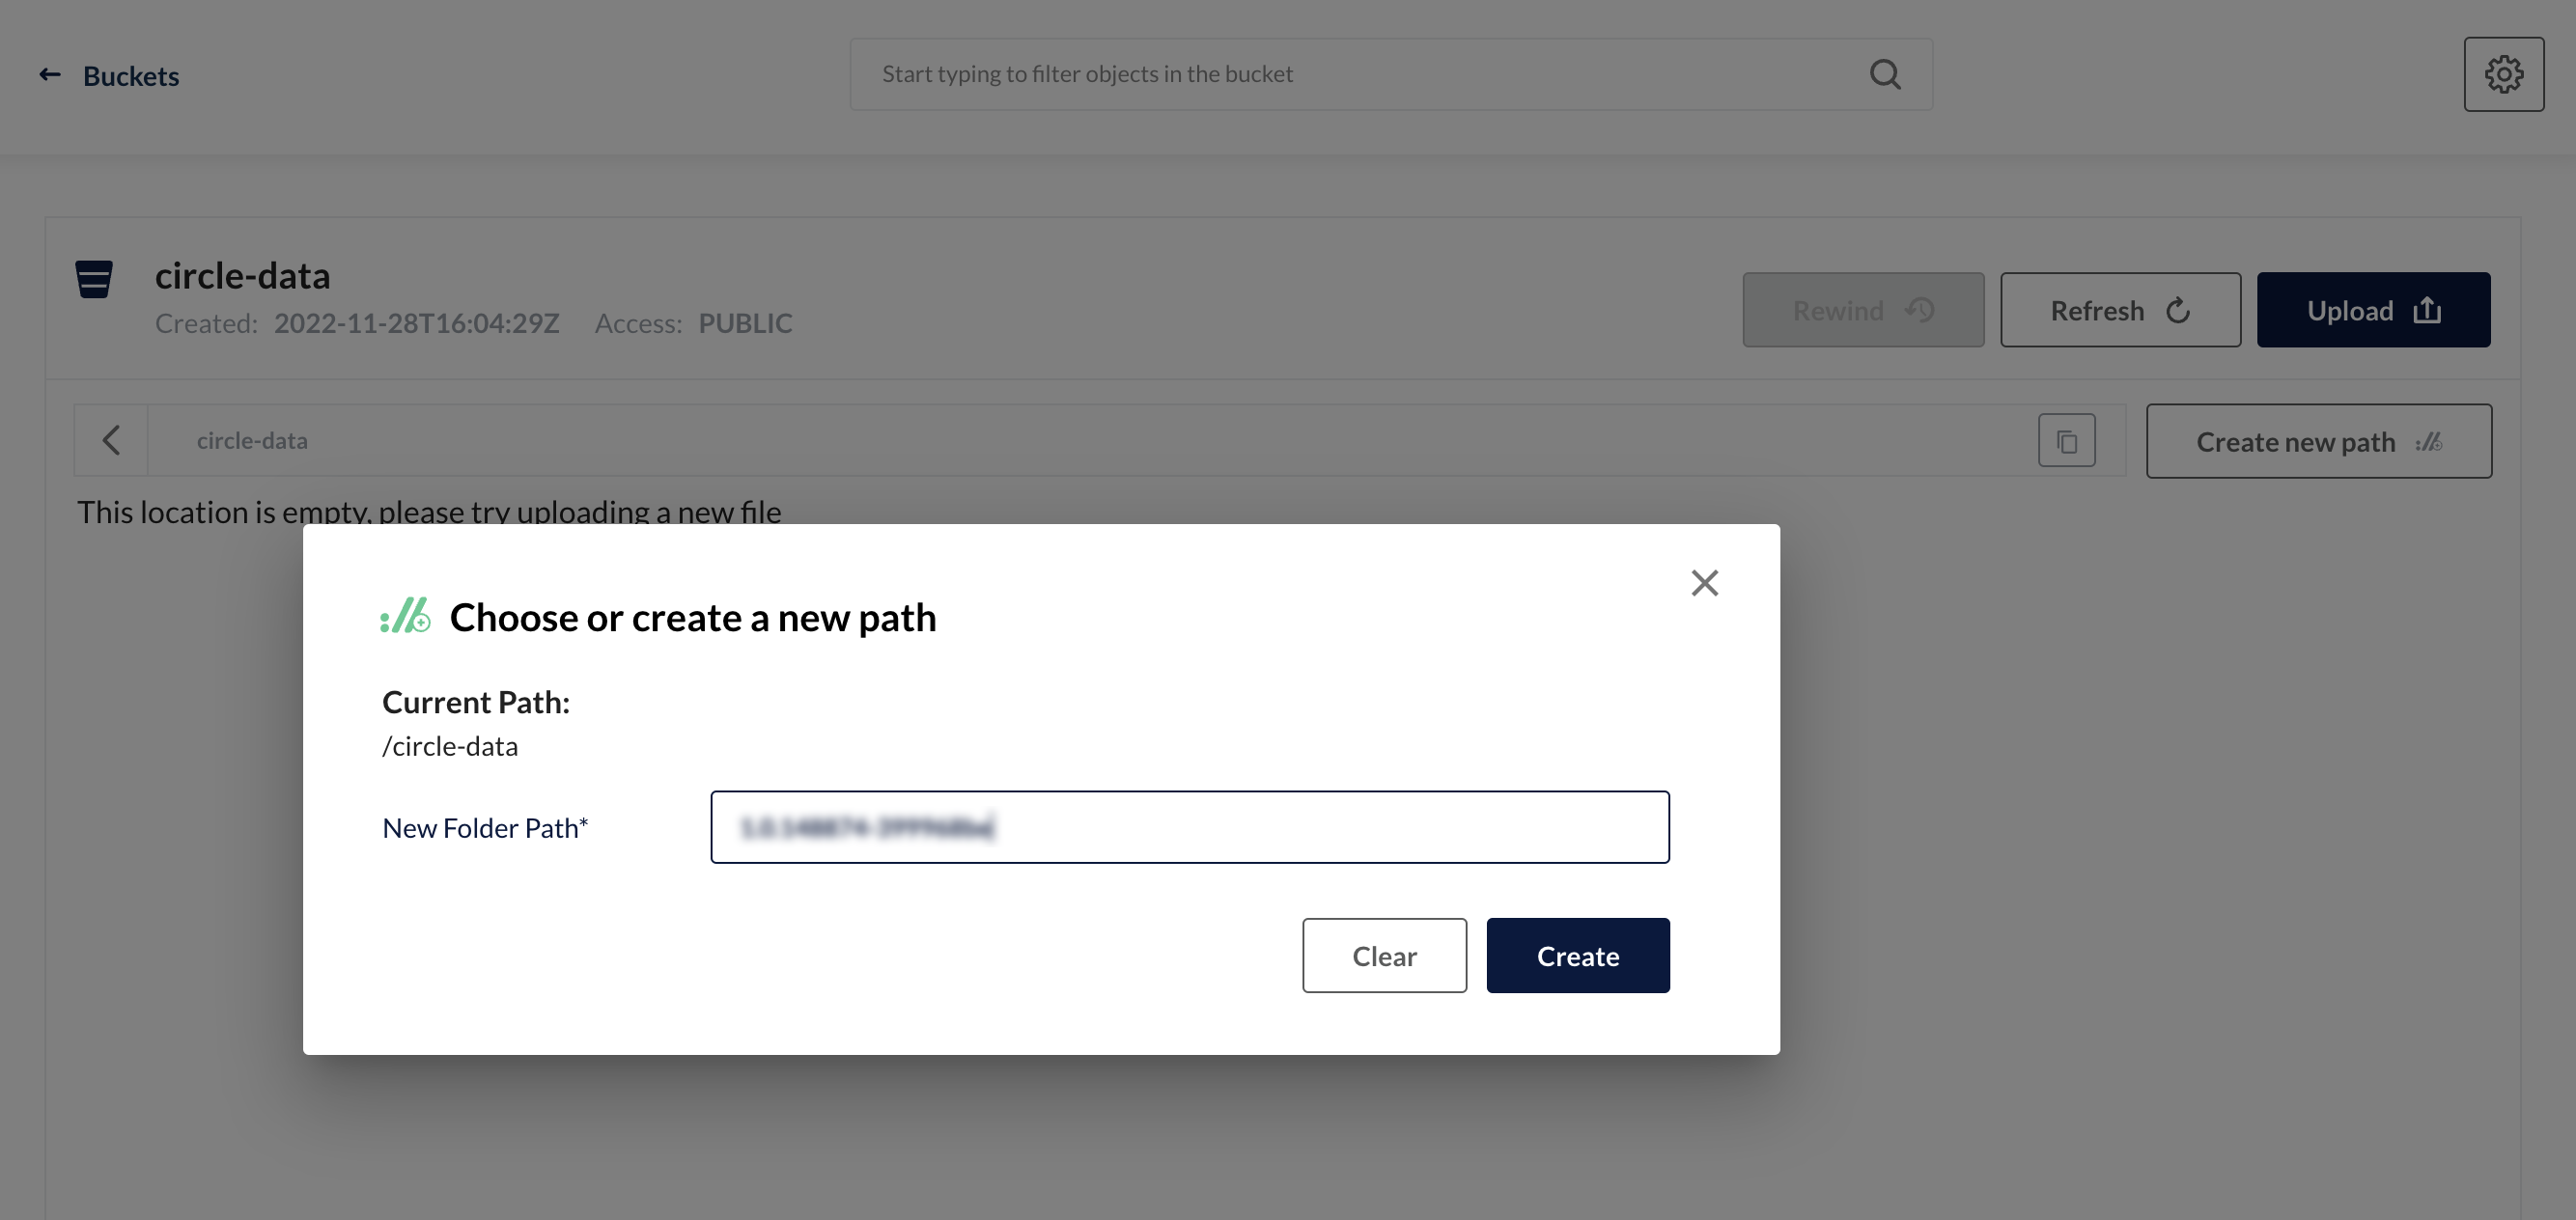
e. Upload the checksums.txt file to the newly created directory.
Copy the downloaded checksums.txt file (step c) to your virtual environment, and place it in MinIO nested under the newly created release directory (step d).
# The structure of the directory should now look like this.
# Note `$CIRCLE_AGENT_VERSION` is not a literal string, but the value of the environment variable we set earlier.
$CIRCLE_AGENT_VERSION/
└── checksums.txt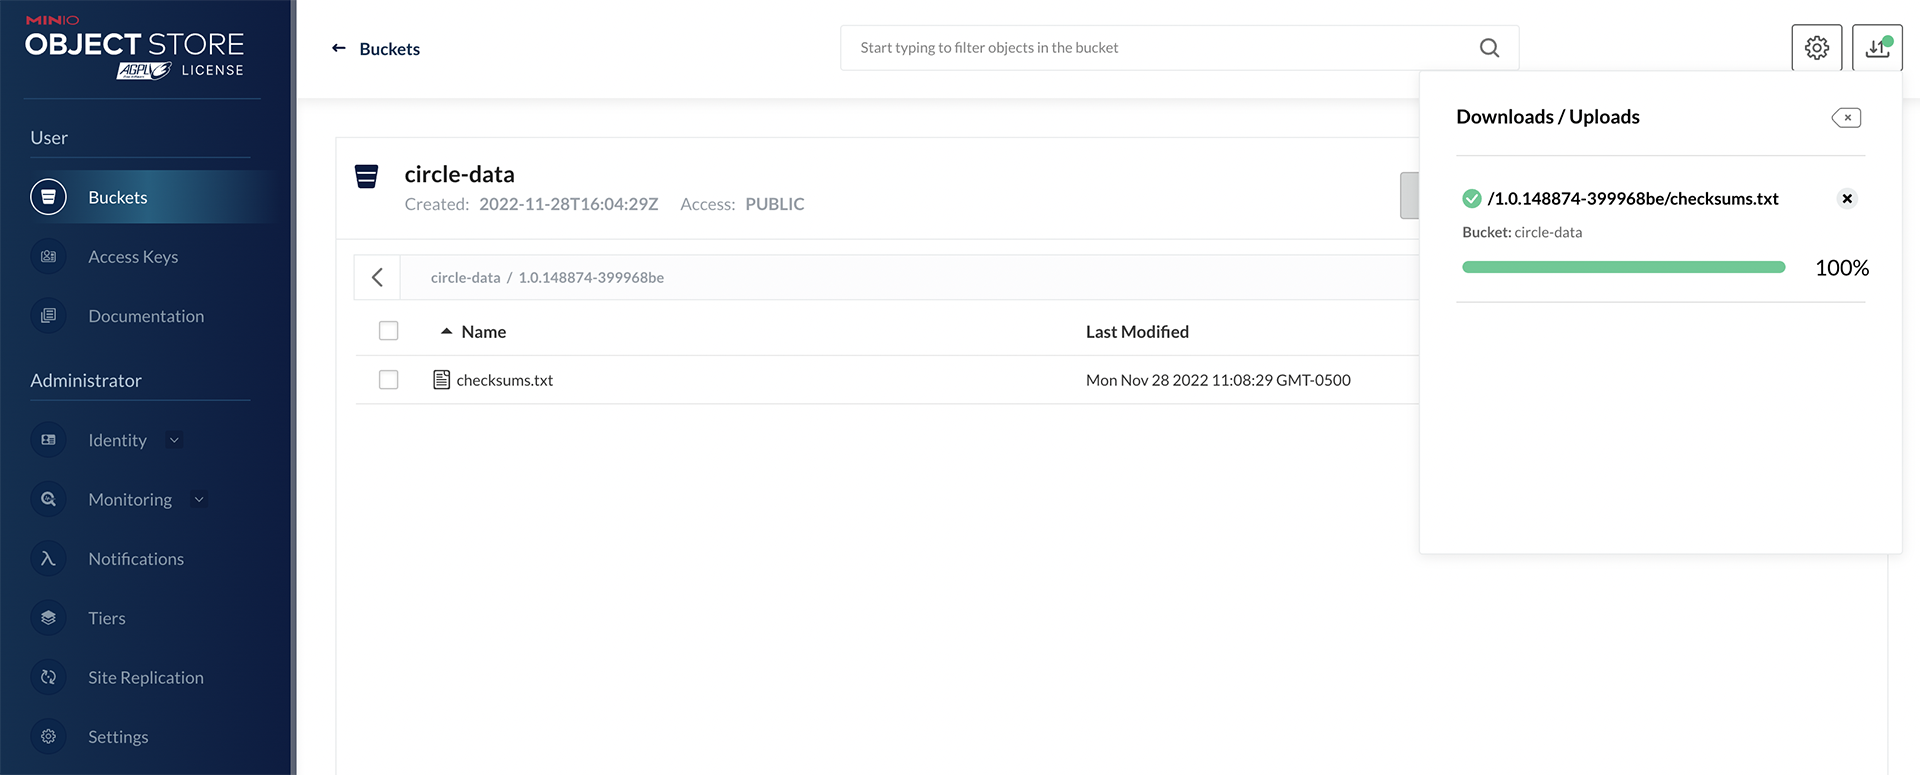
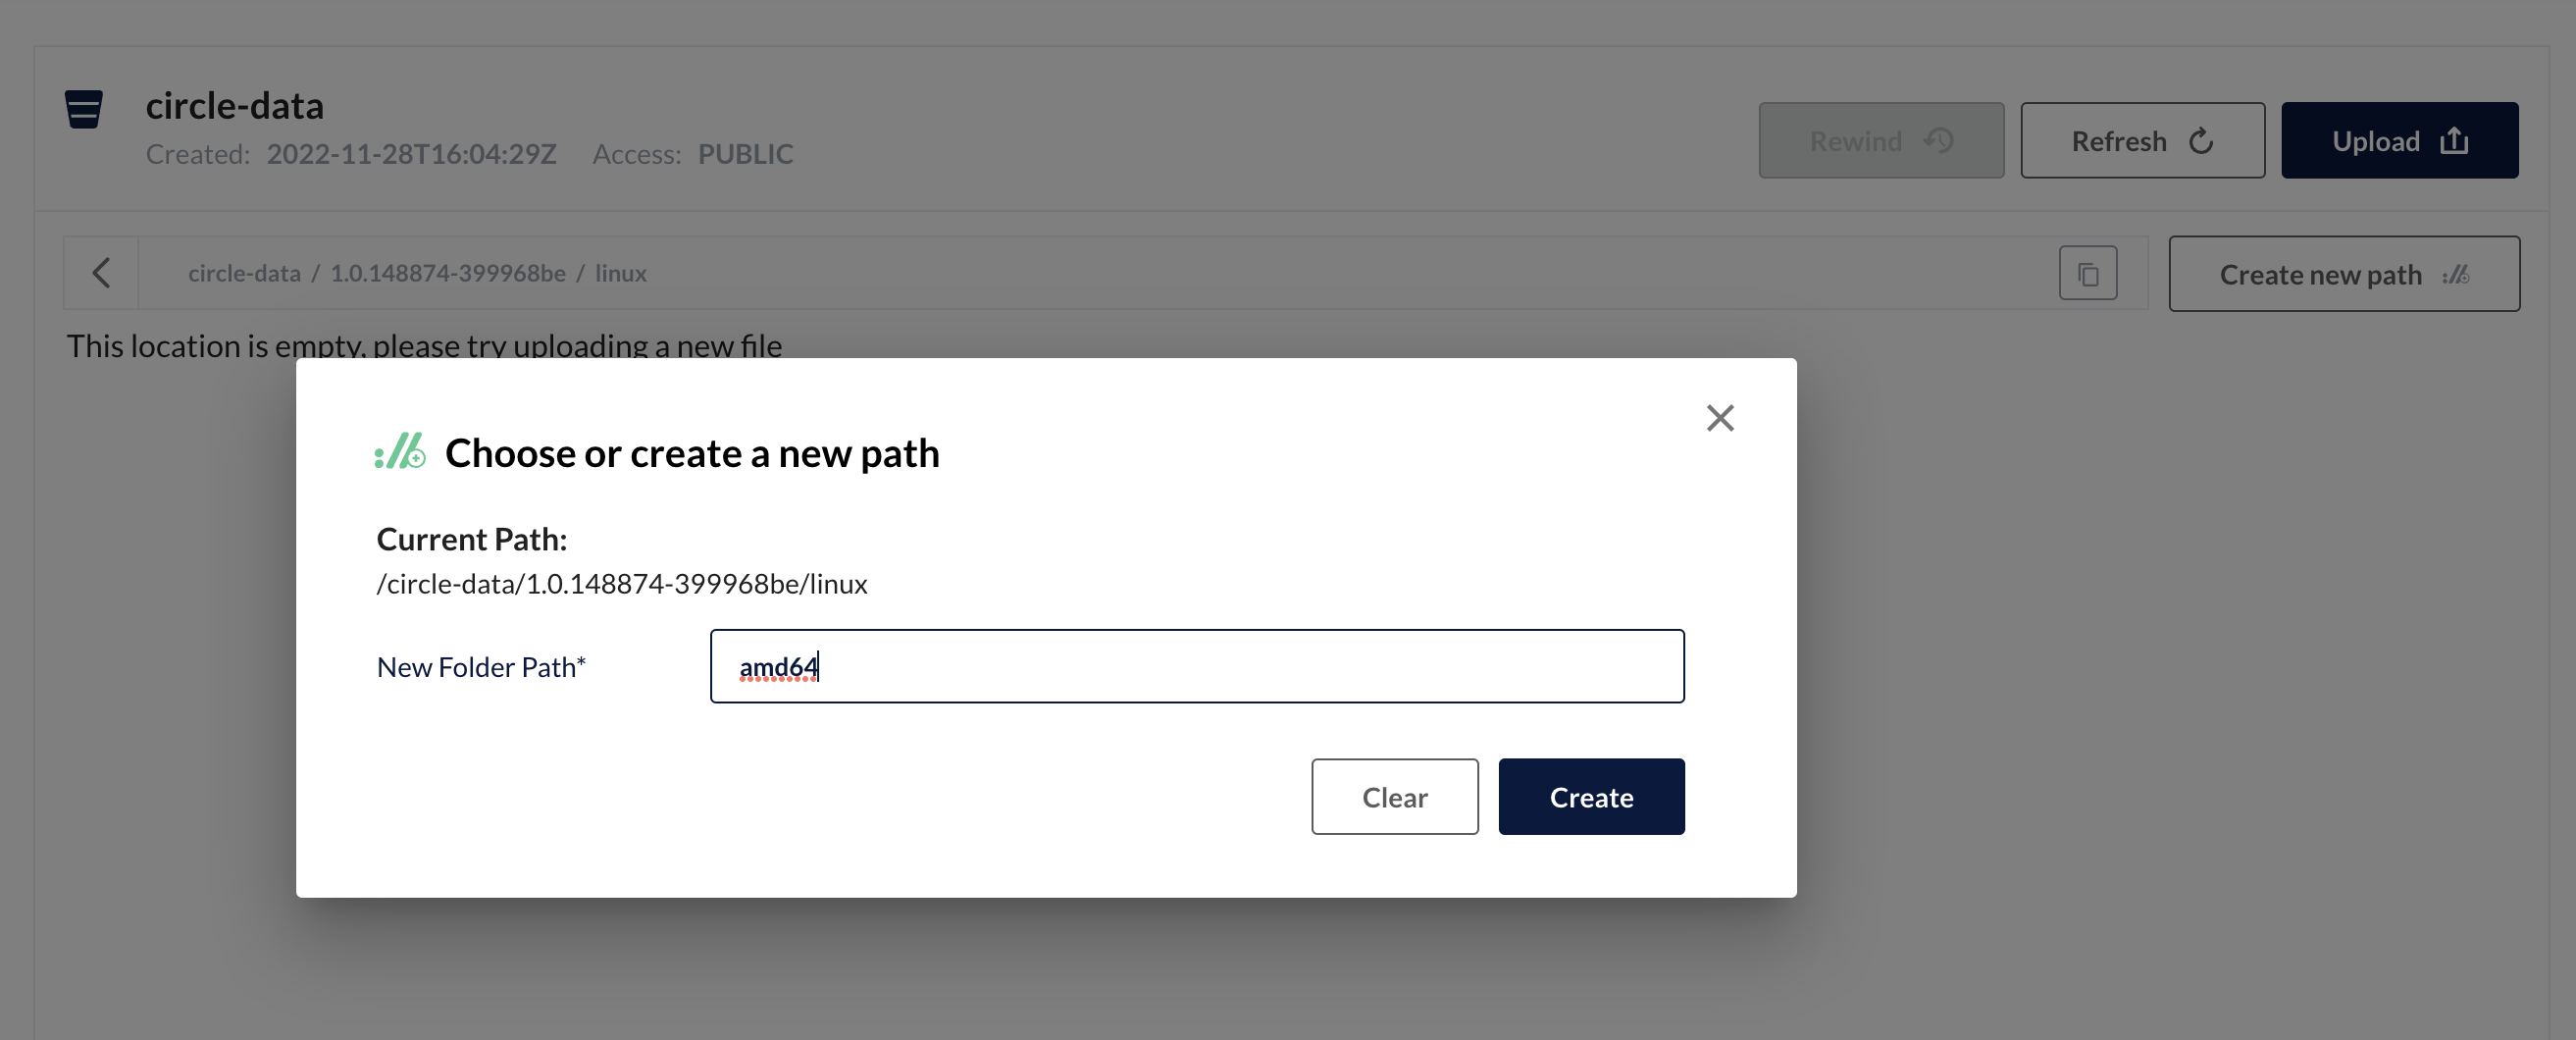
f. Create two new subdirectories in the release directory
Within the release directory (step d), create two new nested subdirectories, first linux, and then within it, amd64.
# The structure of the directory of the bucket should look like this:
$CIRCLE_AGENT_VERSION/
├── checksums.txt
└── linux/
    └── amd64/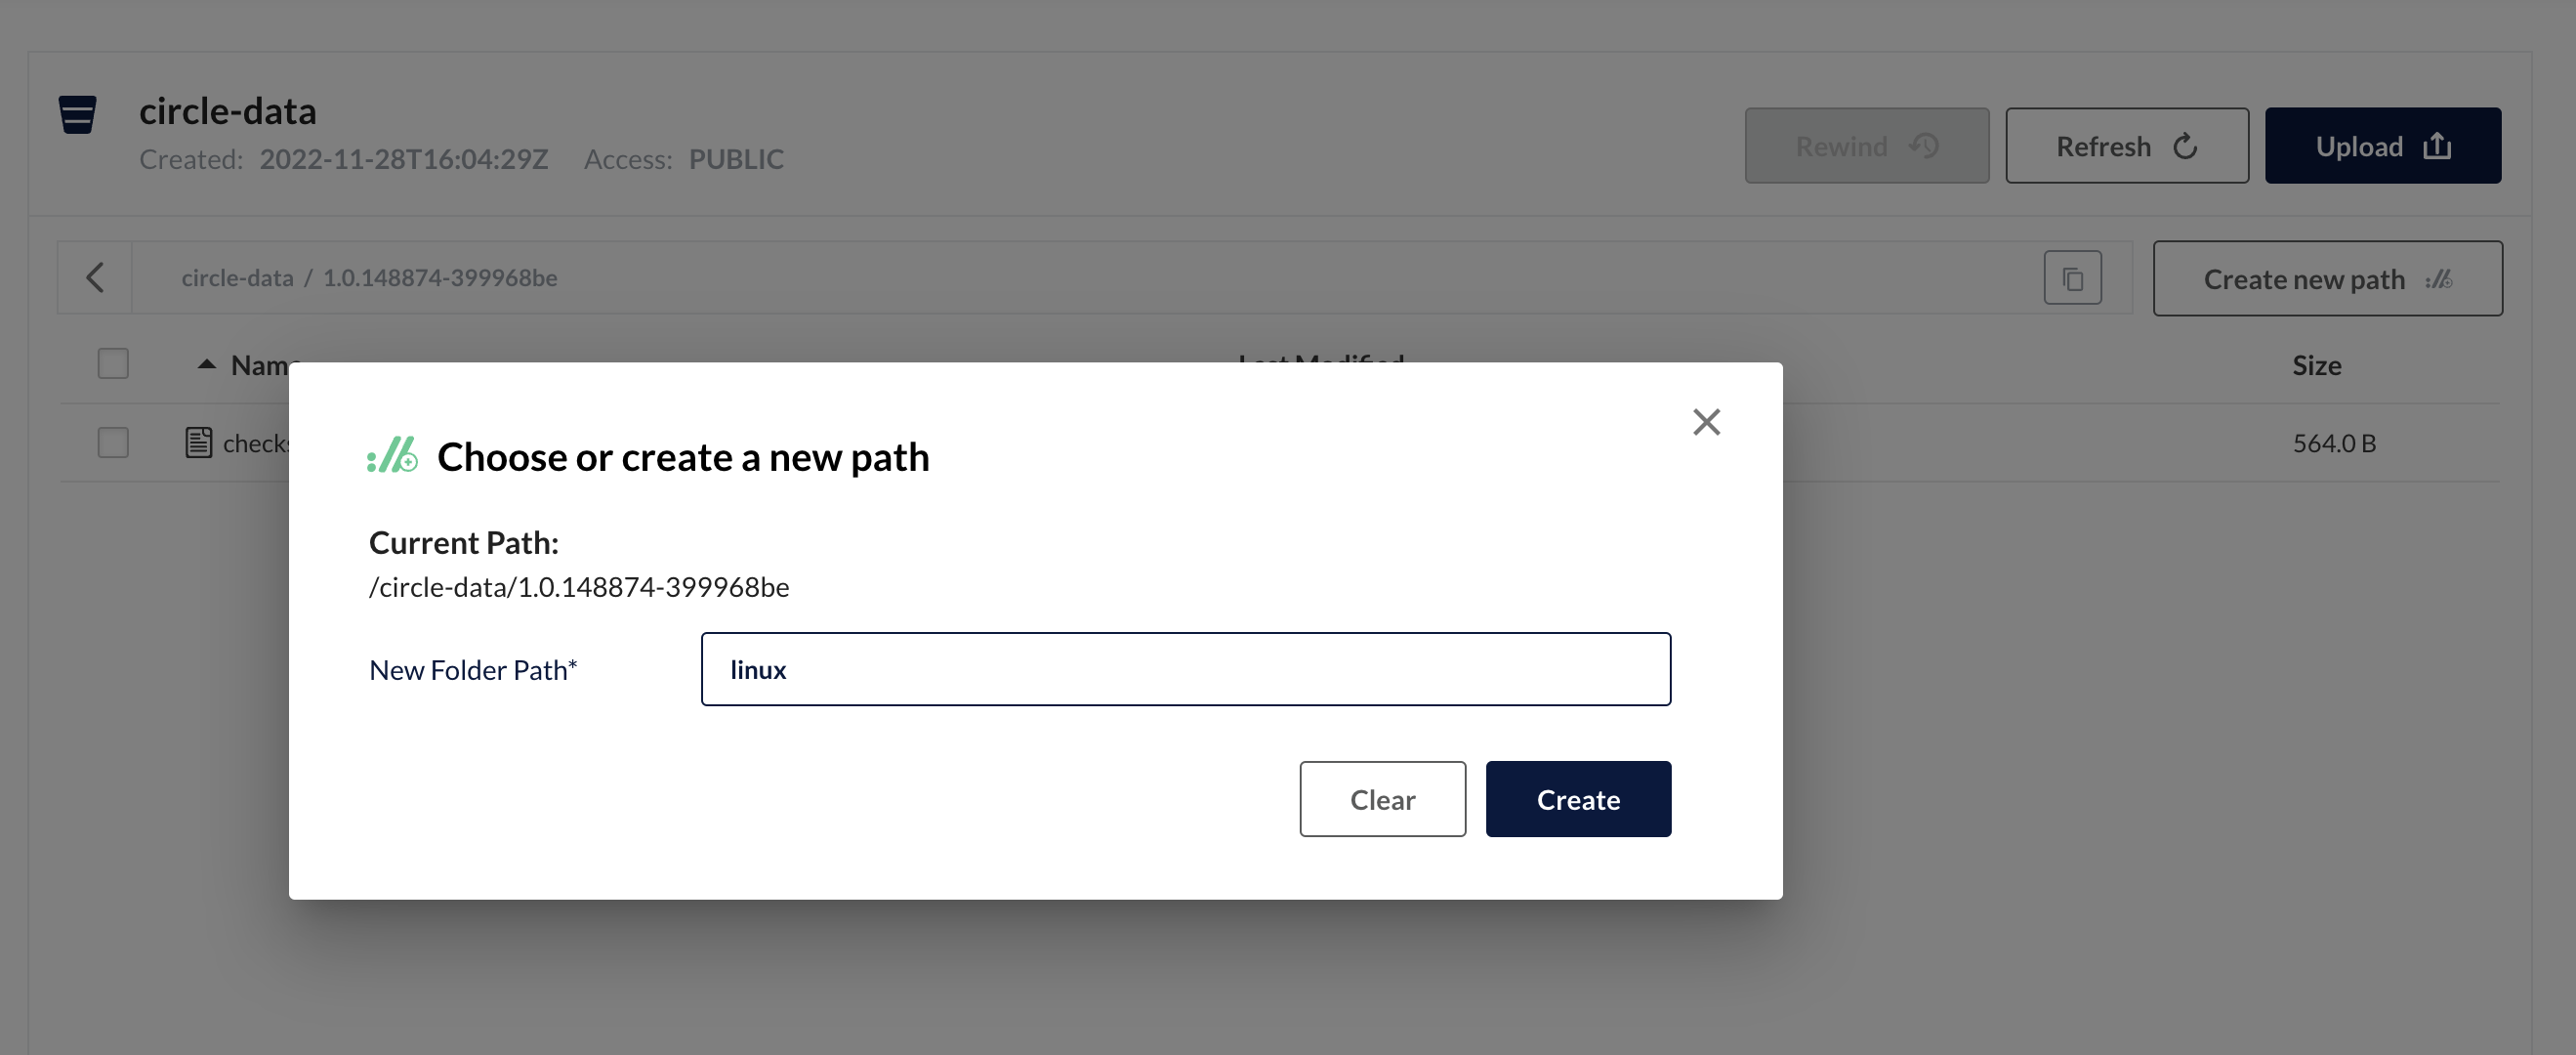
g. Copy the downloaded circleci-agent file
Copy the downloaded circleci-agent file (step c) to your virtual environment, and place it in the amd64 directory you just created.
# The final structure of the bucket should look similar to this:
$CIRCLE_AGENT_VERSION/
├── checksums.txt
└── linux/
    └── amd64/
        └── circleci-agent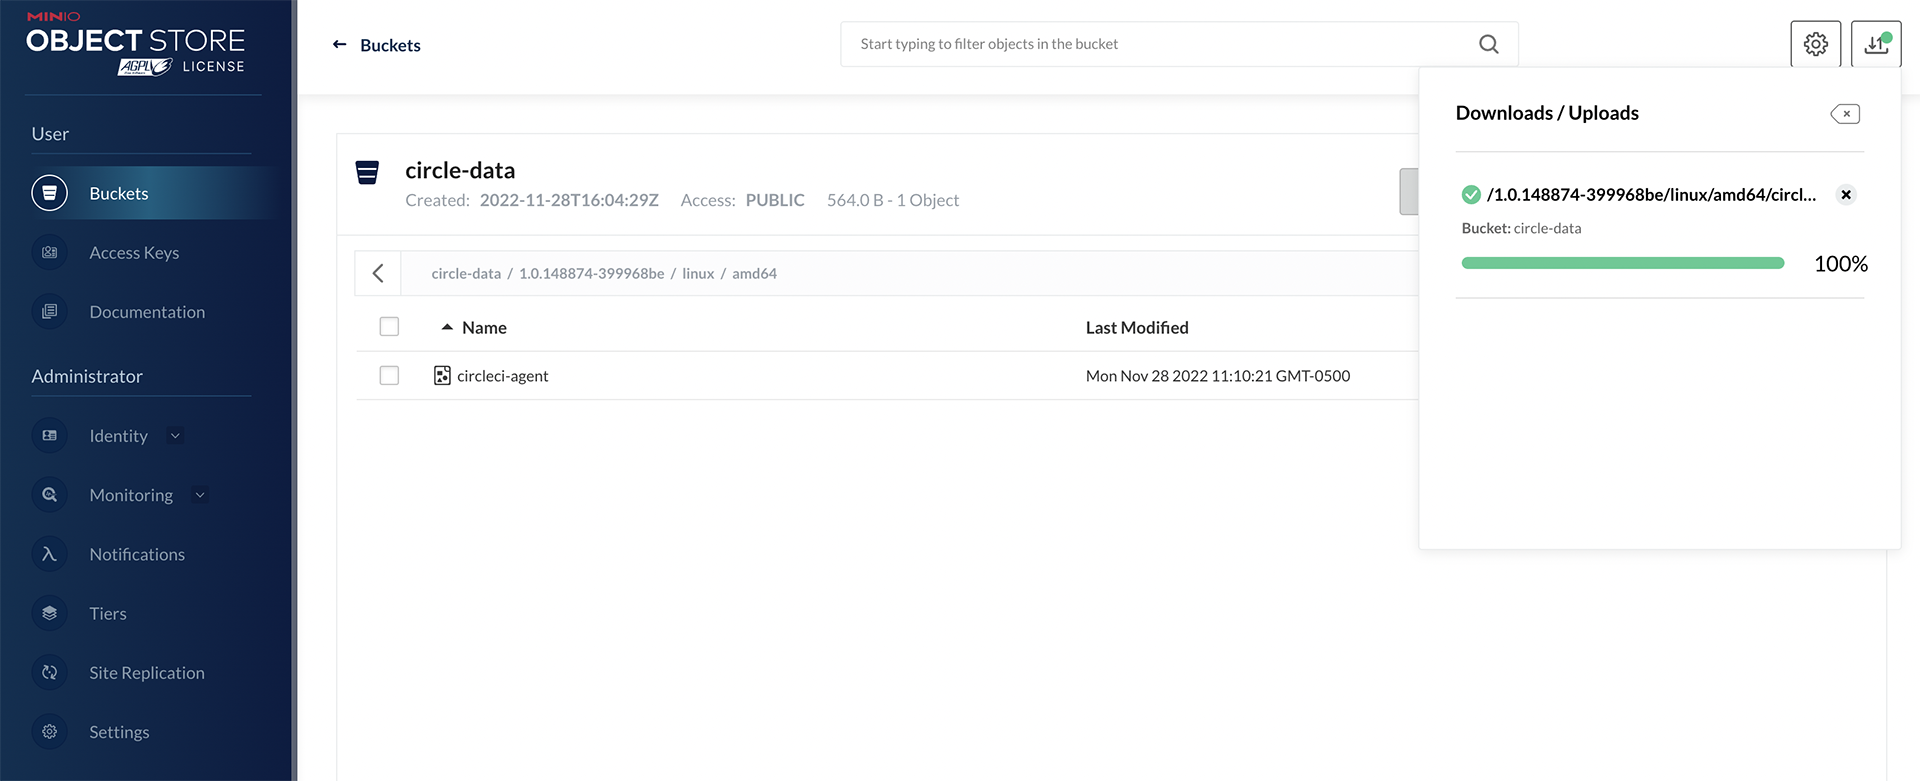
Next steps
Once the steps on this page are complete, go to the Phase 3 - Install CircleCI server guide.