
Automating the testing and deployment of a new web application and the release of feature updates can improve the productivity and efficiency of your development team. If your team has begun a continuous integration practice, they may be eager to add to the benefits by extending the pipeline even further. Deployment is the next logical step. Automation can minimize and even eliminate repeated manual deployments, reducing the risk of human error during this critical part of the development process. A combined CI/CD practice is a worthy goal, but the variety of frameworks and languages used by developers can make continuous delivery a special challenge.
Microsoft Azure Web Apps is a platform as a service (PaaS) that lets you publish Web apps running on multiple frameworks and written in different programming languages. You can then use a CI/CD tool to build, test, and deploy those web applications for a faster release cycle, more efficient development, and higher-quality code.
In this tutorial, I will show you how to set up a continuous deployment pipeline to deploy an ASP.NET Core application to an Azure Web App service. We will use the Azure CLI orb for authentication and to directly deploy our application.
Prerequisites
To get the most from this tutorial, you will need:
- .Net Core runtime installed on your computer Preferably version 6
- A GitHub account
- A CircleCI account
- An Azure account
- A basic knowledge of building applications with ASP.NET Core framework
Our tutorials are platform-agnostic, but use CircleCI as an example. If you don’t have a CircleCI account, sign up for a free one here.
Cloning the demo project
Your first step is to use Git to clone an API built with ASP.NET Core. Run this command:
git clone https://github.com/CIRCLECI-GWP/deploy-asp-net-core-azure.git
Next, go to the root of the new folder created by the previous command. Run the application:
cd deploy-asp-net-core-azure

dotnet watch run
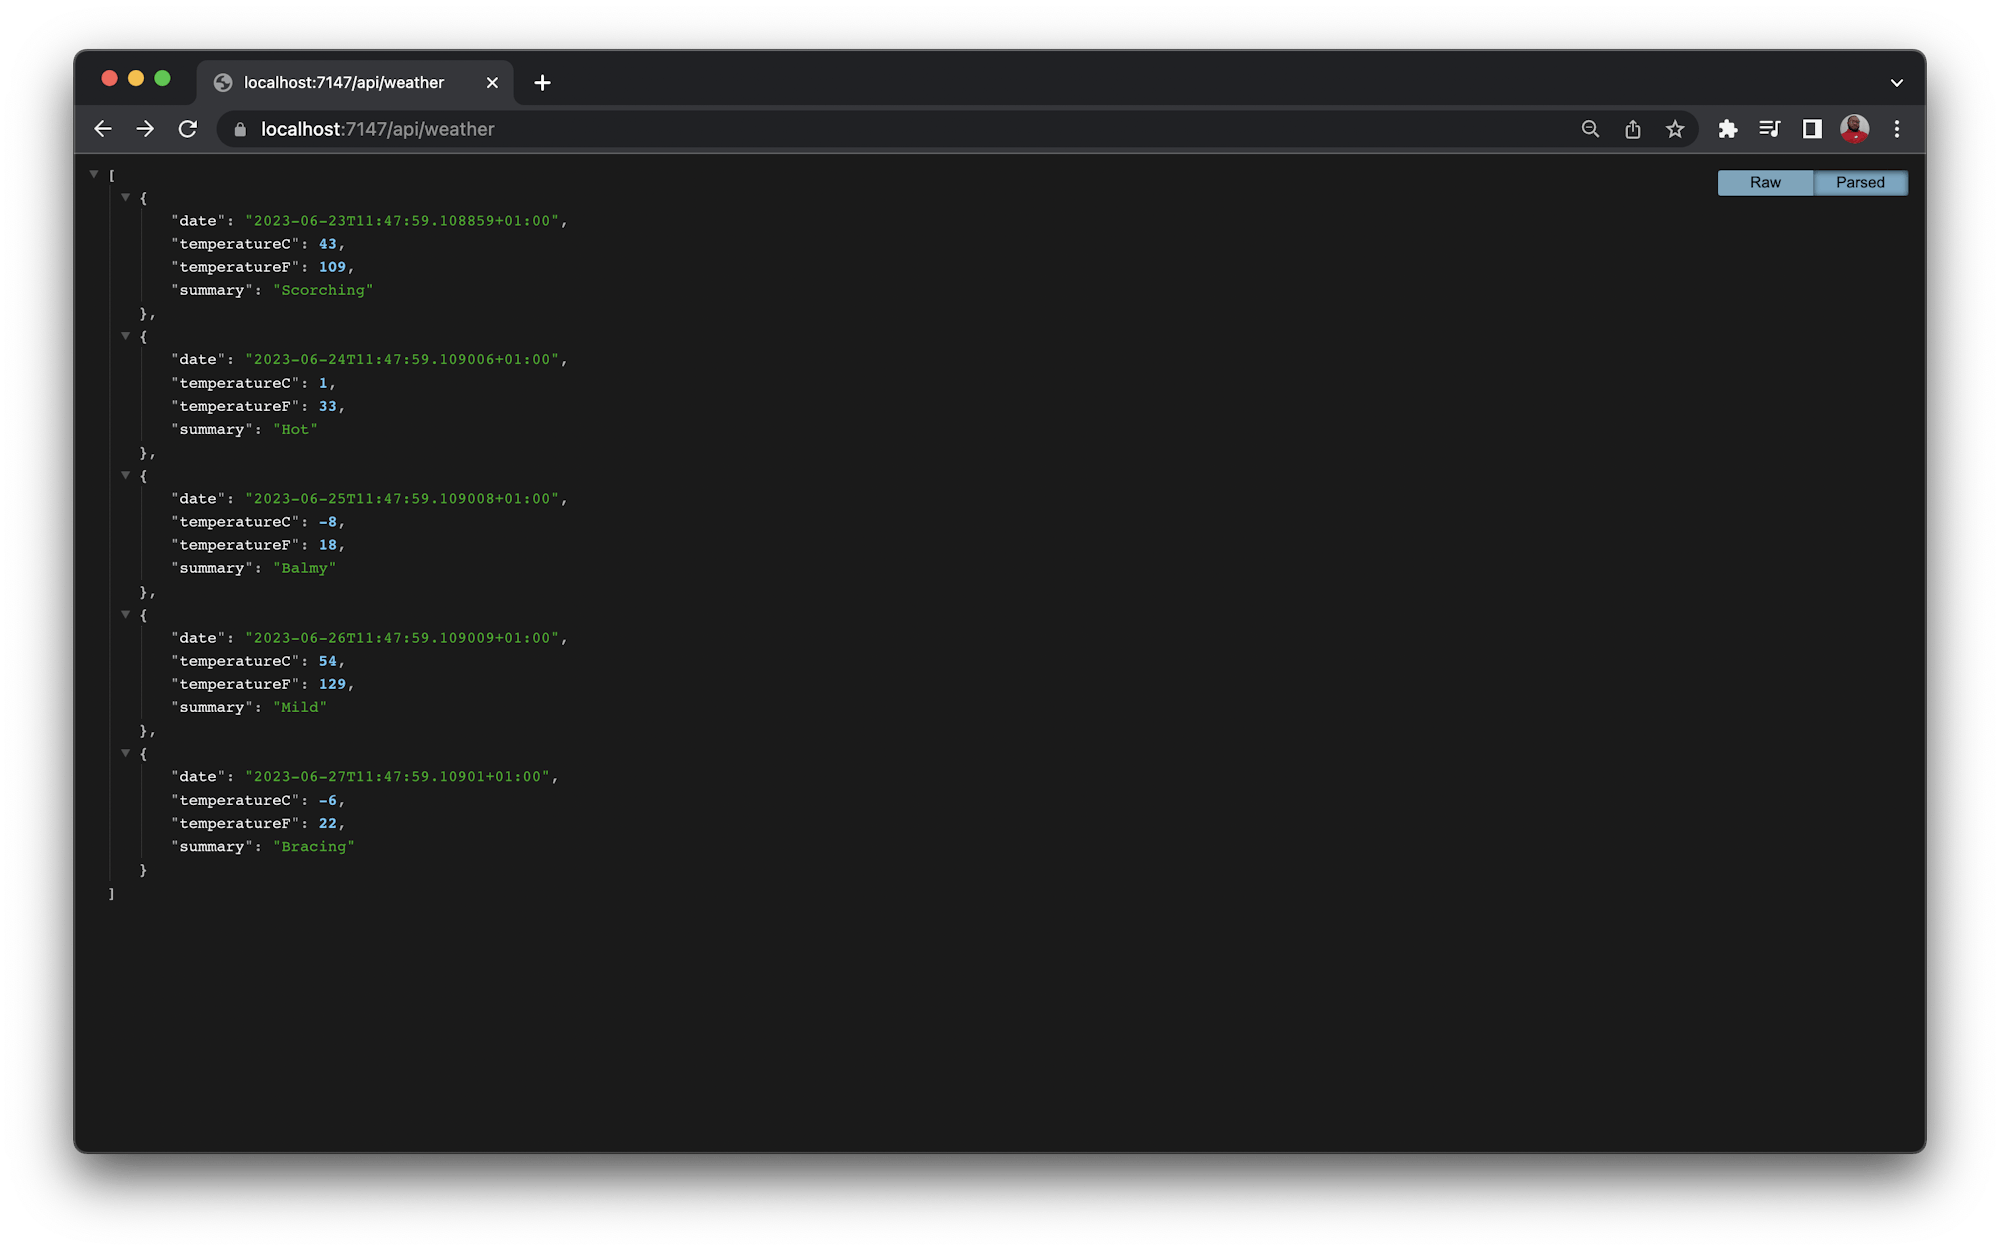
The application will be live on https://localhost:7147. Go to this endpoint: https://localhost:7147/api/weather to review the JSON response.
Reviewing the deployment strategy
Now that you have the application running locally, it is a good idea to review your deployment strategy. There is no need for any project code changes other than including the configuration file to set up deployment for CircleCI.
In chronological order, we will:
- Create an Azure web app
- Create a configuration file to build the application on CircleCI
- Push the project to a repository on GitHub
- Set up the project on CircleCI
- Provide Azure credentials and authenticate using the Azure CLI orb
- Use Git to set up deployment URL
- Deploy our project to Azure Web App
Creating an Azure web app
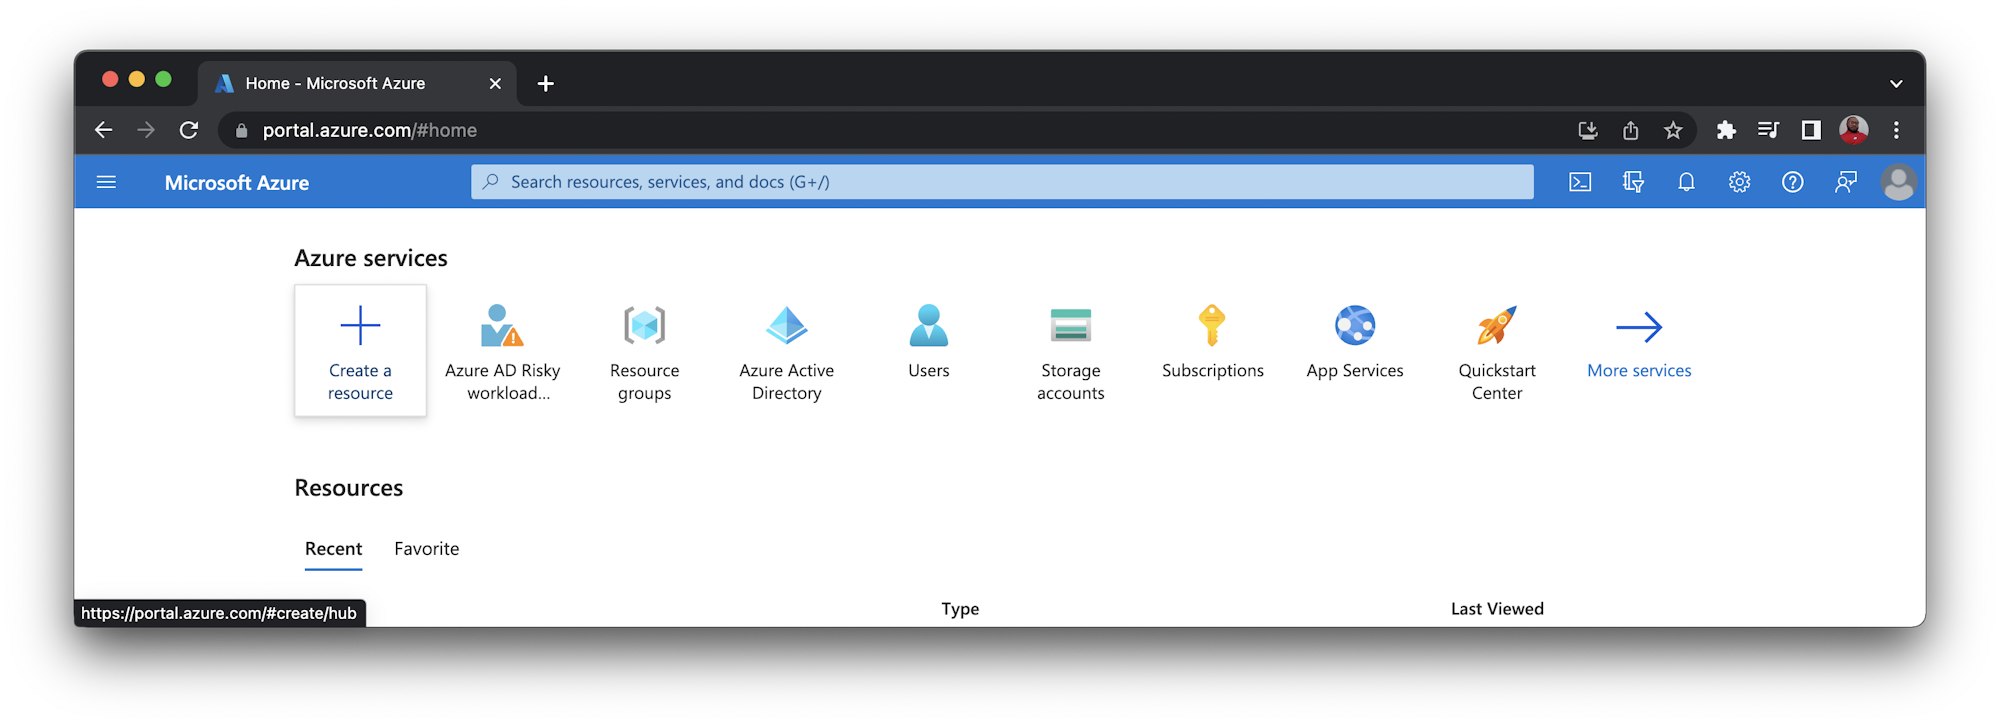
If you do not have one already, create an account on Azure. Then go to your Azure portal dashboard and click Create a resource to create a new service instance.
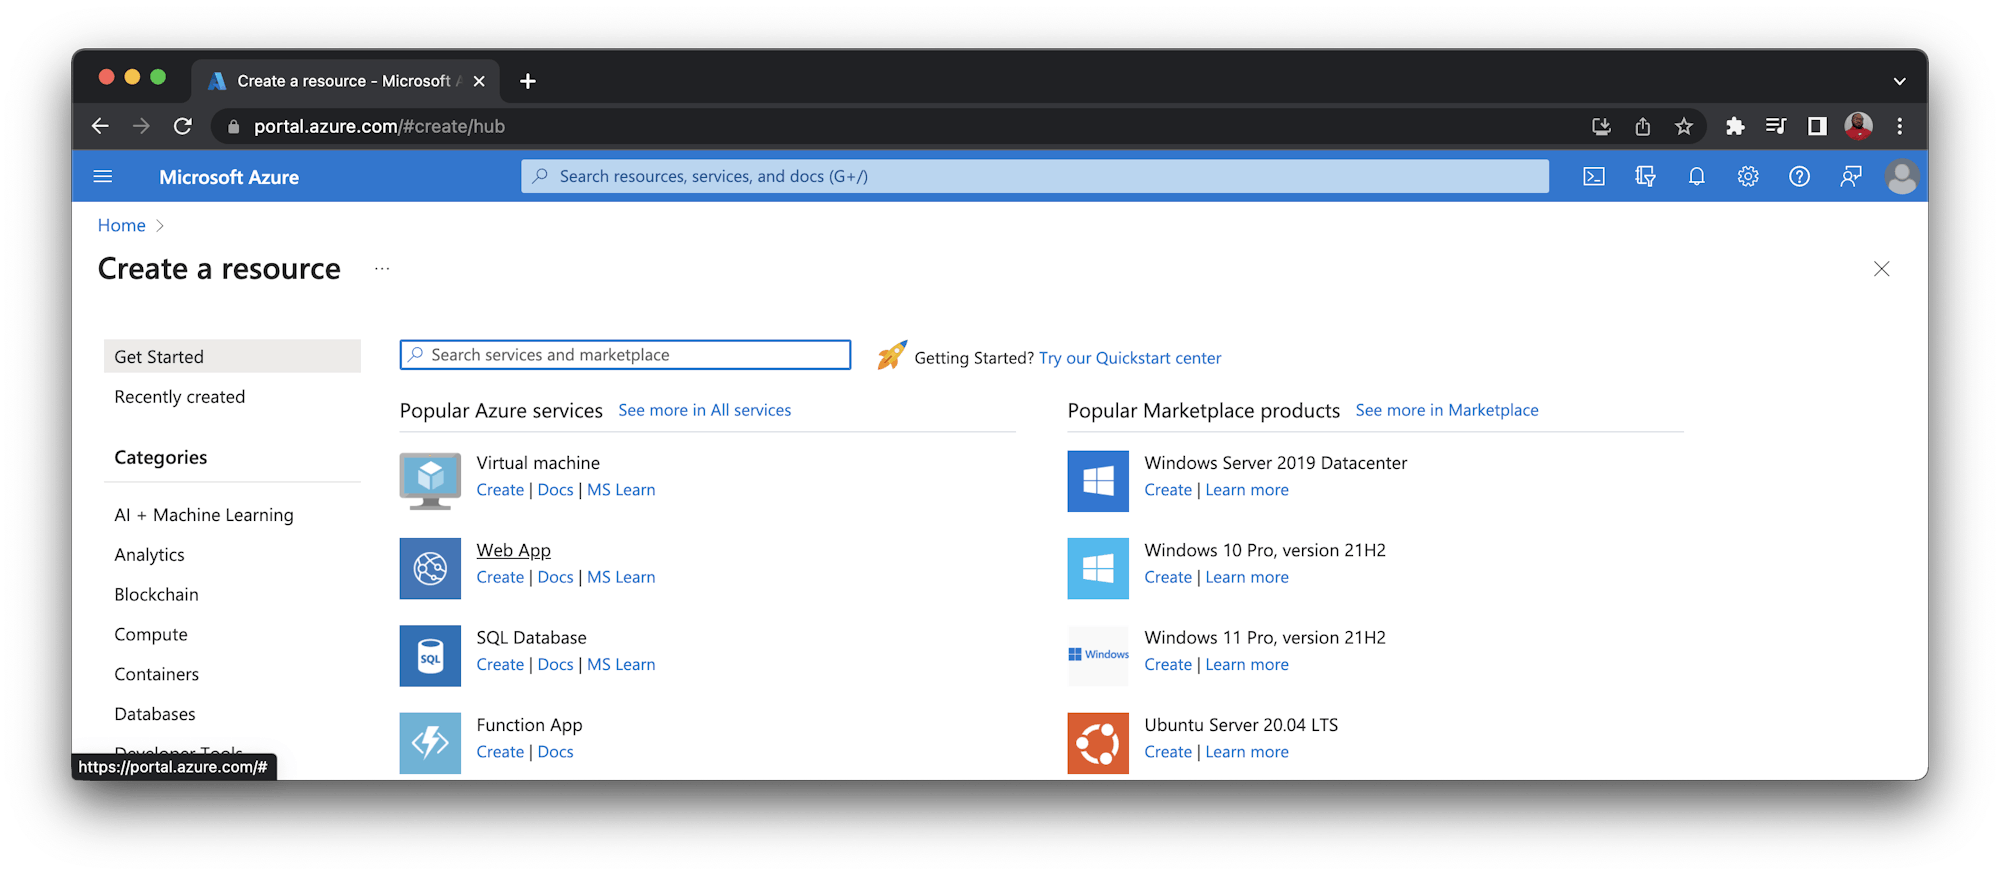
Next, click Web App from the Popular list.
You will be redirected to the Create Web App page. Select an Azure subscription and a resource group. If you haven’t yet, create a new resource group.
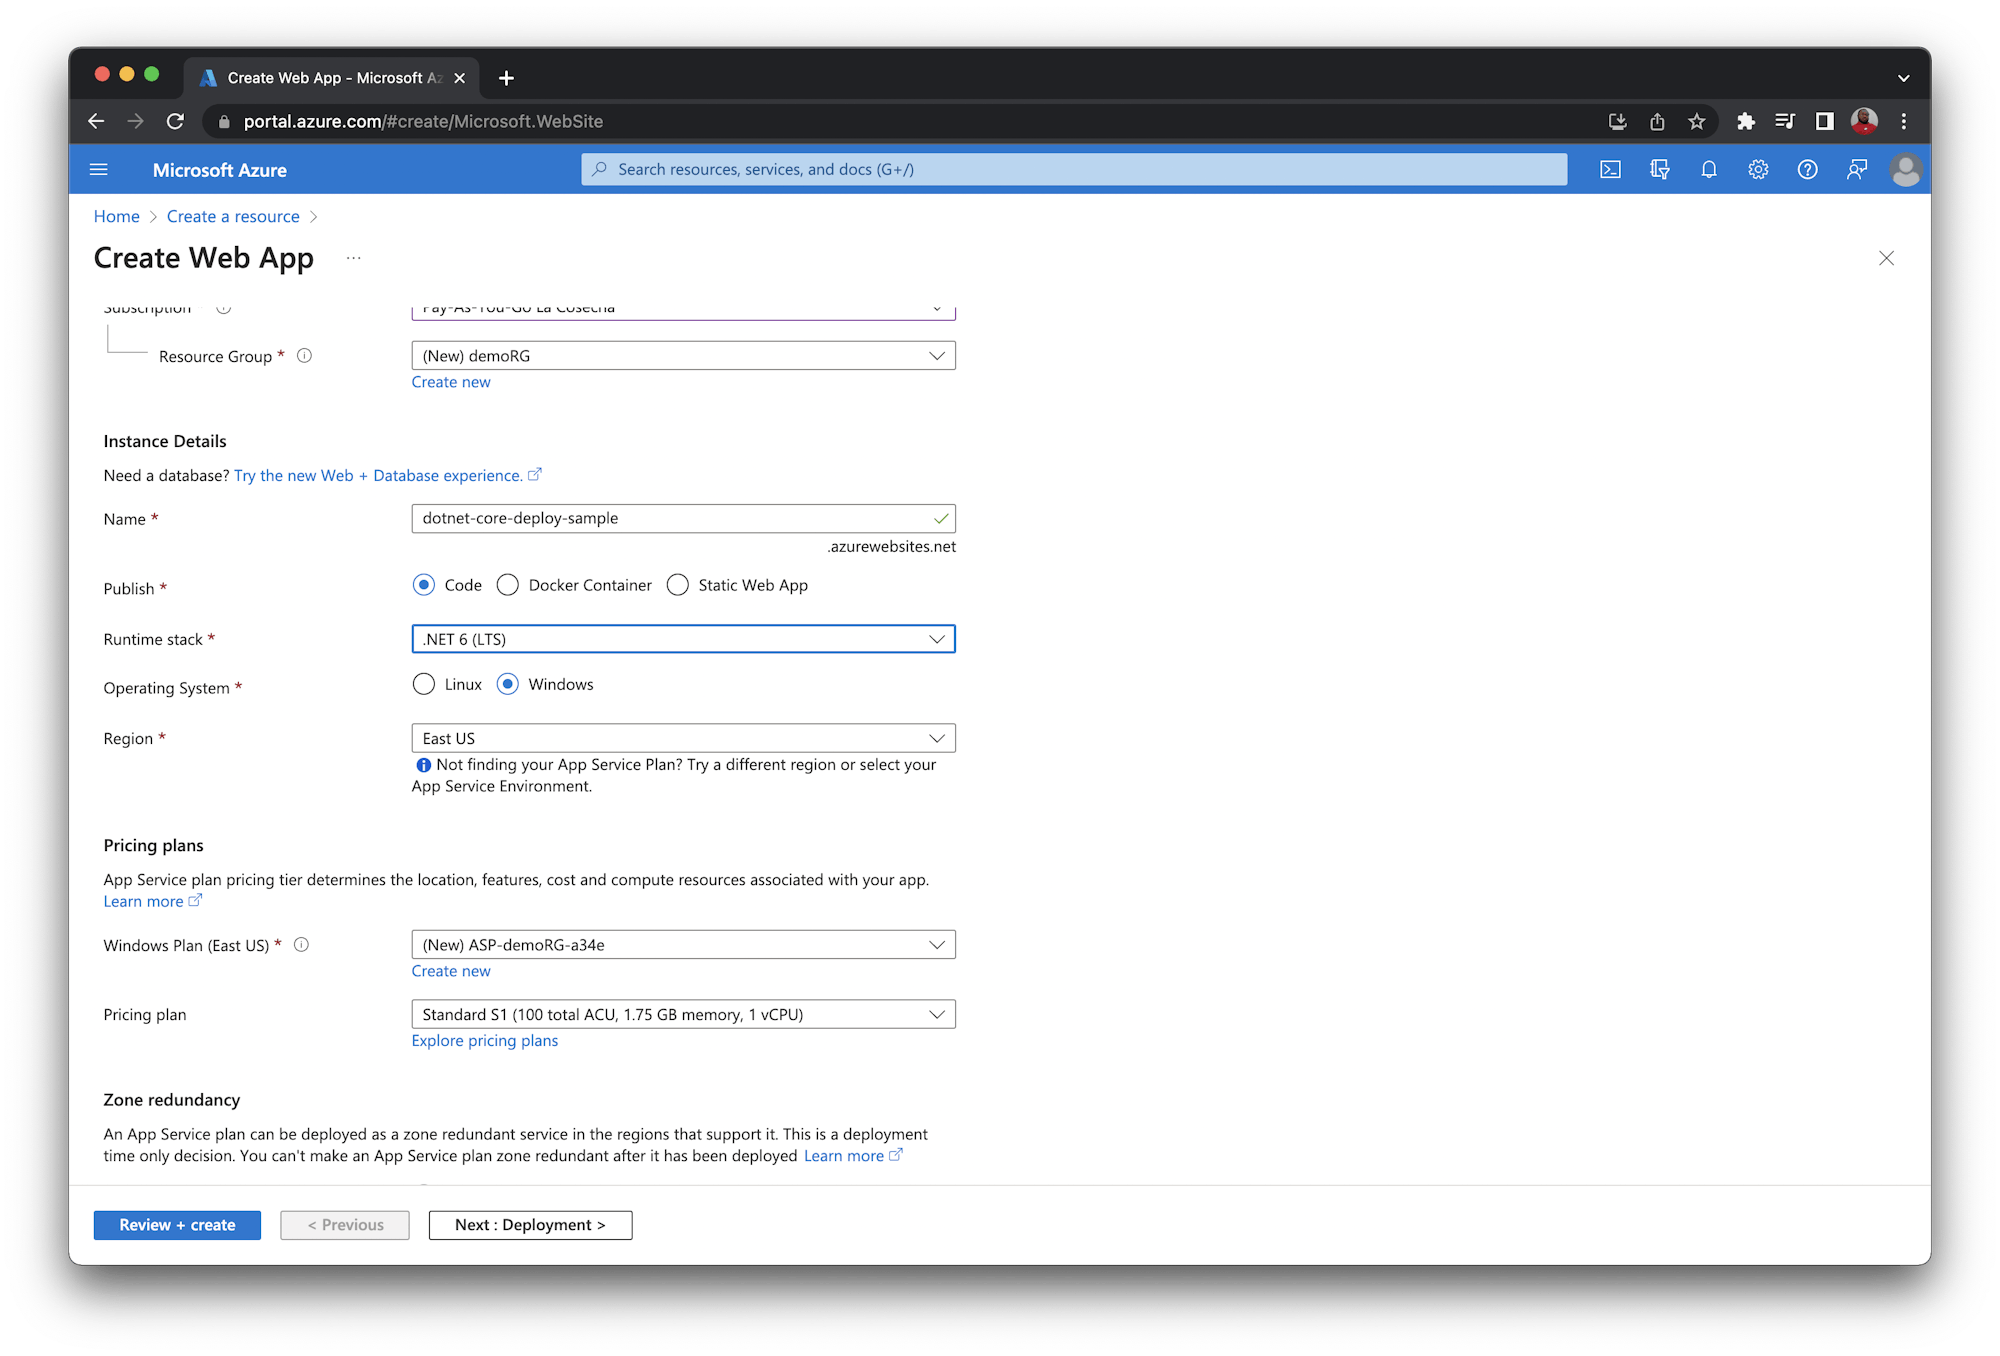
Now, enter a friendly, unique name for your web app. For this tutorial, I have used dotnet-core-deploy-sample. Update other fields as shown in the previous illustration.
Click Review + create, then Create. Wait while Azure sets up the web app environment.
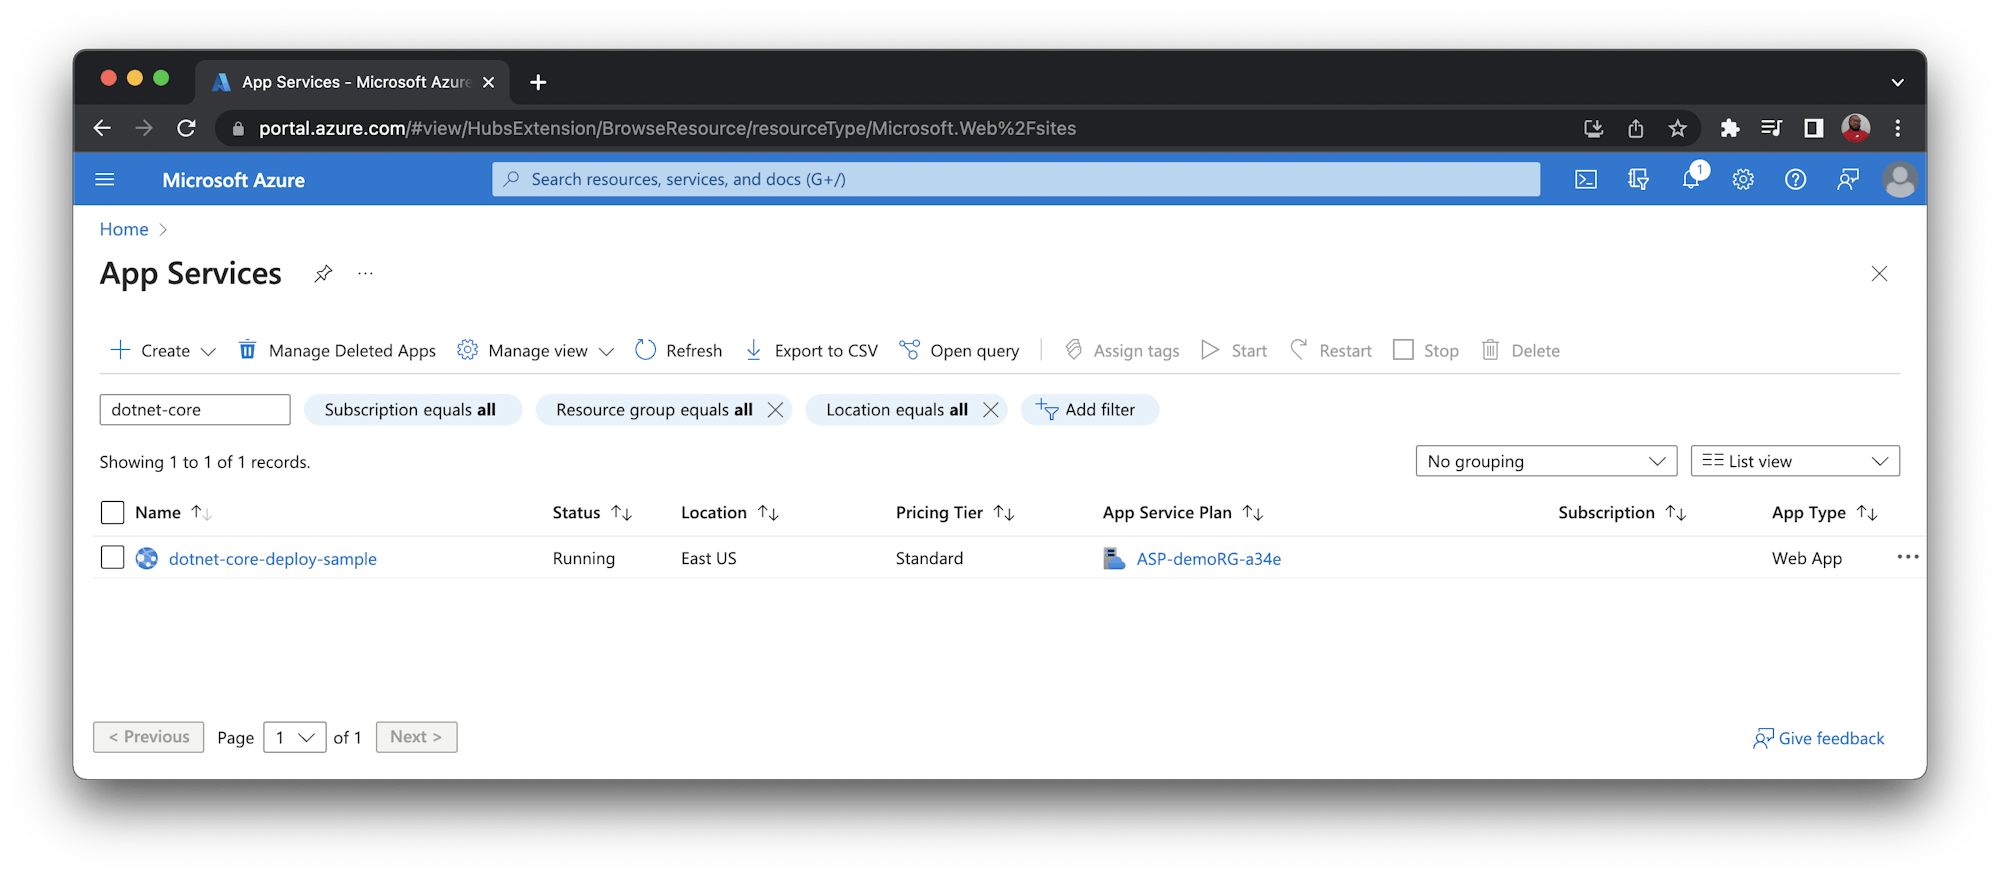
Once the process is completed, you will have a web app ready to host your ASP.NET Core application.
Adding the CircleCI configuration file
In this step, we will create the pipeline configuration for CircleCI using the Windows orb and the Azure CLI orb.
To begin, create a folder named .circleci at the root of your project. In the new folder, create a file named config.yml. In the new file, add:
version: 2.1
orbs:
  azure-cli: circleci/azure-cli@1.2.2
  windows: circleci/windows@5.0.0
jobs:
  build:
    description: Build application with Release configuration
    executor:
      name: windows/default
    steps:
      - checkout
      - restore_cache:
          keys:
            - dotnet-packages-v1-{{ checksum "docker-dotnet-api.csproj" }}
      - run:
          name: "Install project dependencies"
          command: dotnet.exe restore
      - run:
          name: "Build Application according to some given configuration"
          command: dotnet.exe build --configuration Release
      - run:
          name: "Publish to a subfolder"
          command: |
            dotnet.exe publish --configuration Release --output WebAPIFolder
      - persist_to_workspace:
          root: ~/project
          paths:
            - WebAPIFolder
  login-to-azure-and-deploy:
    executor: azure-cli/azure-docker
    steps:
      - azure-cli/install
      - azure-cli/login-with-service-principal
      - attach_workspace:
          at: ~/project
      - run:
          command: az webapp deployment source show --resource-group demoRG --name dotnet-core-deploy-sample
      - run:
          name: "Deploy Web App to Azure"
          command: |
            az webapp deployment source config-local-git --resource-group demoRG --name dotnet-core-deploy-sample
workflows:
  build-and-deploy:
    jobs:
      - build
      - login-to-azure-and-deploy:
          requires:
            - build
This configuration might seem a bit complex, so I will try to break it down for you.
First, it defines and pulls in the orbs we are using for this project:
- The
circleci/azure-cli@1.2.2orb is used to install, initialize, and log into the Azure command-line interface. The Azure CLI gives you access to a set of commands to create and manage Azure resources. - The
circleci/windows@5.0.0orb gives you tools to build Windows projects such as the .Net framework.
The next part of the configuration specifies two different jobs:
buildlogin-to-azure-and-deploy
The build job uses the windows/default executor, which checks out our project from GitHub, installs the project’s dependencies, and publishes the application to a new subfolder named WebAPIFolder. Another step in this job is persist_to_workspace, which uses the workspace feature to move data from a particular job in a workflow to a later job that might need the same data.
In this case, we want the folder housing the published version of our project WebAPIFolder to be available in the next job without rebuilding the project.
The login-to-azure-and-deploy job uses azure-cli/default to install Azure CLI and provides the step to authenticate Azure users. Then it attaches the folder that was stored earlier. The job then uses the Azure CLI to configure the Git URL that will connect with our Azure web app.
The last part of the workflow specifies that the login-to-azure-and-deploy should not run until the build job is complete.
Connecting the application to CircleCI
The next step is to set up a repository on GitHub and link the project to CircleCI. Review Pushing a project to GitHub for instructions.
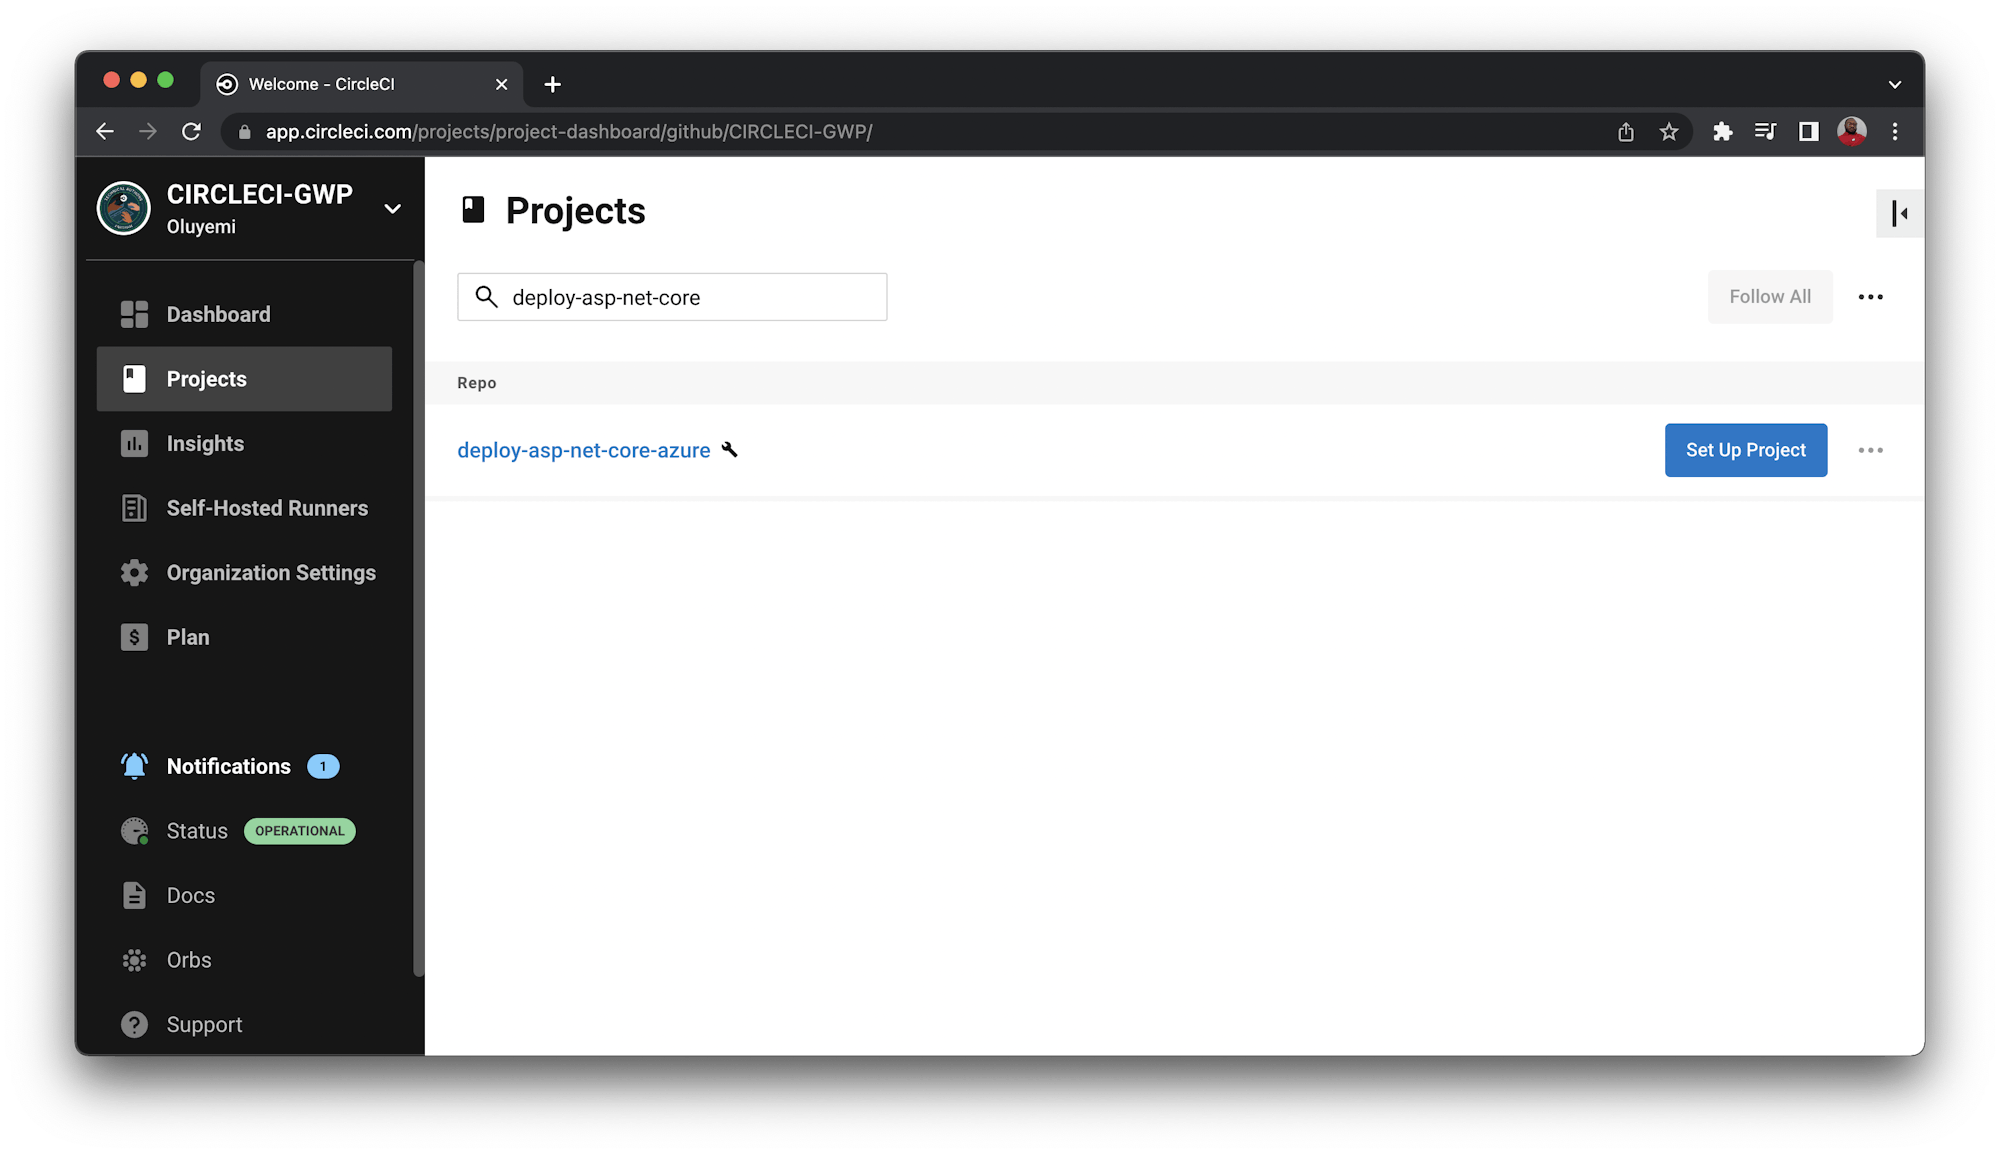
Log in to your CircleCI account. If you signed up with your GitHub account, all your repositories will be available on your project’s dashboard.
Click Set Up Project next to your dotnet-core-sample project.
Replace the resource group with yours.
You will be prompted to either write a new configuration file or use the existing one in your project. Select the existing one and enter the name of the branch where your code is housed on GitHub. Click Set Up Project.
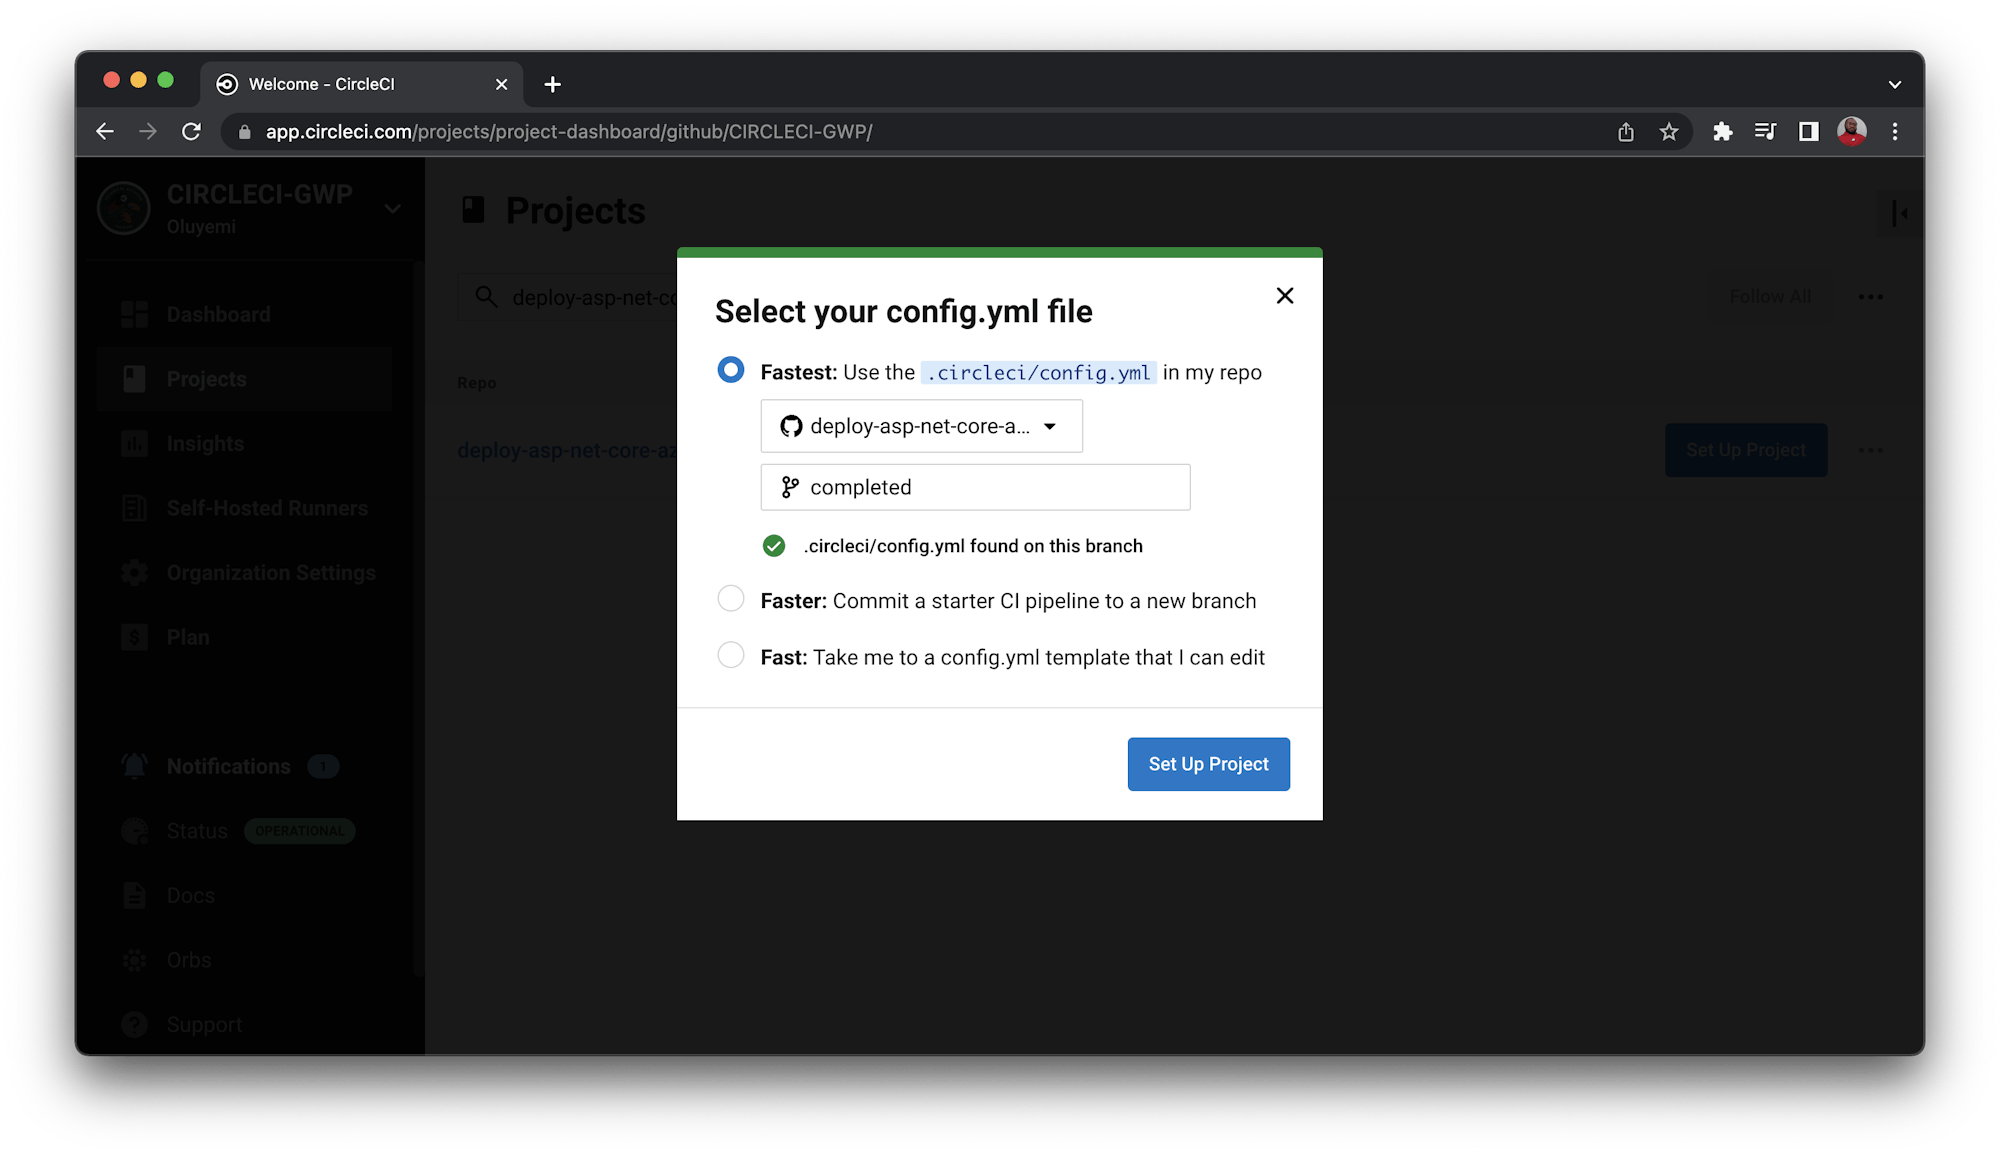
Your first workflow will start running:
- The
buildjob will pass - The
login-to-azure-and-deploywill fail
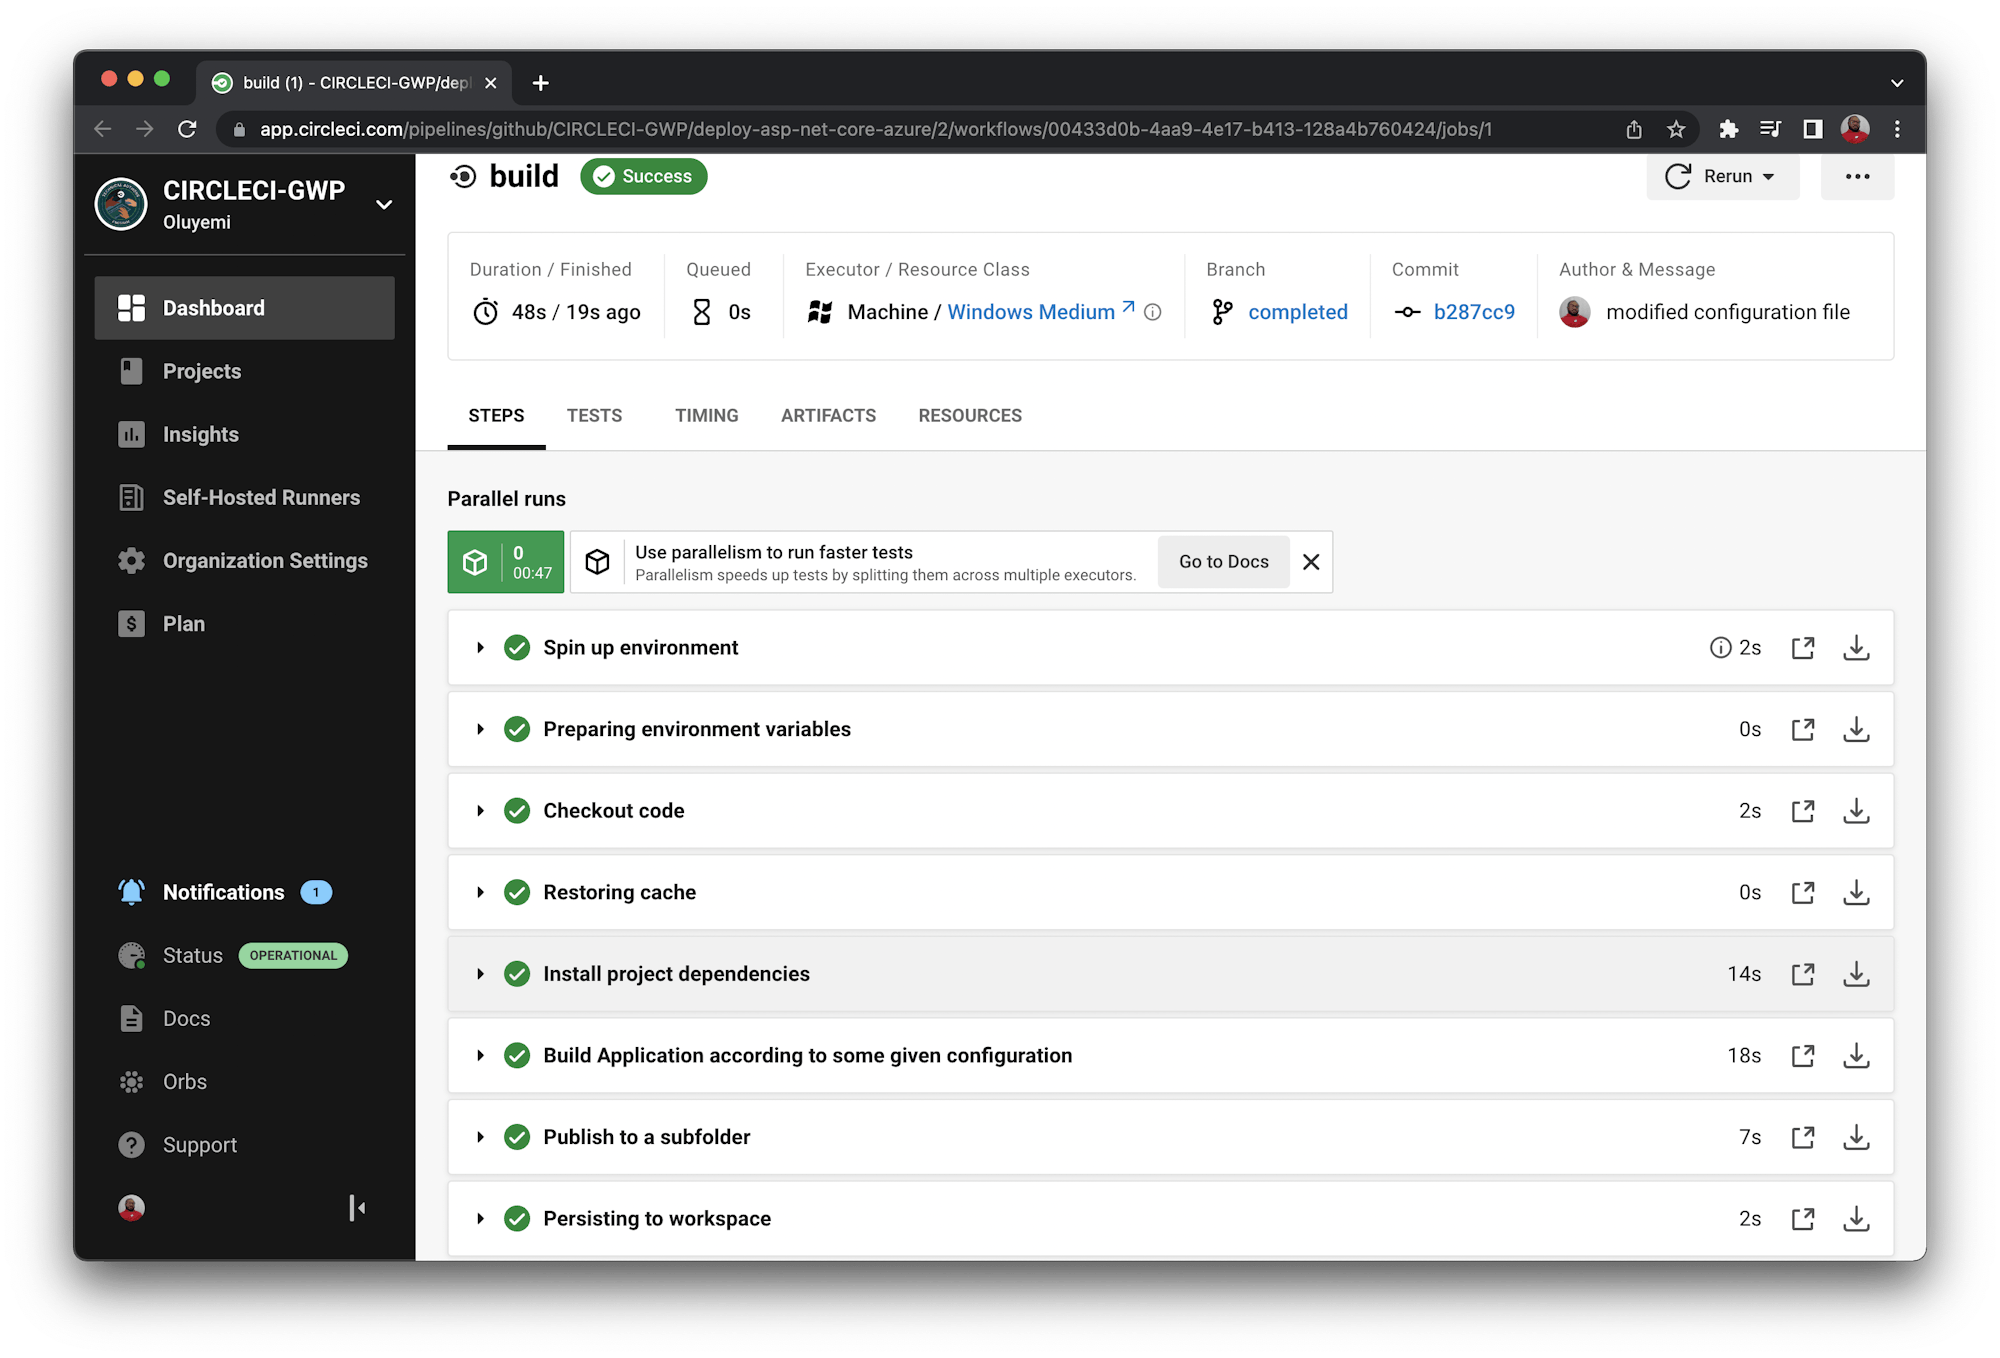
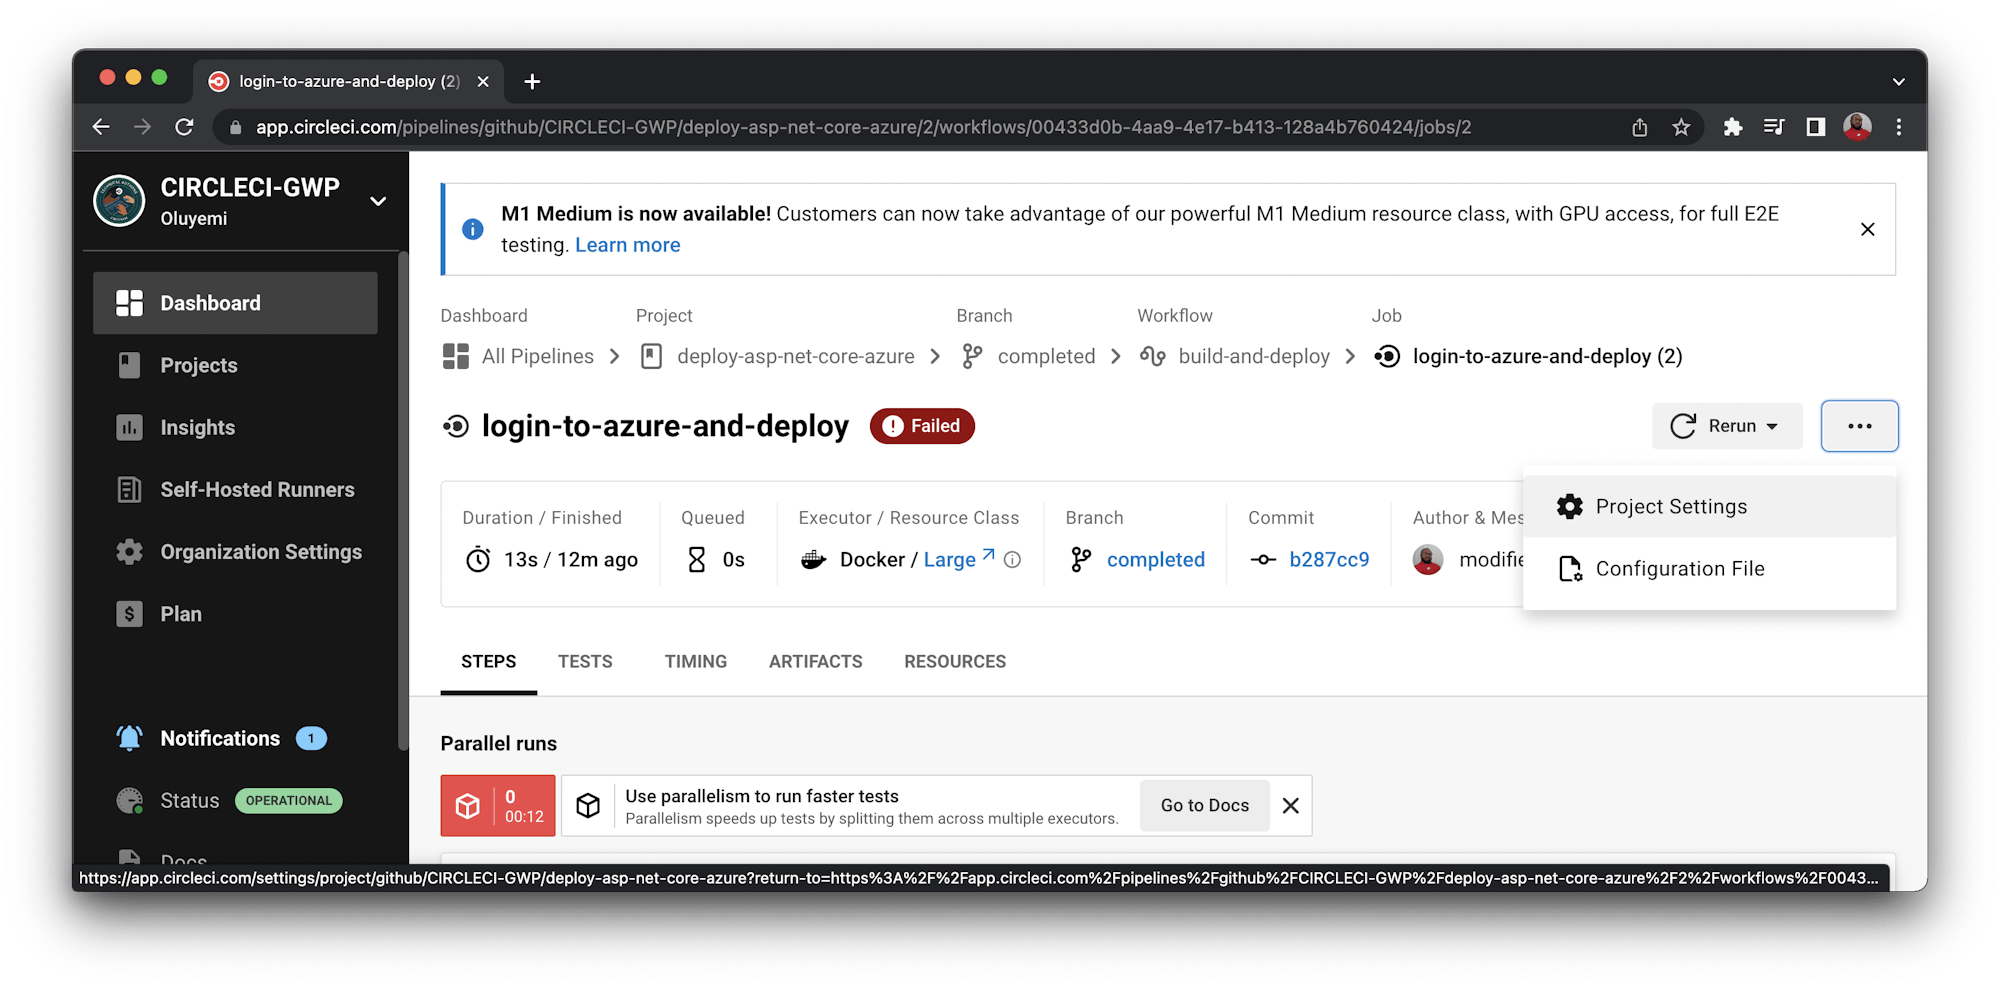
The login-to-azure-and-deploy job will fail because we have not yet specified the Azure credentials.

To fix that, create an Azure Service Principal and add output as environment variables. Learn how to create an Azure service principal with the Azure CLI.
Once you have successfully created an Azure Service Principal, go to the projects page and Click Project Settings.
Click the Environment Variables button on the left sidebar and create these variables:
AZURE_SP_TENANTis the name of the environment variable storing the tenant ID for the Service Principal.AZURE_SPis the Service principalappId.AZURE_SP_PASSWORDis the name of the environment variable storing the password for the Service Principal.
Go back to the dashboard. Click Rerun Workflow from Failed.
When the build has finished running, you can review the output.
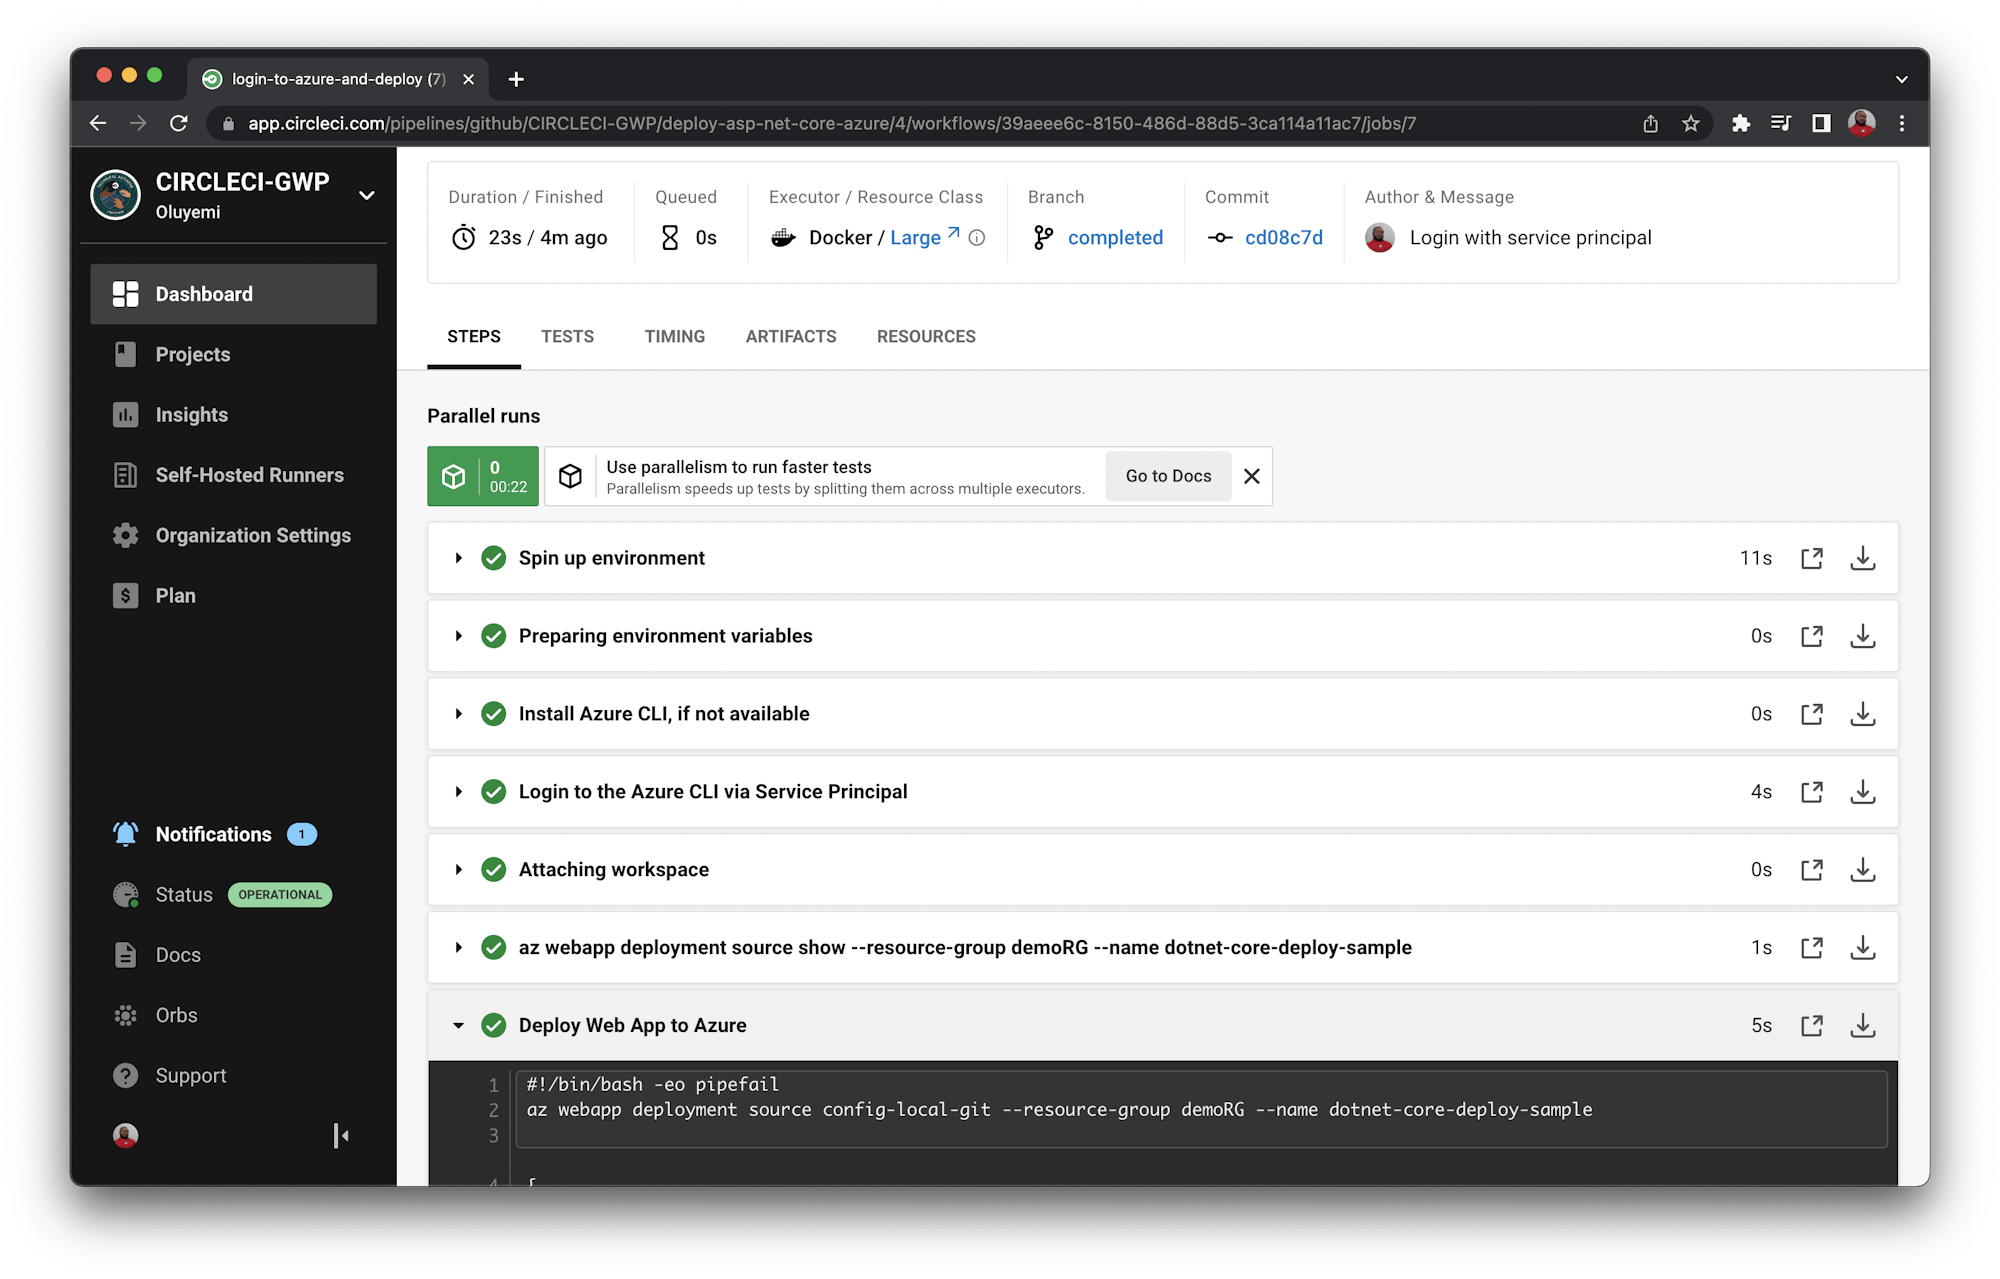
This is the local URL automatically generated for you to use for deployment to your Azure web app. The format of the URL is https://<username>:<password>@sample-dotnet-core-application.scm.azurewebsites.net/sample-dotnet-core-application.git.
The next step is to create your deployment credentials and update the configuration file. Note that the deployment credentials are not the same as the Azure authentication credentials.
Updating the configuration file
In this step, you will update the config file and use Git to deploy to the generated URL. To begin, return to the portal to create a new credential for deployment so that Git does not prompt for a password.
From the side menu bar, Click Deployment Center, then Local Git / FTP Credentials. Scroll to the User Scope section.
Enter a username or use the default one. Enter a password and re-enter it to confirm.
Click the Save button at the top.
Back in your CircleCI project dashboard, navigate to the project settings page and create two more environment variables:
GIT_USERNAMEis the name of the environment variable storing the tenant ID for the Service Principal.GIT_PASSWORDis the Service principalappId.
Replace the content of .circleci/config.yml with this:
version: 2.1
orbs:
  azure-cli: circleci/azure-cli@1.2.2
  windows: circleci/windows@5.0.0
jobs:
  build:
    description: Build application with Release configuration
    executor:
      name: windows/default
    steps:
      - checkout
      - restore_cache:
          keys:
            - dotnet-packages-v1-{{ checksum "docker-dotnet-api.csproj" }}
      - run:
          name: "Install project dependencies"
          command: dotnet.exe restore
      - run:
          name: "Build Application according to some given configuration"
          command: dotnet.exe build --configuration Release
      - run:
          name: "Publish to a subfolder"
          command: |
            dotnet.exe publish --configuration Release --output WebAPIFolder
      - persist_to_workspace:
          root: ~/project
          paths:
            - WebAPIFolder
  login-to-azure-and-deploy:
    executor: azure-cli/azure-docker
    steps:
      - azure-cli/install
      - azure-cli/login-with-service-principal
      - attach_workspace:
          at: ~/project
      - run:
          command: az webapp deployment source show --resource-group demoRG --name dotnet-core-deploy-sample
      - run:
          name: "Deploy Web App to Azure"
          command: |
            az webapp deployment source config-local-git --resource-group demoRG --name dotnet-core-deploy-sample
            cd ~/project/WebAPIFolder/
            git init
            git config --global user.email "yemiwebby@gmail.com"
            git config --global user.name "yemiwebby"
            git add .
            git commit -m "Deploy Azure Web Application"
            git remote add azure https://$GIT_USERNAME:$GIT_PASSWORD@dotnet-core-deploy-sample.scm.azurewebsites.net/dotnet-core-deploy-sample.git
            git push azure master --force
workflows:
  build-and-deploy:
    jobs:
      - build
      - login-to-azure-and-deploy:
          requires:
            - build
The update to the configuration file includes Git, sets a remote URL to reference the link we generated earlier, and pushes to Azure.
Almost done! Once again, push your code to GitHub.

Testing the application
Visit your application at https://<APPLICATION_NAME>.azurewebsites.net/api/weather. Your application was deployed.
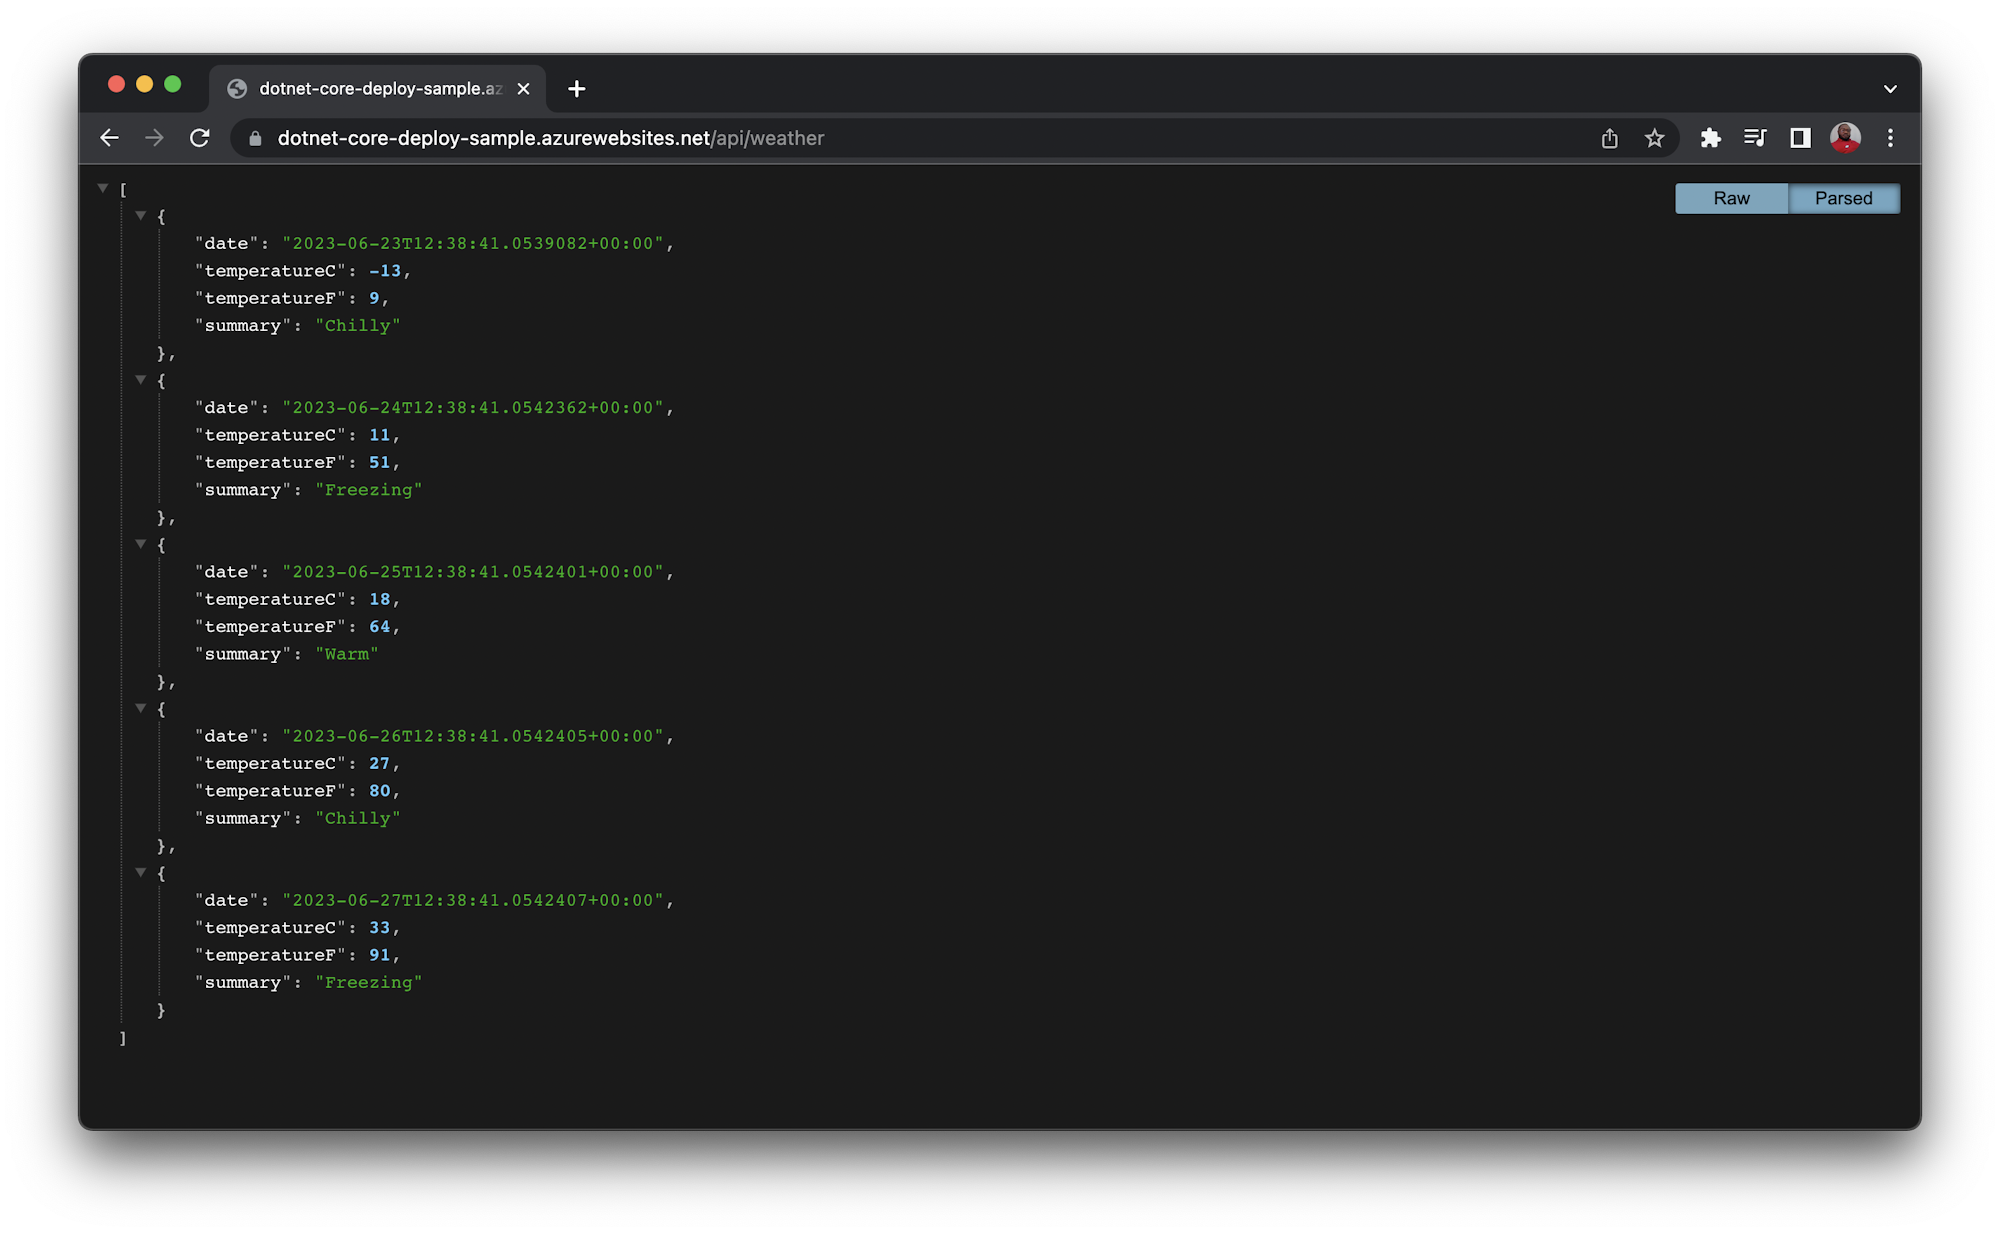
Note: Please note that your URL on Microsoft Azure should be different from the one showed above.
Conclusion
The increasing variety of frameworks and languages used by you and your team could keep you from moving to a fully automated deployment process. In this tutorial, we showed that you can set up a functional deployment pipeline using the Windows and Azure orbs. That pipeline successfully deployed an ASP.NET Core application to the Azure Web Apps hosting platform.
Share the results of your work with your development team to start the conversation about replacing manual deployments with automation. Deploying even a complex application can be done, and the lower risk of human error, increased efficiency, and higher quality code is well worth the investment.
I do hope that you found this tutorial helpful. The complete source code can be found on the completed branch of this repository on GitHub.
Oluyemi is a tech enthusiast with a background in Telecommunication Engineering. With a keen interest in solving day-to-day problems encountered by users, he ventured into programming and has since directed his problem solving skills at building software for both web and mobile. A full stack software engineer with a passion for sharing knowledge, Oluyemi has published a good number of technical articles and blog posts on several blogs around the world. Being tech savvy, his hobbies include trying out new programming languages and frameworks.


