
Imagine you want to build and deploy a Nuxt3 app on Netlify. Because custom scripts are not allowed on Netlify, you will not be able to perform custom tasks like automated testing before deploying the website to your Jamstack hosting platform. That is where continuous integration/continuous deployment comes in. With a CI/CD system, you can run the kind of automated tests that create successful deployments. In this tutorial, I will lead you through building a Nuxt3 app, writing automated tests for it, and deploying it on Netlify.
What is Nuxt.js?
Nuxt.js is a meta-framework for building universal applications, or applications that run on both the client side and the server side. It is a free and open-source JavaScript library built on top of Vue.js. The idea of Nuxt.js came from Next.js, which serves a similar purpose for React.js ecosystem.
What is Netlify?
Netlify is a popular choice among the developer teams to host their Jamstack websites. It allows you to connect your repository and deploy your static websites with just a few clicks. Sometimes you have a complex build step and you need some control over it.
Prerequisites
To follow along with this tutorial, you will need:
- Node.js; I used v14.19.0 to create this tutorial.
- A Netlify account
- A CircleCI account
- A GitHub account
Our tutorials are platform-agnostic, but use CircleCI as an example. If you don’t have a CircleCI account, sign up for a free one here.
Setting up a Nuxt3 application
The first step is to set up a Nuxt3 app that you want to deploy to Netlify.
Open your terminal, navigate to the path you want, and run this command:
npx nuxi init nuxt3-app
Next, navigate to the nuxt3-app directory and install the NPM dependencies by running these commands:
cd nuxt3-app
npm install
Once the dependencies are installed, start the Nuxt3 development server by running this command:
npm run dev -- -o
Use your browser to visit http://localhost:3000, which shows the default home page of a new Nuxt3 app.
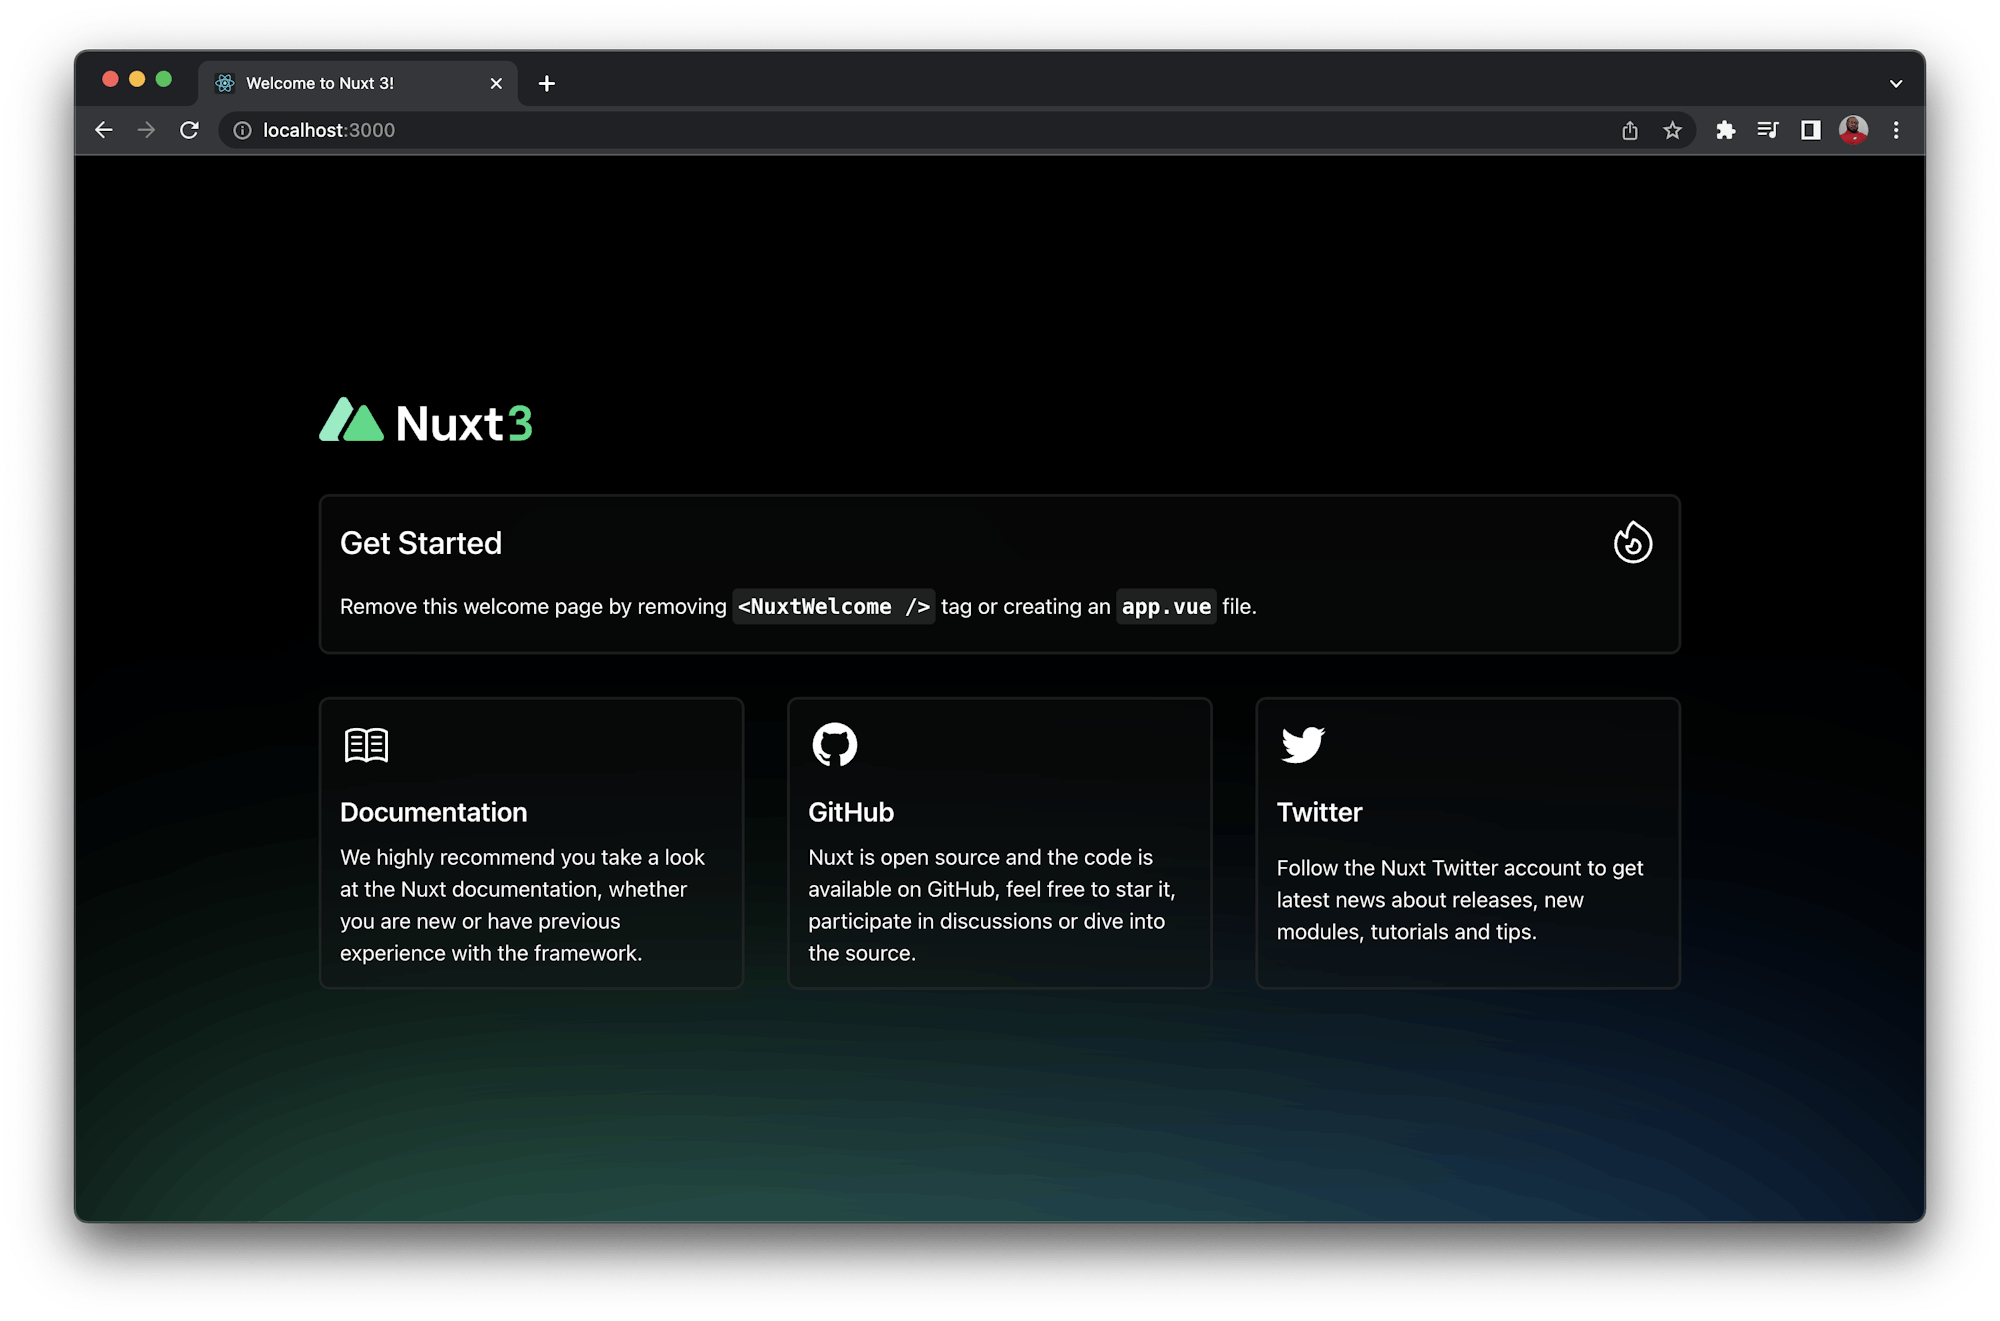
Adding pages in a Nuxt3 app
To make your website more interactive, you can add pages to it.
Create a pages directory at the project’s root directory. In the pages directory, create an index.vue file and add this code:
<template>
  <div>
    <h1>Home</h1>
    <p>This is Home page</p>
    <nuxt-link to="/about">Go to About</nuxt-link>
  </div>
</template>
Next, in the pages directory, create an about.vue file and add this code to it:
<template>
  <div>
    <h1>About</h1>
    <p>This is About page</p>
    <nuxt-link to="/">Go to Home</nuxt-link>
  </div>
</template>
Finally, save your progress and visit the Nuxt3 app on the browser.

Installing the Netlify CLI
The Netlify Command Line Interface (CLI) allows you to deploy your website to Netlify by running command line scripts in your CI/CD system custom builds. You will need to install the CLI as a development dependency to your project.
Go to the project’s root directory and run this command in your terminal:
npm install --save-dev netlify-cli
Once the installation is complete, push the project’s code to GitHub.
Setting up Netlify
First, visit the Netlify’s dashboard and click Add new site > Import an existing project.
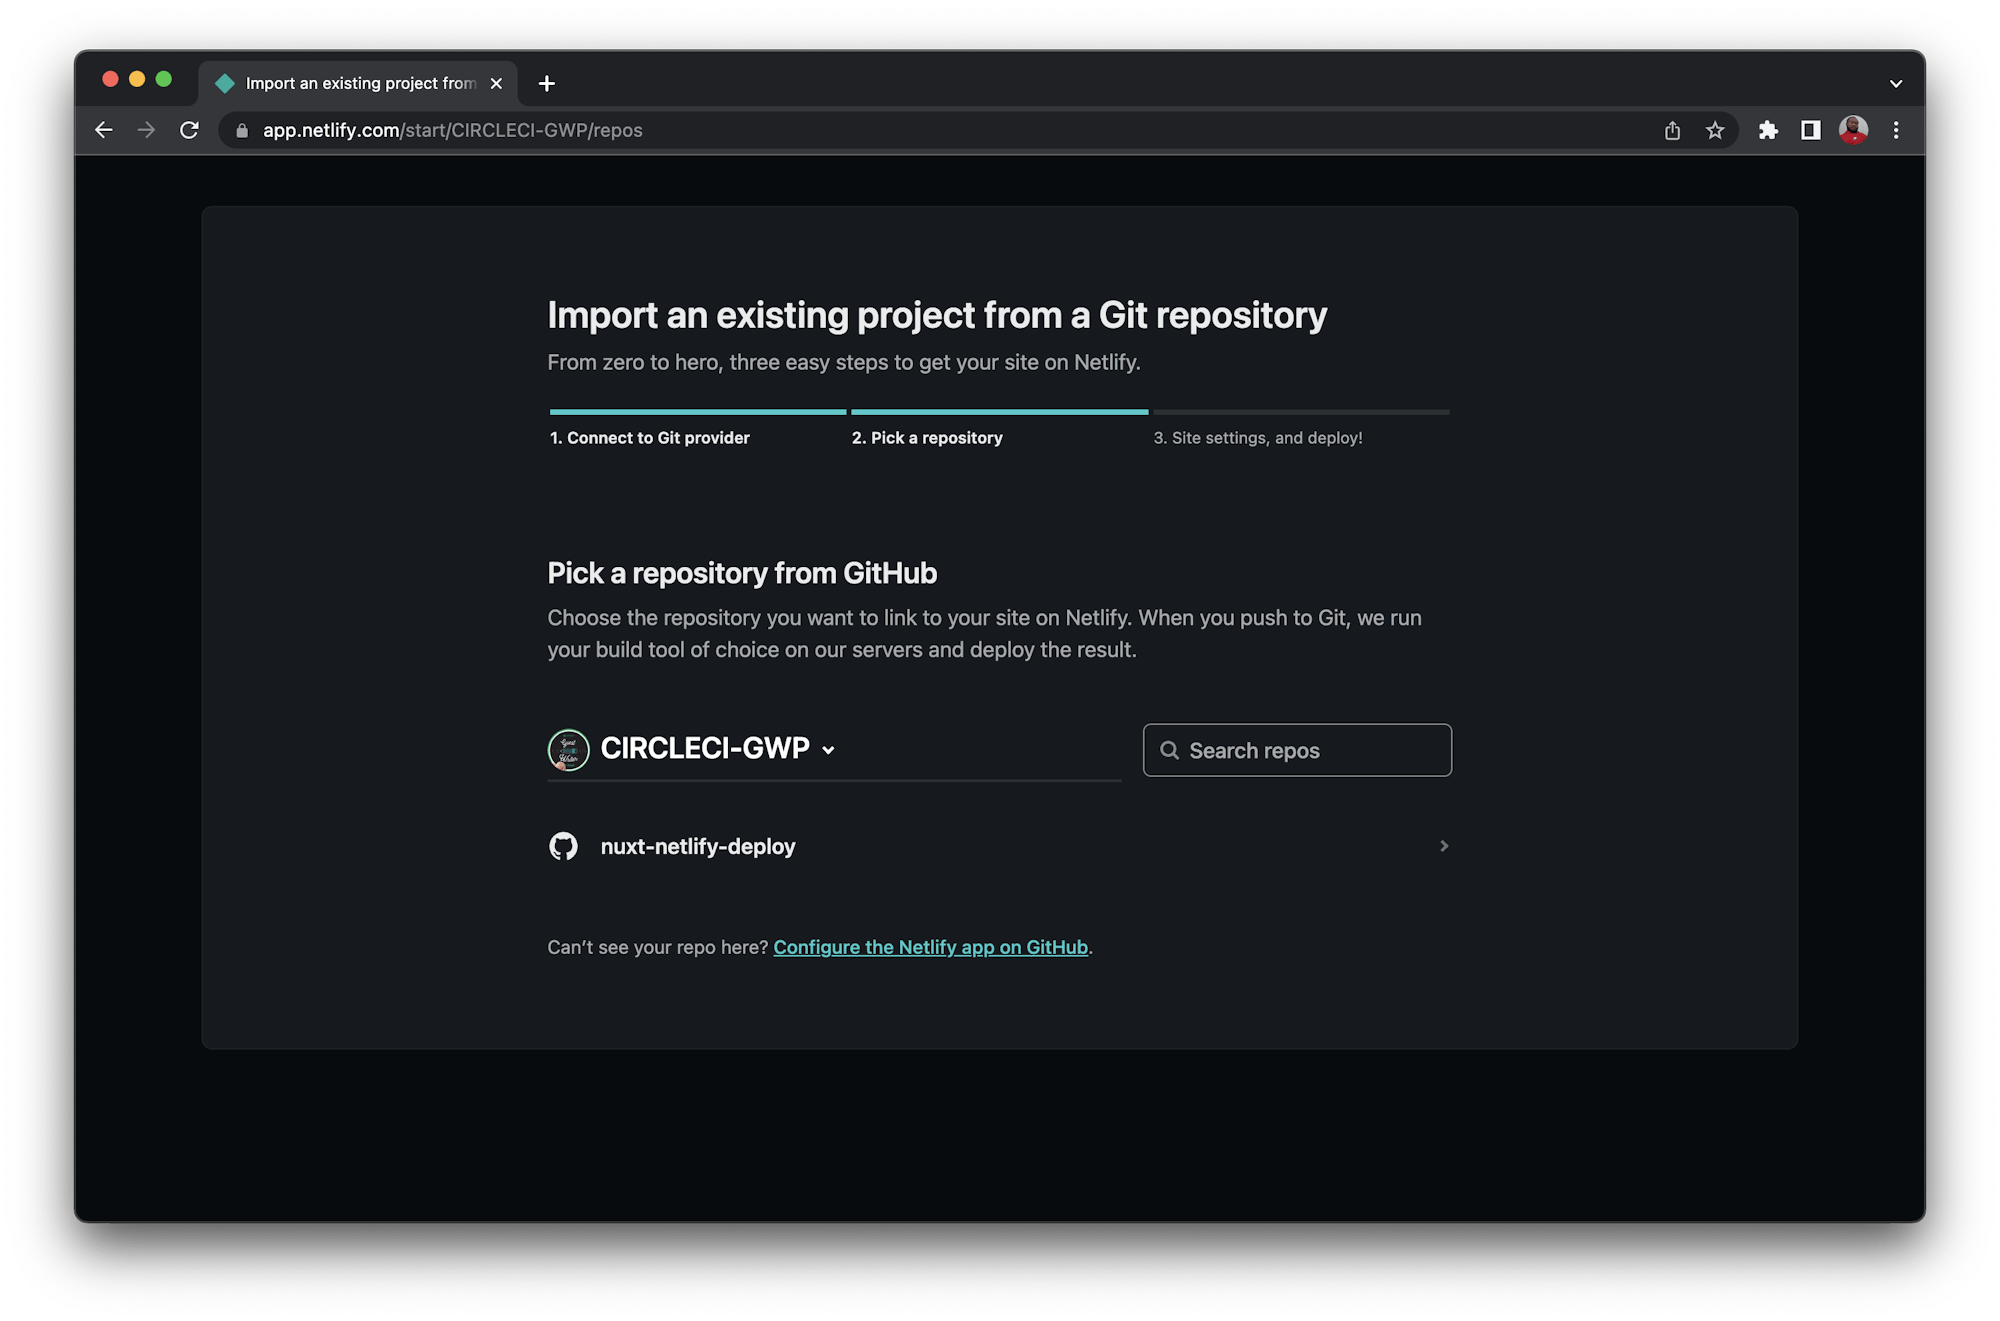
Next, select GitHub as your provider and search for your GitHub repository. If your project does not show up in the list, click Configure the Netlify app on GitHub and authorize Netlify to access your repository.
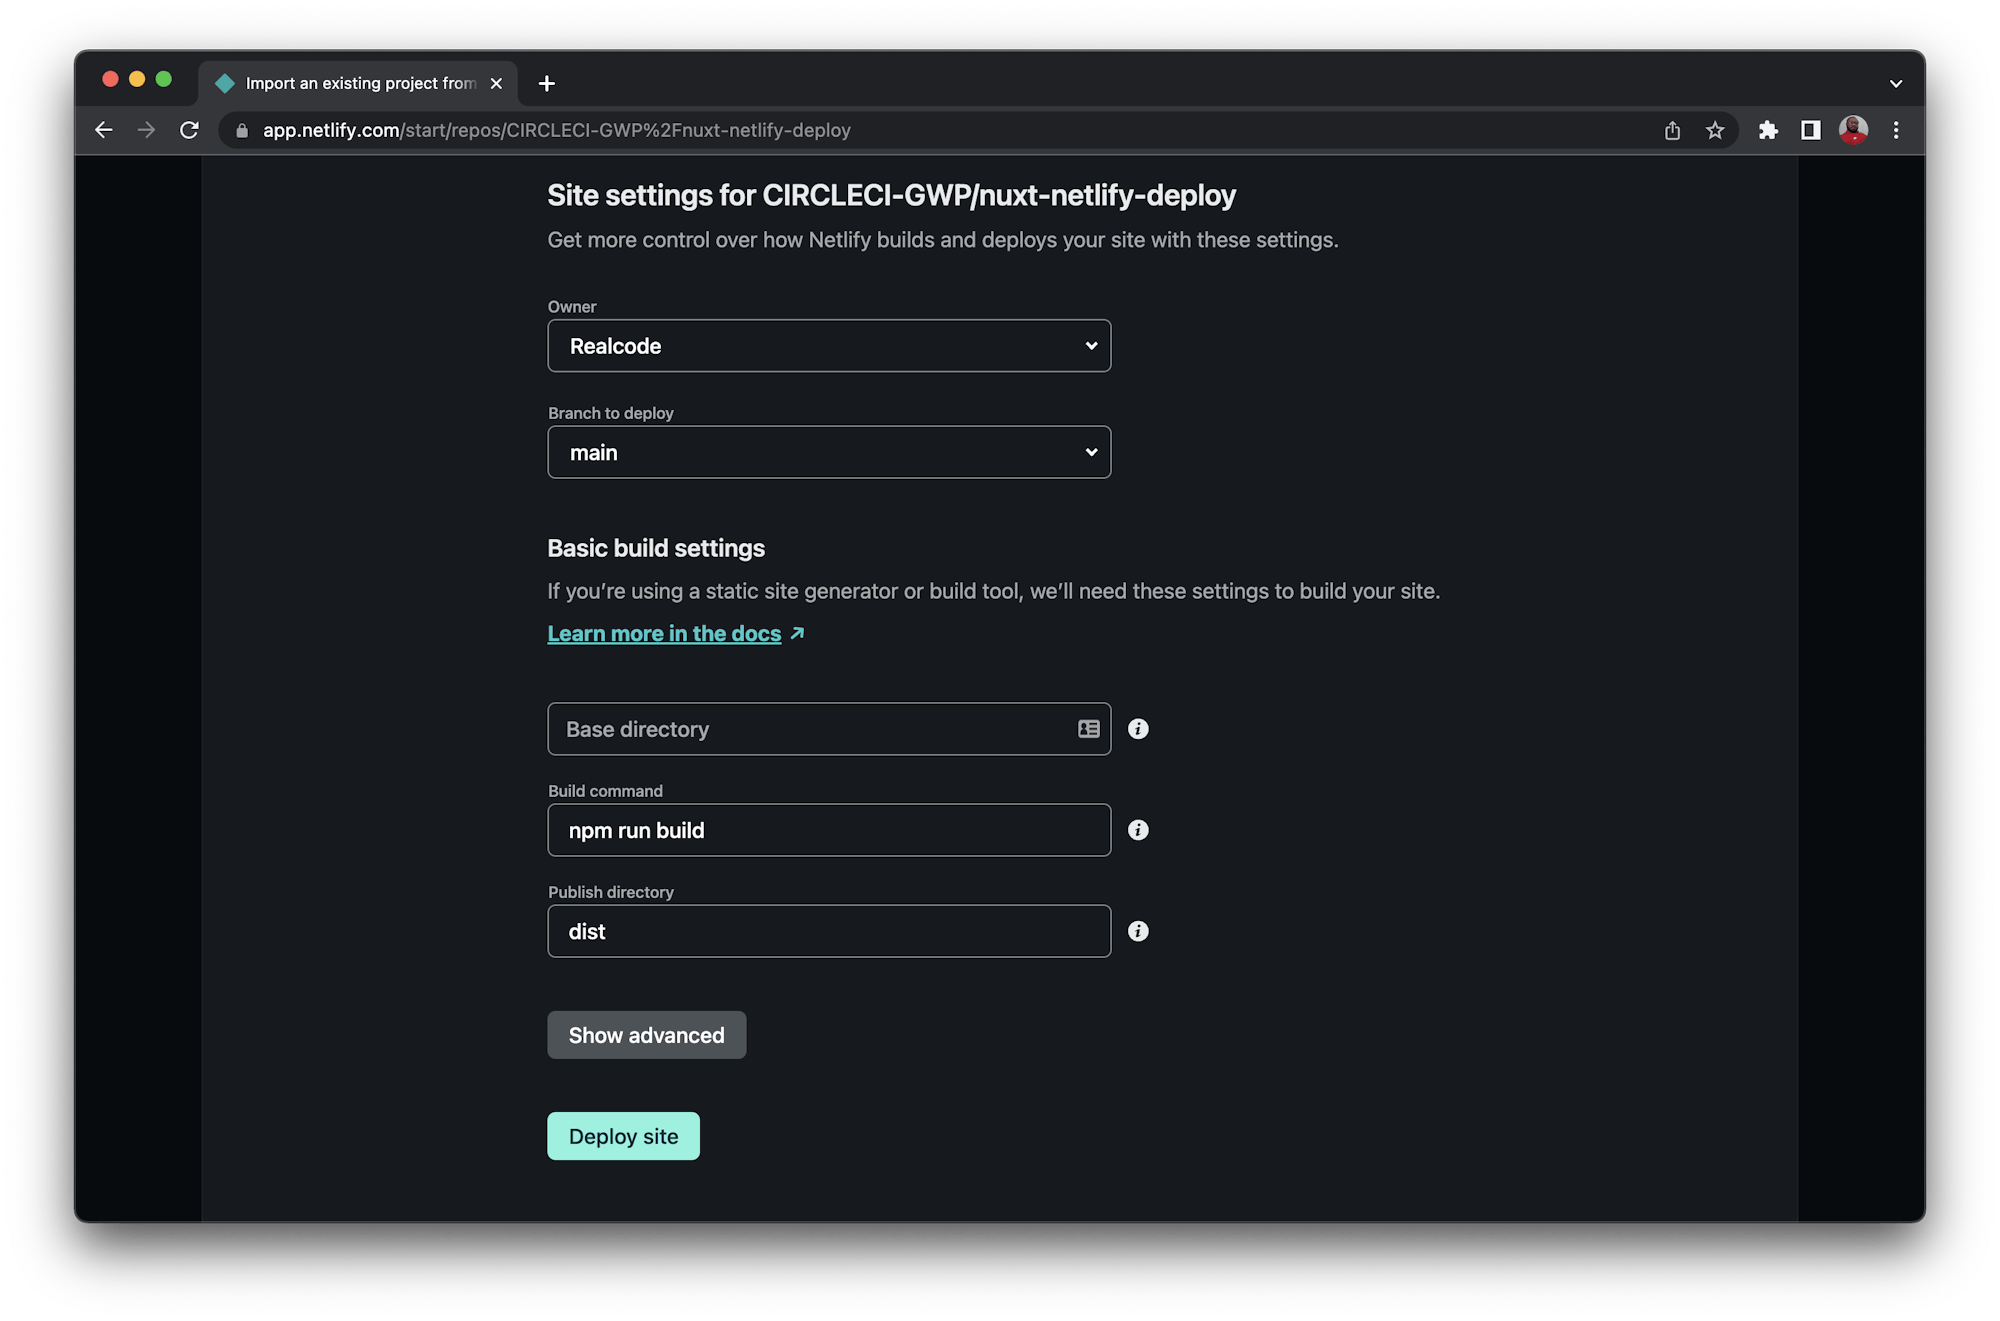
Next, do a quick review to your Netlify project’s basic build settings. If everything is ok, click Deploy site to allow Netlify to deploy your Nuxt3 app for the very first time.
Once the build process is complete, visit the deployment URL on your app’s dashboard. In our case, it is https://aquamarine-bublanina-66d811.netlify.app/.
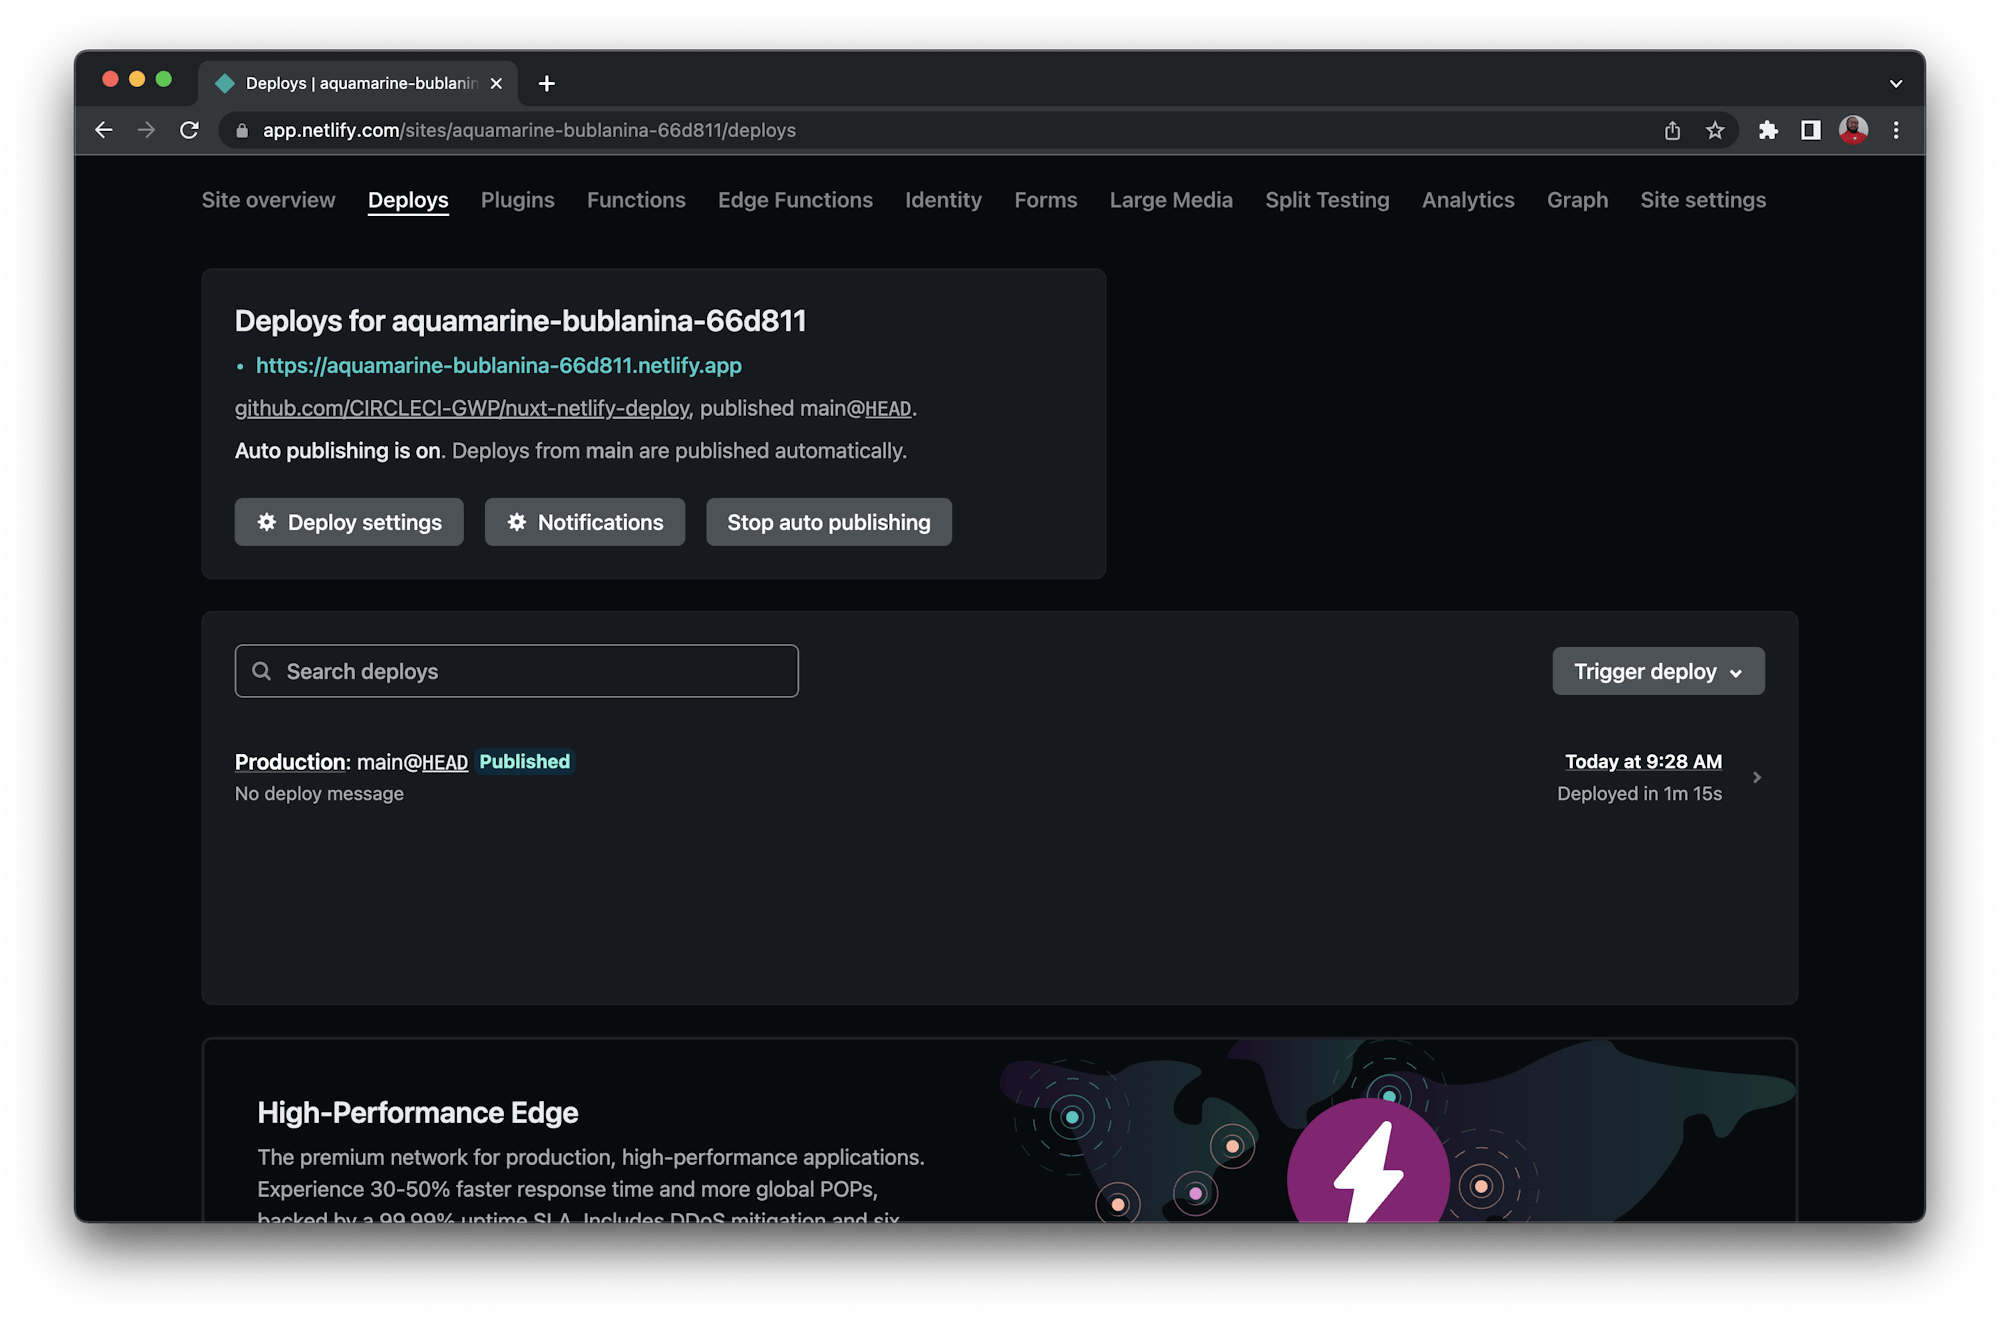
Finally, when deploying from CircleCI to Netlify, you’ll need a site ID and a personal access token:
-
For the
SITE IDuse the APP ID of your website. You can find it by clicking the Site settings tab, then clicking General > Site Details.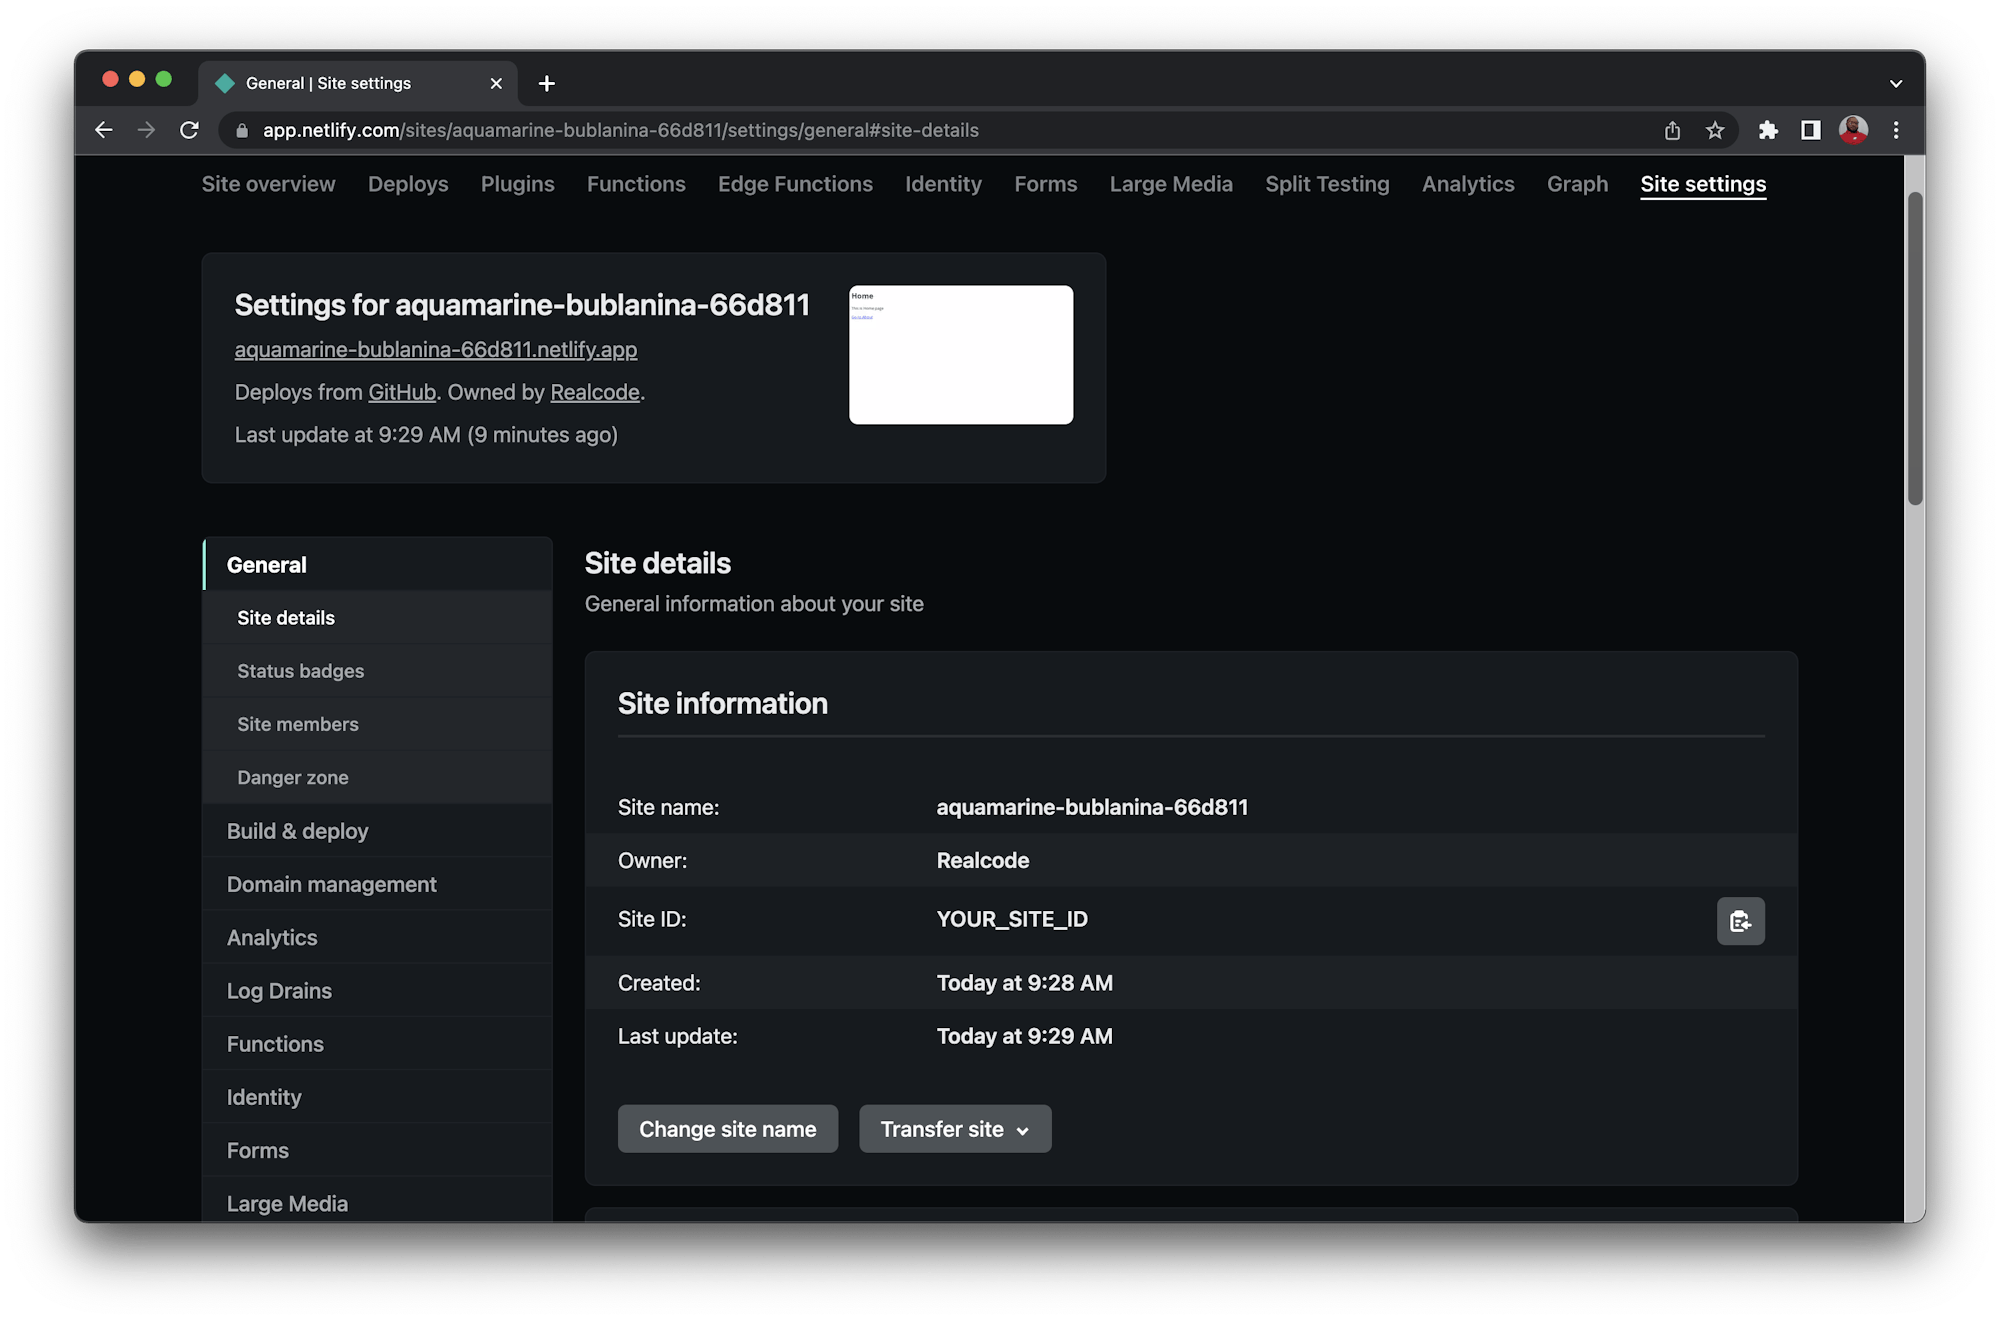
-
Get your
Personal Access tokenby clicking User Settings, then Applications. Save your access token in a secure place; you will not be able to display it again.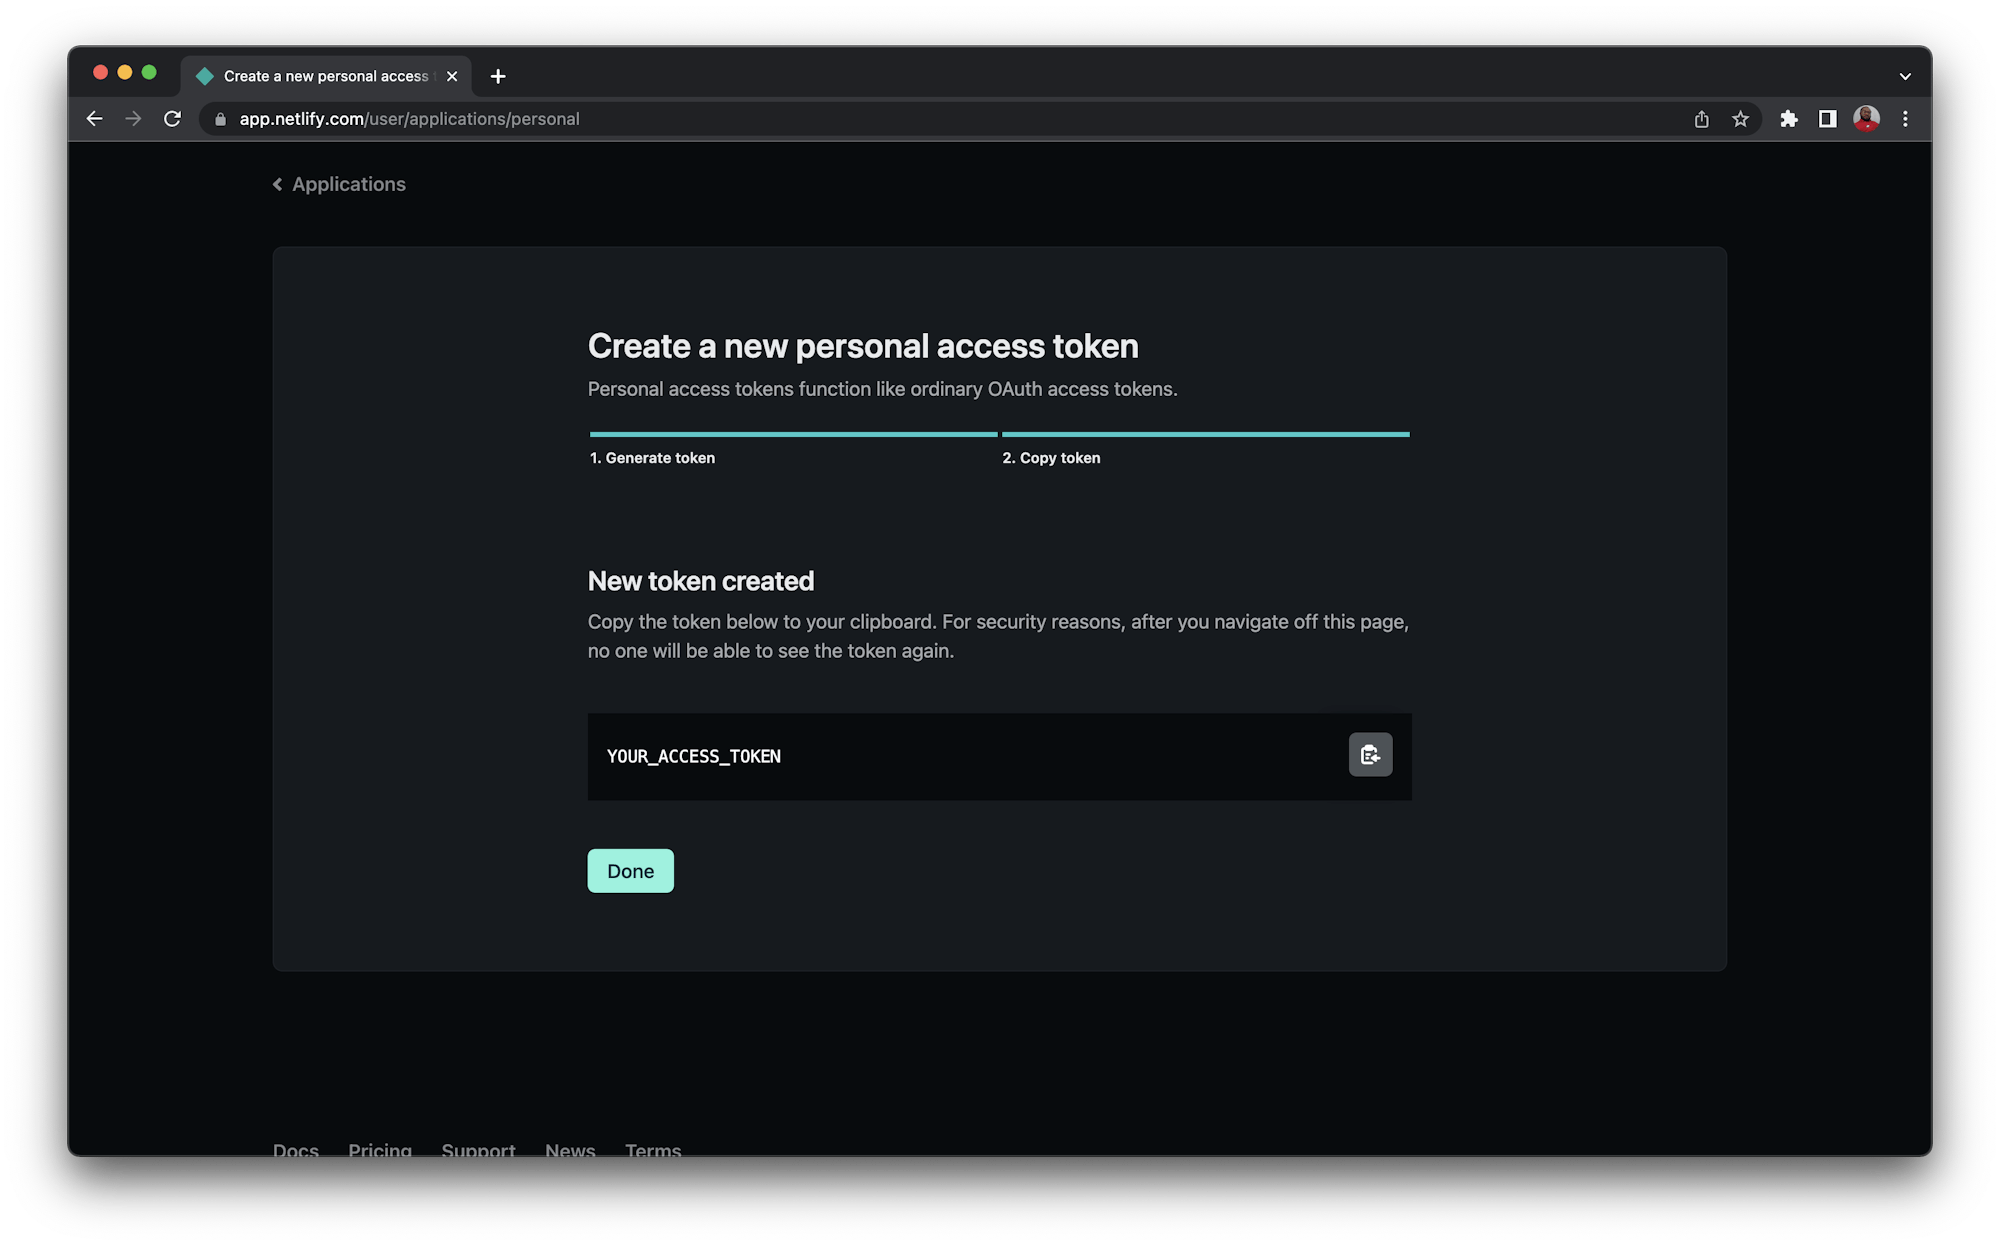
Stopping the Netlify builds
With this setup, two deploys will be triggered whenever you push to the main_ branch. One deploy is on Netlify and the other one on CircleCI. To save resources, you only want to deploy from a single source; in this case, CircleCI. That means you need to disable the builds on Netlify.
Go back to your site’s page on the Netlify dashboard. Click the Site settings tab. On the side menu bar, click Build & Deploy, then click Edit settings and select Stop builds. Save your changes once you are done.
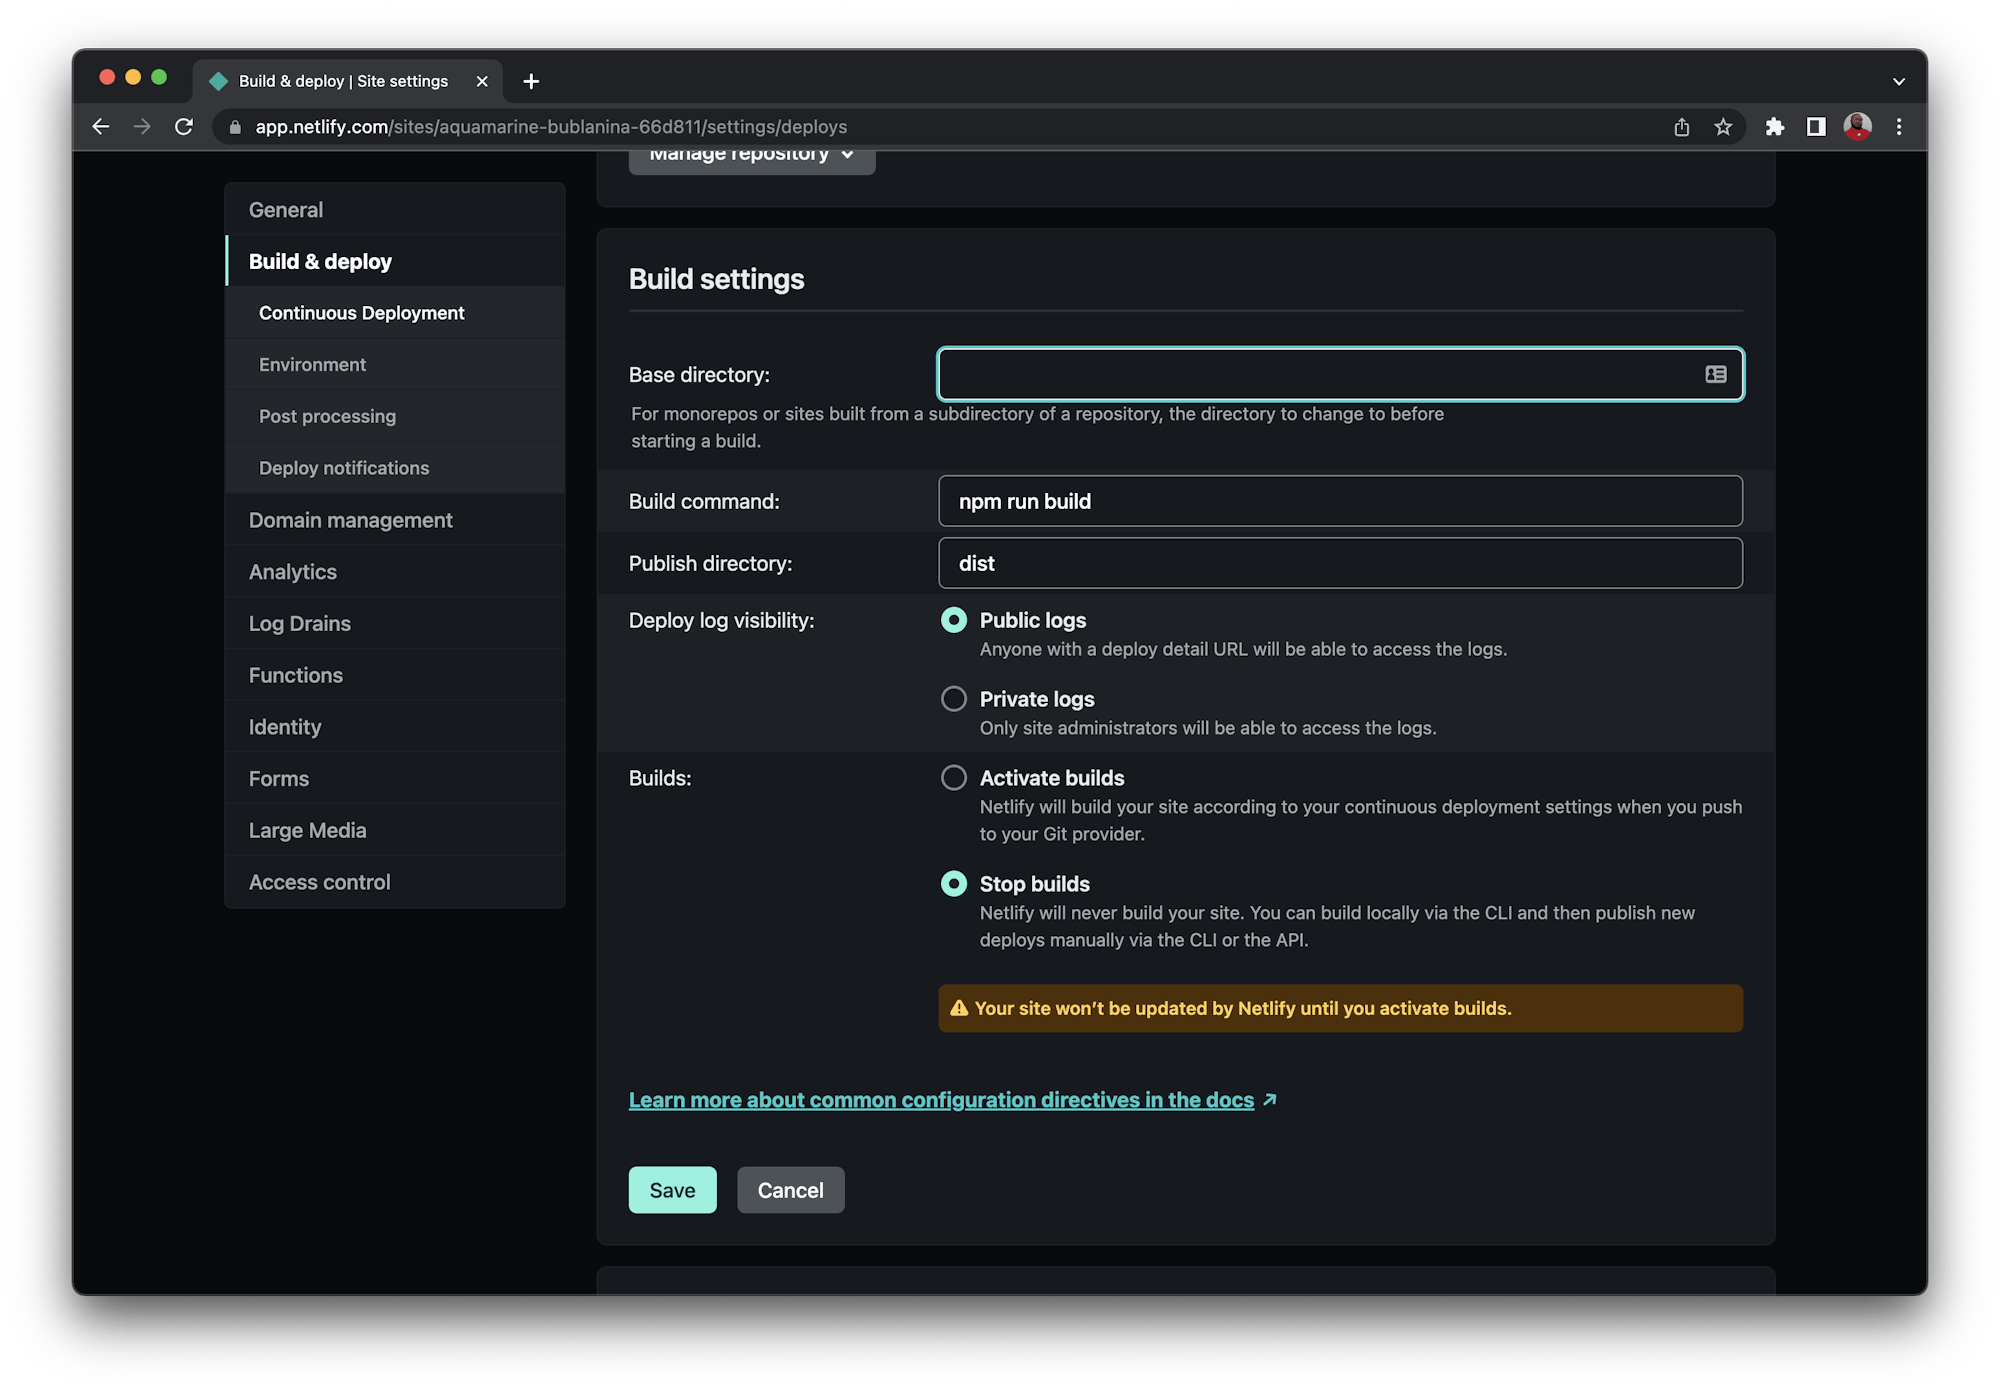
That’s it. Now Netlify will not trigger the project deployment when you’ll push to your main branch.
Setting up CircleCI
Now that the Netlify setup is complete, you can start setting up CircleCI.
At your project’s root directory, create a .circleci directory and add a config.yml file to it. This is where you will write the configuration to build and deploy your website to Netlify using CircleCI.
Now, open the newly created file and add this content:
version: 2.1
jobs:
  build:
    working_directory: ~/repo
    docker:
      - image: cimg/node:14.19.0
    steps:
      - checkout
      - run:
          name: Update NPM
          command: "sudo npm install -g npm"
      - restore_cache:
          key: dependency-cache-{{ checksum "package-lock.json" }}
      - run:
          name: Install Dependencies
          command: npm install
      - save_cache:
          key: dependency-cache-{{ checksum "package-lock.json" }}
          paths:
            - ./node_modules
      - run:
          name: Nuxt3 Build
          command: npm run generate
      - save_cache:
          key: nuxt3-public-cache-{{ .Branch }}
          paths:
            - ./.output/public

workflows:
  build-deploy:
    jobs:
      - build:
          filters:
            branches:
              only:
                - main
This configuration:
- Checks out the project from the repository
- Installs and caches the project dependencies
- Builds (
npm run generate) and caches the.output/publicdirectory, which holds the production build of your Nuxt3 website - Configures the workflow to run only when a push is made to the main branch
Next, push these new changes to your GitHub repository.
Now, on the CircleCI dashboard, click Projects from the left sidebar menu.
From the projects list, find your project and click Set Up Project. You will receive notification that CircleCI automatically detects your configuration file. Give it a quick review and click Set Up Project.

This triggers a successful build on CircleCI but will not deploy to Netlify. That is because you have not yet added credentials. You will do that next.
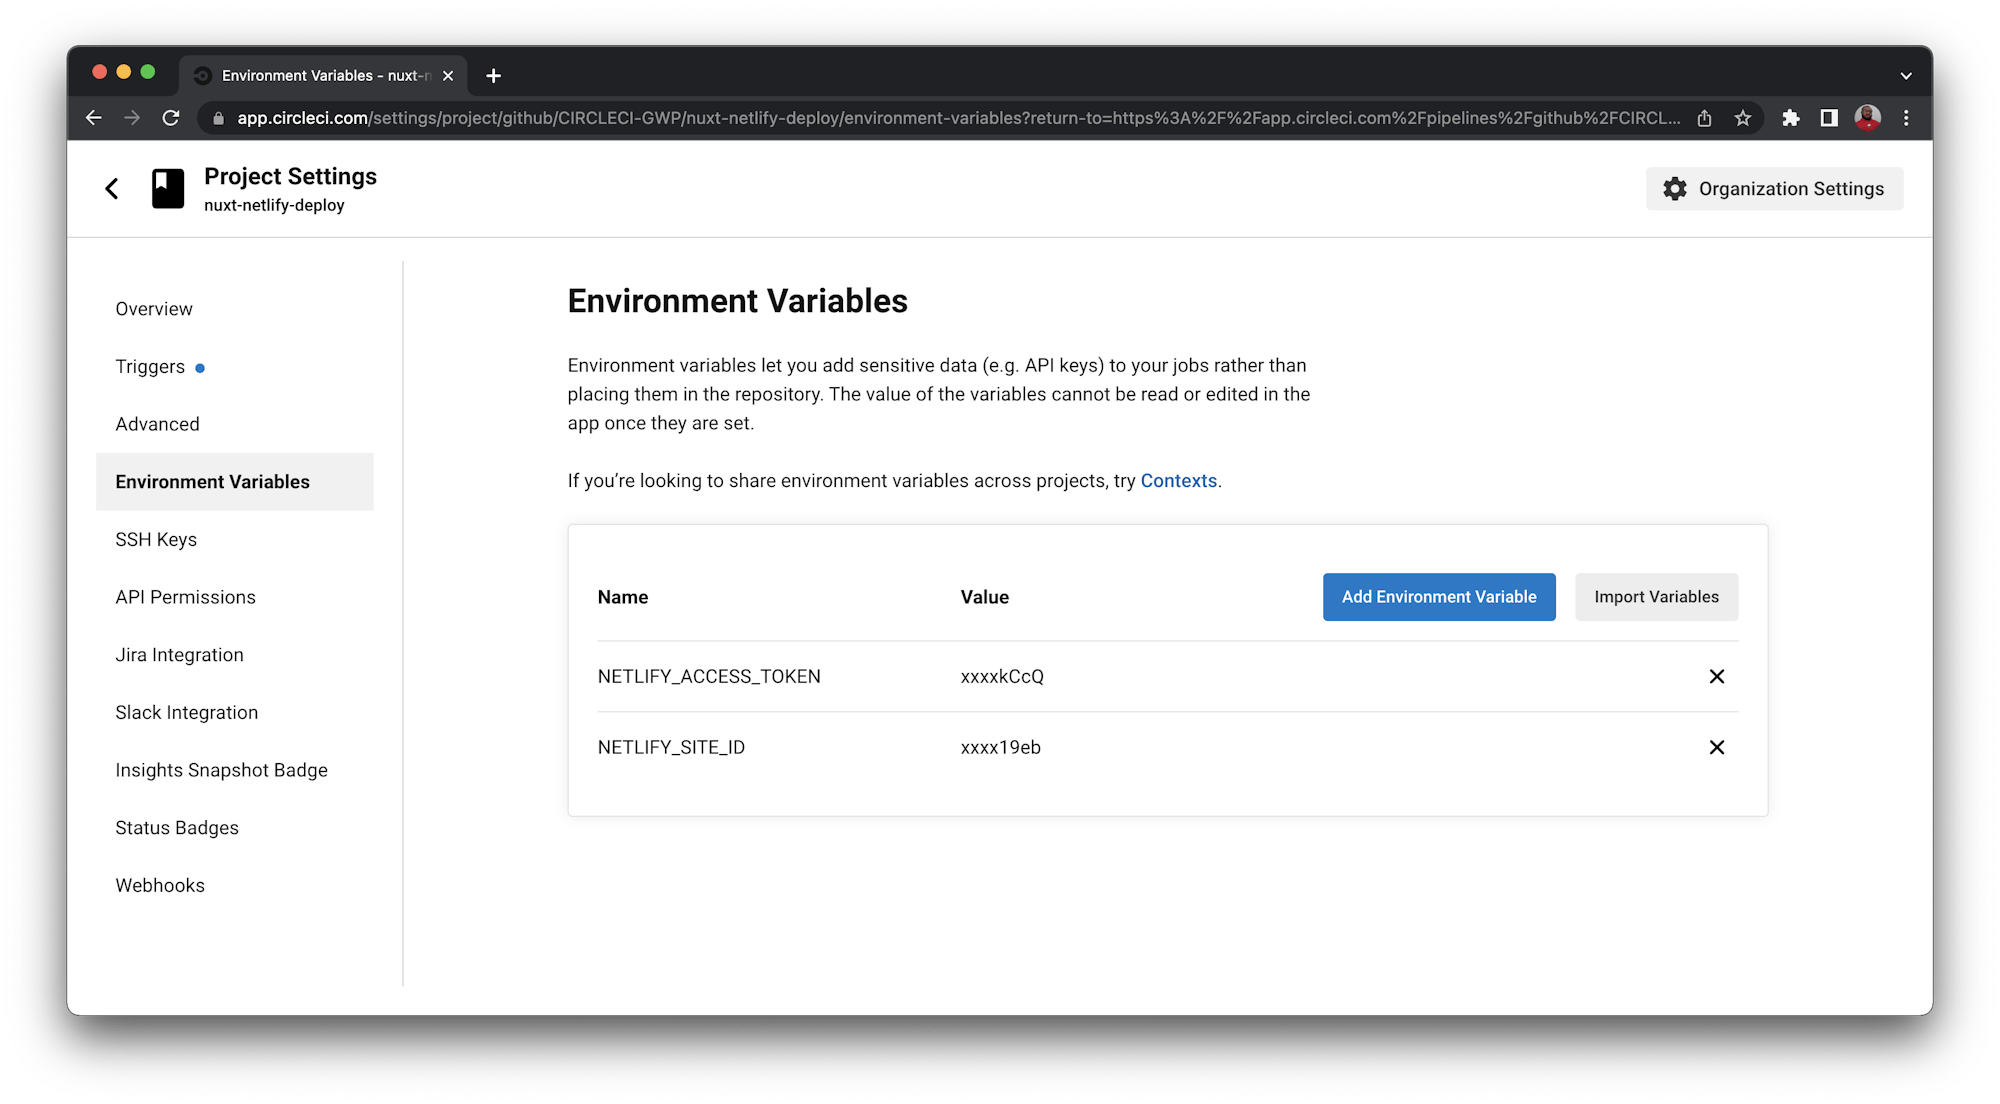
Next, click Project Settings. On the Project Settings page, click Environment Variables from the left sidebar menu. On this page, add these two environment variables:
NETLIFY_SITE_IDis the APP ID from your Netlify application.NETLIFY_ACCESS_TOKENis your Netlify Personal Access token.
Updating the CircleCI configuration file
Now that you have set up your project on CircleCI, you can update the configuration file with the deployment credentials and use Netlify CLI to deploy your website.
Update the content of config.yml file as shown here:
version: 2.1
jobs:
  build:
    working_directory: ~/repo
    docker:
      - image: cimg/node:14.19.0
    steps:
      # 1
      - checkout
      - run:
          name: Update NPM
          command: "sudo npm install -g npm"
      - restore_cache:
          key: dependency-cache-{{ checksum "package-lock.json" }}
      # 2
      - run:
          name: Install Dependencies
          command: npm install
      - save_cache:
          key: dependency-cache-{{ checksum "package-lock.json" }}
          paths:
            - ./node_modules
      # 3
      - run:
          name: Nuxt3 Build
          command: npm run generate
      - save_cache:
          key: nuxt3-public-cache-{{ .Branch }}
          paths:
            - ./.output/public
      # 4
      - run:
          name: Deploy to Netlify
          command: ./node_modules/.bin/netlify deploy --site $NETLIFY_SITE_ID --auth $NETLIFY_ACCESS_TOKEN --prod --dir=./.output/public
# 5
workflows:
  version: 2
  build-deploy:
    jobs:
      - build:
          filters:
            branches:
              only:
                - main
This update adds the script to deploy directly to Netlify using the credentials you created earlier.
Next, make some changes to your code to verify that the new website was indeed deployed from CircleCI and push your changes to GitHub. This push to main_ branch will trigger the deployment pipeline and deploy your website to Netlify.
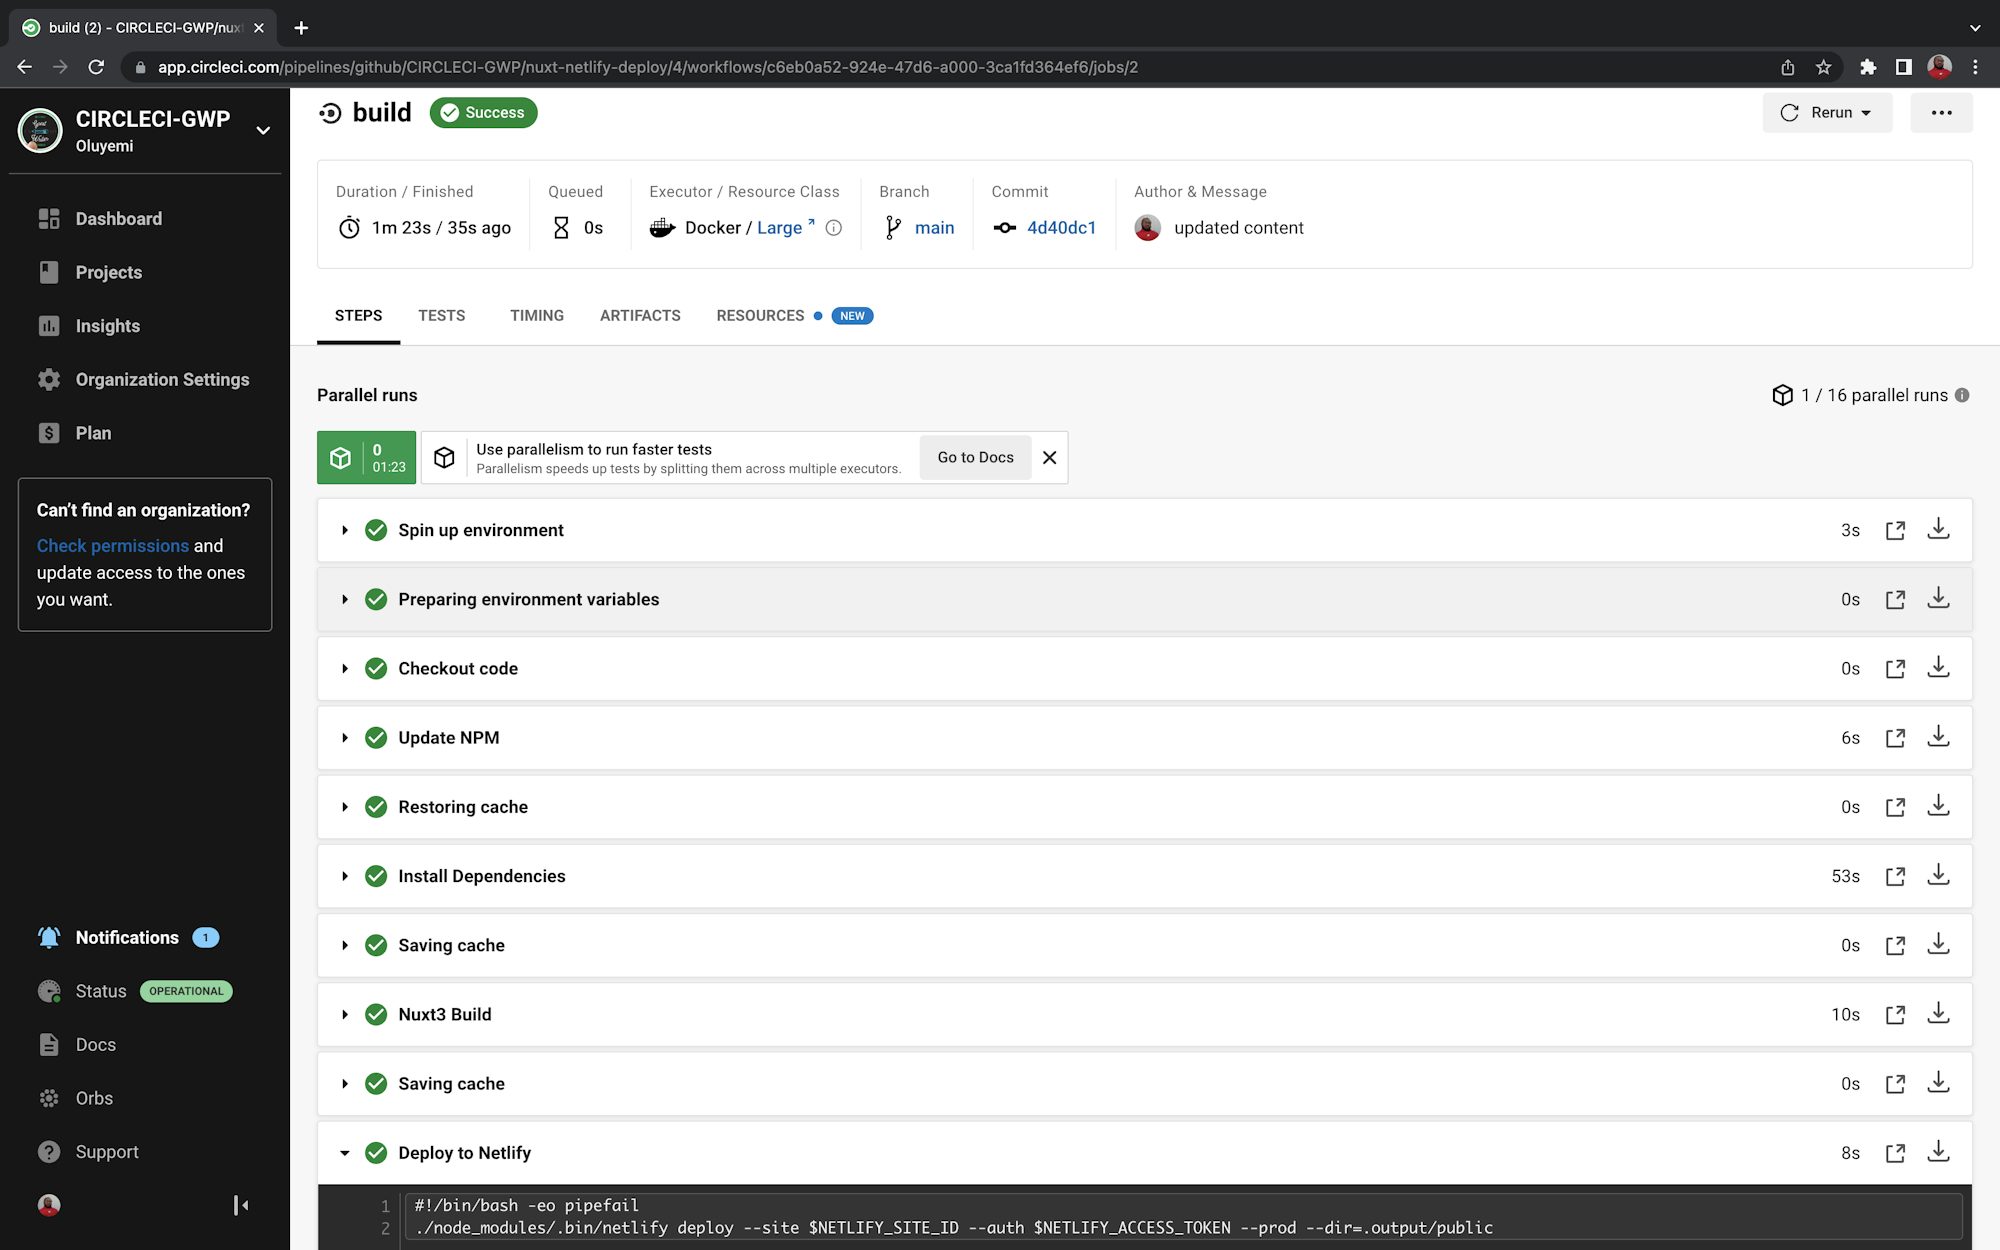
With a successful build, visit your website again to verify the changes you deployed.

You may want to visit the Netlify dashboard to verify that no build was triggered on Netlify.
Conclusion
In this article, you learned to build and deploy a Nuxt3 app on Netlify using CircleCI. This CI/CD system allows you to run custom scripts that are sometimes blocked on hosting platforms like Netlify. Next, you can use CircleCI webhooks to trigger deployment from your CMS.
If you use Heroku as your hosting platform, you can read our tutorial on using CircleCI pipelines for custom deployment to Heroku.


