Using Gradle build scans in Android projects

Senior Software Engineer at Premise Data
A build scan is a shareable and centralized record of an Android build that provides insights into what happened and why. Some benefits of build scans are:
- They help developers understand how their builds are used every day
- They give you deep, task-level data, performance metrics, and visualizations for every developer and CI build
- Developers can use build scans to dramatically improve build speed and reliability by finding and fixing build issues
- They create collaboration by allowing developers to share a build scan link to point out a problem or ask for help
Prerequisites
To complete this tutorial, a few things are required:
- Basic understanding of the Gradle build tool
- Knowledge of how to set up an Android project on CircleCI
- Knowledge of the Android build process.
Reference the previous post on Gradle, Turbocharging your Android Gradle builds using the build cache, if further reading is required before you proceed.
Building the app
For the sake of brevity, we will not be building the app from scratch. Instead, you will build on top of a starter project. Go ahead and download the starter project here or git clone https://github.com/CIRCLECI-GWP/circle-notes.git. We will use the build scan documentation.
Steps:
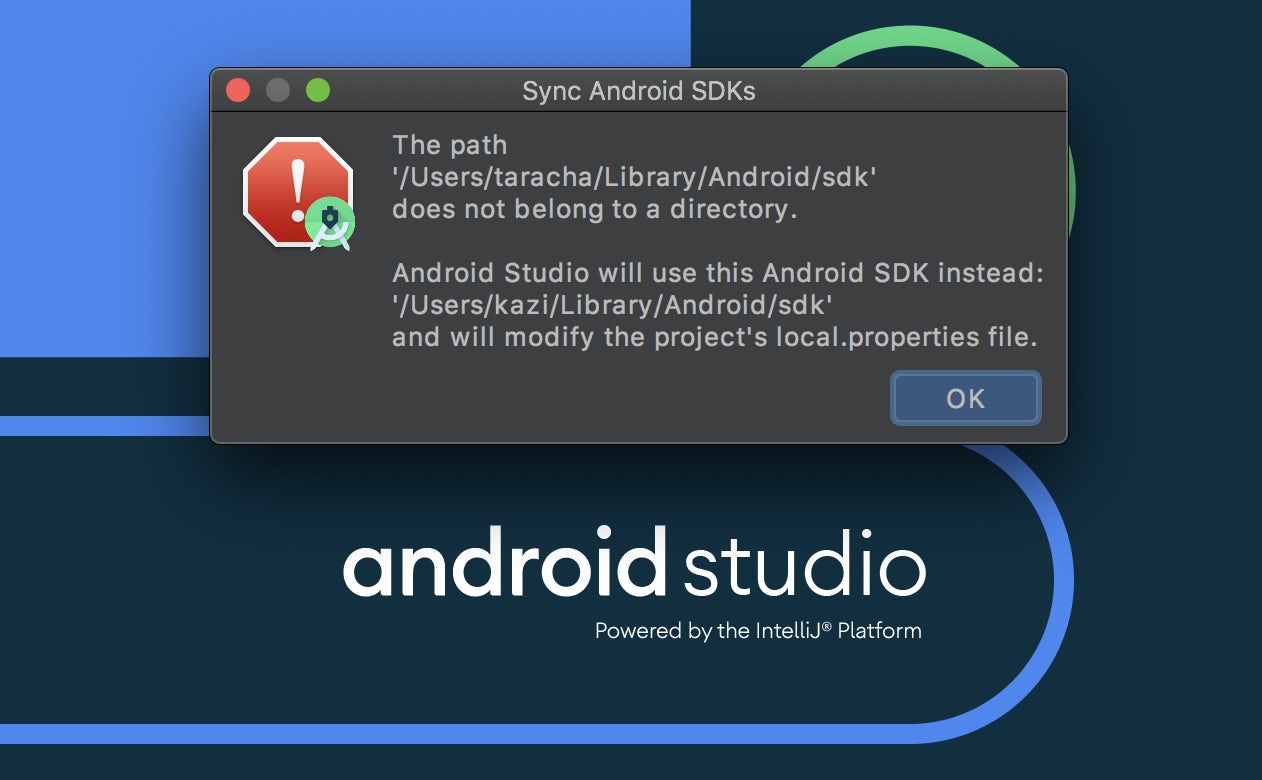
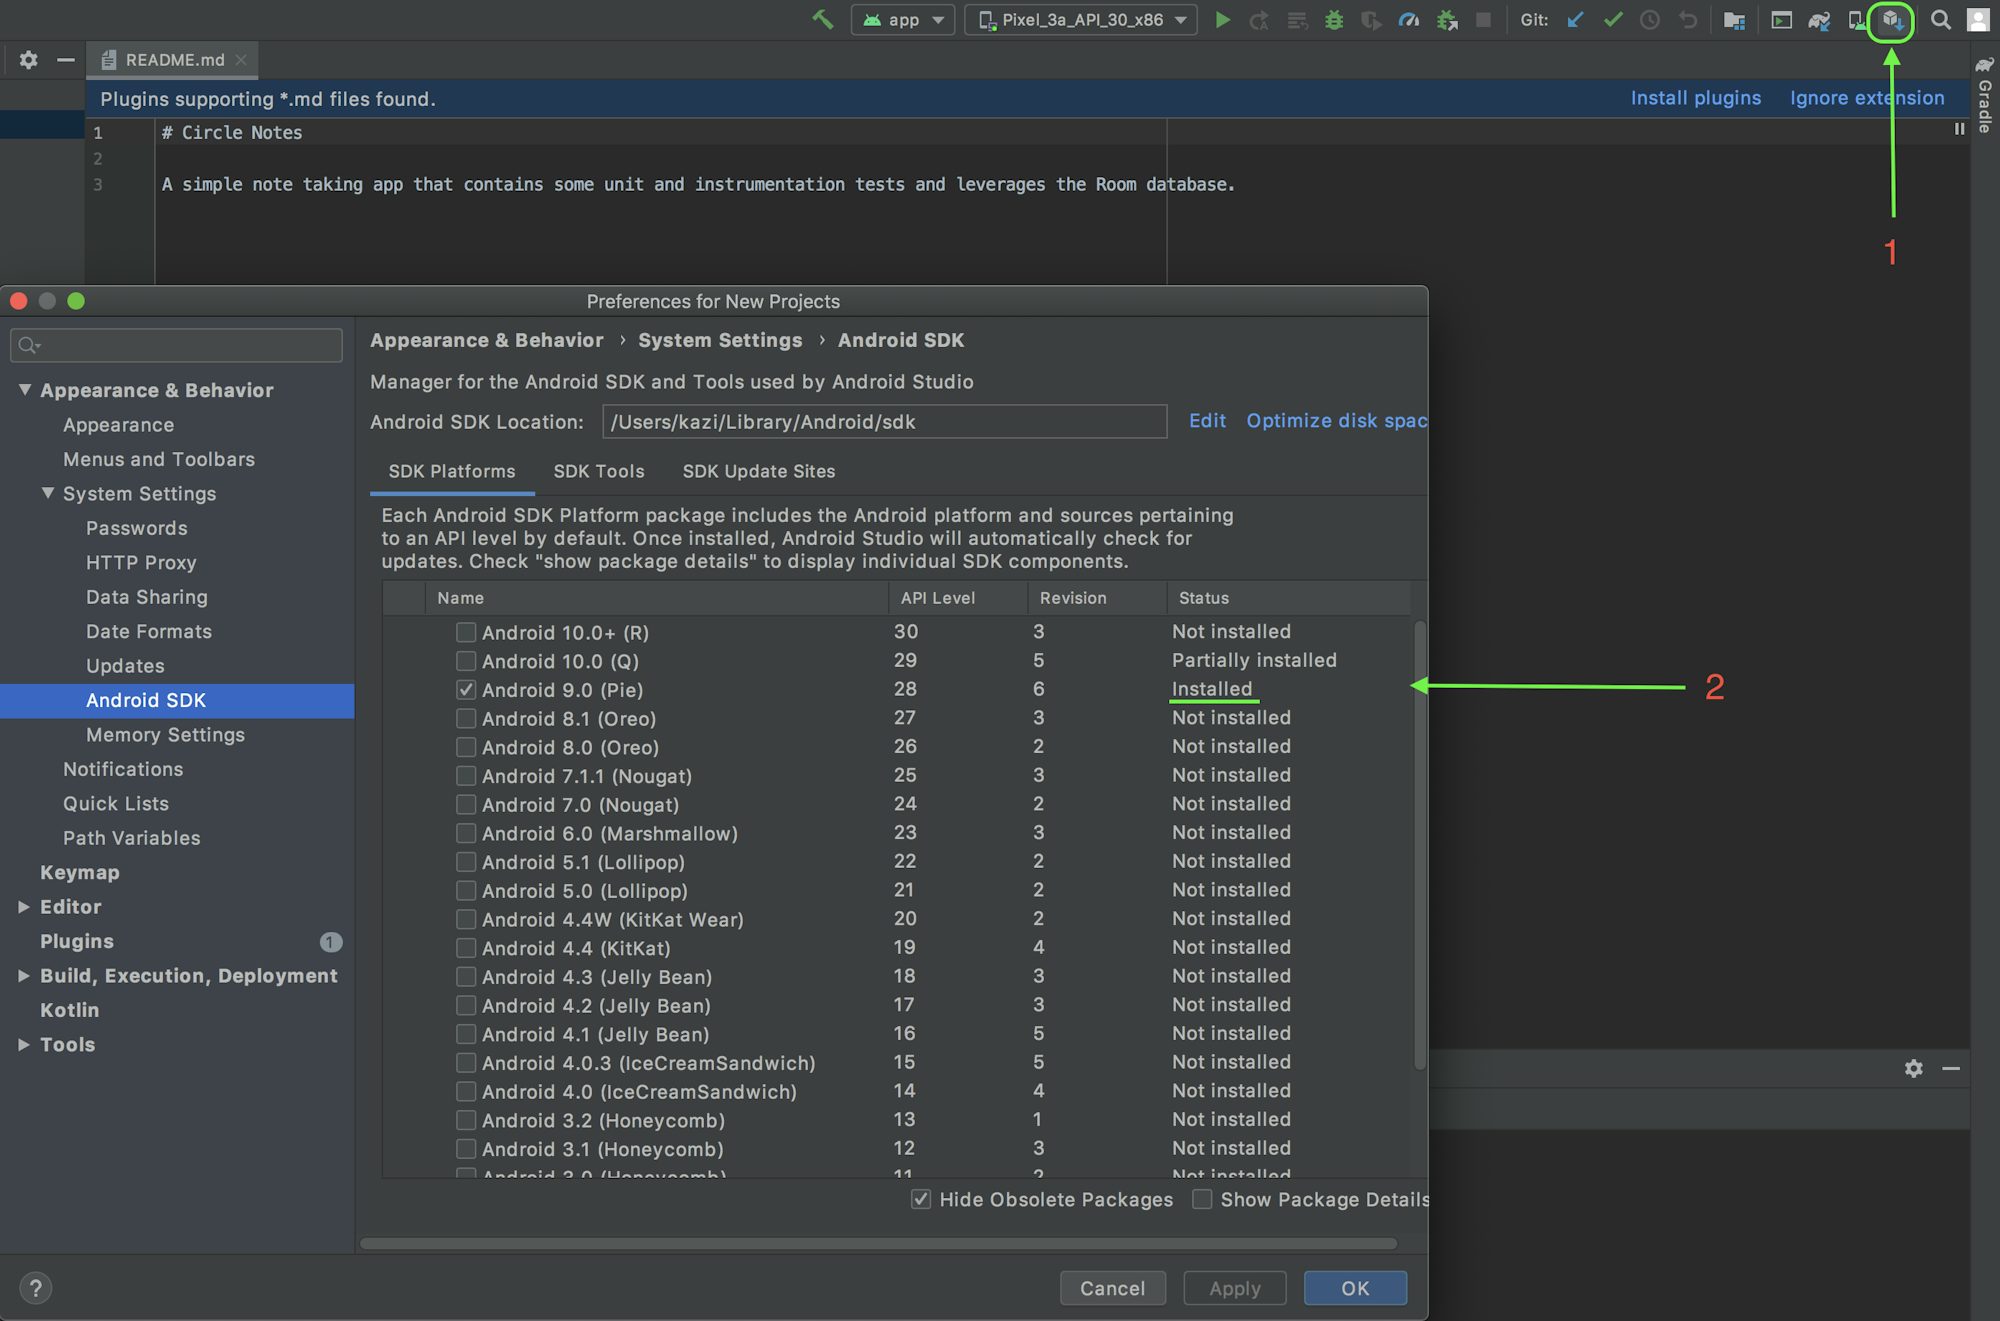
- As soon as you have the project available locally, open it in Android Studio. If prompted, click OK in the Sync Android SDKs dialog.
- Click 1 and make sure that 2 is selected. That means API Level 28 has been installed. If it is not, click the checkbox then Apply and OK. Otherwise, click OK.
- Click the run button on Android Studio.

- An emulator will start up and the app will run.
Getting set up
First, we will apply the Gradle Enterprise Gradle plugin. Because our project is using Gradle version 5.4.1, we will use com.gradle.build-scan as the plugin ID.
The plugin must be applied in the build.gradle file of the project.
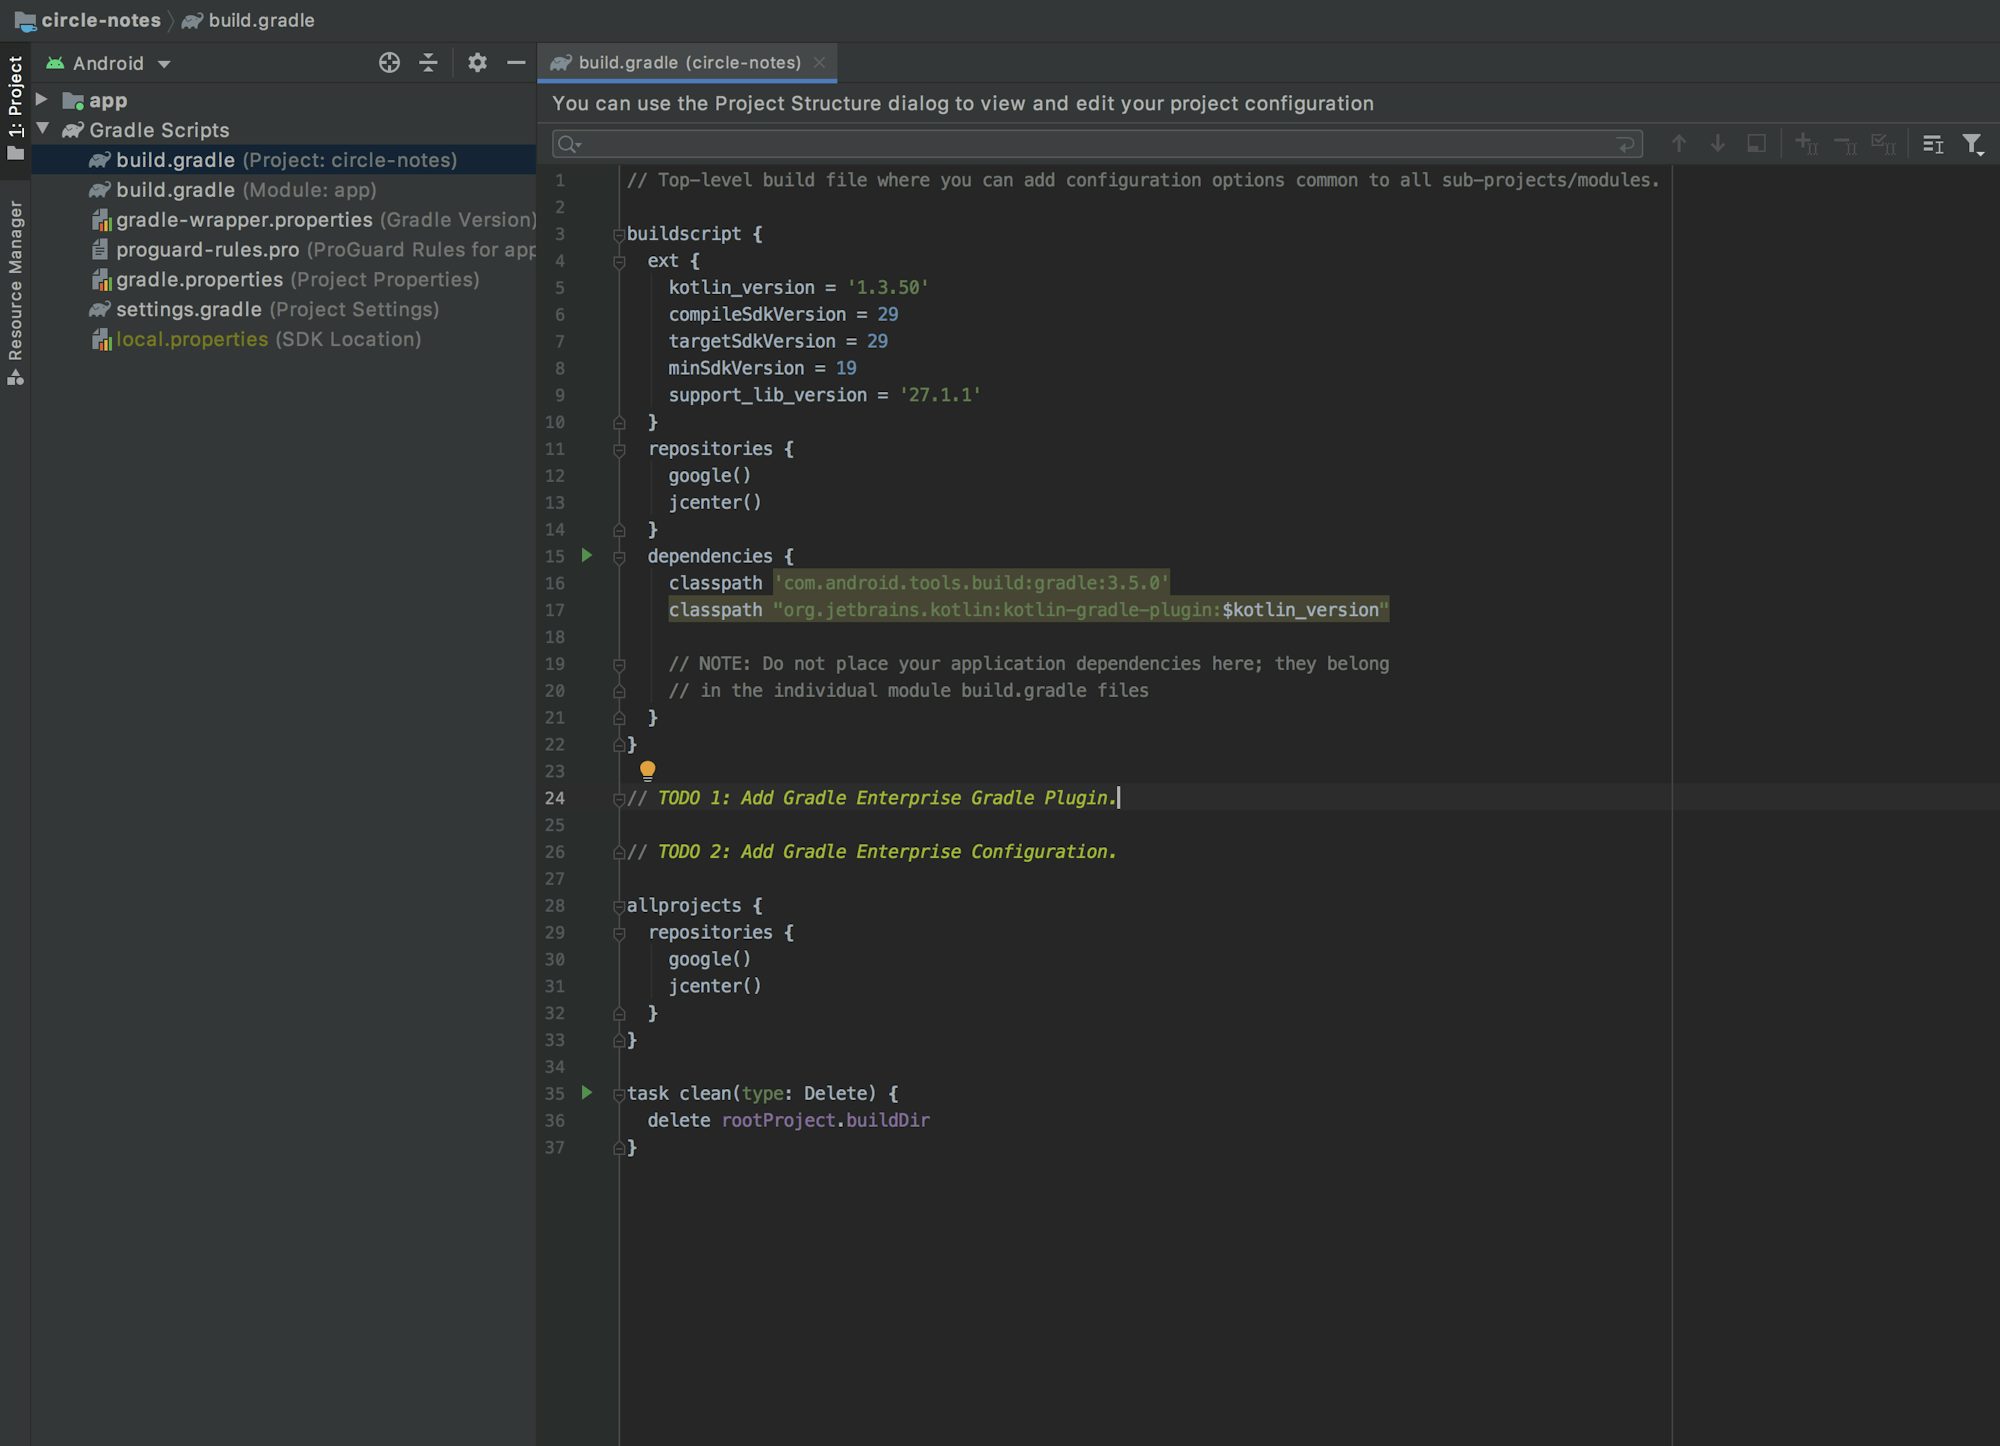
// TODO 1: Add Gradle Enterprise Gradle Plugin.
plugins {
  id "com.gradle.build-scan" version "3.3.4"
}

// TODO 2: Add Gradle Enterprise Configuration.
gradleEnterprise {

}
Note: In code snippets and screenshots for the rest of the tutorial, I have removed the ‘TODO’ lines.
Connecting to scans.gradle.com
Because we do not have a Gradle Enterprise server set up, our build scans will be published to scans.gradle.com.
You will need to agree to the terms of service (TOS) at https://gradle.com/terms-of-service. You can agree to the TOS by adding this to your build:
plugins {
    id "com.gradle.build-scan" version "3.3.4"
}

gradleEnterprise {
    buildScan {

        // Connecting to scans.gradle.com by agreeing to the terms of service
        termsOfServiceUrl = "https://gradle.com/terms-of-service"
        termsOfServiceAgree = "yes"
    }
}
NOTE: Not agreeing to the TOS in your build means that you will be prompted to do so each time you try to publish a build scan to scans.gradle.com.
Controlling when build scans are published
It turns out that build scans are not automatically published after you apply the plugin. For this tutorial, though, we want to publish every build. We can do that by using the publishAlways() directive:
plugins {
    id "com.gradle.build-scan" version "3.3.4"
}

gradleEnterprise {
    // configuration
    buildScan {

        // Connecting to scans.gradle.com by agreeing to the terms of service
        termsOfServiceUrl = "https://gradle.com/terms-of-service"
        termsOfServiceAgree = "yes"

        // Publishing a build scan for every build execution
        publishAlways()
    }
}
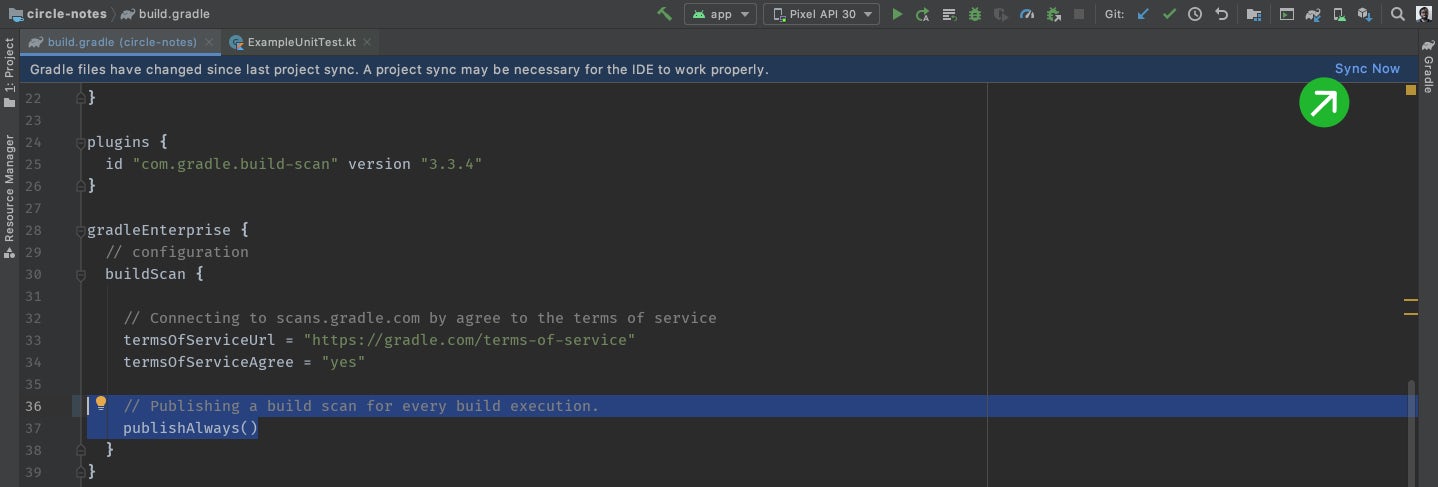
Make sure you sync the project after making changes to the build.gradle file.
Generate a local build scan
To generate a local build scan run the following gradle task in your Android Studio CLI:
./gradlew assembleDebug --scan
Appending the command with --scan publishes a scan on demand.
After the assemble Gradle task completes running, you will see a build scan link output in the CLI.

This project runs well using JDK8. If you are running JDK 10 or above, you may need to make some changes to these three files: gradle/wrappper/gradle-wrapper.properties, build.gradle, and settings.gradle on the app level.
An example you can use for this tutorial is available: Pull Request. These changes ensure that you are targeting the latest version of gradle (6.7) and that you update the build scan plugin to work with gradle 6.7.
Click the link to open the build scan.
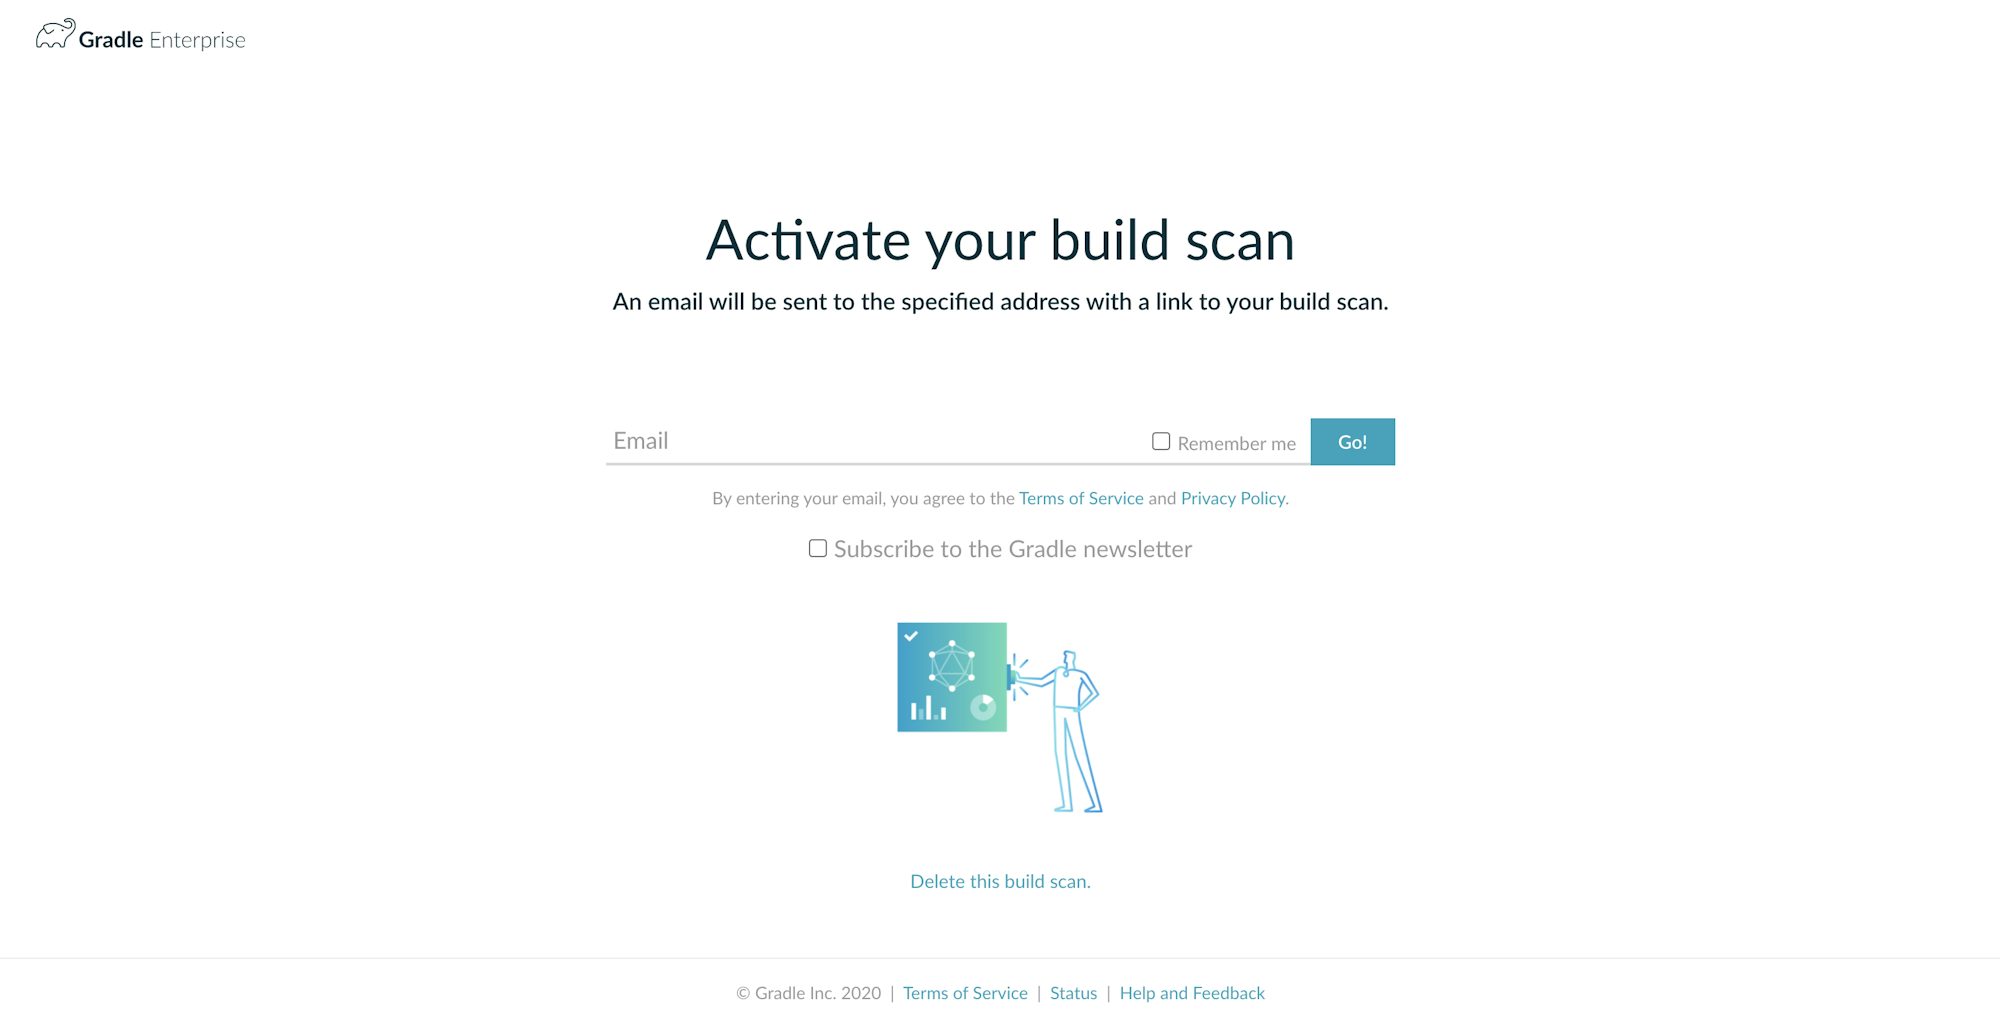
Enter your email to activate the build scan. The scan will be sent to your email inbox.
Note: Selecting the Remember me checkbox saves your email address for 90 days.
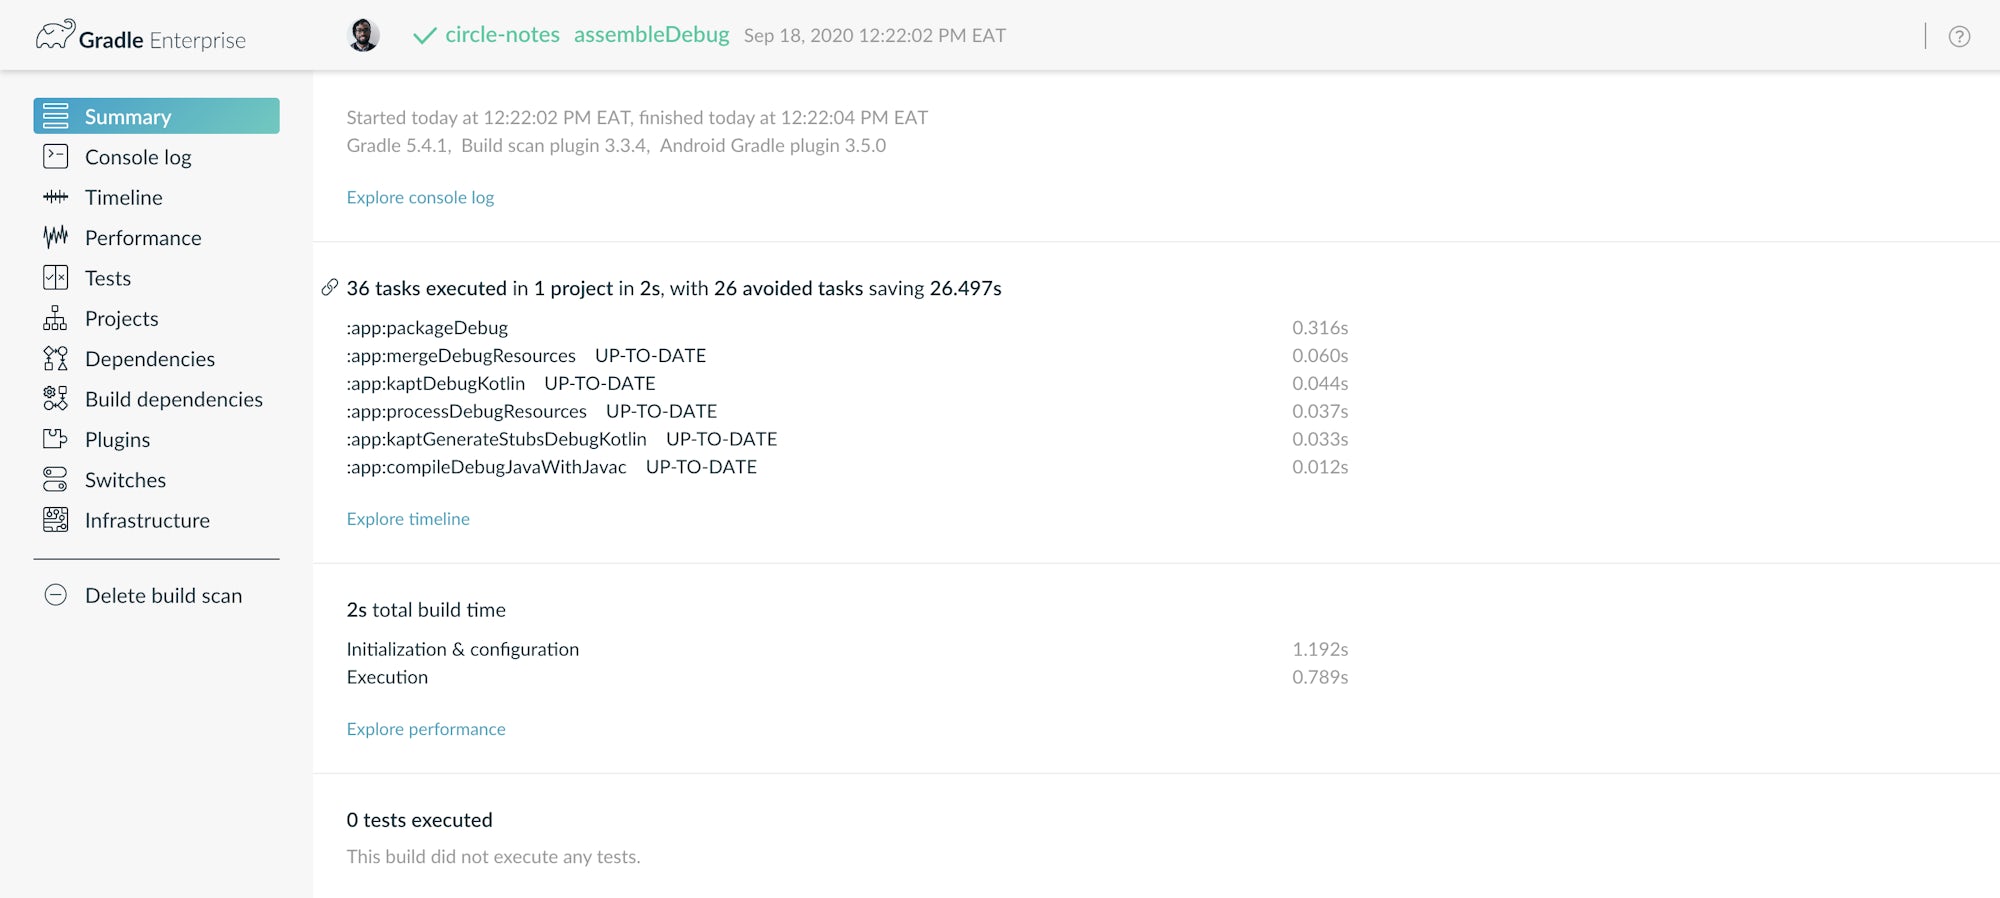
Congratulations! You have generated a local build scan.
Generating CI build scans
Generating a continuous integration (CI) build scan depends on how you set up your build. In this part of the tutorial, I will show you how to set up CI build scans using the circle-notes project. Using this project, a build scan is triggered any time we commit changes to the master branch. The build is triggered whether a build fails or succeeds.
The config.yml file is already provided in the starter project for this tutorial. You will need to set up this project on Circle CI to trigger CI builds.
If you are doing this for the first time, click Set Up Project, then Use Existing Config. Then click Start Building.
Any changes we make triggers a workflow where the unit test and lint jobs are run.

Click build to view the details.
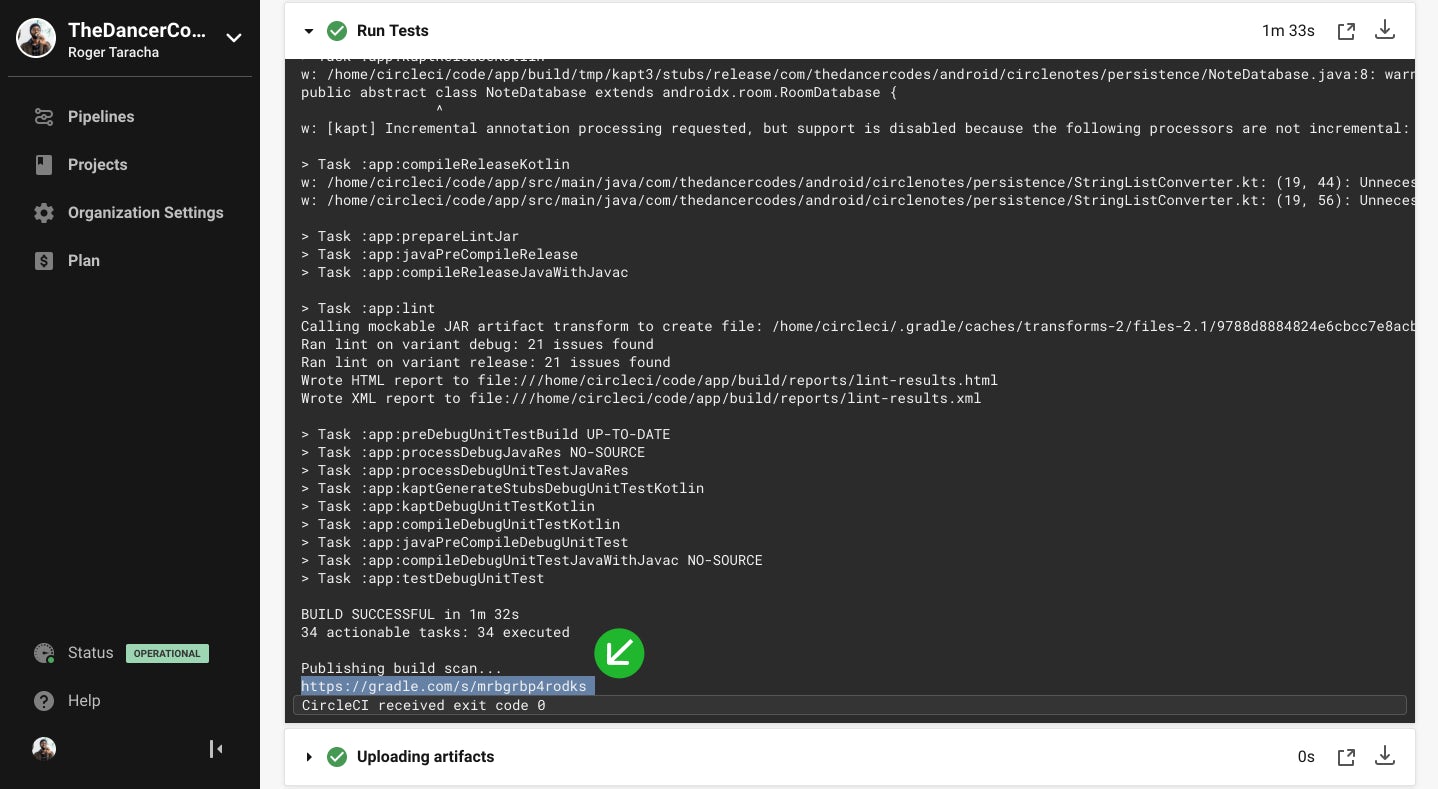
When you open the build scan link in your browser, you will be prompted to activate the build scan. (Just like the locally generated one did.) When you activate it, you should see the build scans belonging to the lint and unit tests job.
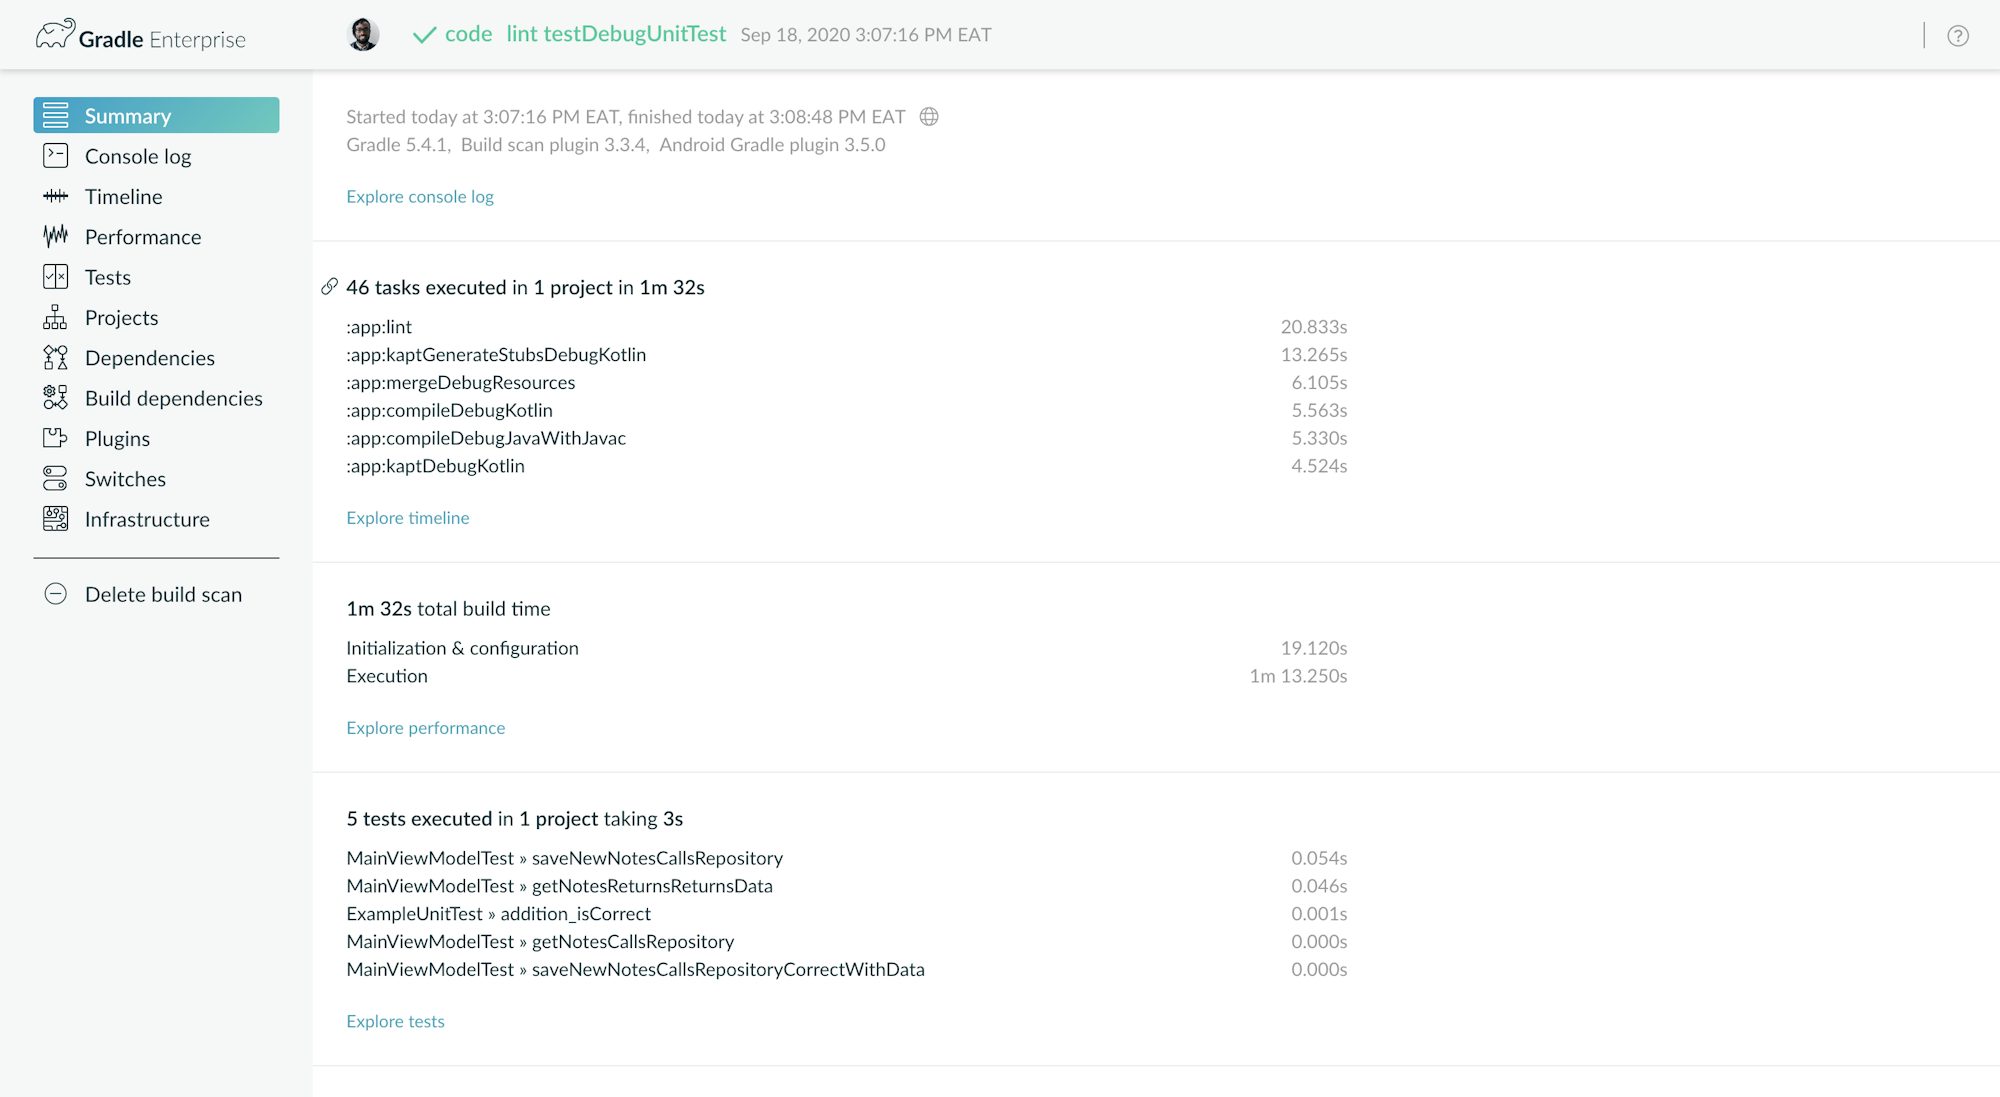
Congratulations! You have generated CI build scans.
How to use a build scan
In this section, I will highlight a couple of the things that you can do with build scans.
1. Sharing console logs
Build scans include the console output produced by the build. Many tools used by the build, like compilers, write diagnostic information to the console log.
Use the left navigation menu to visit the Console log section. Click any line to highlight it or shift-click to highlight a block of lines.
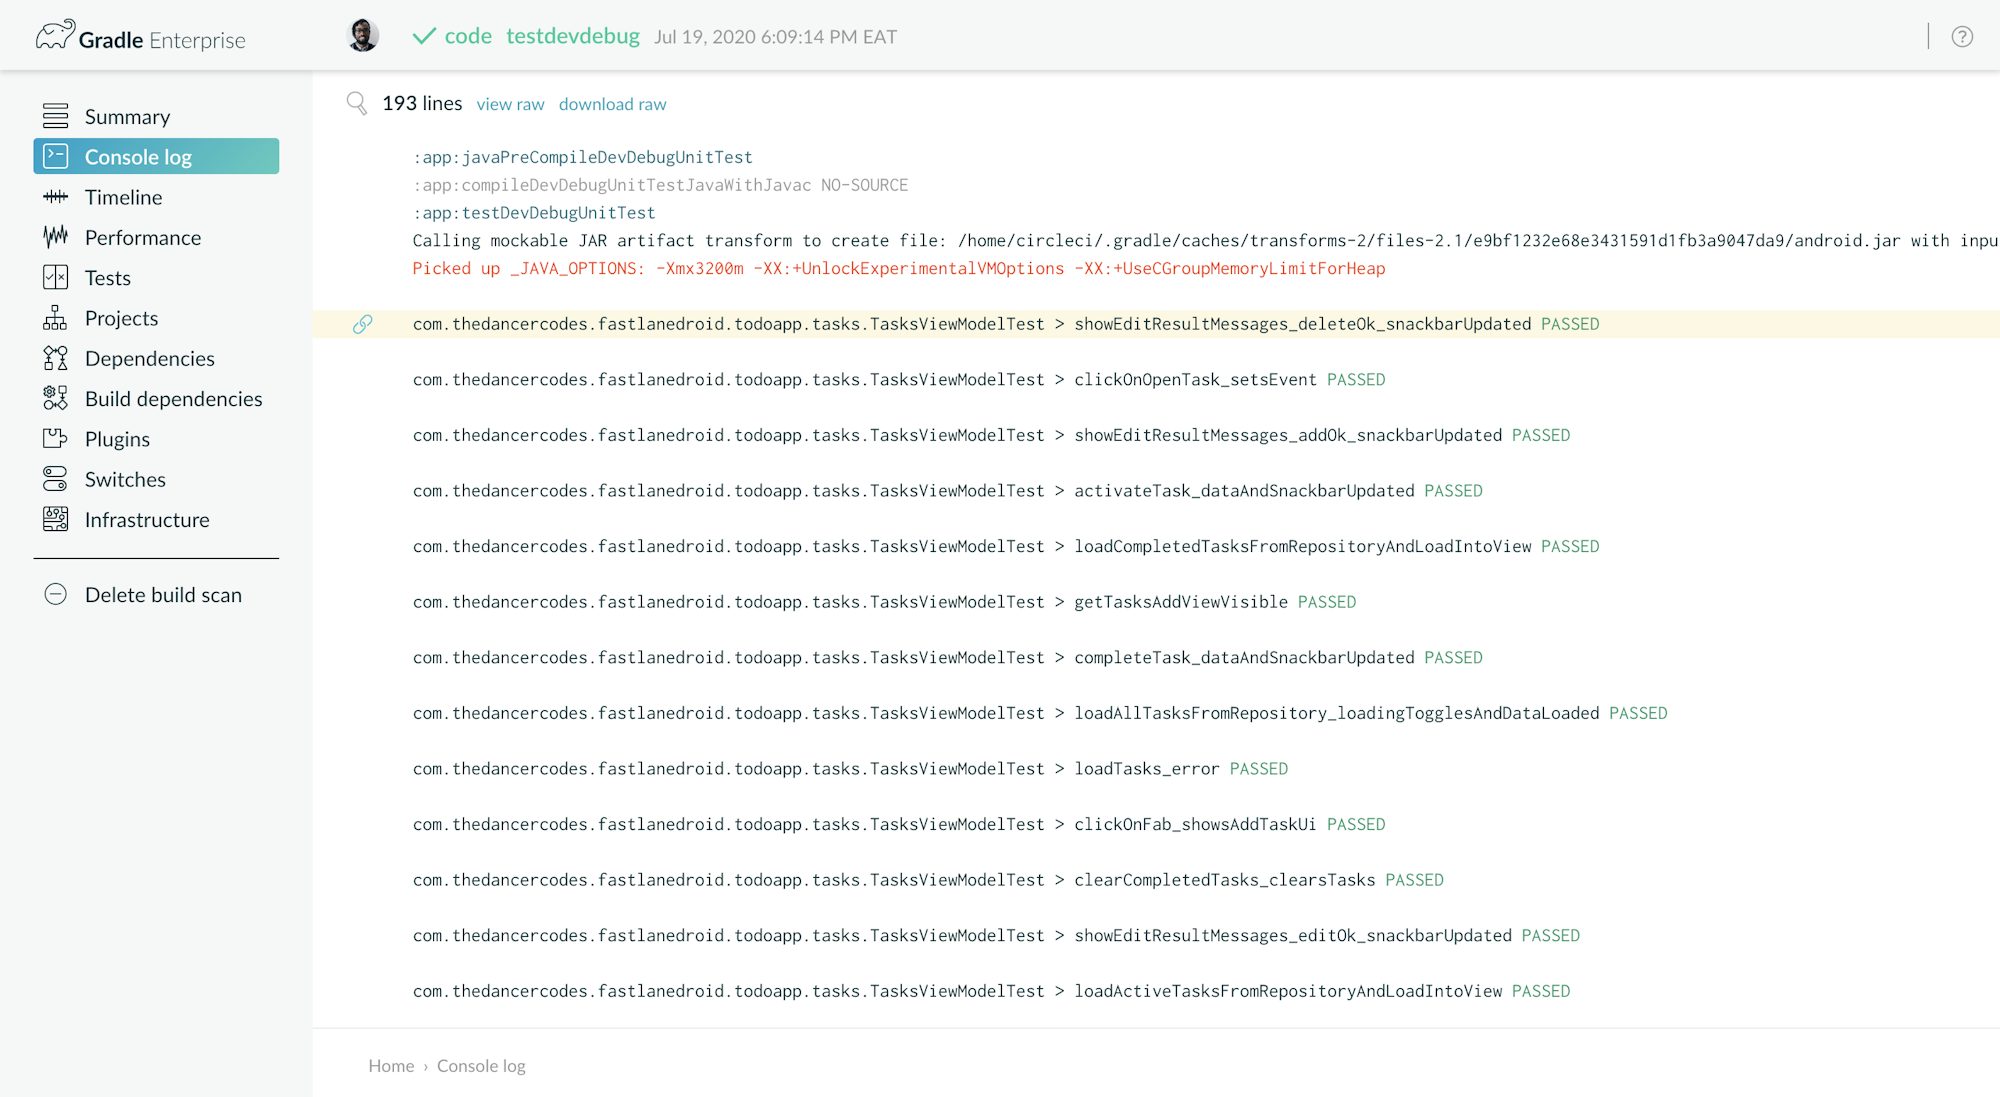
You will note that the browser’s current location has been updated. By sharing that URL with a colleague, you can direct them to the exact console output that you want them to see. Many aspects of build scans are directly linkable to make sharing and collaboration easier.
2. Viewing and sharing test execution results
Tests are the cornerstone of software development. Build scans visualize test results, including test durations, logging output, and outcome.
Use the left navigation menu to visit the Tests section. Click any failed test to see the console output and error trace.
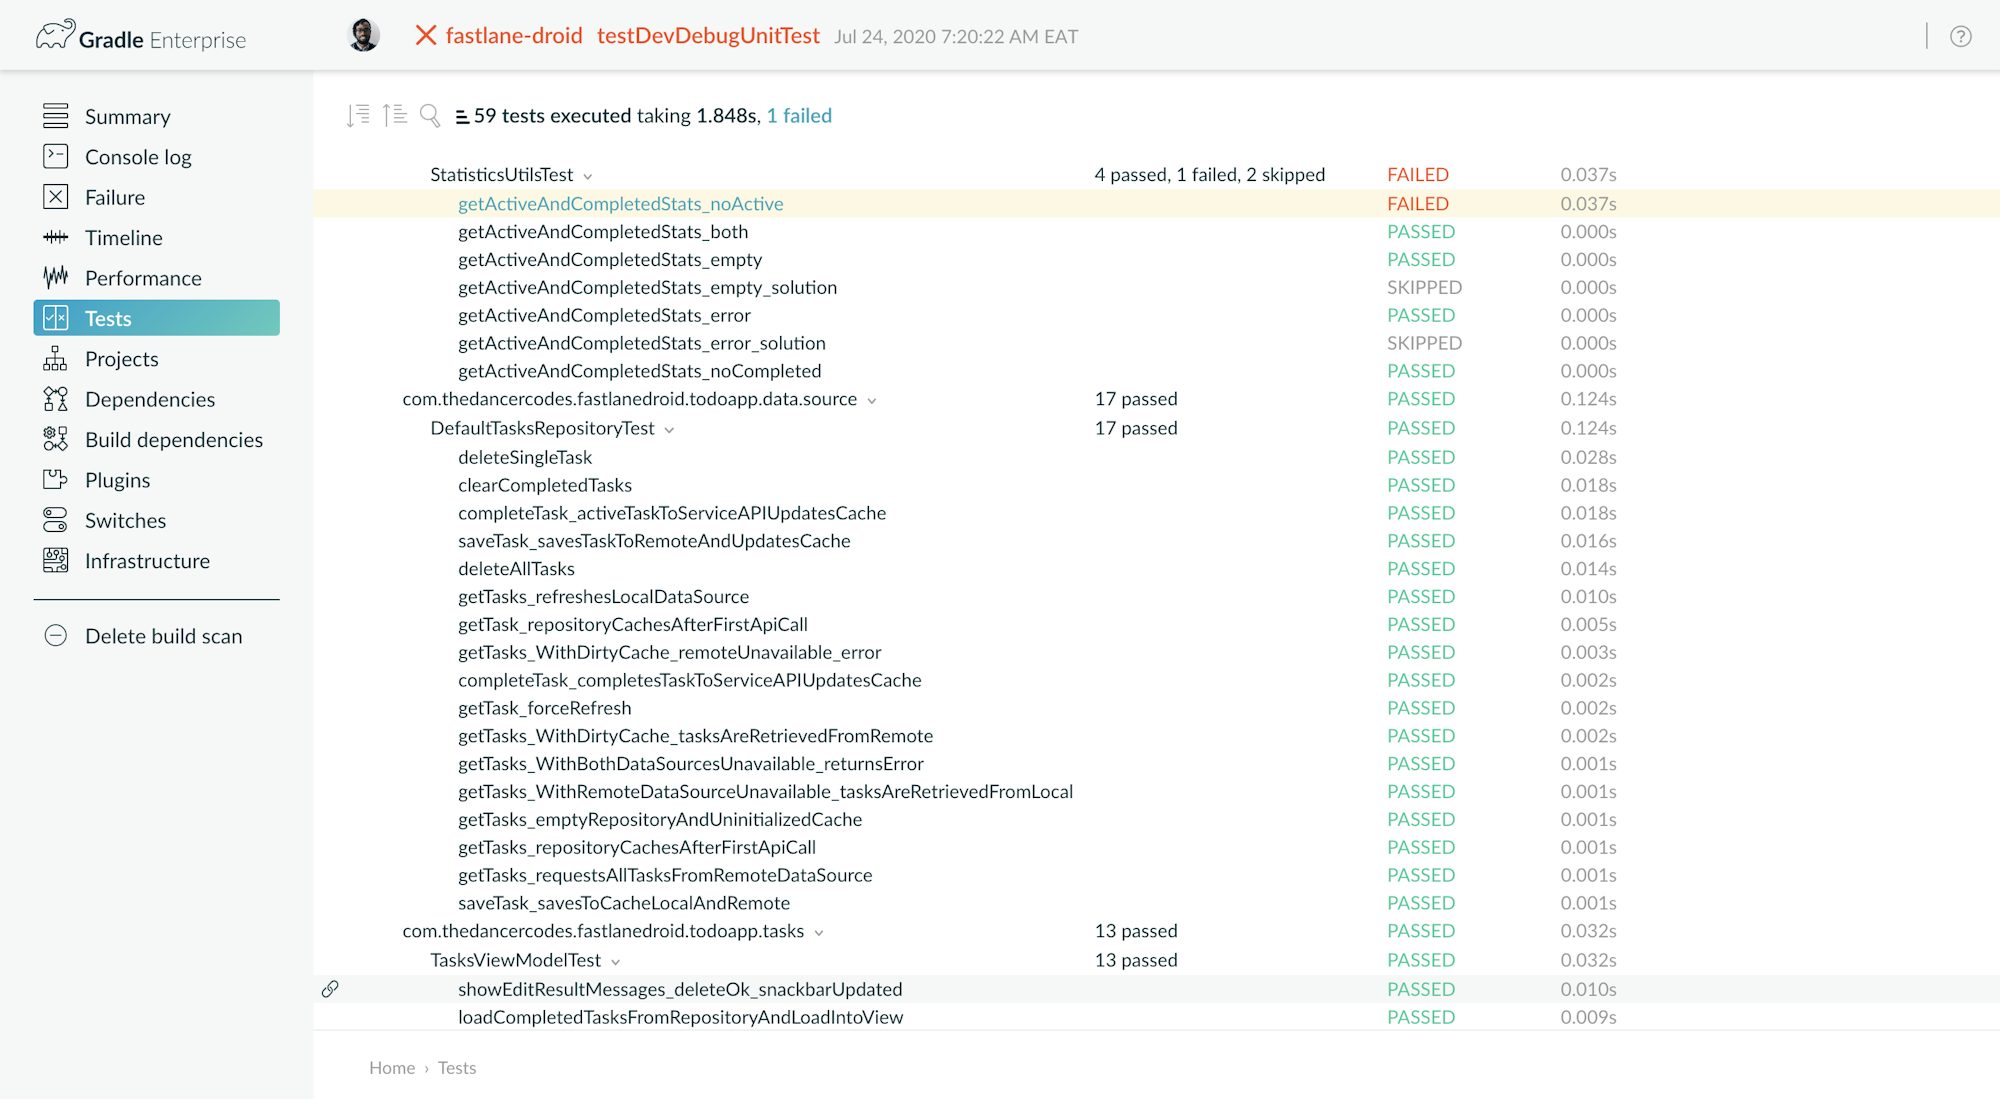
Links to build scans make it nearly effortless for developers to share the test results of local builds with their team and other colleagues. This kind of easy collaboratiion makes solving test failures more efficient and quicker.
3. Analyzing build performance
A key benefit of build scans is the wide range of insights they provide into build performance. Many builds will perform differently on different machines. Deep performance insights give users the power to optimize every nook and corner of the build.
From the left navigation menu click Performance.
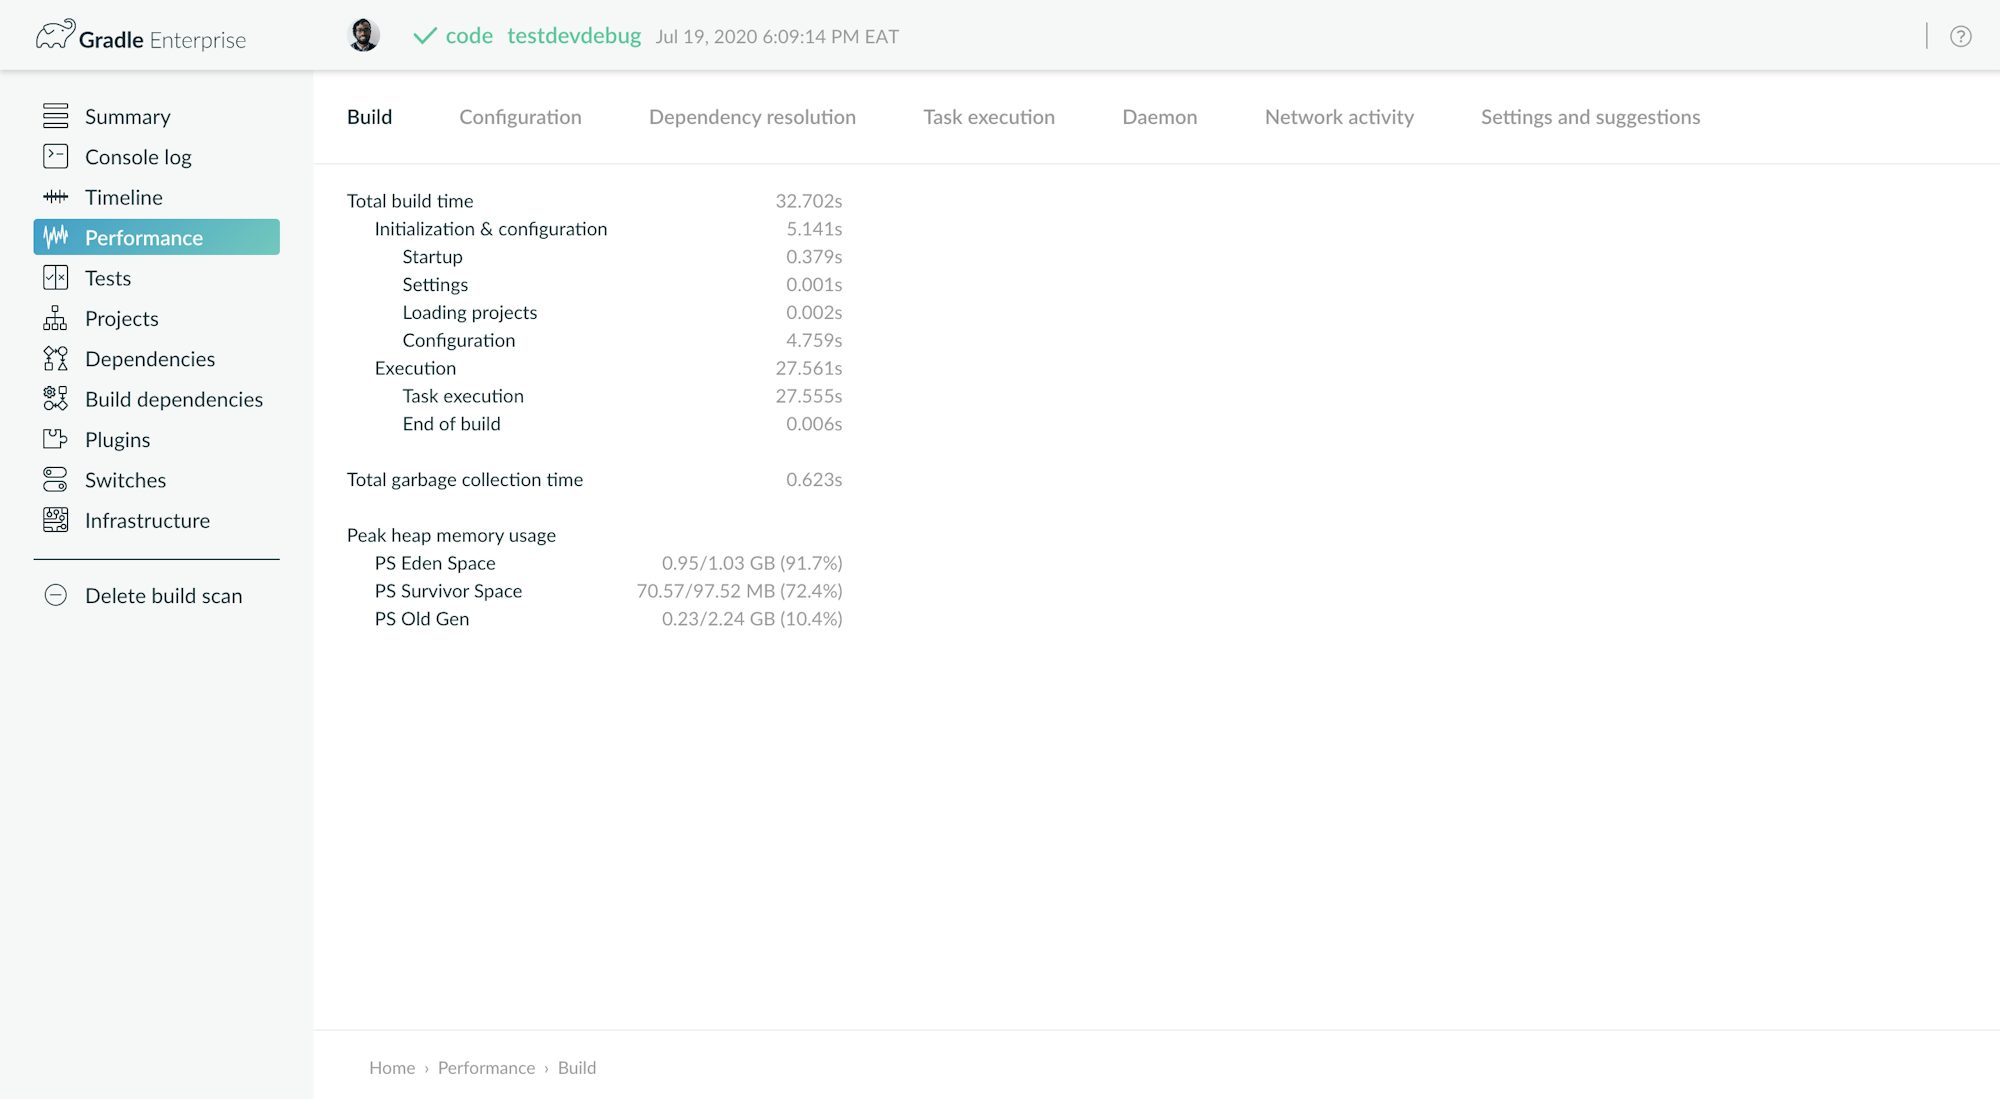
There is a tab for each aspect of performance. The first Build tab shows a high-level build time breakdown and memory information.
The Configuration tab breaks down the time spent configuring the projects in the build. The breakdown interactively highlights the slowest scripts, plugins, and lifecycle callbacks used during the build. Optimize these less-than-speedy items to make your build faster.
The Task execution tab groups build tasks by outcome, and provides a concise breakdown of them. Use this high-level view to understand incremental build and build caching coverage for a particular build. The dedicated Timeline section (available from the left navigation menu) provides an alternate view for visualizing the task execution. Click the task name to get more detail on them. The Timeline section clearly shows the parallel utilization of your build.
The Network activity tab lists the network requests made during the build and can be used to identify slow dependency repositories or particularly troublesome requests.
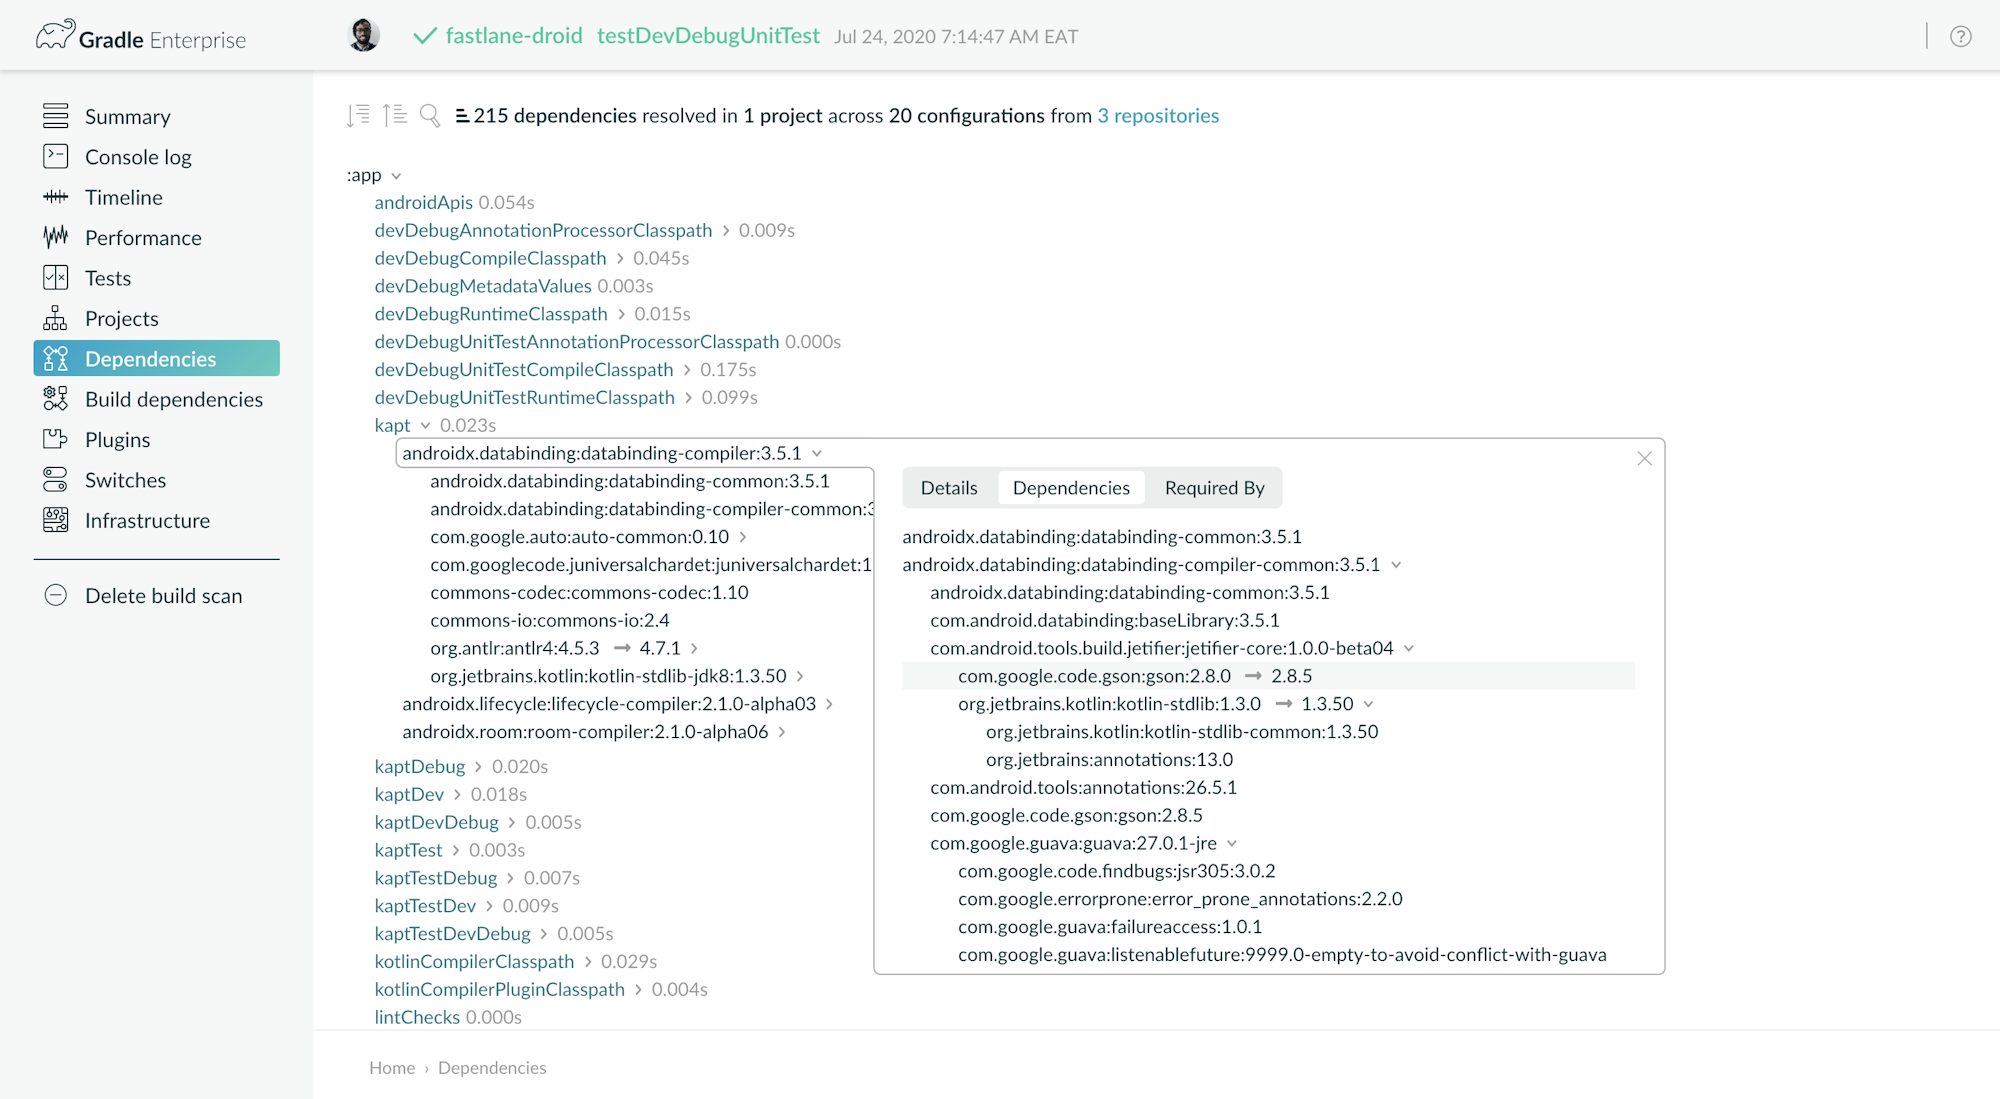
4. Understanding your dependencies
Each build scan provides an interactive visualization of every dependency configuration resolved during that build. You can search for dependencies across all the projects in the build by name or type of resolution.
Conclusion
This tutorial is complete! You learned how to:
- Generate a local and CI build scan
- View the build scan information online
- Create a script to enable build scans for all builds
Use what you have learned to optimize builds and improve your team’s productivity and performance.
