Preventing SQL injection attacks with automated testing

Fullstack Developer and Tech Author

There are far too many application data breaches happening every day, usually when a malicious agent attacks the database. SQL injection is one of the most destructive ways an application can be attacked. The attack tricks the application into running well-crafted malicious code at the database level. An SQL injection attack targets an application’s database, which can result in leaked, lost, or corrupted data and reduce user trust in your company.
In this tutorial, I will demonstrate how to use automated testing in a continuous integration (CI) pipeline to check vulnerable application entry points for database injection attacks.
Prerequisites
To follow this tutorial, a few things are required:
- Basic knowledge of JavaScript
- Node.js installed on your system (version >= 18.0)
- A CircleCI account
- A GitHub account
Cloning the demo project
To begin the tutorial, you will need to clone the demo project. The project is a simple Node.js user accounts API application with these endpoints:
GET : /users/fetchis an endpoint for fetching all users.POST : /users/fetchis aPOSTendpoint that takes a useridand uses it to fetch a single user.POST : /users/createis aPOSTendpoint that takes the parametersnameandemailto create a new user record.
This project runs on a SQLite database that stores data in memory (for demo purposes) and contains a single table, named users.
Clone the project by running this command:
git clone --single-branch --branch base-project https://github.com/CIRCLECI-GWP/prevent-sql-injection.git
Once the cloning process is complete, go to the root of the project and install the dependencies by running:
cd prevent-sql-injection
npm install
Next, run the application with this command:
npm run dev
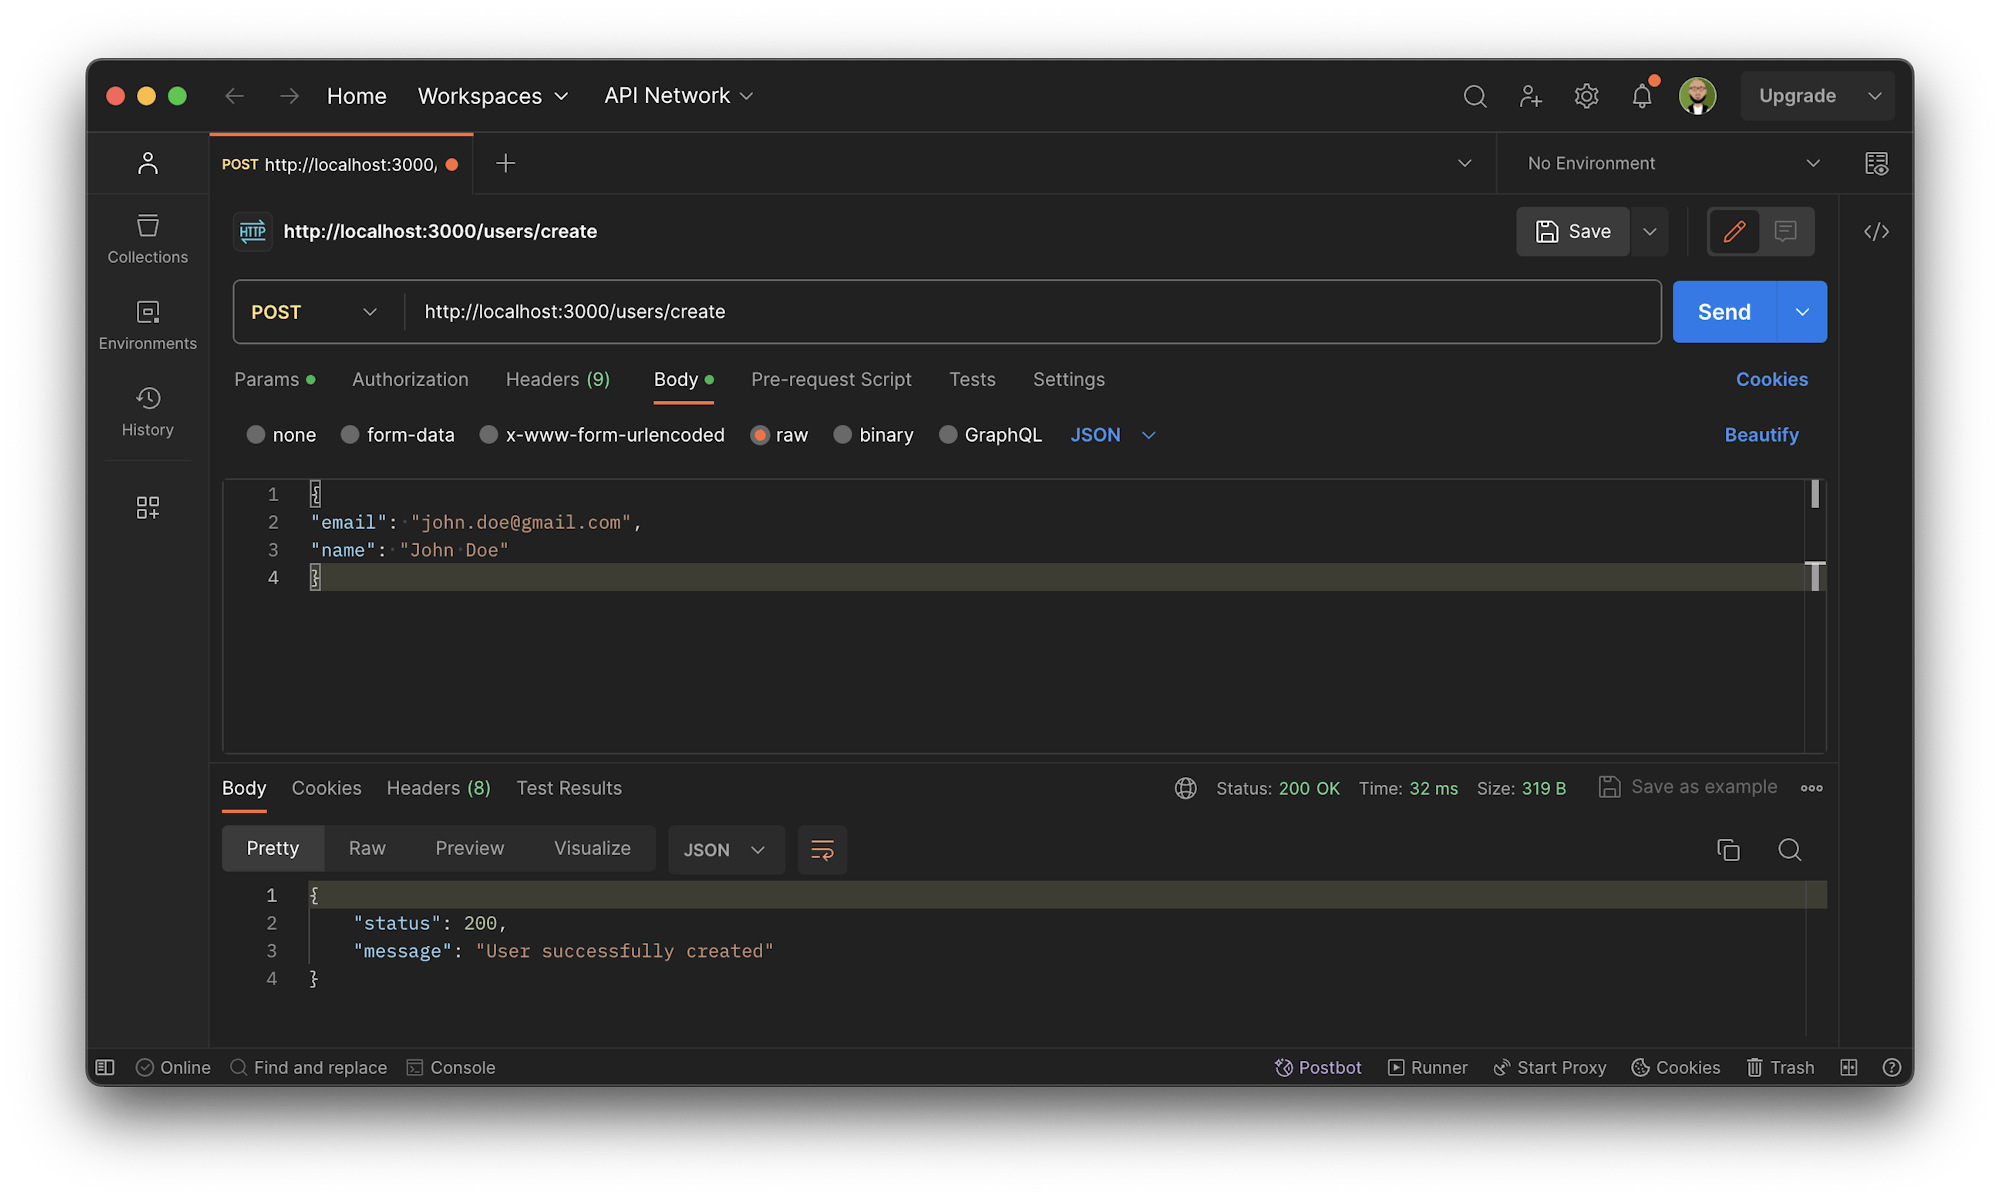
The application will start listening on a default port of 3000. Open Postman and add some users using the http://localhost:3000/users/create endpoint. (You can only create a single user at a time.)
{
  "email": "john.doe@gmail.com",
  "name": "John Doe"
}
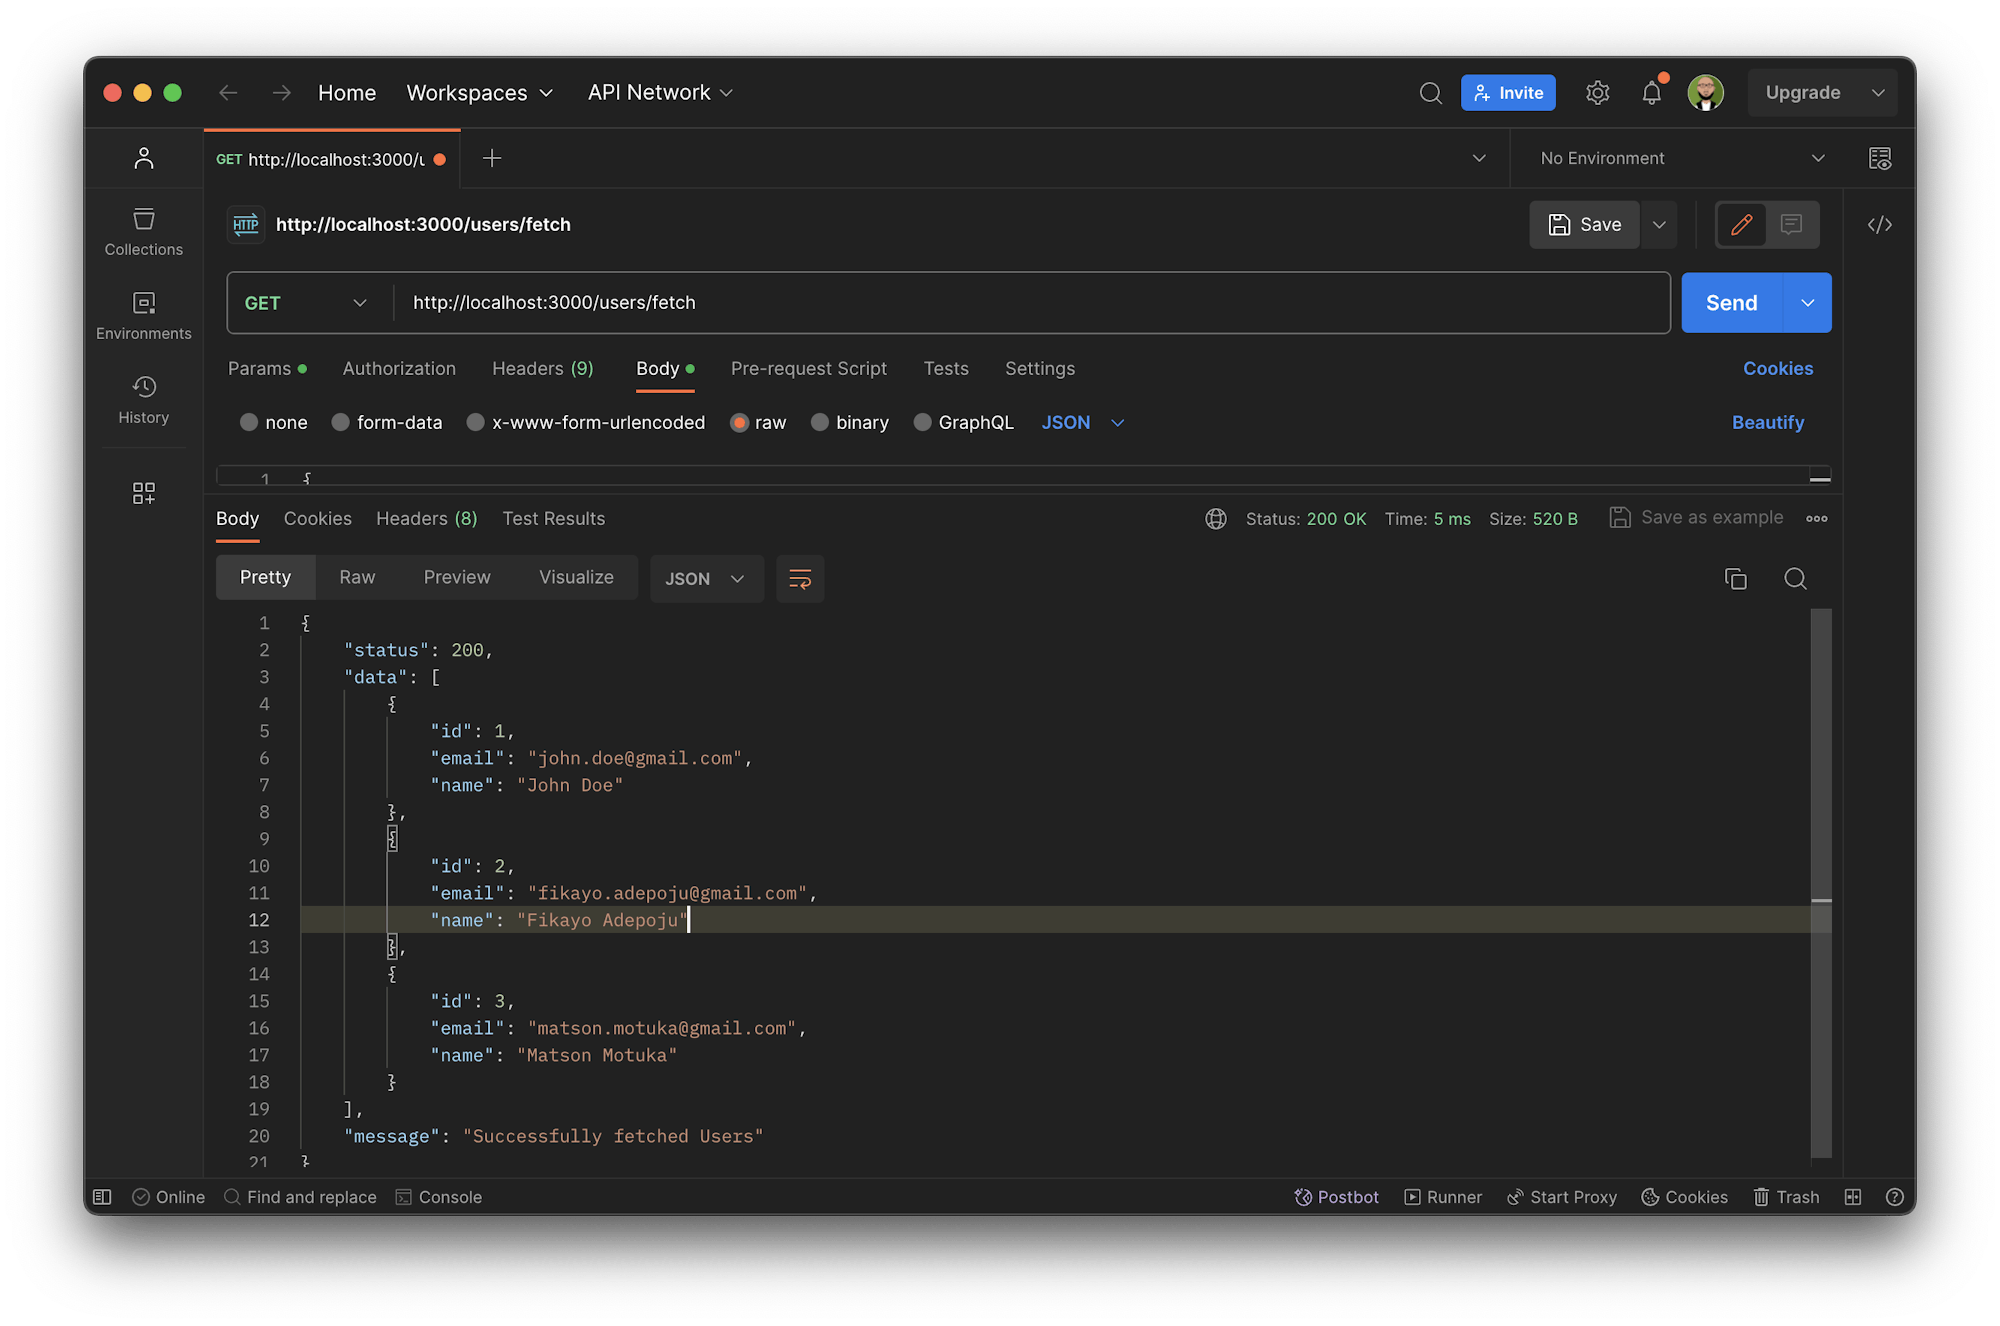
Fetch the users by making a GET call to the http://localhost:3000/users/fetch endpoint.
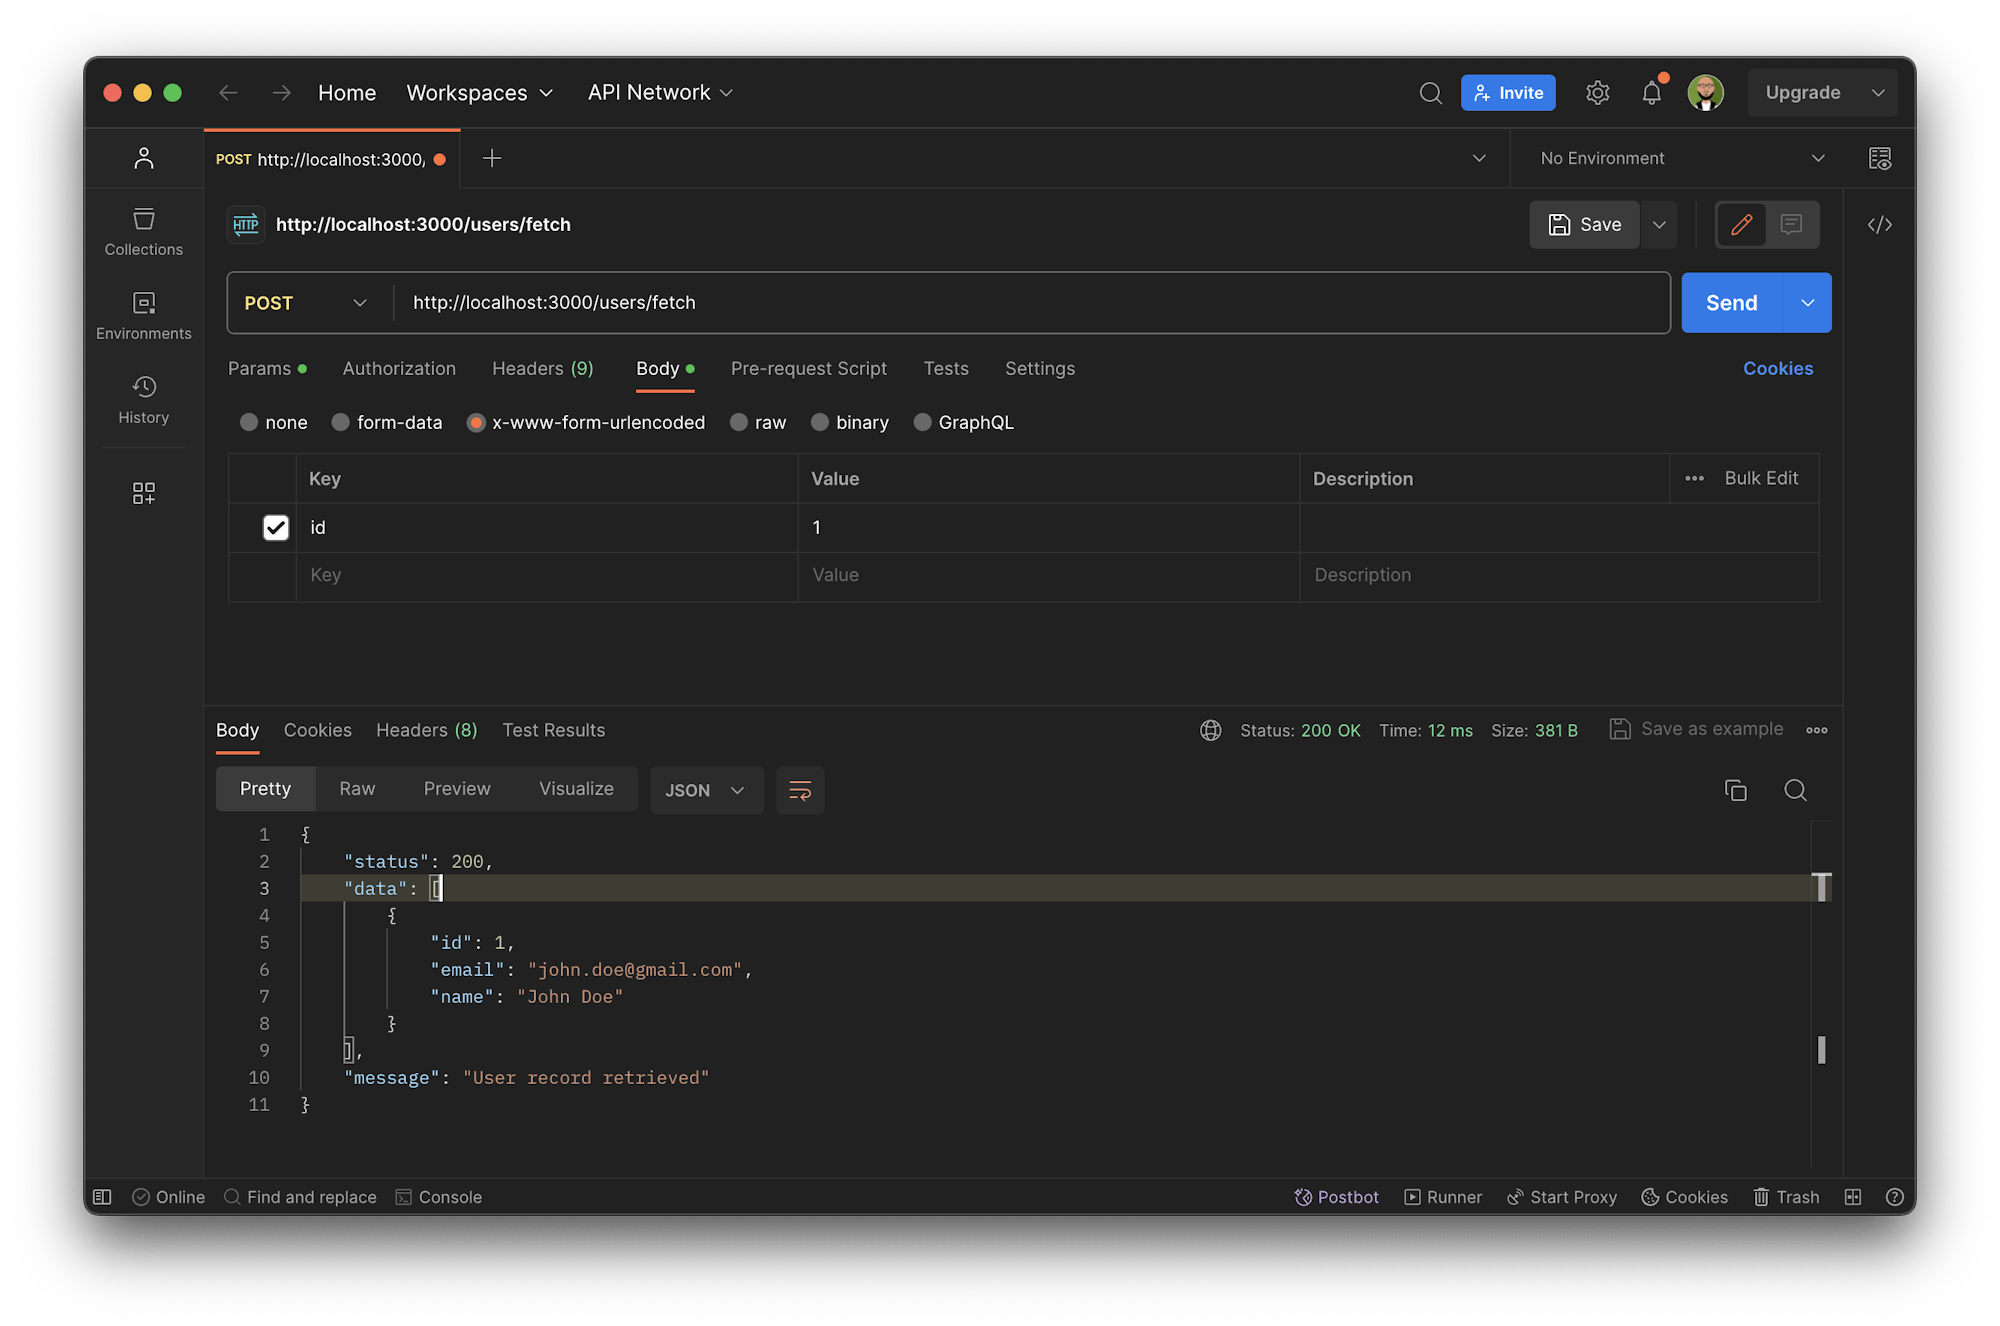
You can also send an id parameter for the first user by calling the POST endpoint of /users/fetch to retrieve the user.
Adding tests to check for sensitive data exposure threat
The endpoints POST : /users/fetch and POST : /users/create are two entry points into the application. They take in data that the application processes to give results. The handlers for these two endpoints can be found in user.js at the root of the project:
...

function getUser(req, res) {

    let sql = `SELECT * FROM users WHERE id='${req.body.id}'`;

    db.all(sql, function (err, data) {
        if(err) throw err

        res.json({
            status : 200,
            data,
            message : "User record retrieved"
        })
    })

}

function createUser(req, res) {

    let sql = `INSERT INTO users(email, name) VALUES ('${req.body.email}', '${req.body.name}')`;

    db.run(sql, function (err) {
        if(err) throw err

        res.json({
            status : 200,
            message : "User successfully created"
        })
    })
}
Both handlers run SQL queries that directly take in user data from the request object. You can attack one of these endpoints to expose its SQL injection vulnerability.
You will be testing the POST : http://localhost:3000/users/fetch endpoint, which is supposed to take the id of a specific user and return just that user in a data array. A well-crafted SQL injection attack will attack this endpoint causing it to expose the data for all users in the database.
To begin, install jest (test runner) and supertest (for testing API endpoints) using this command:
npm install -D jest supertest
Once this installation is done, create a folder __tests__ and within this folder, create the file injection.test.js. Add this code:
const supertest = require("supertest");
const app = require("../app");
const request = supertest(app);

const db = require("../db");

let createTableSQL =
  "CREATE TABLE IF NOT EXISTS `users` ( `id` INTEGER PRIMARY KEY AUTOINCREMENT NOT NULL , `email` VARCHAR(100) NOT NULL , `name` VARCHAR(240) NOT NULL)";

let insert =
  "INSERT INTO users (name, email) VALUES ('user1@test.com','User 1'), ('user2@test.com','User 2'), ('user3@test.com','User 3')";

test("Test malicious data exposure", (done) => {
  db.run(createTableSQL, function (err) {
    db.run(insert, function () {
      let maliciousUserId = `1' OR 1=1;--`;

      request
        .post("/users/fetch/")
        .send({ id: maliciousUserId })
        .set("Accept", "application/json")
        .expect(200)
        .expect("Content-Type", /json/)
        .end(function (err, res) {
          if (err) return done(err);

          //Should not return more than one record
          expect(res.body.data.length).toBeLessThan(2);
          done();
        });
    });
  });
});
This test case begins by creating the users table and seeding it with 3 test users. It then crafts a malicious user id that intercepts the SQL query and injects a condition that will always be true. This is an alternative to the condition that restricts the result to just the user with the id. The result is that the query returns all the users in the users table.
You can test the result of the API call to make sure it does not contain more than one record. With 3 users already in the table, if the request returns more than 1 result, it will fail, which indicates that the attack was successful.
To complete the test setup, add a test script to package.json:
"scripts": {
    ...
    "test": "jest"
},
Now you can run the test. At the root of the project, run:
npm run test
Once the test runs, you will get a failed result.
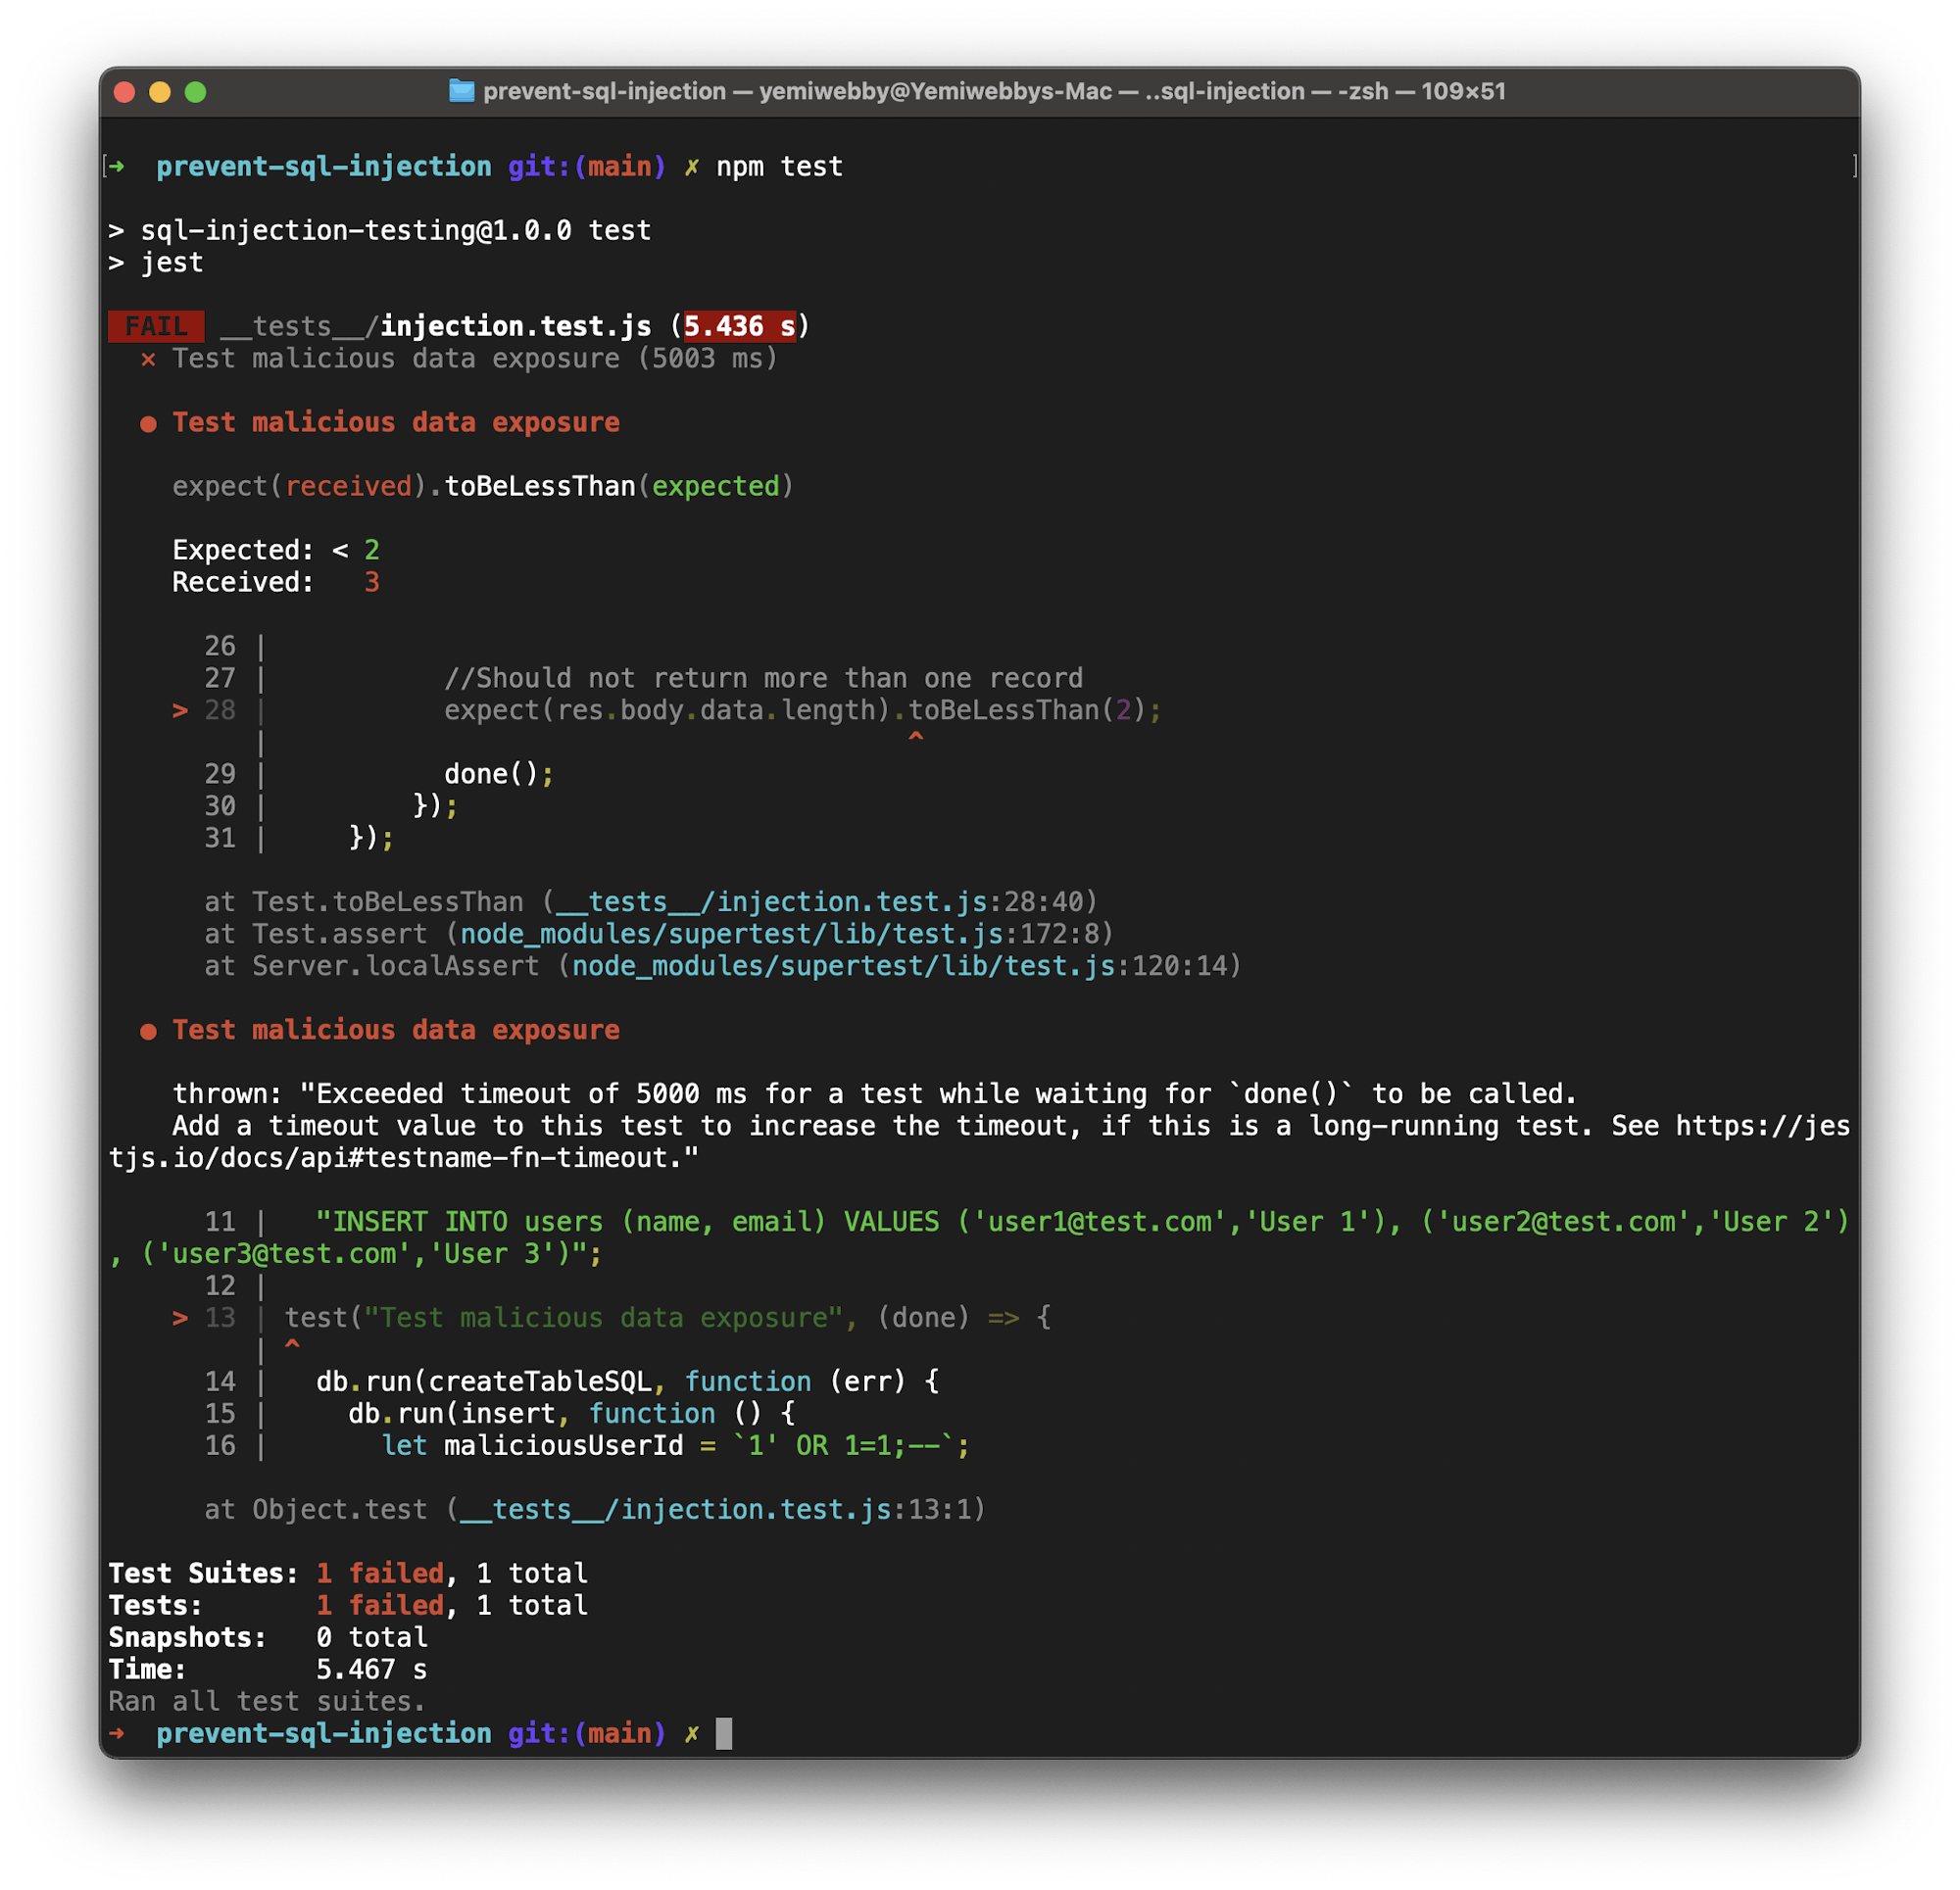
Instead of returning a single value or none at all if there is no match, the injection attack was able to successfully force the database to expose more than 2 users contained in the table. This kind of attack is a dangerous way for malicious users to expose sensitive or private data like phone numbers, account numbers, and credit card information.
Fixing the injection loophole
So, how can this be fixed? SQL injection is usually fixed by tweaking your code to check for conditions to validate data coming from users accessing your application. In the earlier case for example, we can try checking that the value submitted by the user it is an integer, because IDs are stored as integers. Any malicious SQL will not pass that check because they are strings and not integers.
However, even though the strategy works to fix the loophole in the POST : http://localhost:3000/users/fetch endpoint, there is another recommended best practice for processing SQL statements in your applications: the SQL command in the getUser handler.
let sql = `SELECT * FROM users WHERE id='${req.body.id}'`;
It is considered unsafe to directly pass user-inputed values into your SQL queries. You can instead use placeholders in your queries that map to a set of values defined in an array or object. Most database drivers and Object Relational Mappers (ORMS) provide this functionality. For your endpoint, replace the getUser code handler in the users.js file with this piece of code:
function getUser(req, res) {
  let sql = `SELECT * FROM users WHERE id=?`;

  db.all(sql, [req.body.id], function (err, data) {
    if (err) throw err;

    res.json({
      status: 200,
      data,
      message: "User record retrieved",
    });
  });
}
The updated handler uses the placeholder ? in your query, then passes an array as the second argument to db.all(), which contains the id for the user. When you rerun the test you will get a passing result.
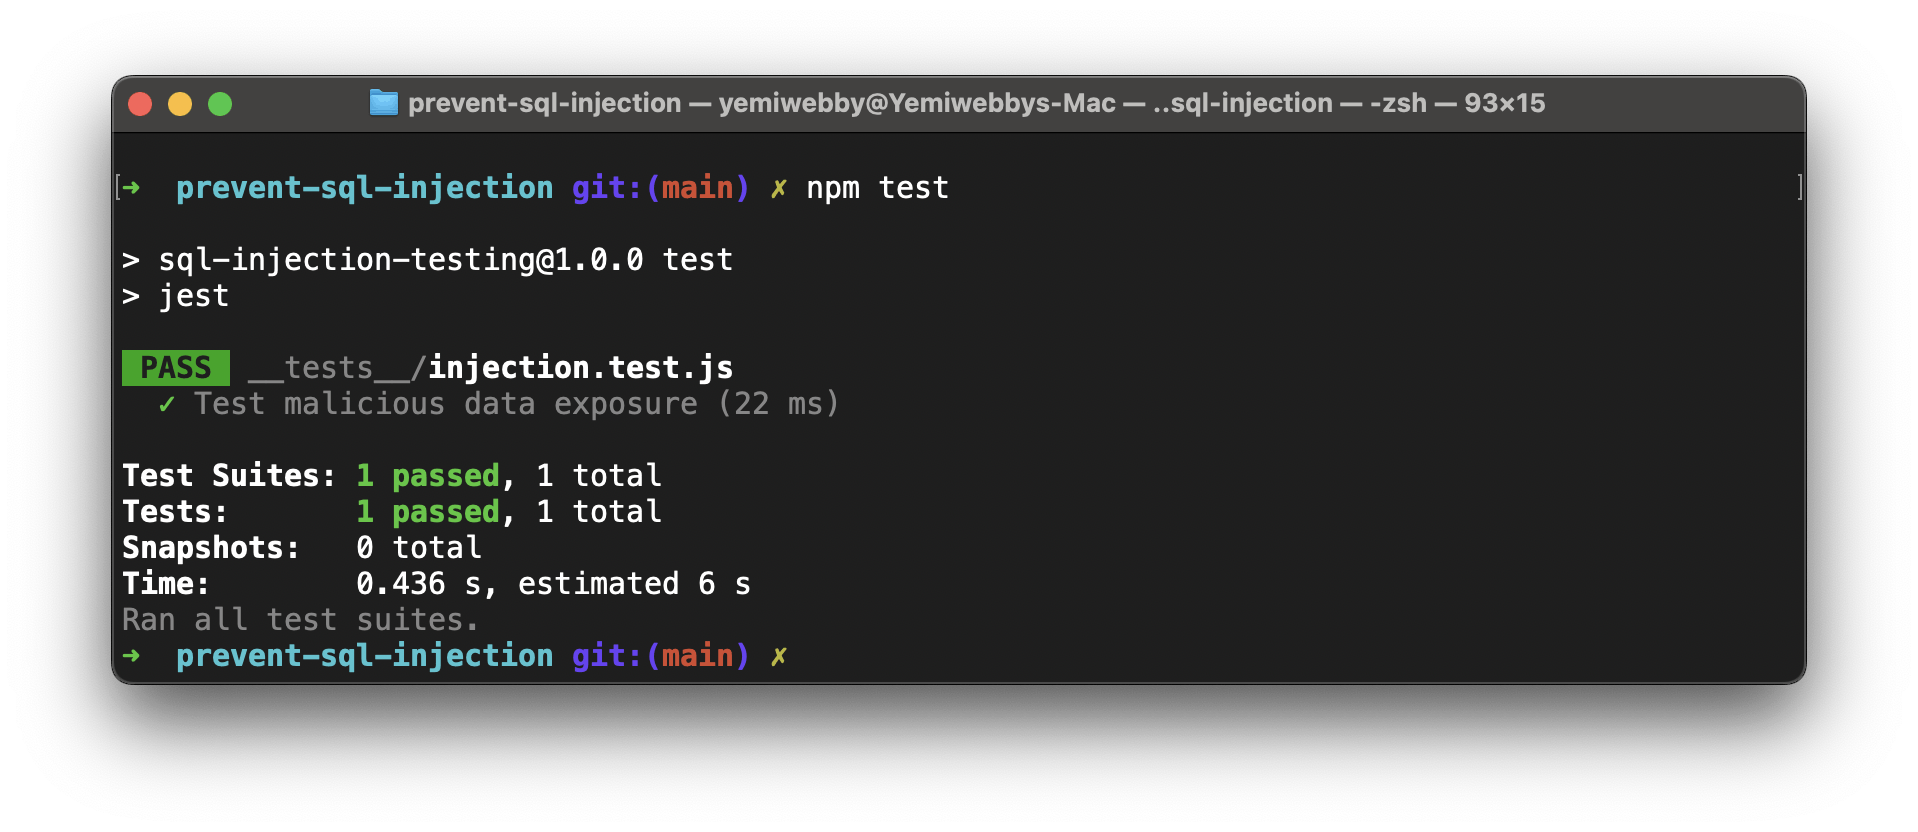
Our test now passes because the malicious code is converted into a non-harmful string that does not match any user id. No user is returned, keeping your data safe from unwanted exposure.
Automating the testing process
You can do more that just run SQL injection tests manually. You can automate the entire process with CircleCI so that when updates are pushed to the code, these tests run to ensure that your data is fully protected.
To automate the running of the SQL injection tests, the first step is to create a folder named .circleci at the root of the project. Add a configuration file named config.yml inside the folder you just created. In the file, enter this code:
version: 2.1
orbs:
  node: circleci/node@5.1.1
jobs:
  build-and-test:
    executor:
      name: node/default
    steps:
      - checkout
      - node/install-packages
      - run:
          command: npm run test
workflows:
  build-and-test:
    jobs:
      - build-and-test
This configuration starts with defining the Node.js orb. The Node.js orb contains a set of prepackaged CircleCI configurations you can use to easily install Node.js and its package managers (npm and yarn).
In the build-and-test job, there are steps to check out the latest code changes, install packages, and run the test suite.
Note: The node/install-packages step is predefined in the Node.js orb.
Commit all changes and push the project to GitHub.
Next, log in to CircleCI and go to the Projects dashboard. You can choose the repository that you want to set up from a list of all the GitHub repositories associated with your GitHub username or your organization. In your case, search for prevent-sql-injection and click Set Up Project
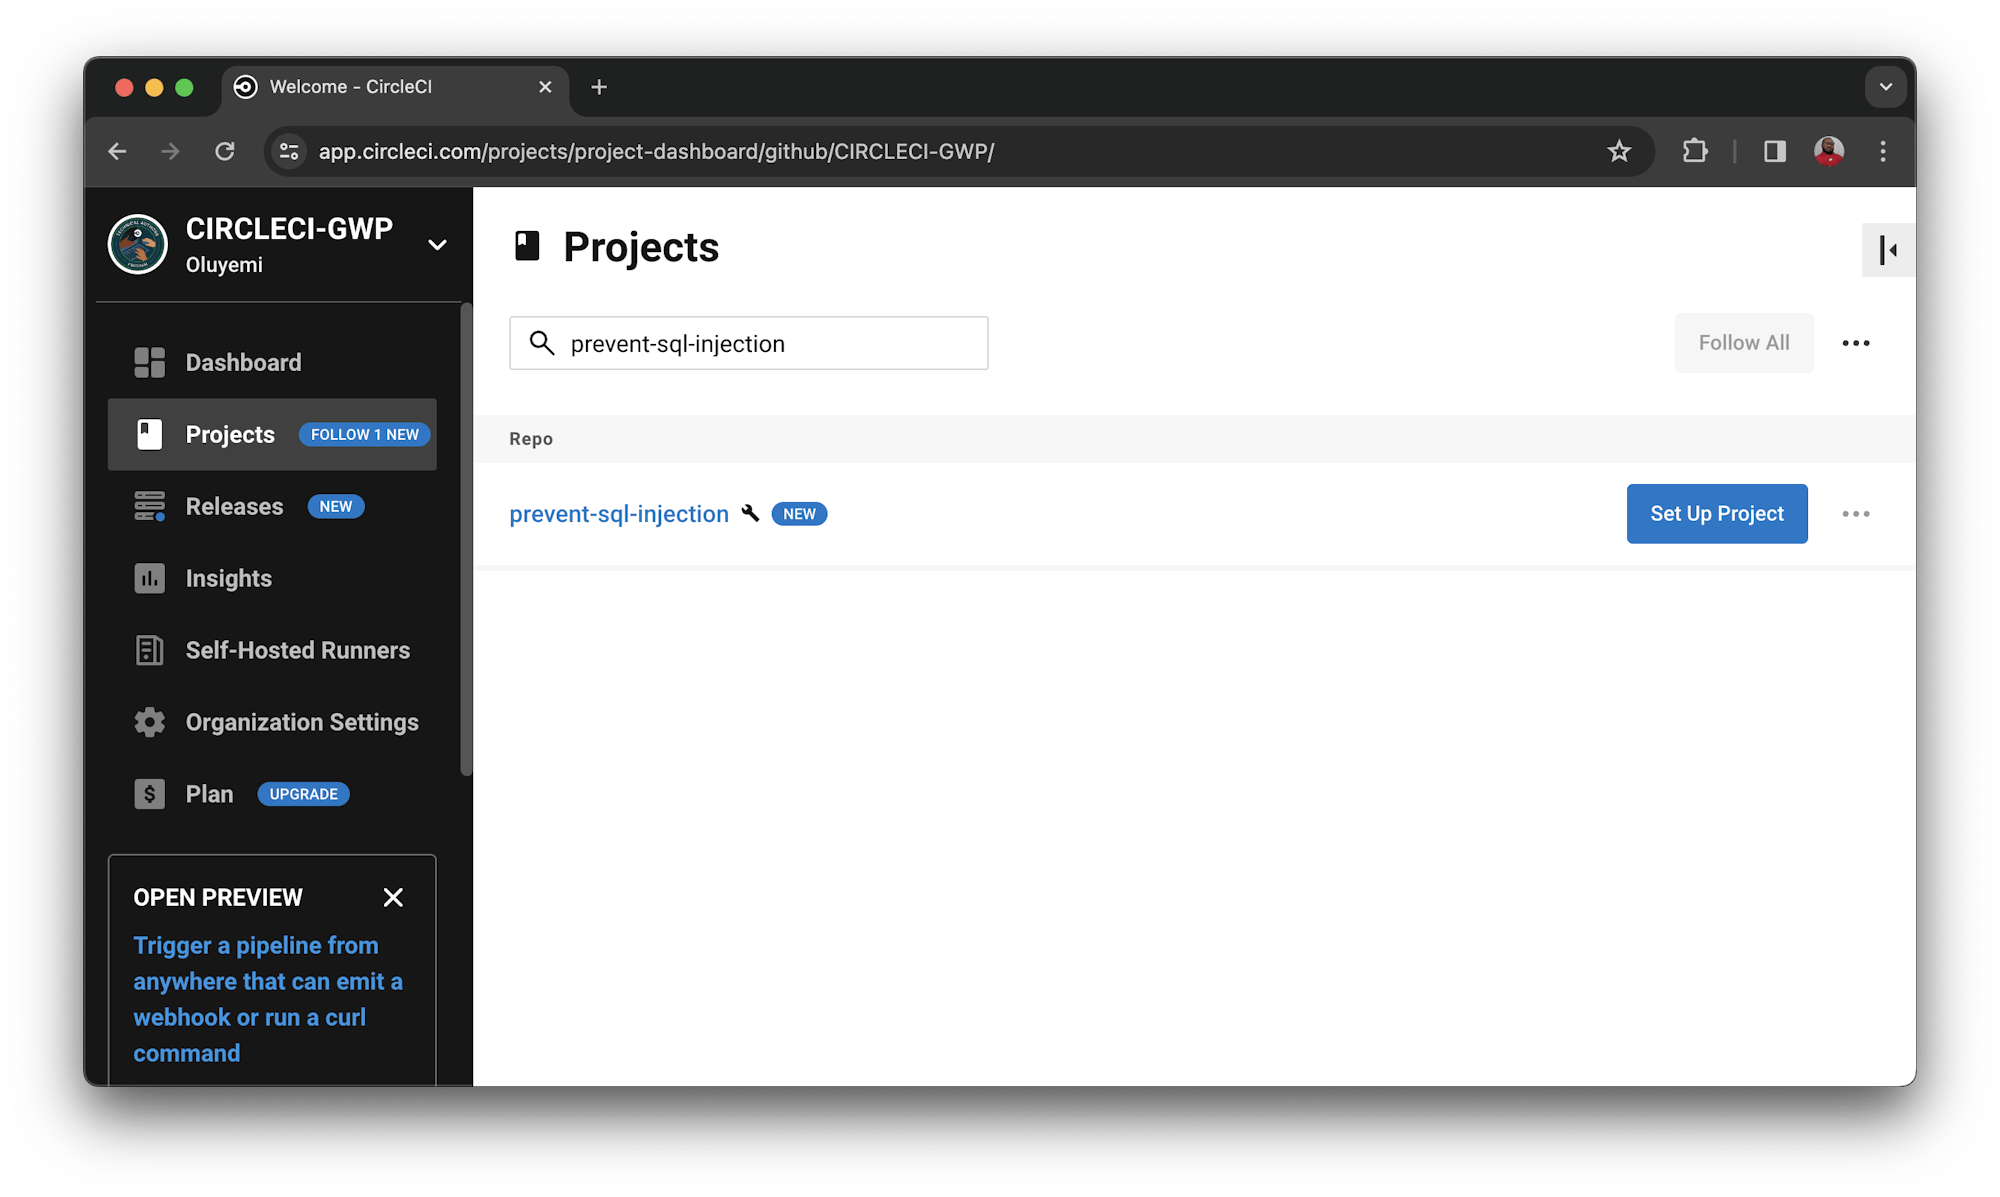
Choose the option to use the configuration file in your repository and enter the name of the branch your configuration file is on. Next, click Set Up Project to start the building process on the prompt.
This triggers the pipeline and builds successfully.
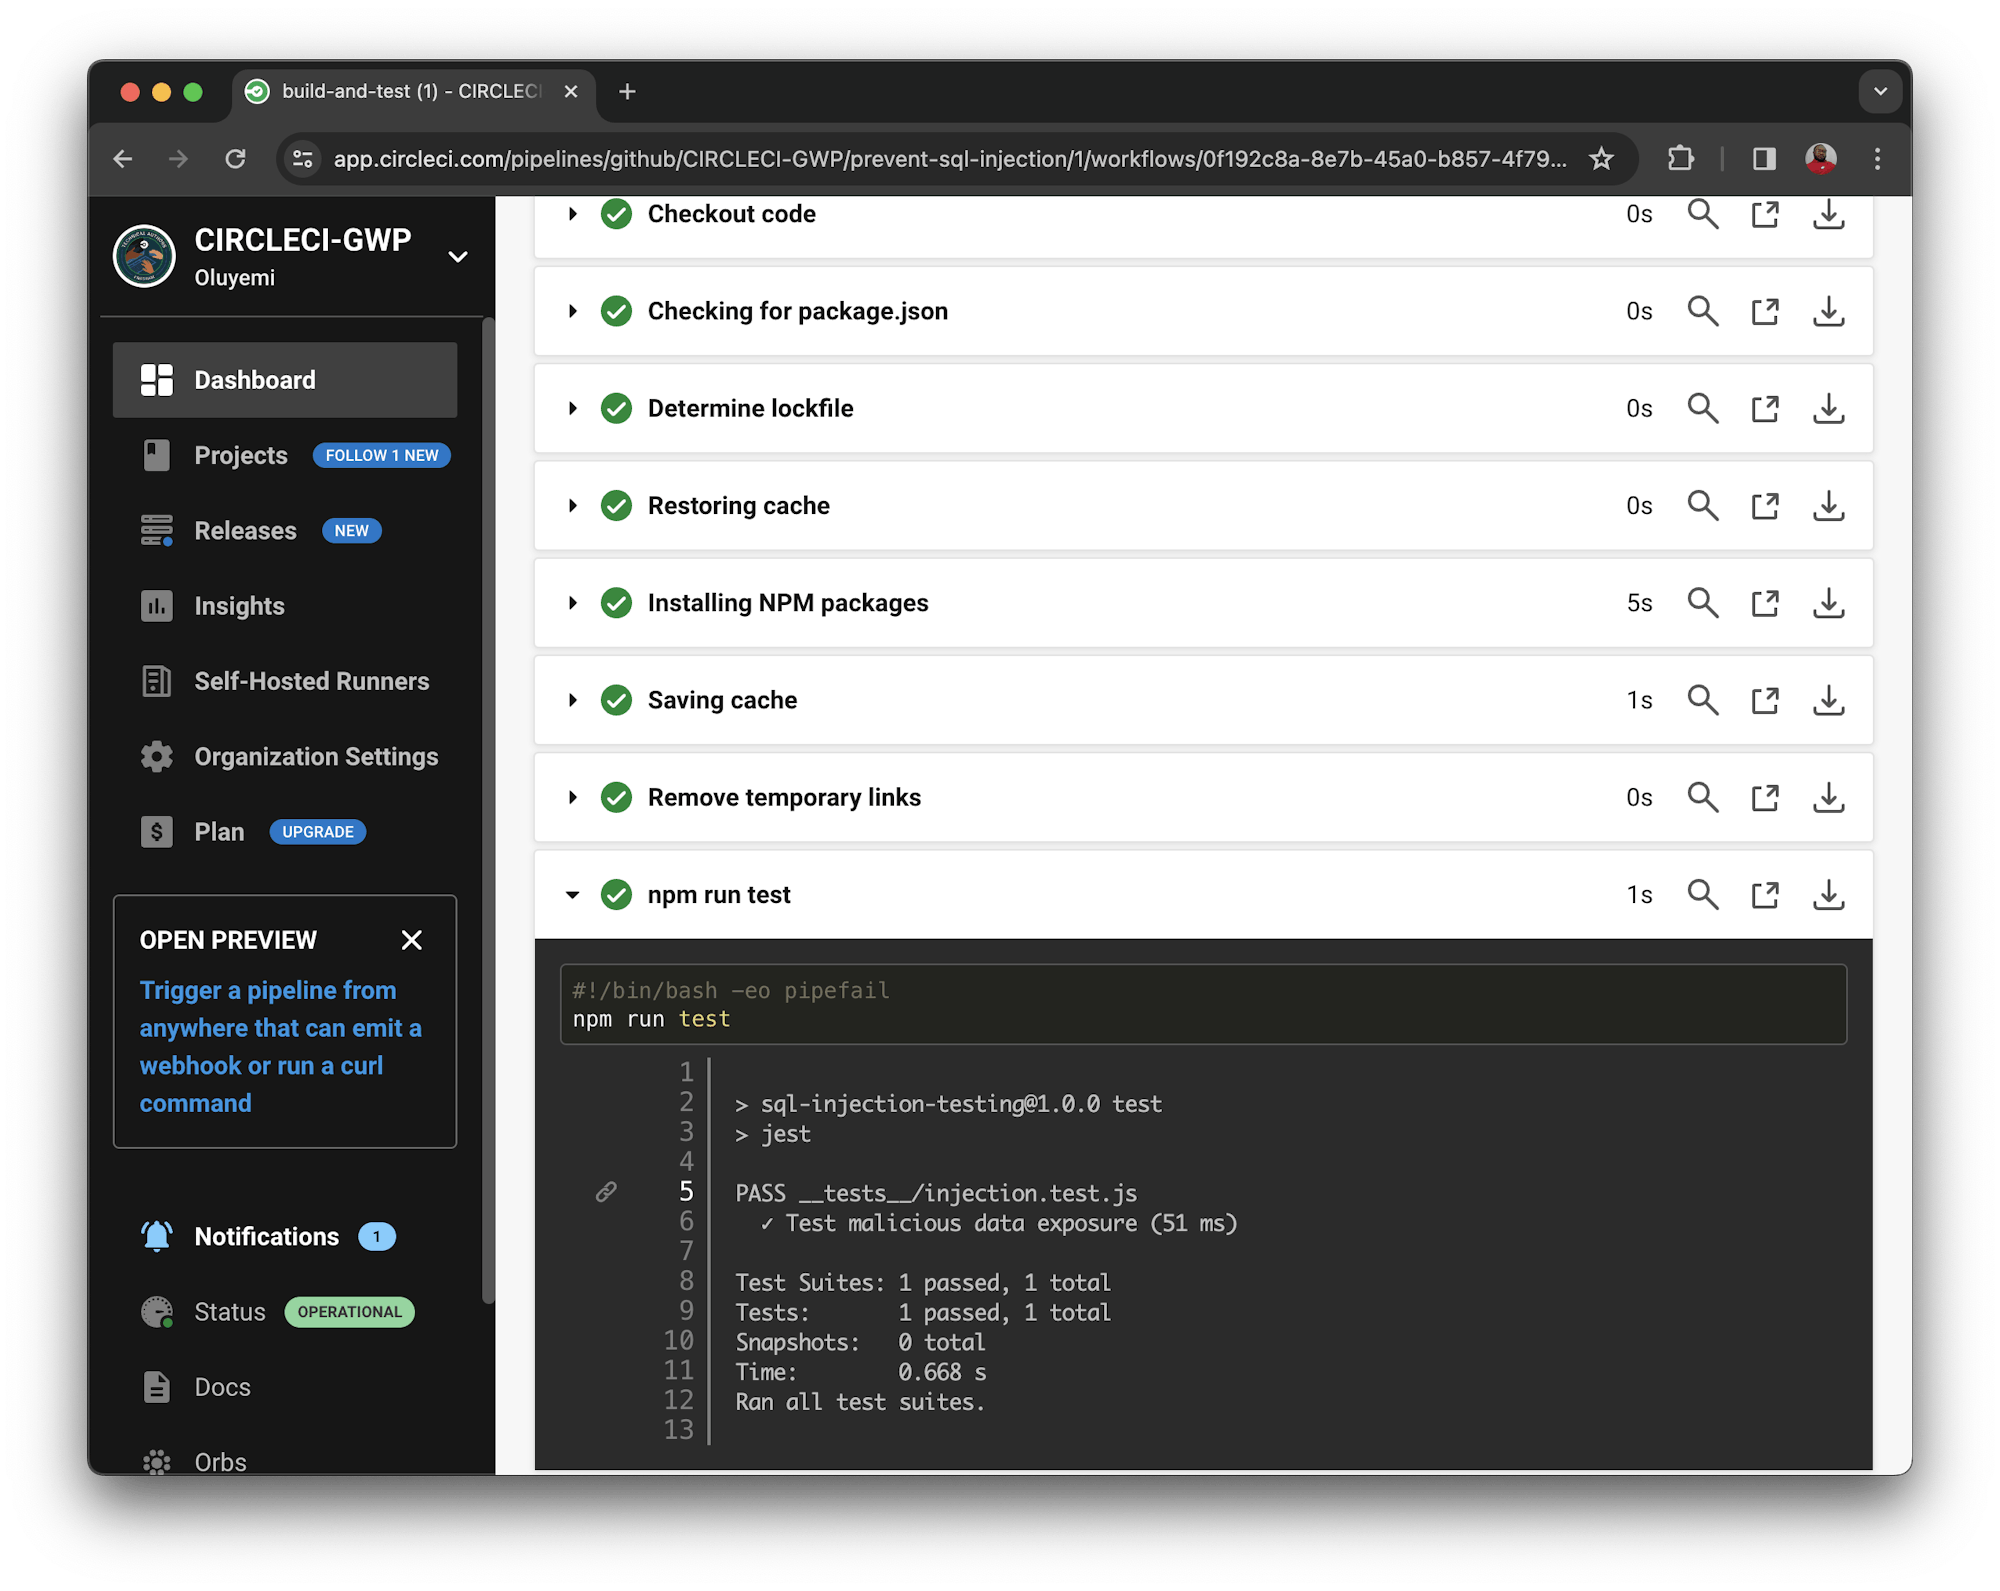
The tests have passed as expected. You now have an automated pipeline for testing SQL injection attacks.
Note: Avoid running injection tests on a production database; always run these tests in a staging environment.
Conclusion
The database is the heart and soul of all data-driven applications (almost all of them these days). Any attack on the database cannot be tolerated, so thoroughly testing the application code for SQL injection attacks is a requirement.
In this tutorial, you have learned to create a simple injection test for an exposed endpoint and how to automate the testing process. It will be well worth your time to apply what you have learned to other projects your team is working on.
Happy coding!


