PyTorch is an open-source machine learning (ML) framework that accelerates the path from research prototyping to production deployment. You can work with PyTorch using regular Python without delving into the underlying native C++ code. It contains a full toolkit for building production-worthy ML applications, including layers for deep neural networks, activation functions and optimizers. It also has associated libraries for computer vision and natural language processing.
In this tutorial, you will learn how to use PyTorch’s torchvision library to build an image classification model and expose the functionality as a REST API using Flask. To ensure your model and API are functioning properly and to enable fast iteration on your application, you’ll set up a series of pytest unit tests and automate them in a continuous integration pipeline.
This article extends the PyTorch tutorial on DenseNet-121.
Prerequisites
For this tutorial, you need to set up a Python development environment on your machine. You also need a CircleCI account to automate the testing of the PyTorch model and the REST API. Refer to this list to set up everything required for this tutorial:
Creating a new Python project
First, create a new directory for your Python project and navigate into it.
mkdir circleci-pytorch-flask-model
cd circleci-pytorch-flask-model
Installing the dependencies
In this tutorial, we will use the torchvision Python package for the PyTorch model and Flask for exposing the model’s prediction functionality as a REST API. Also, we will use the requests package for network calls.
Create a requirements.txt file in the root of the project and add these dependencies to it:
Flask
torchvision
requests
To install the dependencies use the pip install command (in your terminal):
pip install -r requirements.txt
Defining an inference script
With your dependencies set up, you now want to set up an inference script to define your torchvision machine learning workflow.
First, create an imagenet_class_index.json file at the root of the project and add the class mappings to it from this GitHub file. Next, create a predict.py file at the root of the project and add these imports to it.
import io
import json

from torchvision import models
import torchvision.transforms as transforms
from PIL import Image
from torchvision.models import DenseNet121_Weights
Next, create an instance of the model and initialize it with pre-trained weights.
imagenet_class_index = json.load(open('imagenet_class_index.json'))
model = models.densenet121(weights=DenseNet121_Weights.IMAGENET1K_V1)
model.eval()
The eval() function sets the model to evaluation (inference) mode. PyTorch models have two modes, eval and train:
trainmode is used during training to make the model learn from the dataset.evalmode is used to get predictions from the learned model.
Finally, define the get_prediction() function that takes an image and uses the model to return the predicted class.
def transform_image(image_bytes):
    my_transforms = transforms.Compose([transforms.Resize(255),
                                        transforms.CenterCrop(224),
                                        transforms.ToTensor(),
                                        transforms.Normalize(
                                            [0.485, 0.456, 0.406],
                                            [0.229, 0.224, 0.225])])
    image = Image.open(io.BytesIO(image_bytes))
    return my_transforms(image).unsqueeze(0)

def get_prediction(image_bytes):
    tensor = transform_image(image_bytes=image_bytes)
    outputs = model.forward(tensor)
    _, y_hat = outputs.max(1)
    predicted_idx = str(y_hat.item())
    return imagenet_class_index[predicted_idx]
Here’s how get_prediction() works:
get_prediction()callstransform_image()to manipulate the image before passing it to the model. It uses torchvision’stransformsmodule to resize, crop and normalize the image. Thetransformsmodule offers a number of other functions to perform common manipulations to images.
-
Next, it calls the model’s
forwardfunction, passing the transformed input image to it. This passes the image tensor being through the DenseNet model (running in evaluation mode) and returns a set of model classes along with their confidence level, or probability. The summation of confidence for different classes add up to 1, or 100%. -
Next, the
max(1)function processes the output to return the index of the top predicted class. -
Finally, the
imagenet_class_indexreturns the class name based on thepredicted_idx.
Adding unit tests for model inference
Now that you have a script for your image prediction model, you want to add some unit tests to ensure it works properly and continues to behave as you expect as you modify and expand on your model’s capabilities.
First, create a utils.py file at the root of the project and add these utility functions to download the image from an URL:
import requests

def download_image(url, filename):
    response = requests.get(url)
    if response.status_code == 200:
        with open(filename, 'wb') as f:
            f.write(response.content)
        return filename
    else:
        raise Exception(f"Unable to download image from {url}")

def get_bytes_from_image(image_path):
    return open(image_path, 'rb').read()
Next, define a unit test to test the DenseNet-121 model against an image of a cat.
Before you continue, download the image, create a folder test_images at the root level of your working directory, and save the image in that folder. The expected path should be ./test_images/cat_image.jpeg
import unittest

from predict import get_prediction
from utils import get_bytes_from_image

class TestDenseNetModel(unittest.TestCase):
    def test_cat_image_inference(self):

        image_path = './test_images/cat_image.jpeg'
        img_bytes = get_bytes_from_image(image_path)

        prediction = get_prediction(img_bytes)

        self.assertEqual(prediction, ['n02124075', 'Egyptian_cat'])
You can run the test by executing this command:
pytest ./
Defining a Flask web server
With your model functioning and your unit tests passing, it’s time to set up an API to expose the model predictions.
In this section, you will create a Flask app using Python 3 and a /predict endpoint that gets model predictions. Flask is an open-source Python framework for developing web applications. It is a popular choice for building the API service layer for lightweight applications.
To define the Flask app, create a app.py file at the root of the project and add the following code snippet:
from flask import Flask, jsonify, request

app = Flask(__name__)

@app.route('/')
def index():
    return 'Welcome to the Image Classification API!'

if __name__ == '__main__':
    app.run()
Next, add the /predict endpoint to the app by adding this snippet:
from utils import download_image, get_bytes_from_image
from predict import get_prediction

tmp_dir = '/tmp'

@app.route('/predict', methods=['POST'])
def predict():
    if request.method == 'POST':
        imageUrl = request.form['image_url']
        try:
            filename = download_image(imageUrl, tmp_dir + '/image.jpg')

            img_bytes = get_bytes_from_image(filename)

            class_id, class_name = get_prediction(image_bytes=img_bytes)
            return jsonify({'class_id': class_id, 'class_name': class_name})
        except Exception as e:
            print(e)
            return jsonify({'error': str(e)}), 500
The predict() function accepts image_url as input, downloads the image to a temporary directory, and passes it to the get_prediction() method that we defined in the previous section.
To test the API endpoint, first start the Flask web server by executing the following command:
flask --app app run
It will start a web server at http://localhost:5000. You can test the prediction API using curl:
curl --location 'http://127.0.0.1:5000/predict' \
--form 'image_url="https://raw.githubusercontent.com/CIRCLECI-GWP/pytorch-flask-model/06d0d0ea0d05dd9792e93a9db63678797c018d4a/test_images/cat_image.jpeg"'
Adding unit tests for the API endpoint
To add a unit test for the API endpoint, first create a test_app.py file at the root of the project and add this code snippet to it:
from  app import app

import unittest

cat_image_url = "https://raw.githubusercontent.com/CIRCLECI-GWP/pytorch-flask-model/06d0d0ea0d05dd9792e93a9db63678797c018d4a/test_images/cat_image.jpeg

class TestPredictionsAPI(unittest.TestCase):
    def test_cat_image_response(self):
        self.app = app
        self.client = self.app.test_client

        request = {
            'image_url': cat_image_url
        }

        response = self.client().post('/predict', data=request)
        self.assertEqual(response.status_code, 200)
        self.assertEqual(response.json['class_id'], 'n02124075')

    def test_invalid_image_response(self):
        self.app = app
        self.client = self.app.test_client

        request = {
            'image_url': 'https://i.imgur.com/THIS_IS_A_BAD_URL.jpg'
        }

        response = self.client().post('/predict', data=request)
        self.assertEqual(response.status_code, 500)
This snippet defines test cases for both success and failure scenarios. You can run the test by running:
pytest ./
Automating the build and test workflow using CircleCI
Now that you have tested the model and the API locally, automate the workflow so that the unit tests can be executed every time you push code to the main branch. Setting up your machine learning models to automatically build and test in the cloud on every change creates a reliable system for validating you application’s functionality without adding time consuming and error prone manual steps to your development process.
To learn more about automation your machine learning workflows, check out CI for machine learning: Build, test, train.
Adding the configuration script
First, add a .circleci/config.yaml script in the project’s root containing the configuration file for the CI pipeline. Add this code snippet to it:
version: 2.1
orbs:
  python: circleci/python@2.1.1

workflows:
  build-app-with-test:
    jobs:
      - build-and-test
jobs:
  build-and-test:
    docker:
      - image: cimg/python:3.9
    steps:
      - checkout
      - python/install-packages:
          pkg-manager: pip
      - python/install-packages:
          pip-dependency-file: requirements.txt
          pkg-manager: pip
      - python/install-packages:
          args: pytest
          pkg-manager: pip
          pypi-cache: false
      - run:
          name: Run tests
          command: pytest
Take a moment to review the CircleCI configuration.
The build-and-test job uses the circleci/python@2.1.1 orb to build and test the PyTorch model and API. The job checks out the repository, installs pip packages using the requirements.txt file, and runs the tests using pytest.
Now that the configuration file has been set up, create a repository for the project on GitHub and push all the code to it. Review Pushing a project to GitHub for instructions.
Setting up the project on CircleCI
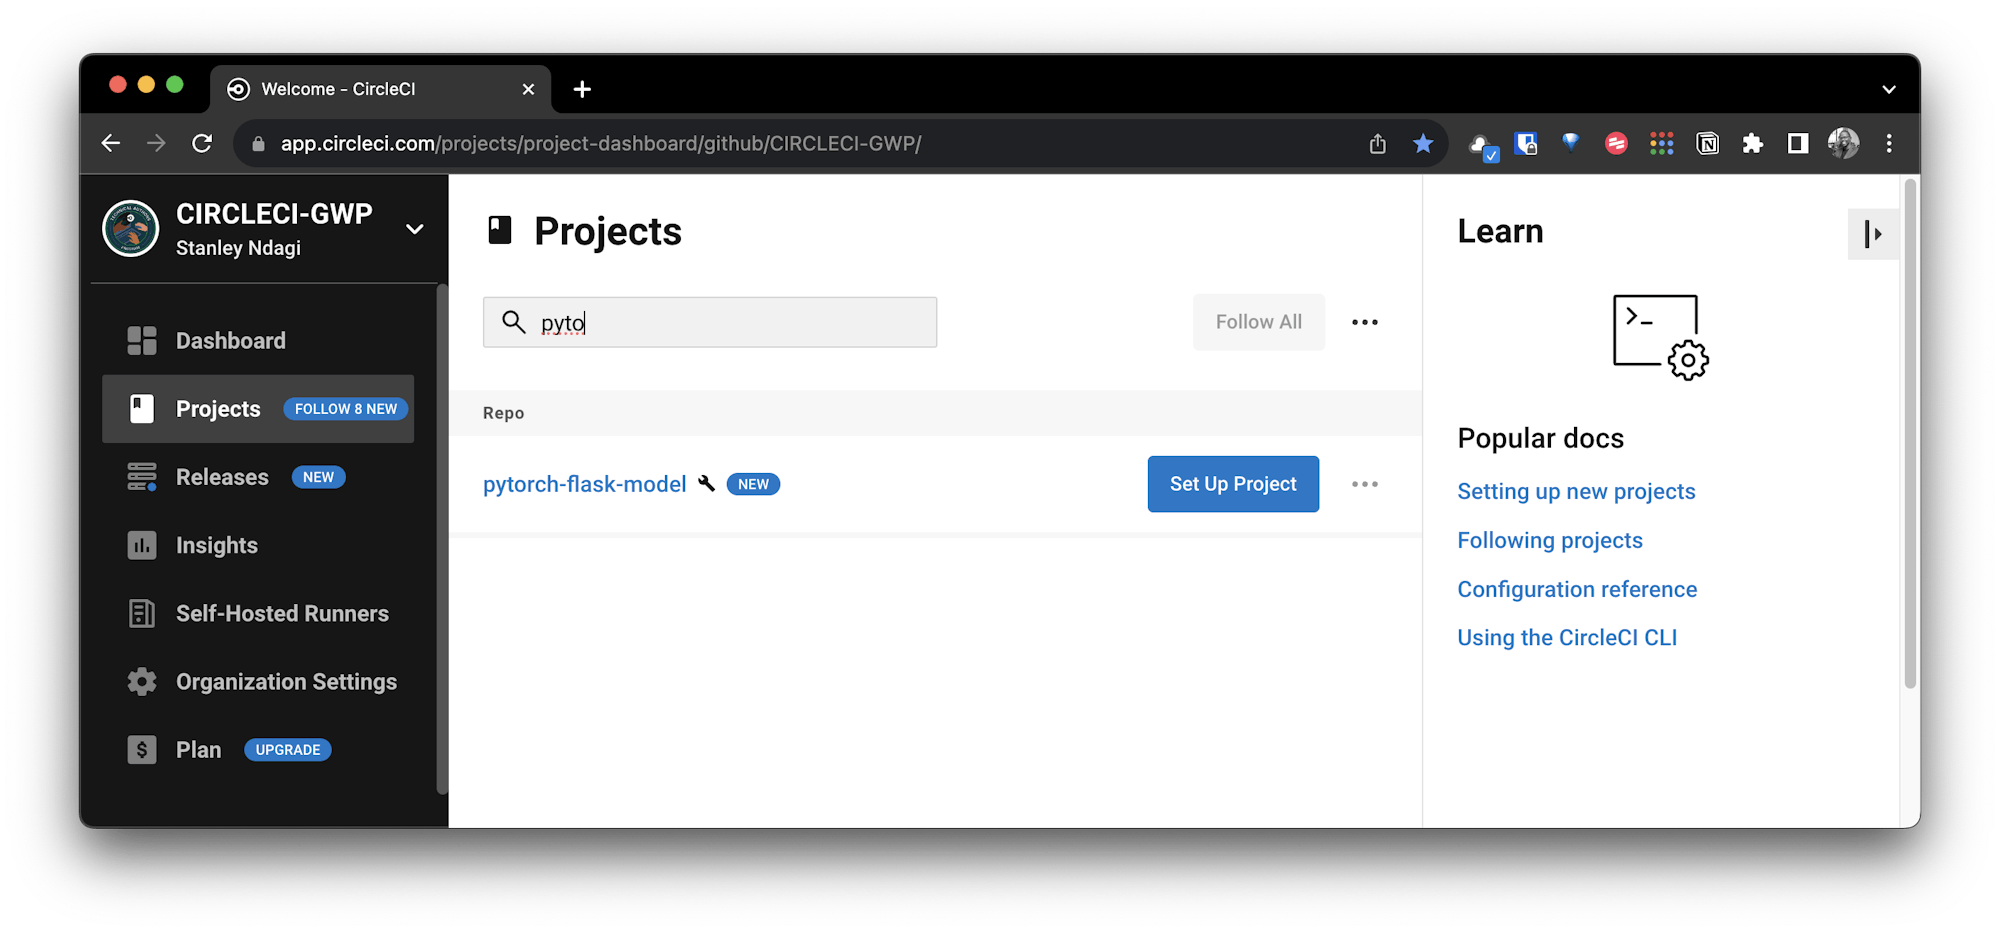
Log into your CircleCI account. On the CircleCI dashboard, click the Projects tab, search for the GitHub repo name and click Set Up Project.
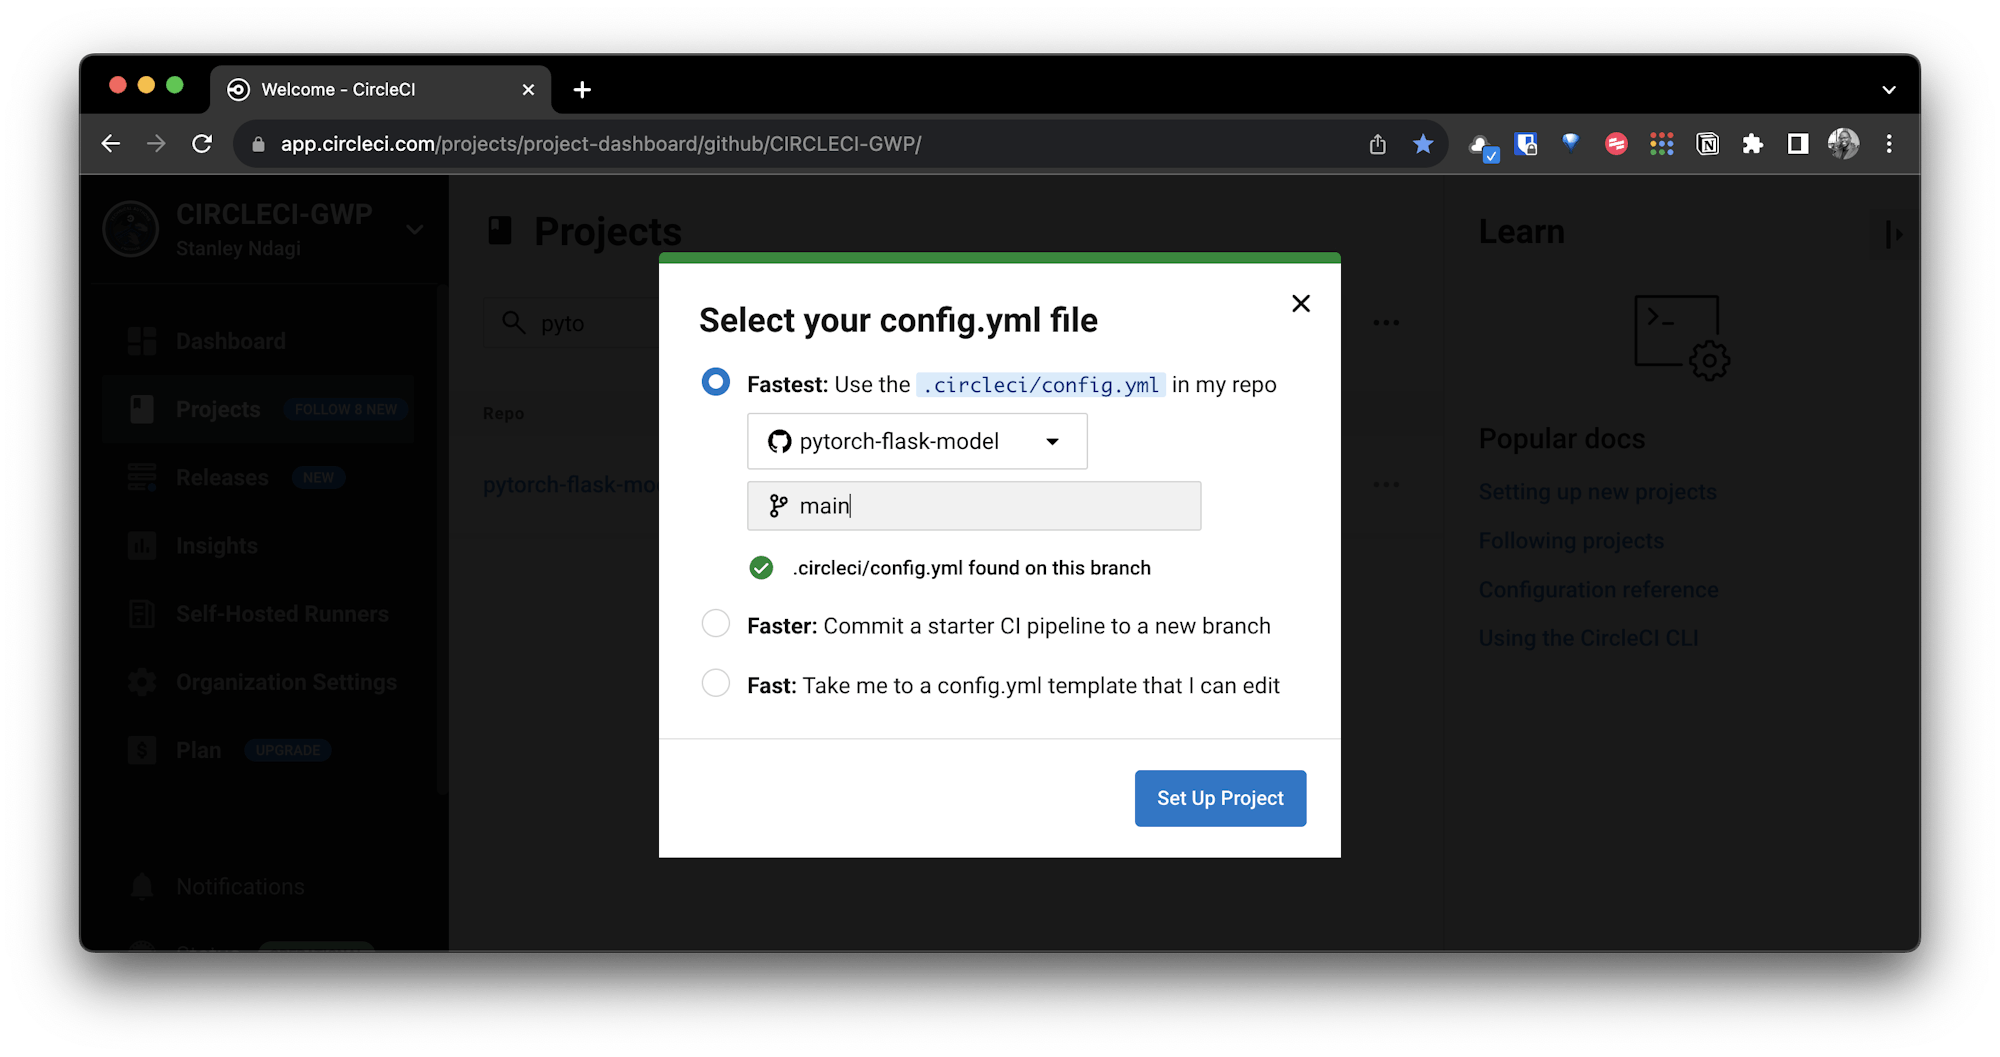
You will be prompted to add a new configuration file manually or use an existing one. You have already pushed the required configuration file to the codebase, so select the Fastest option. Enter the name of the branch hosting your configuration file. Click Set Up Project to continue.
Completing the setup will trigger the pipeline. The pipeline should run successfully.
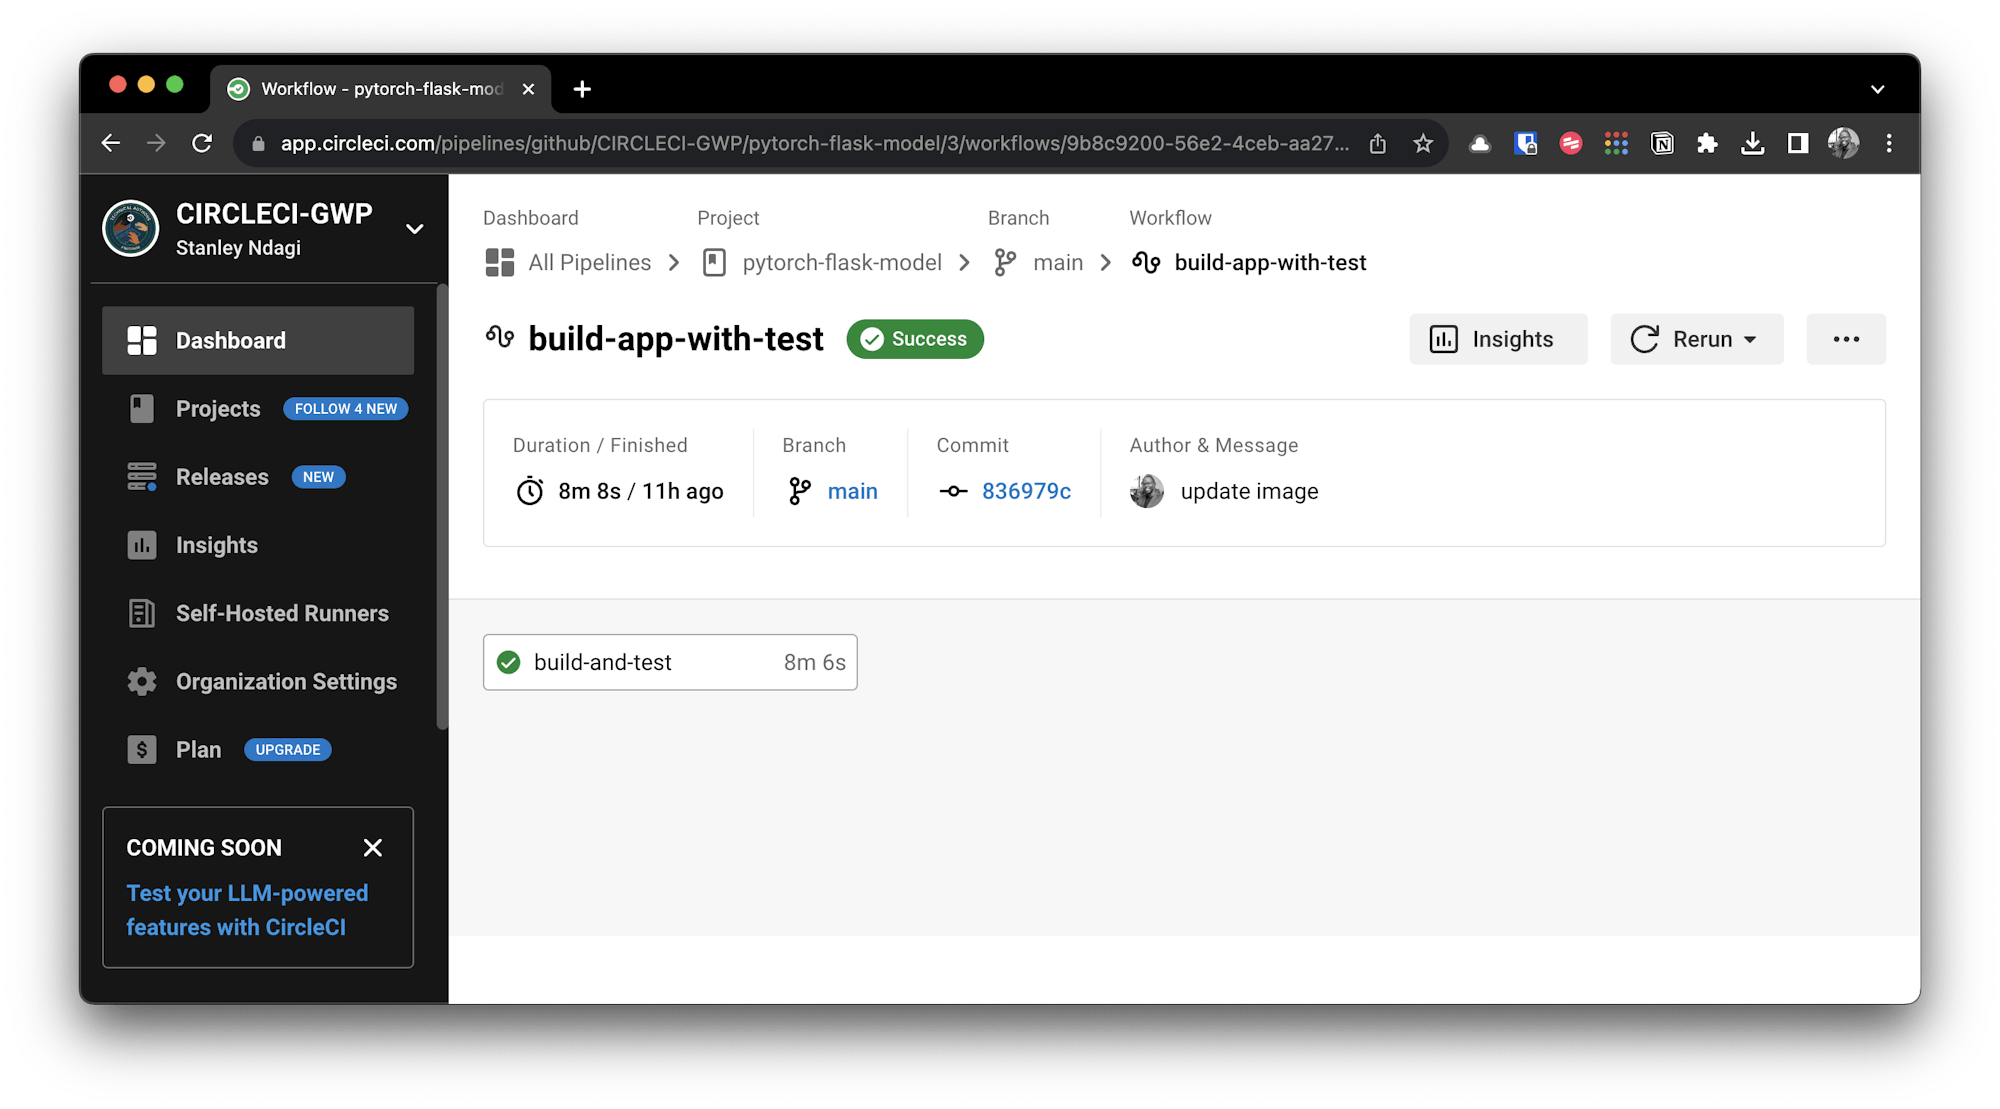
Congratulations! Now whenever you push new code to your project repository, CircleCI will build and test your application, notifying you if any of your tests fail.
Conclusion
In this tutorial, you learned how to automatically build and test a PyTorch model using CircleCI. PyTorch reduces the complexity of working with ML models and increases the speed of prototyping and development. It simplifies the process of building custom models using the neural network layers, activation functions, and optimizers provided by the PyTorch library.
With CircleCI, you can automate the build and testing pipeline with continuous integration. The pipeline can be used to execute unit tests for the PyTorch model and the corresponding prediction API using pytest to boost development speed.
You can check out the complete source code used in this tutorial on GitHub.
Vivek Kumar Maskara is a Software Engineer at JP Morgan. He loves writing code, developing apps, creating websites, and writing technical blogs about his experiences. His profile and contact information can be found at maskaravivek.com.