This article is an introduction to using an automated CI/CD pipeline to build and push production-grade Docker images to the Amazon Elastic Container Registry (ECR) for storage.
To follow along, you will need a free CircleCI account and an AWS account.
What is Amazon ECR?
Amazon ECR is a fully-managed, private Docker container registry that makes it easy for developers to store, manage, and deploy Docker container images. Amazon ECR integrates seamlessly with Amazon Elastic Container Service Amazon ECSe and Amazon Elastic Kubernetes Service Amazon EKS. Amazon ECR can also be used with other cloud vendors.
Why would you want to use a private Docker registry like Amazon ECR?
- In many circumstances, it is desirable to segregate the development, test, and production registries.
- It’s fully managed, which eliminates the need to operate your own container repositories or worry about scaling the underlying infrastructure.
- It’s secure. A private container registry with scanning capabilities and role-based access control offers more security, governance (IAM), and efficient management. It transfers your container images over HTTPS and automatically encrypts your images at rest.
- Running registries close to the systems running the containers cuts deployment latency and reduces exposure to network outages.
Developers use registries to store images created during the application development process. Continuous integration pipelines can automate the process of both building container images and pushing these artifacts into Amazon ECR, making development faster and more efficient.
Imagine a pipeline where you push a commit that triggers a build on CircleCI, which then pushes a new image into Amazon ECR. Your registry can then fire off a webhook and trigger a deployment, without any manual steps required.
Registries make it much easier to build a fully automated pipeline like this. Container images stored in the registry can then be used in various phases of development.
In a few steps, we are going to containerize a simple Node.js application, build the image, and push it to Amazon ECR, all in an automated CircleCI workflow. We’ll use use CircleCI orbs to keep our pipeline configuration minimal and easy to understand.
Setting up Amazon ECR
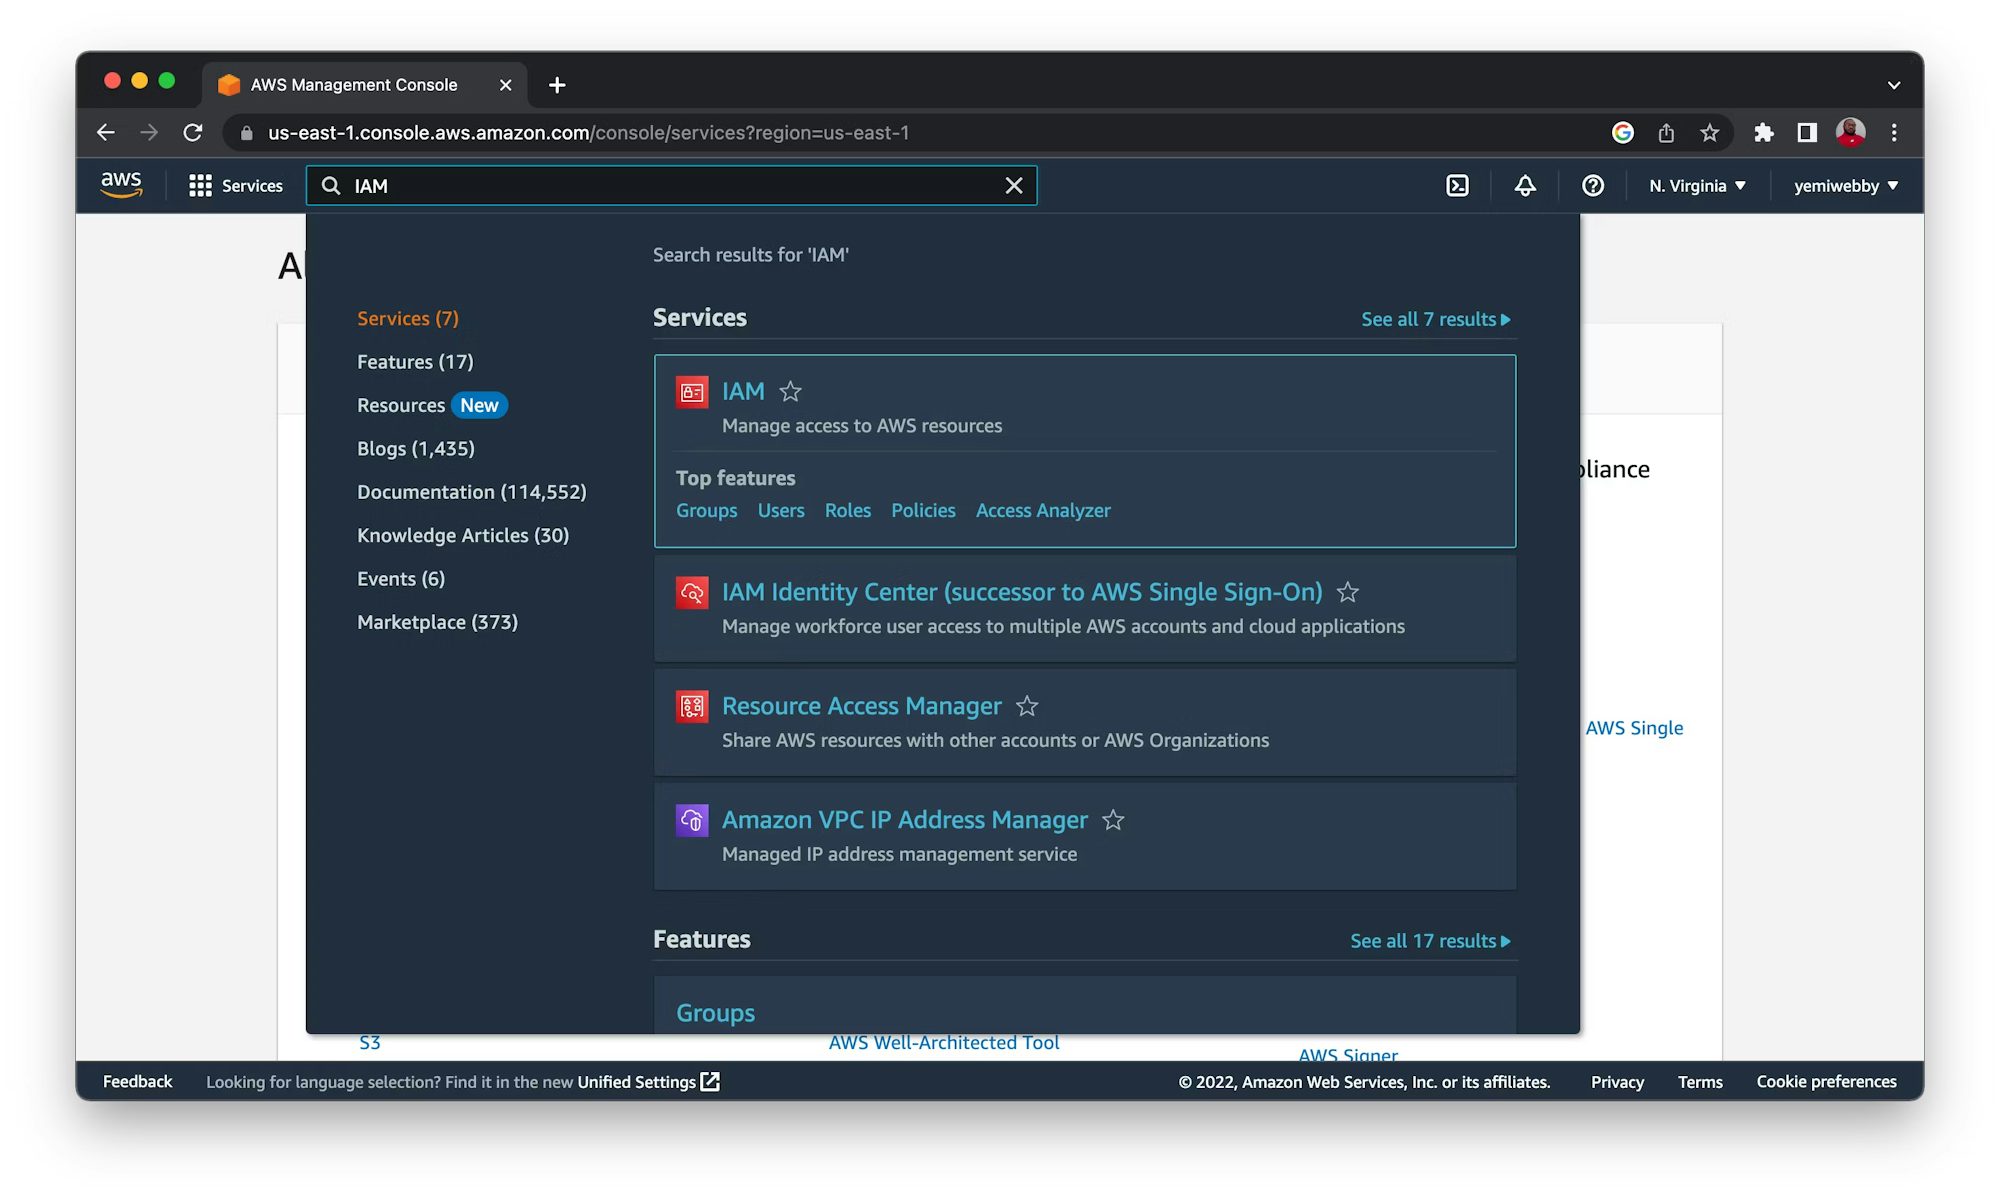
From the AWS management console, select IAM. This service lets you manage access to AWS resources.
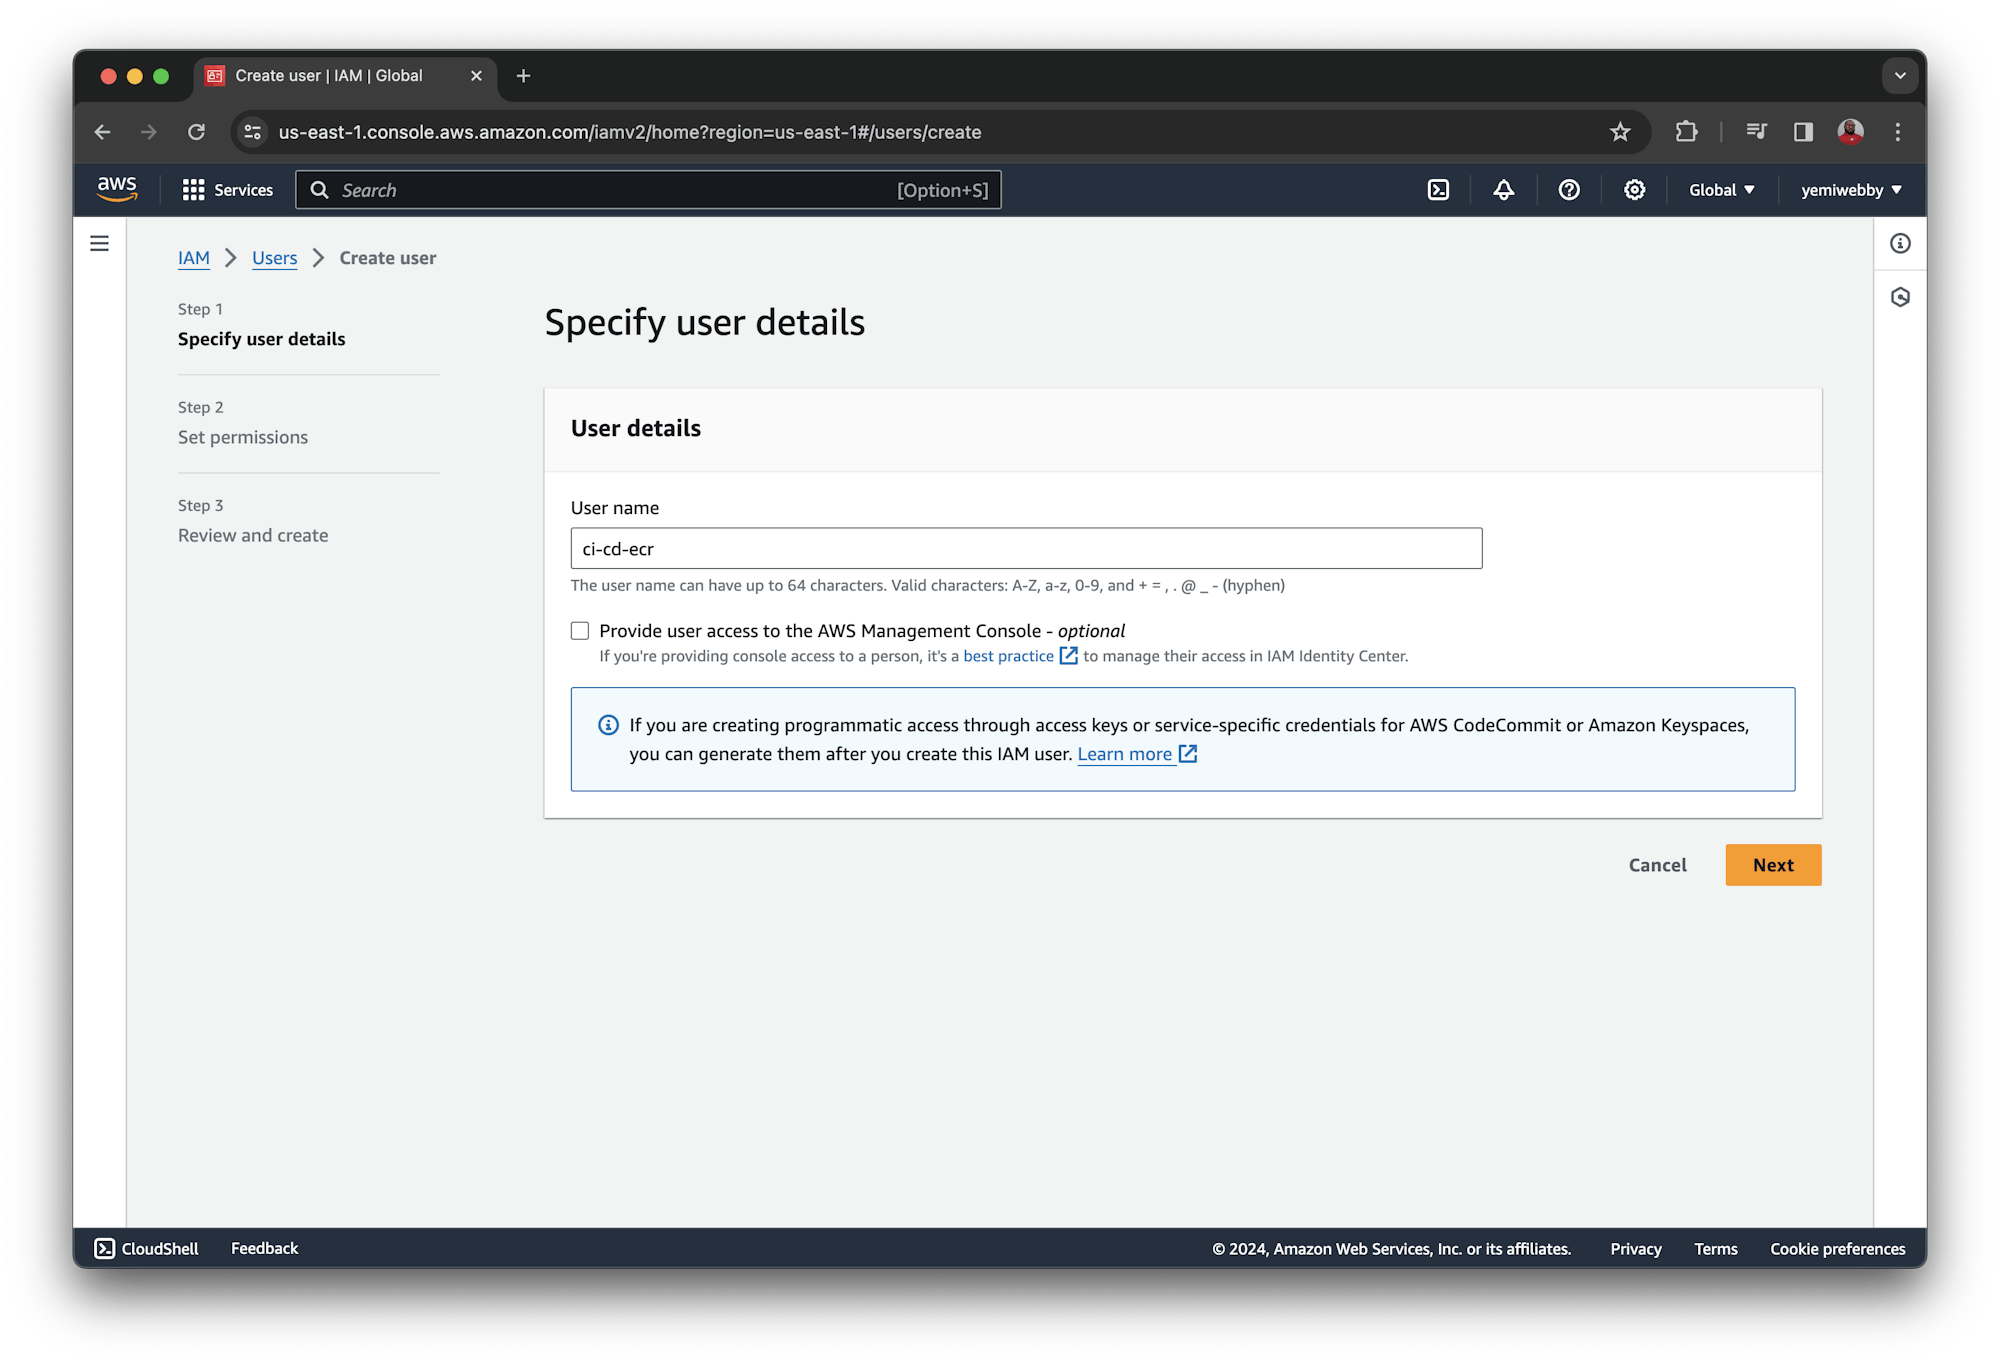
Create a role/user. I called mine ci-cd-ecr, but any name will work.
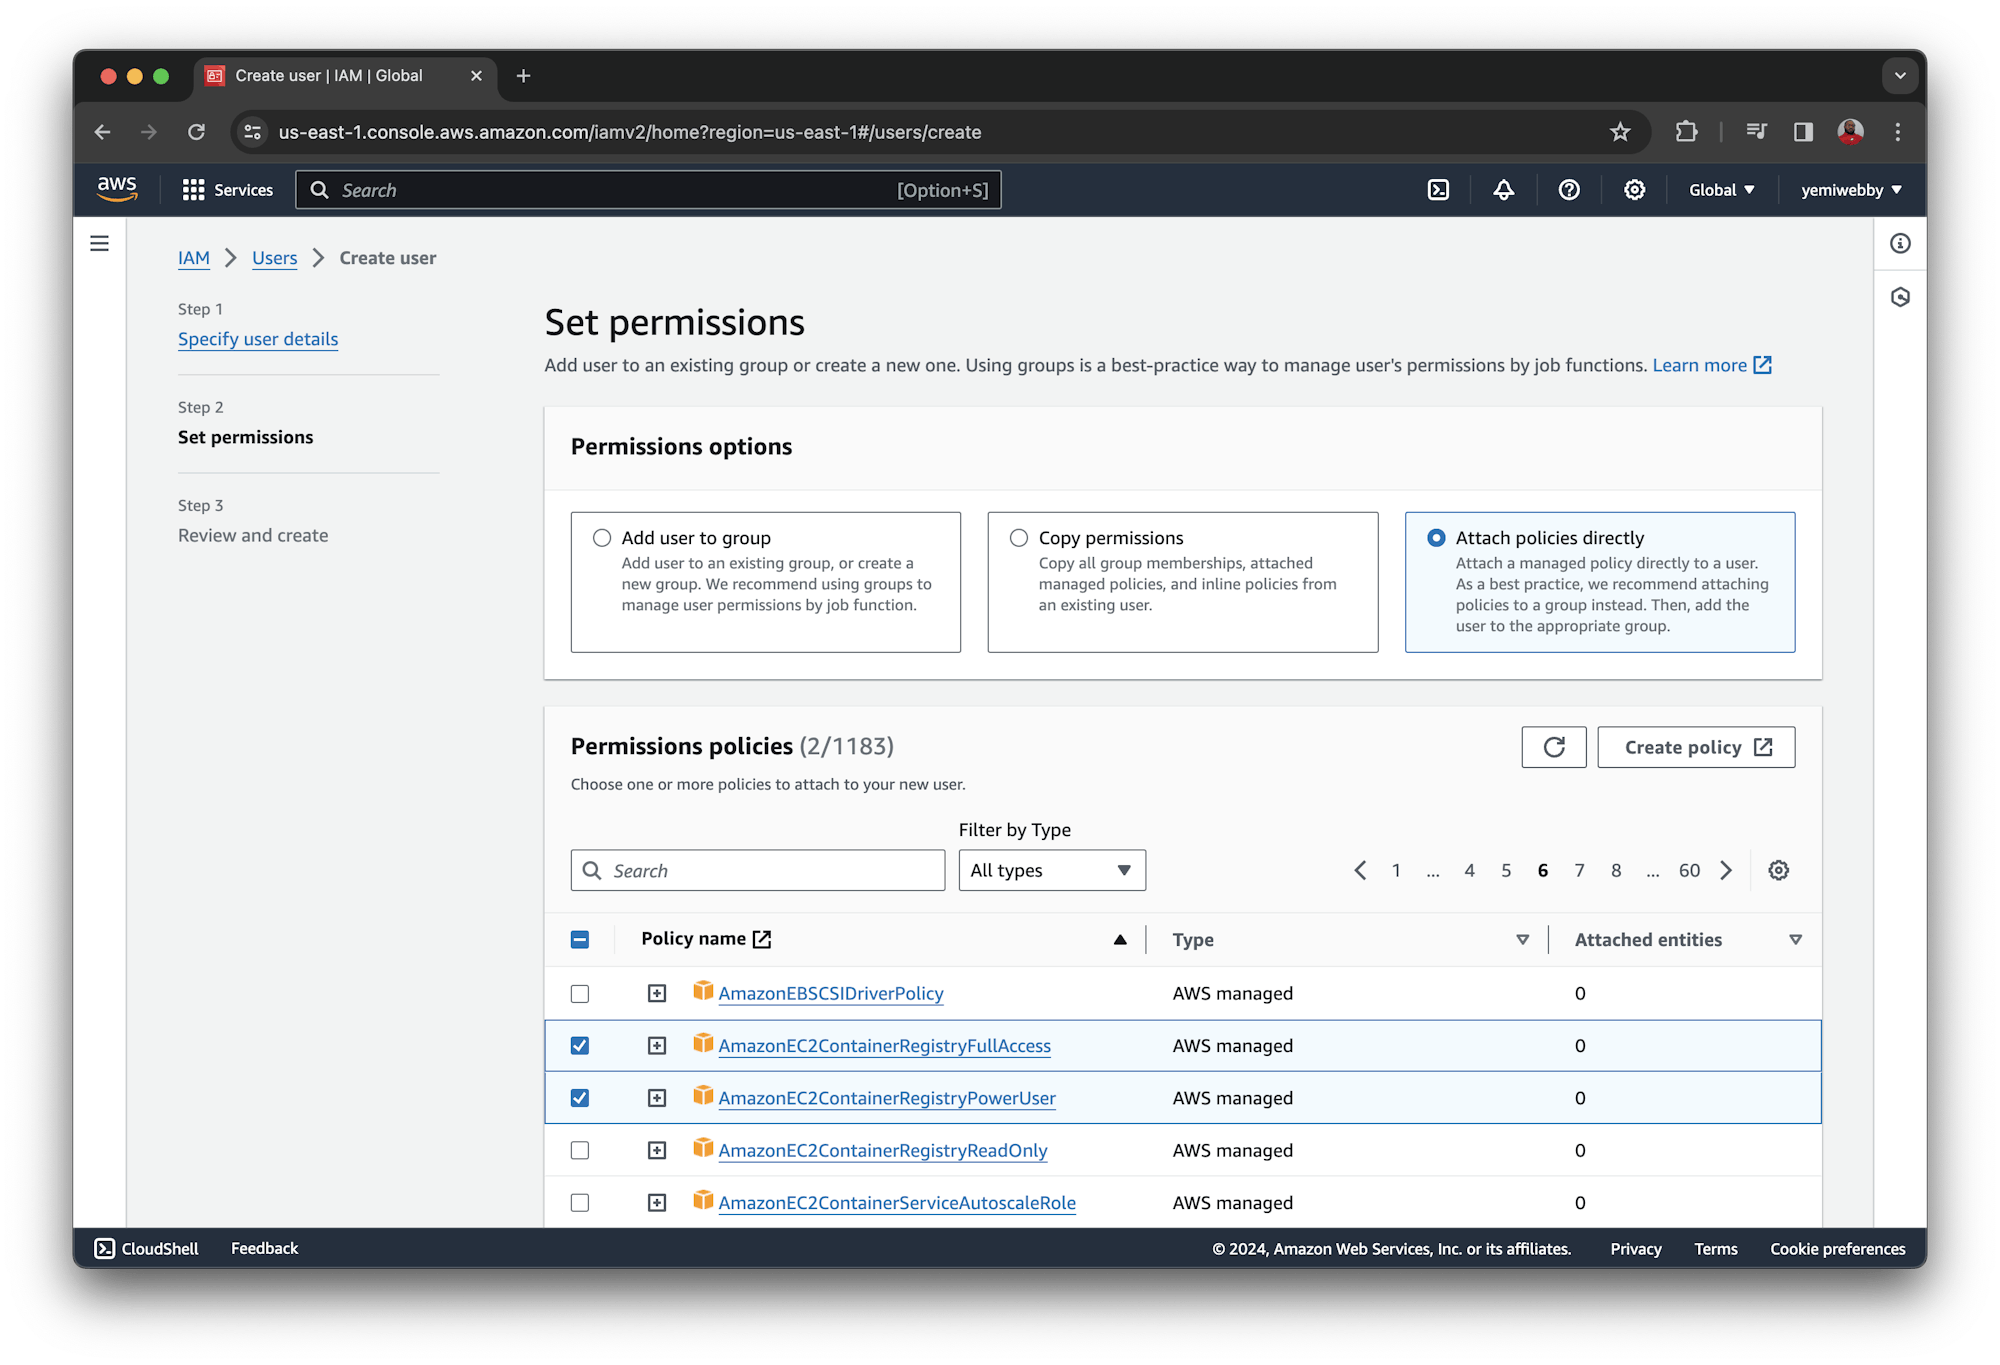
Next, set permissions for the user. Click Attach policies directly. The screenshot shows what you need to successfully create a private repository for your image on AWS and have full access for other modifications.
Finally review and create the user.
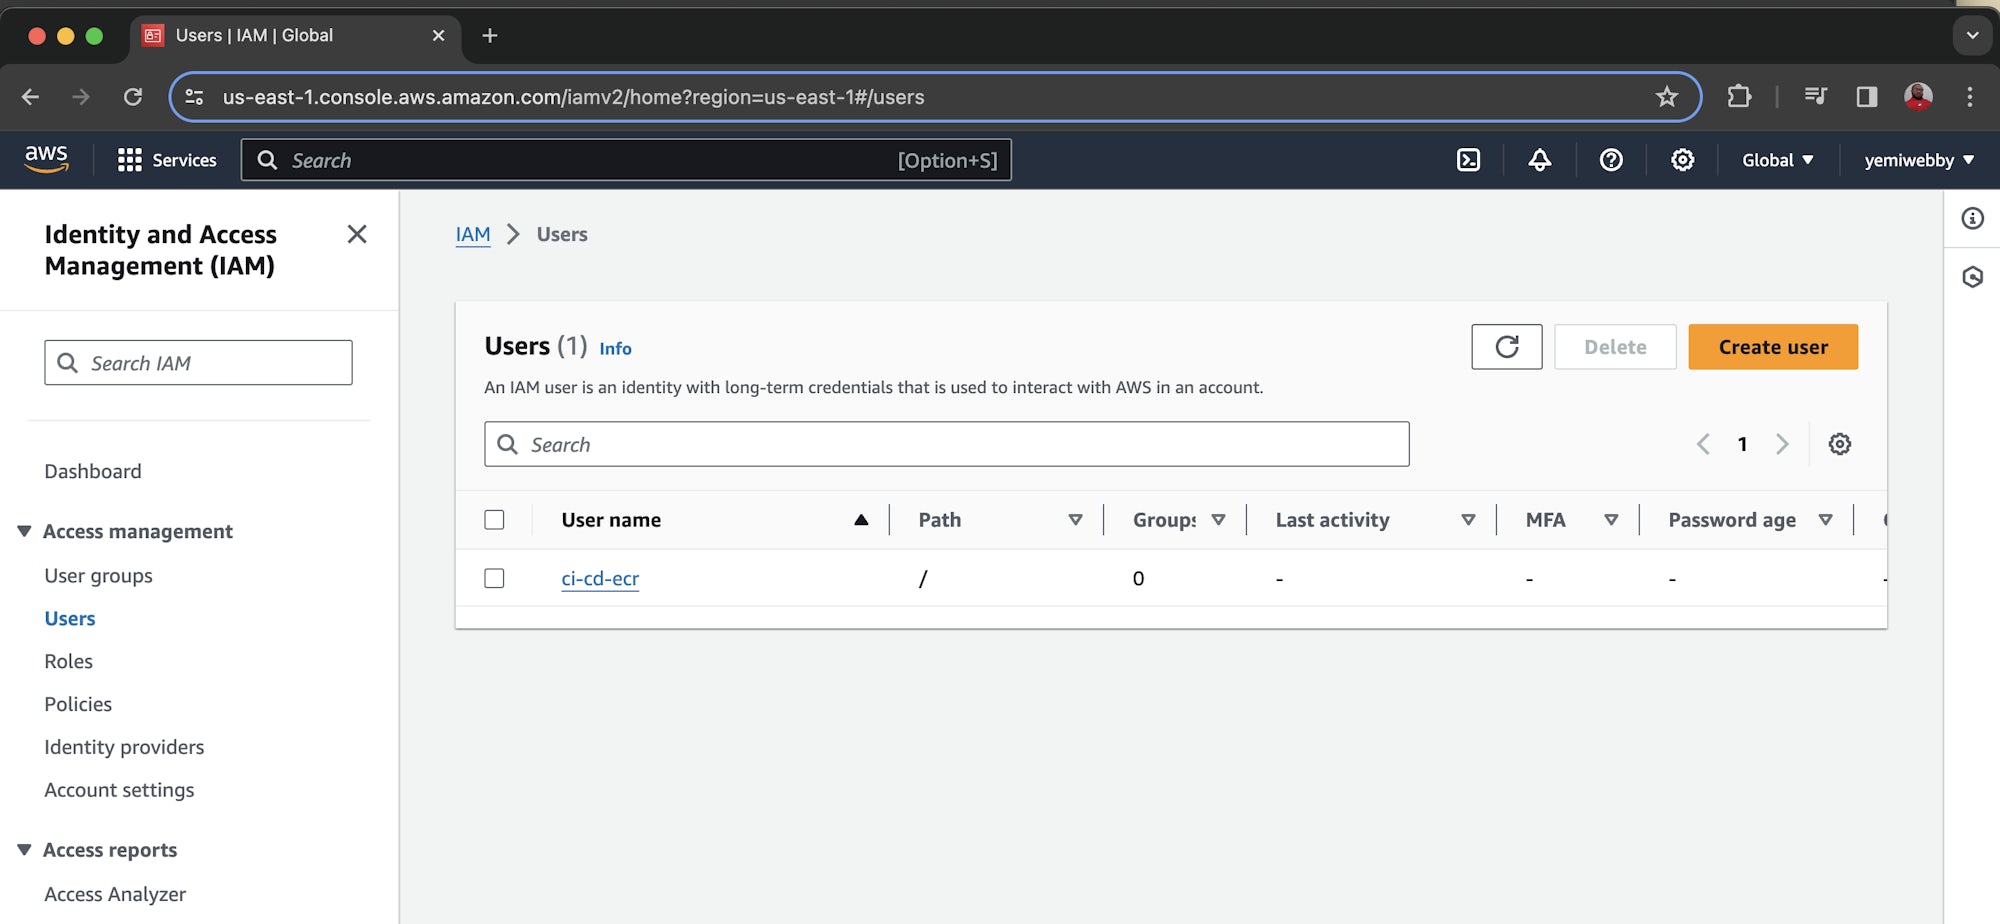
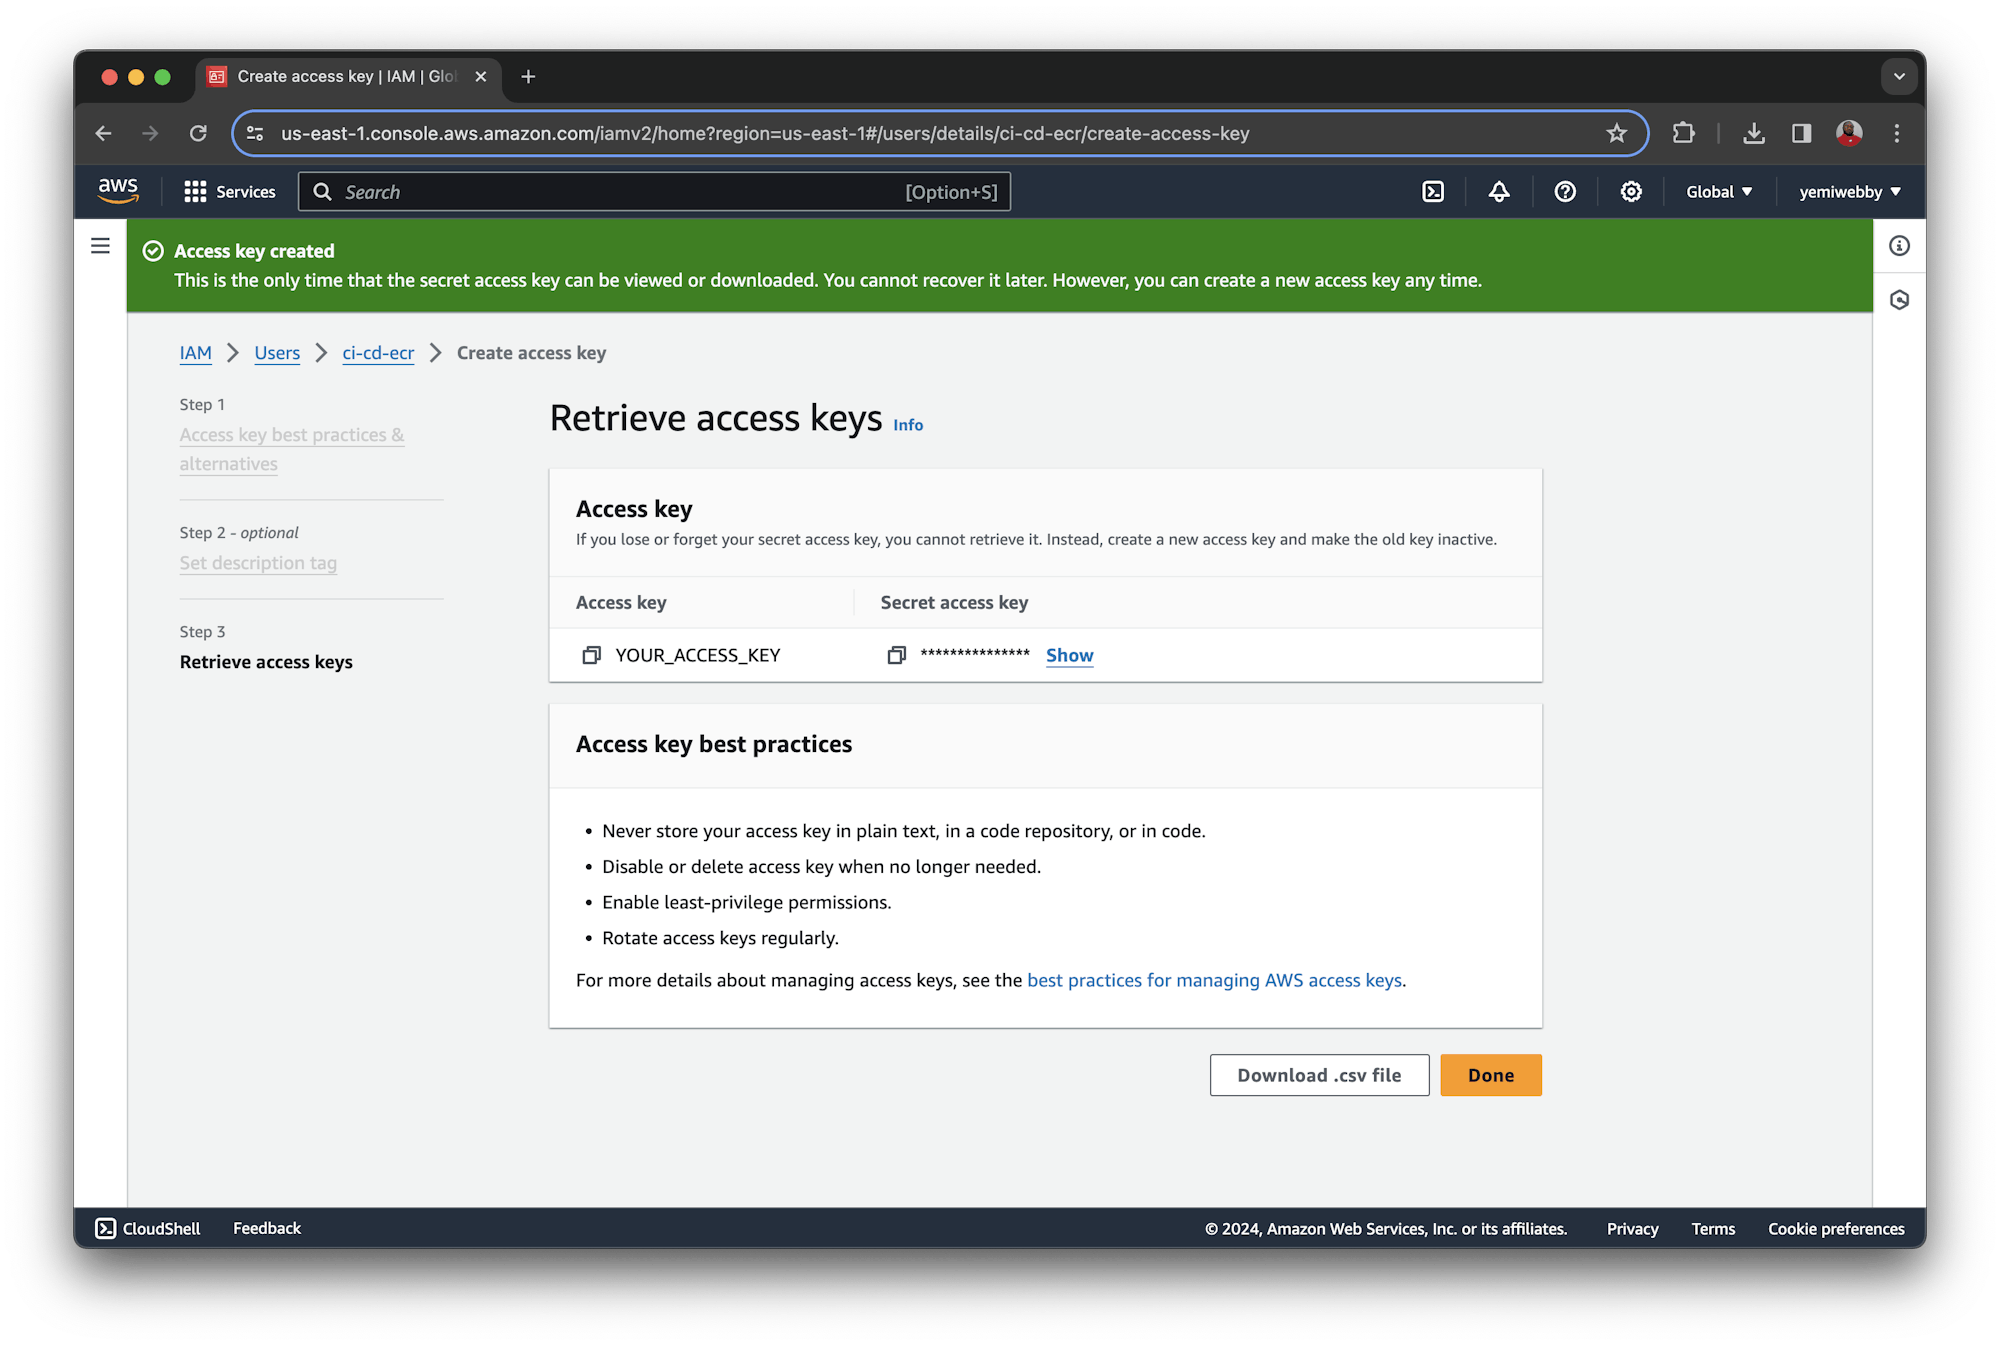
Because we need the new user to programmatically access AWS resources, we need to create an access key. Click the username of the new user and click Create access key.

Once you are done, you will be greeted with a success message along with your user credentials. This page is only displayed once, so make a note of the Access Key ID and the Secret access key which will be used later on. Alternatively, you can download the provided .csv file, which contains the same credentials.
Setting up a CircleCI pipeline using the AWS-ECR orb
The code for this demo is available on GitHub. Clone the application using the following command:
git clone https://github.com/CIRCLECI-GWP/circleci-ecr-app-demo
Find the CircleCI config.yml file in the .circleci/ folder. Using orbs, as you’ll see, you can build an image and push it to Amazon ECR using only 13 lines of config! The aws-ecr orb comes prepackaged with commands to:
- Build an image
- Login to Amazon ECR
- Create an Amazon ECR repo, if one doesn’t exist
- Push an image to Amazon ECR
Here is the full config for your pipeline:
version: 2.1

orbs:
  aws-ecr: circleci/aws-ecr@8.1.3

workflows:
  build_and_push_image:
    jobs:
      - aws-ecr/build-and-push-image:
          context: aws-dev
          create-repo: true
          dockerfile: Dockerfile
          path: .
          repo: circleci-ecr-app-demo
          tag: "$CIRCLE_SHA1"
This configuration file uses the Amazon Elastic Container Registry orb to build and deploy your Docker image. The dockerfile: command specifies the path to your Dockerfile. The demo repo uses the following Dockerfile:
# Set the base image to use for subsequent instructions
FROM node:alpine

# Add metadata to an image
LABEL app="simple-node-application"
# Directive to set environmental variables key to value pair
ENV NPM_CONFIG_LOGLEVEL warn

# Set the working directory for any subsequent ADD, COPY, CMD, ENTRYPOINT,
# or RUN instructions that follow it in the Dockerfile
WORKDIR /usr/src/app

# Copy files or folders from source to the dest path in the image's filesystem.
COPY package.json /usr/src/app/
COPY . /usr/src/app/

# Execute any commands on top of the current image as a new layer and commit the results.
RUN npm install --production

# Define the network ports that this container will listen on at runtime.
EXPOSE 3000

# Configure the container to be run as an executable.
ENTRYPOINT ["npm", "start"]
Adding credentials and environment variables for Amazon ECR
CircleCI contexts allow you to securely store credentials and share them across projects. Since we will need our AWS credentials to deploy our container image, we’ll first need to set up our context.
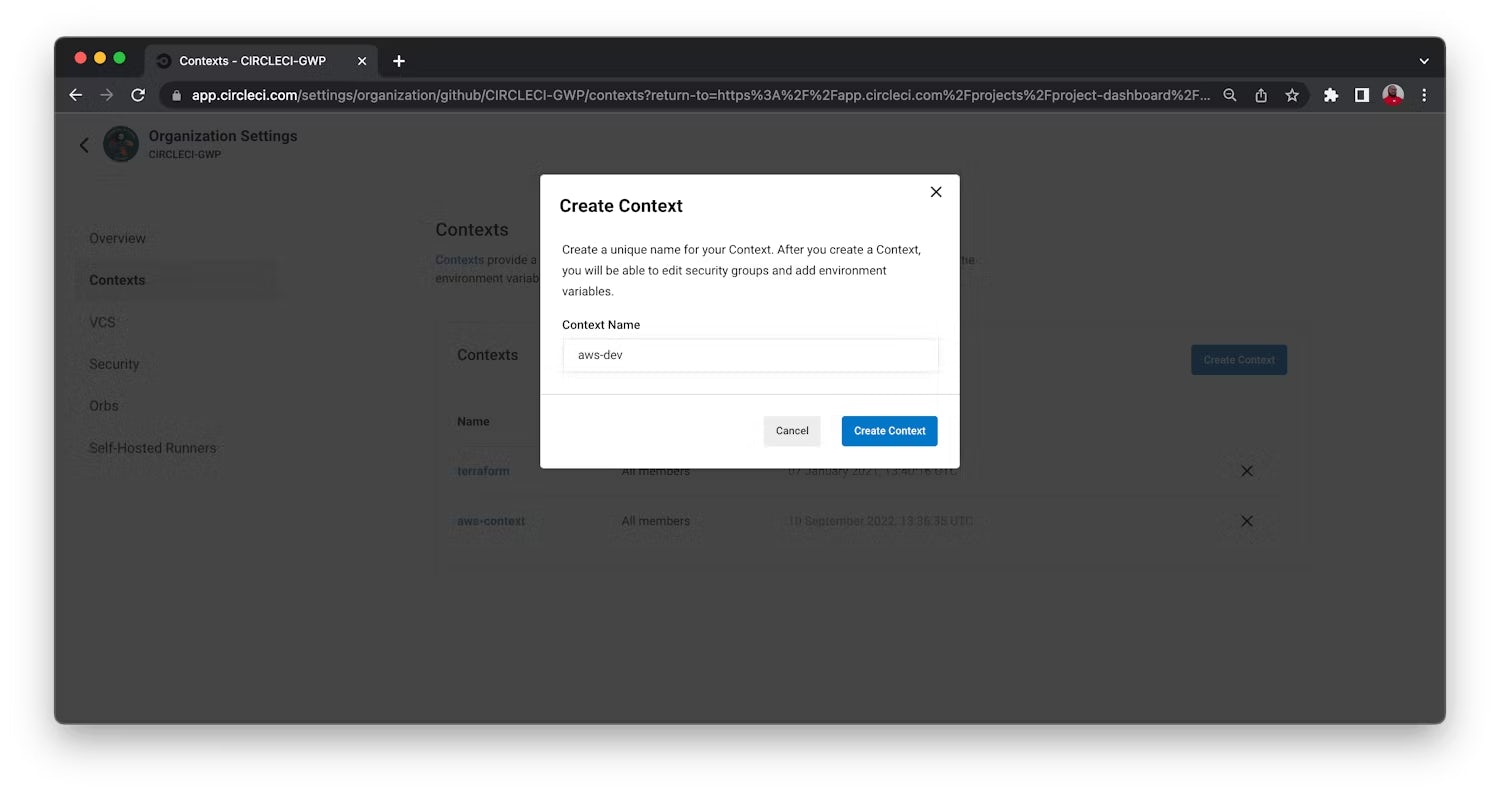
In your CircleCI dashboard, go to the Organization Settings page by clicking on the link in the sidebar. Next, select Context. Click the Create Context button and add a unique name for your Context. The Context appears in a list with Security set to All members to indicate that anyone in your organization can access this Context at runtime. As specified in the .circleci/config.yml configuration for this tutorial, the Context name should be aws-dev.
Next, select the aws-credentials context.
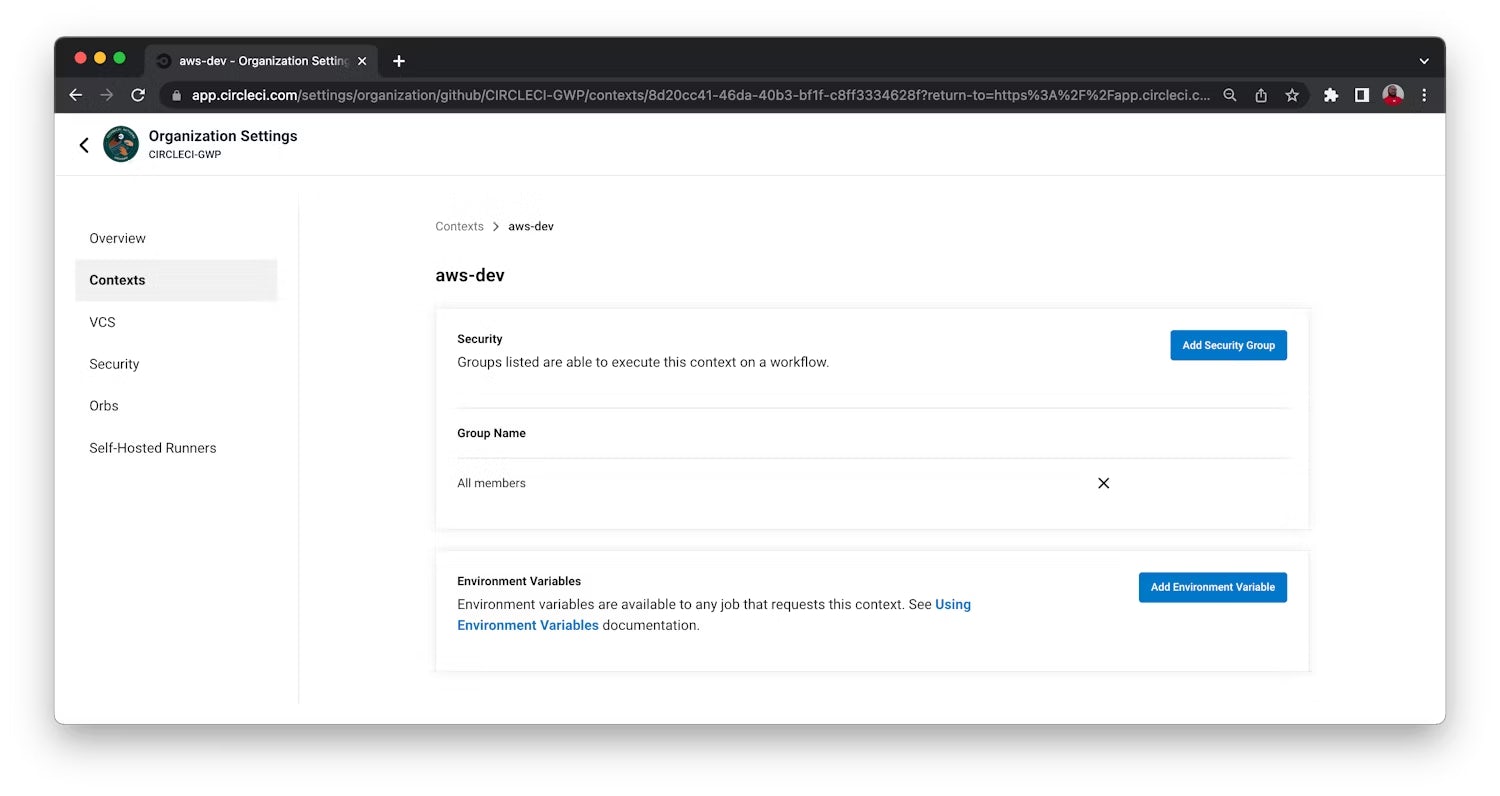
Click the Add Environment Variable button. Enter the variable name and value you want to associate with this context. Click the Add Variable button to save. The aws-dev context requires these three environment variables:
AWS_ACCESS_KEY_IDis the AWS access key id for theci-cd-ecrIAM role you created earlier.AWS_SECRET_ACCESS_KEYis the AWS secret key for theci-cd-ecrIAM role that you created earlier.AWS_ECR_REGISTRY_IDis the 12 digit AWS id associated with the ECR account. This is also known as account ID.AWS_REGIONis the AWS region where your ECR resources will be located.
Note: You don’t have to set $CIRCLE_SHA1 because it is the default variable available in all CircleCI projects. It’s the SHA1 hash of the last commit of the current build. Using the Git commit hash gives you the ability to trace what’s in the containers. Ideally, it allows you to trace a container back to its Docker image, and then back to the Dockerfile and code contained in the image. In an automated execution environment, this will take you back to the commit that caused the Docker image to be built.
Connecting the application to CircleCI
The next step is to set up a repository on GitHub and link the project to CircleCI. Review Pushing a project to GitHub for instructions.
Log in to your CircleCI account. If you signed up with your GitHub account, all your repositories will be available on your project’s dashboard. Locate your project (circleci-ecr-app-demo in this case) and click Set Up Project.
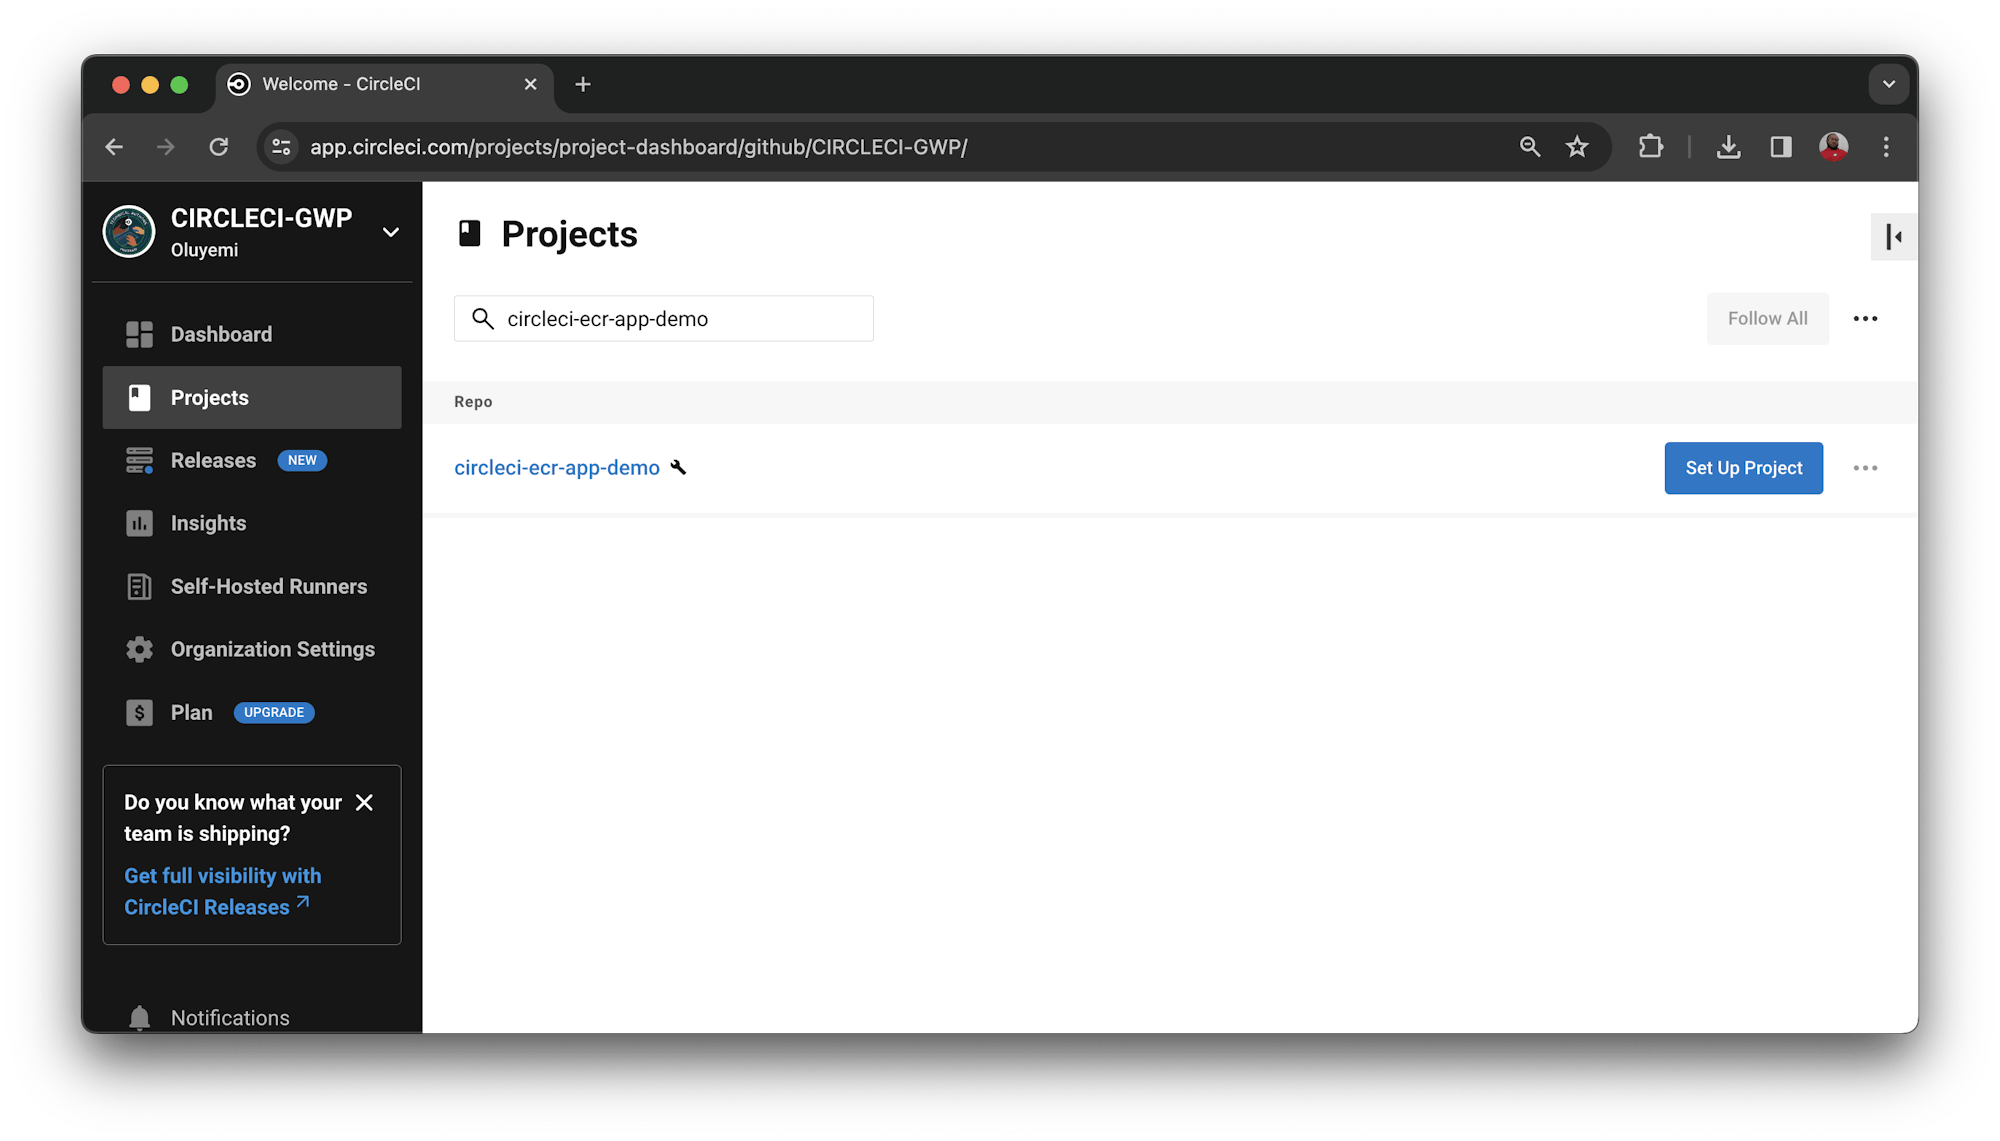
Enter the name of the branch where your code is housed on GitHub and click Set Up Project.
Your first workflow will start running and complete successfully.
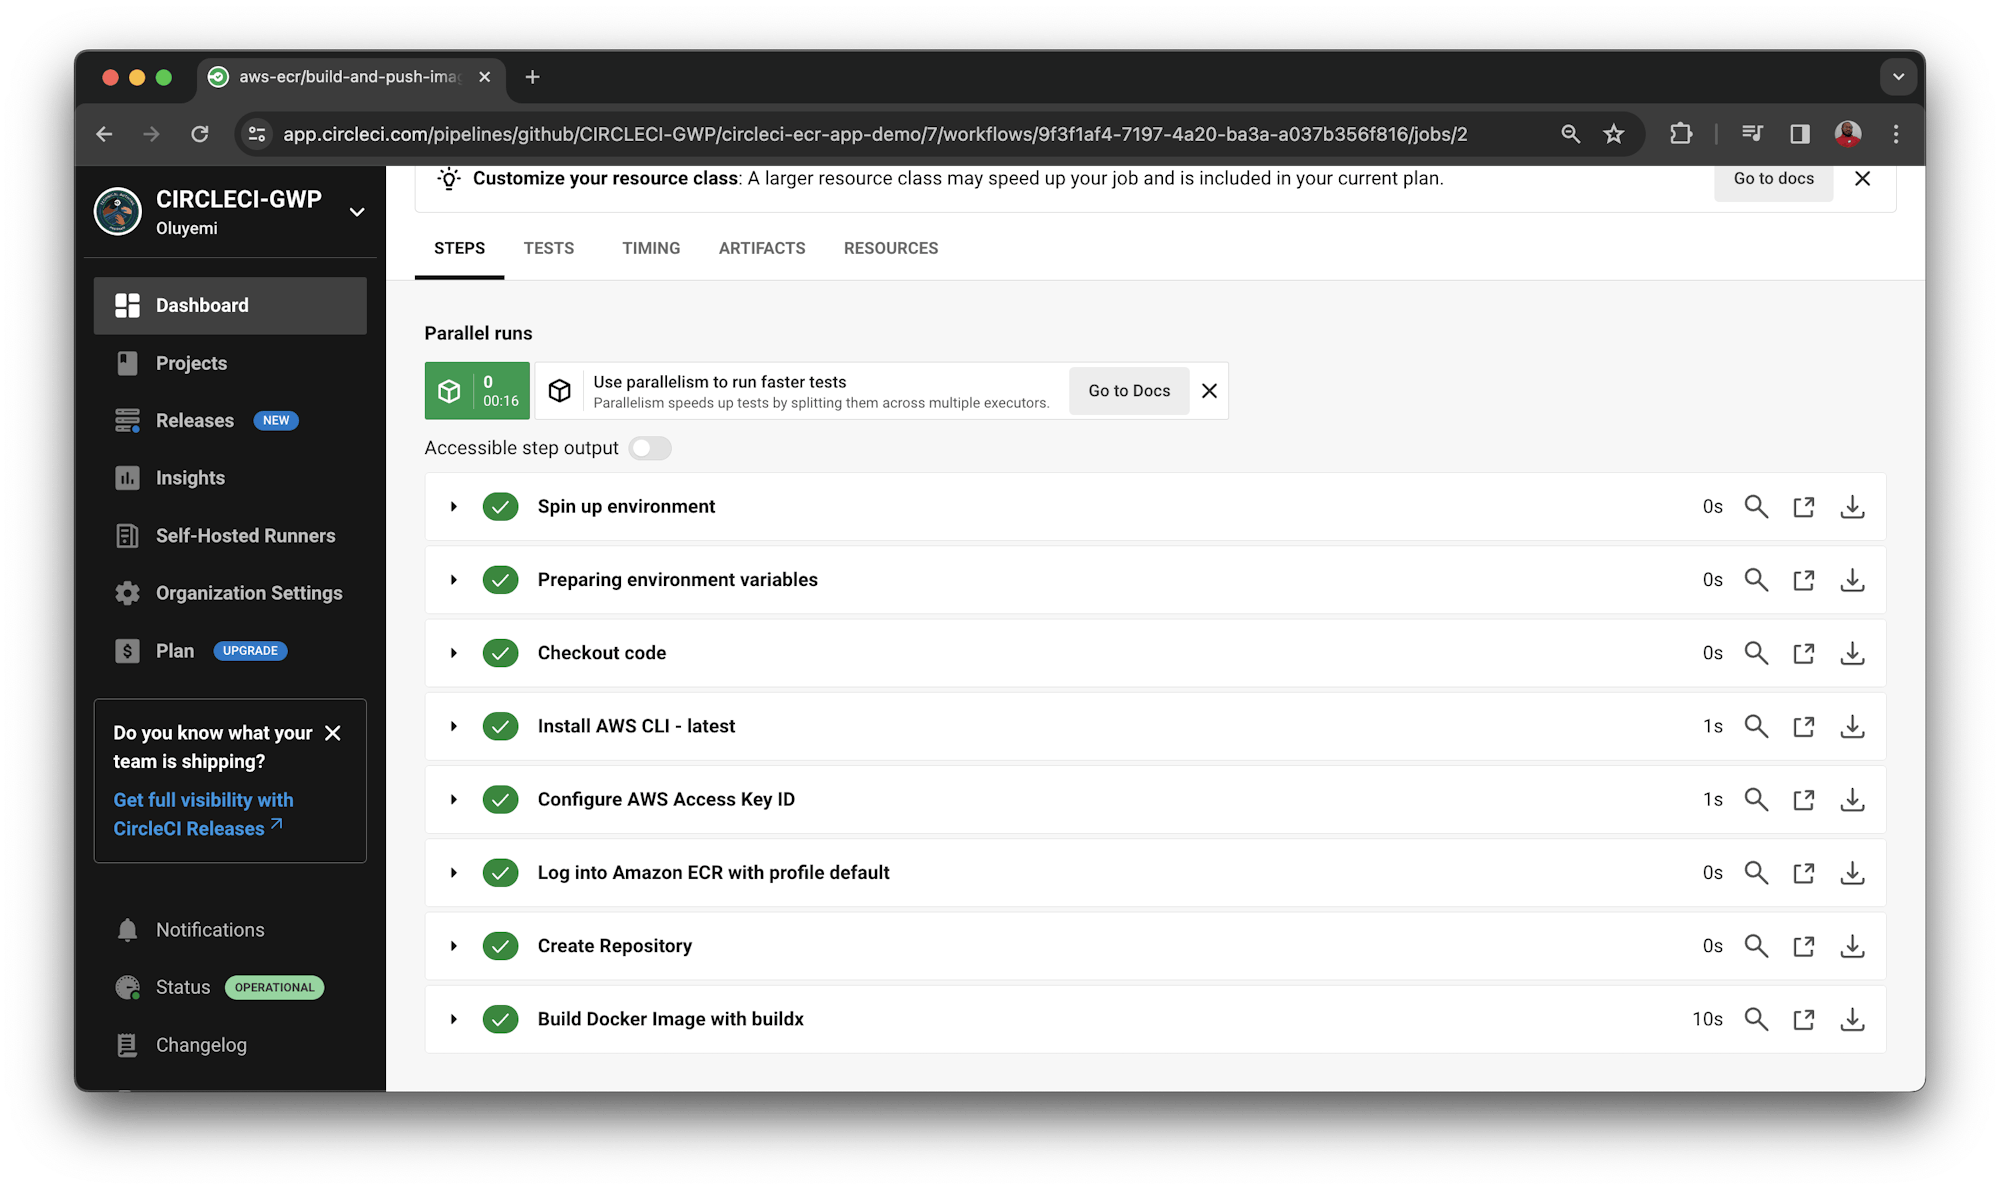
Now, any time you update your project, your CI pipeline will automatically build a new image and push it to ECR. To review the repository information, go to your AWS management Console.
Conclusion
With both CircleCI and Amazon ECR successfully configured, you can start building images and pushing them to the repository.
With just a few lines of code, you were able to build and push your Docker image to Amazon ECR. CircleCI orbs save time by importing pre-built commands, jobs, and executors into CircleCI configuration files, providing easy integration with cloud services and other tools.
Dominic Motuka is a DevOps Engineer at Andela with 4+ years of hands-on experience supporting, automating, and optimizing production-ready deployments in AWS and GCP, leveraging configuration management, CI/CD, and DevOps processes.


