Continuous integration for progressive web apps

Fullstack Developer and Tech Author

Web and browser technology continues to advance, and the gap between the performance of web and native applications continues to be reduced. Features that were once exclusive to native applications are now being implemented in web applications. Not so recently, the emergence of progressive web applications (PWAs) has greatly closed the gap between web and native applications. Web applications can now be installed, receive push notifications, and even work offline. In this post, we will build a simple PWA, write tests for it, and automate the testing process by building a continuous integration (CI) pipeline with CircleCI.
Prerequisites
To follow this post, a few things are required:
- Basic knowledge of Javascript
- Node.js installed on your system
- HTTP Server Module installed globally on your system (
npm install -g http-server) - A CircleCI account
Let’s begin.
Setting up the demo application
To begin, create an application folder by running the following command:
mkdir my-pwa
Next, inside the root of the application, create a file named index.html which will be the home page for the application. Paste the following code into this file:
<!DOCTYPE html>
<html lang="en">
  <head>
    <meta charset="UTF-8" />
    <meta name="viewport" content="width=device-width, initial-scale=1.0" />
    <link rel="manifest" href="manifest.json" />
    <link rel="stylesheet" type="text/css" href="styles.css" media="all" />

    <title>My PWA Application</title>
  </head>
  <body>

    <h2>
      Welcome to my Progressive Web Application.
    </h2>

    <script src="app.js"></script>
  </body>
</html>
In the file above, we have a typical HTML page with a title that reads “My PWA Application” and a welcome message. This file also references a manifest.json file (to configure our PWA for installation), a styles.css file for some basic styling, and an app.js file which will load in our service worker. All of these files will be created in the course of this tutorial.
To get a preview, run the following command at the root of the application:
http-server
This will invoke the http-server module to spin up an ad hoc server to serve the application. You will see the following screen in your browser after navigating to the URL where the application is being served (the address will be displayed on the console after running the command).
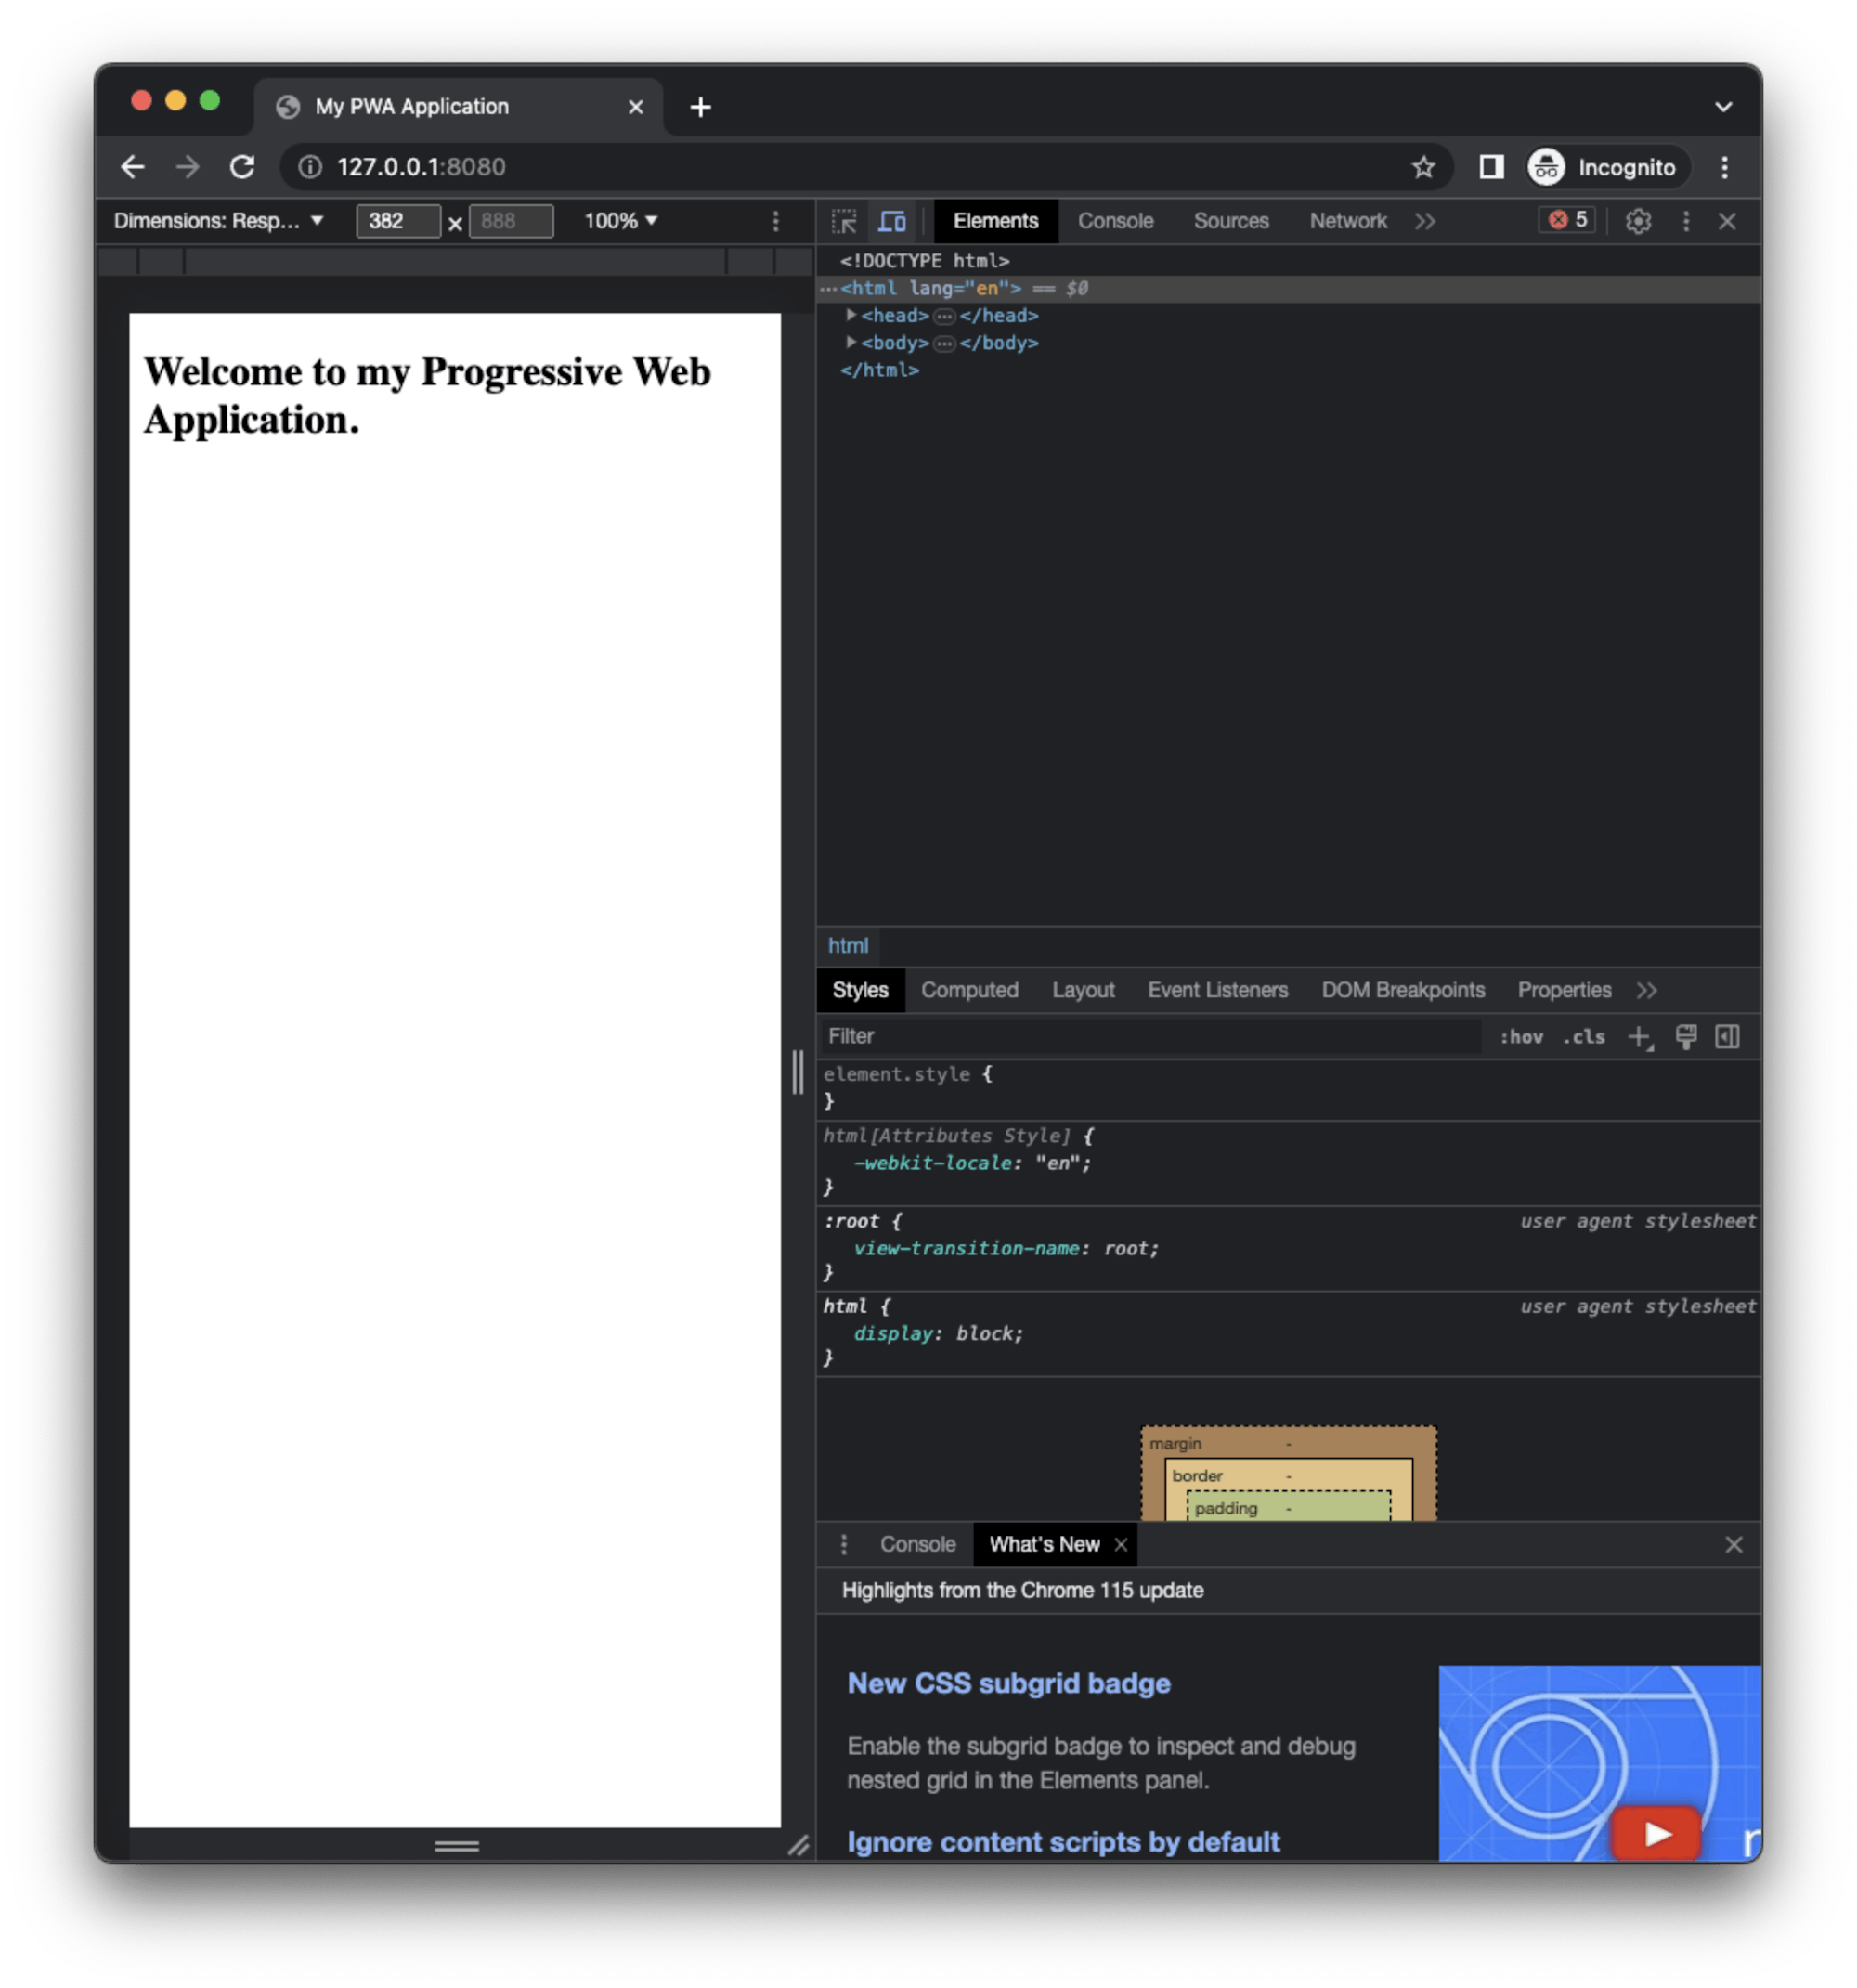
Note: I am running in Incognito mode on the Google Chrome browser with the developer tools opened and mobile view activated. I prefer running PWAs in Incognito mode during development as this ensures that I get updates to my service worker.
Next, let’s add styles by creating a styles.css file in the root folder of the application. Paste the following code into the file:
/* ./styles.css */

h2 {
  color: blue;
  padding: 5px;
}
This file doesn’t do much, it simply gives the h2 header some padding and colors it blue.
Adding a service worker
Service workers are the engine room that powers PWA capabilities. We will be adding a service worker to this project by creating a new file named serviceworker.js in the root folder of the application and pasting the following code in it:
// ./serviceworker.js

var cacheName = "sw-v1";
var filesToCache = ["./", "./index.html", "./styles.css"];

self.addEventListener("install", function (e) {
  console.log("[ServiceWorker] Install v1");
  e.waitUntil(
    caches.open(cacheName).then(function (cache) {
      console.log("[ServiceWorker] Caching app shell");
      return cache.addAll(filesToCache);
    })
  );
});

self.addEventListener("activate", (event) => {
  event.waitUntil(self.clients.claim());
});

self.addEventListener("fetch", function (event) {
  event.respondWith(
    caches.match(event.request).then(function (response) {
      if (response) {
        return response;
      }
      return fetch(event.request);
    })
  );
});
To the familiar eye, this is pretty much PWA boilerplate 101. First, we are setting a name for our cache. This will enable us to set the version of our service worker whenever the file is updated so that when the browser installs the updated service worker file, we can identify the version we are currently running. I have named this sw-v1 to identify it as my first version. We cache our application root files (index.html and styles.css) here.
Next, an array of the files to be cached is created. These are the files that will be cached in the browser’s memory for the user to access while offline.
Then we handle the install event which uses our cache name to create a cache where our files are stored.
The next event to handle is activate, which is fired when a new version of a service worker is being activated after installation. Here, we ensure that the old service worker stops serving the cached files.
Finally, we handle the fetch event which intercepts requests by the application and checks the cache to see if a cached version of the requested resource is available. If it is available, the cached resource is served and if not, a fresh request is made for the resource.
In order to make our application use the service worker we just created, we need to load it into our application. Create an app.js file in the root folder of the application and paste the following code:
// ./app.js

if ("serviceWorker" in navigator) {
  window.addEventListener("load", function () {
    navigator.serviceWorker.register("./serviceworker.js").then(
      function (registration) {
        console.log("Hurray! Service workers with scope: ", registration.scope);
      },
      function (err) {
        console.log("Oops! ServiceWorker registration failed: ", err);
      }
    );
  });
}
Let’s take our service work for a spin. Ensure that your app is still running, then do a hard reload on the browser tab where the application is currently loaded (Ctrl + Shift + R). Now check the browser console to see the console log messages we wrote to confirm the installation of the service worker.
You will see the following messages in your console.

Great!
Our service worker is now installed and our files cached for offline access. To confirm the cache, go to the Application tab in Chrome developer tools and expand the Cache Storage section. You will see the named cache that our service worker just created.
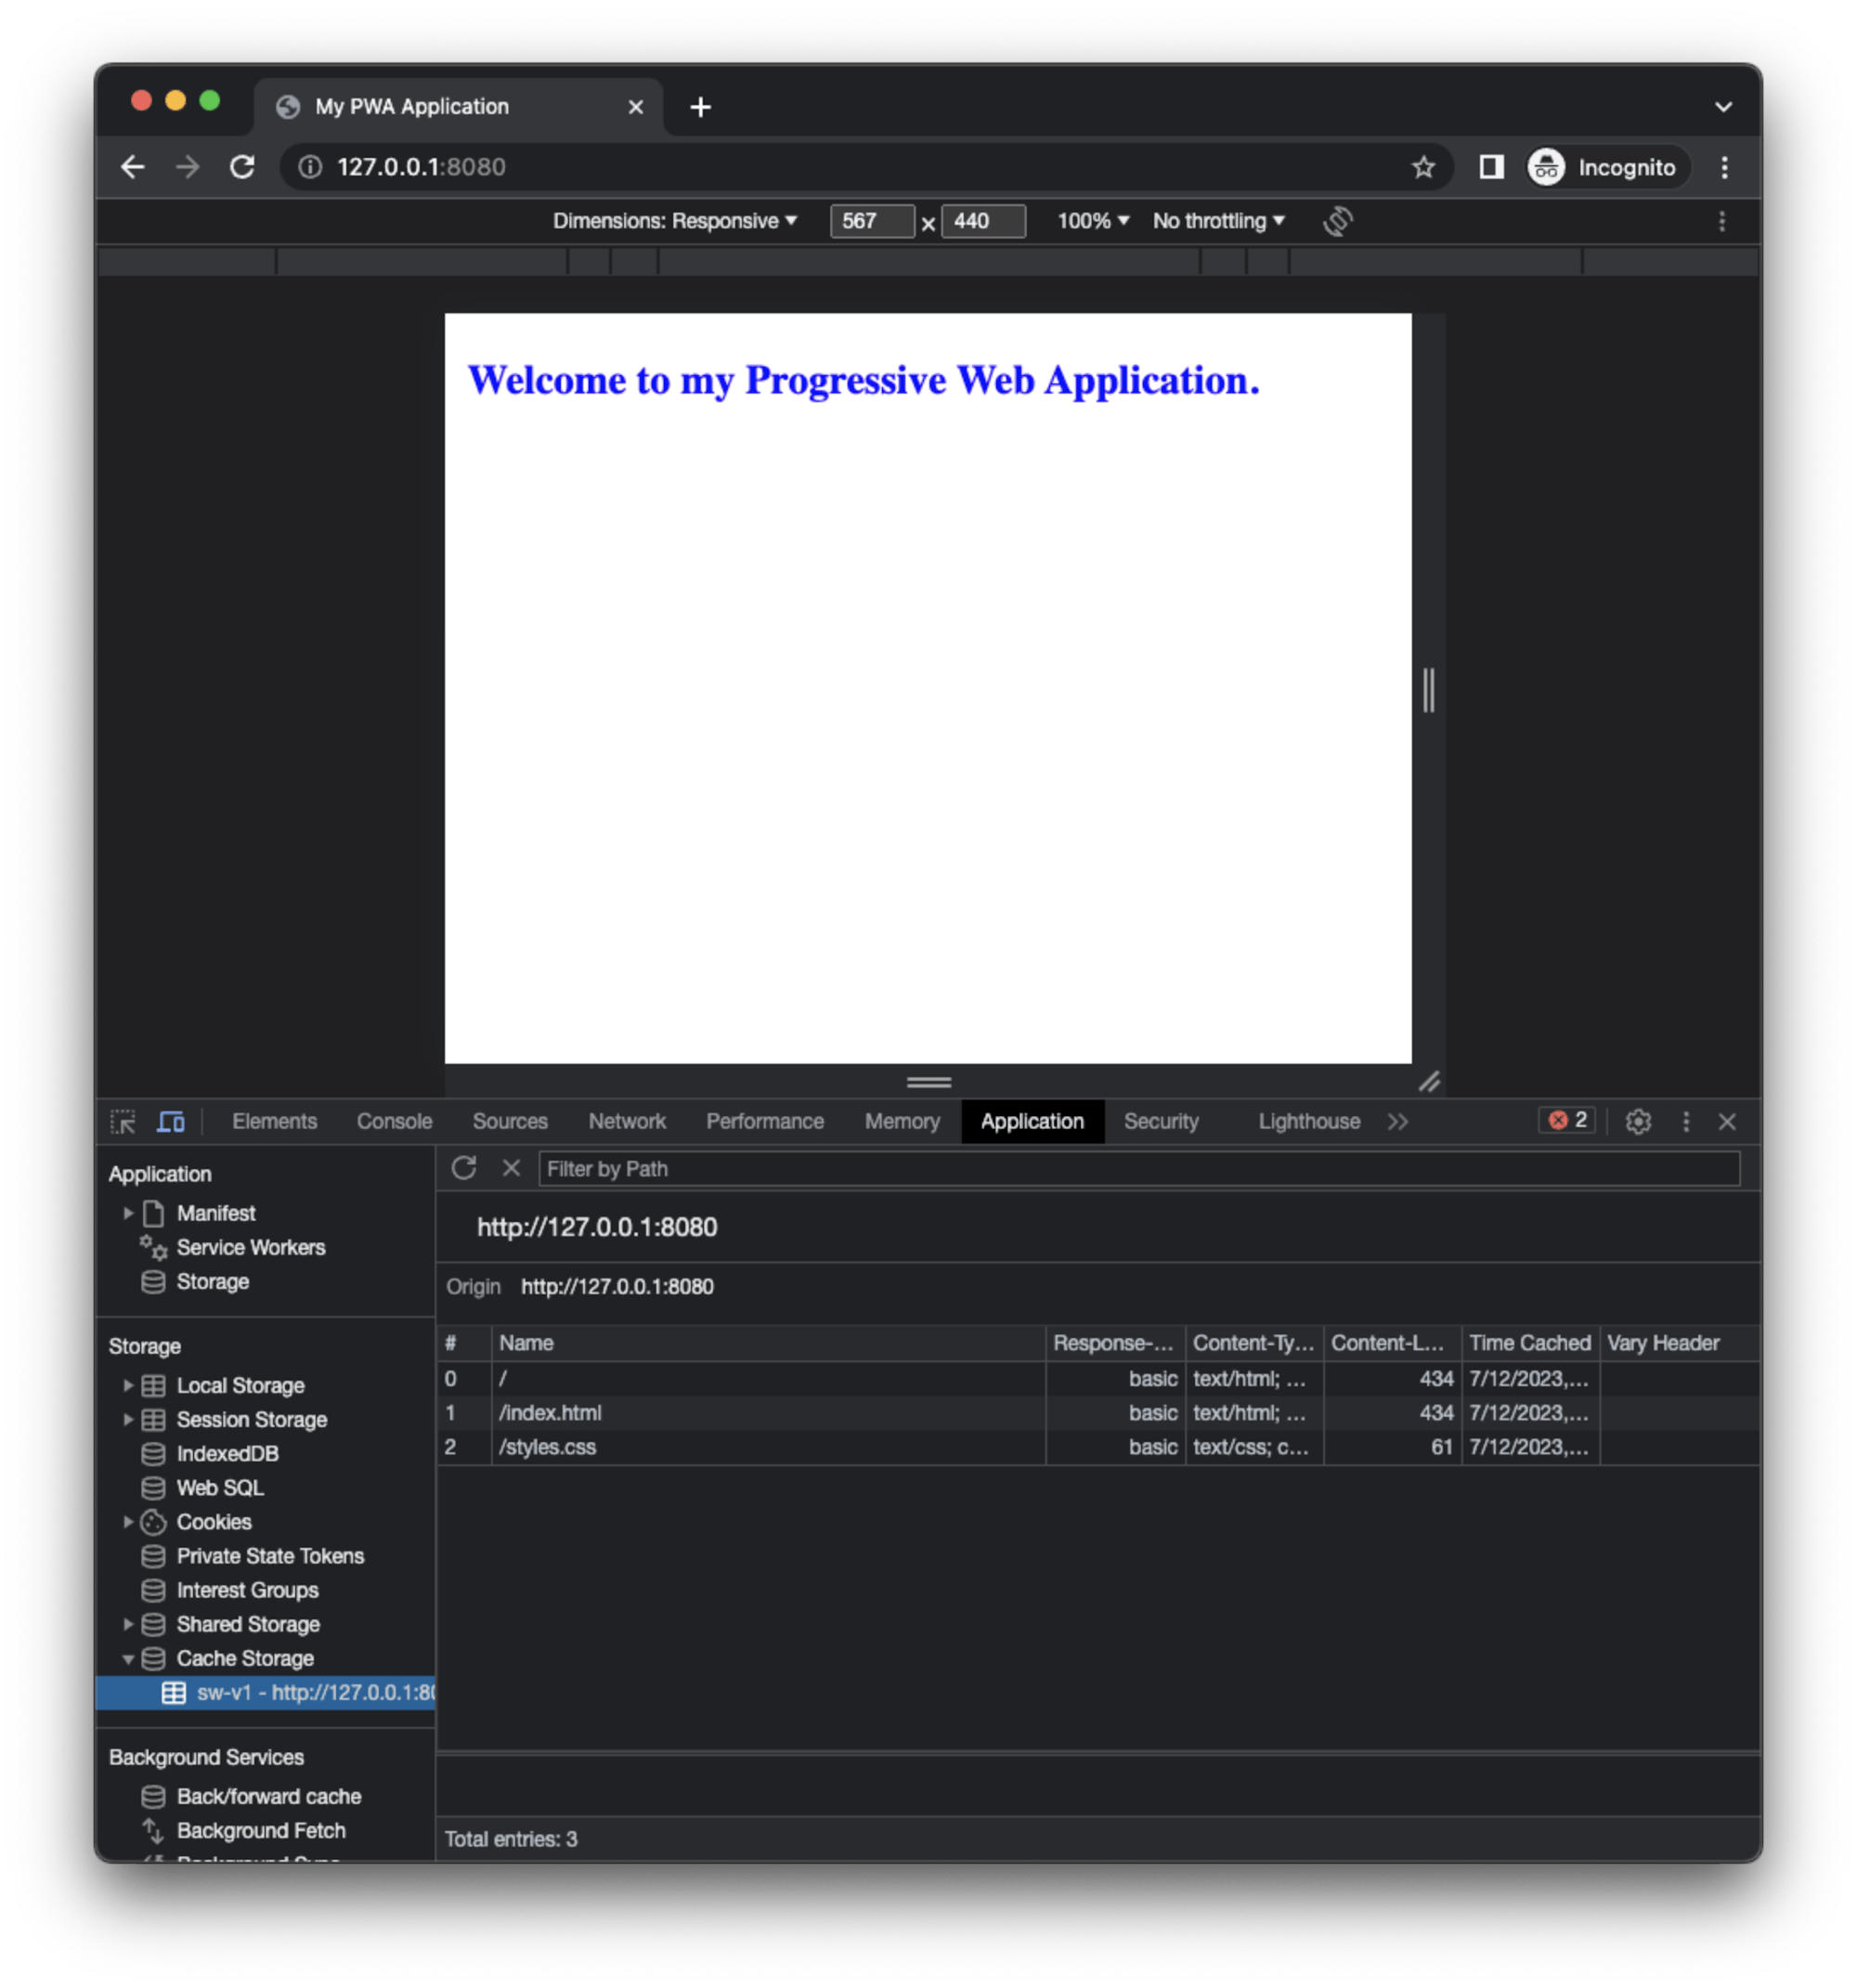
To confirm that we now have offline capabilities by virtue of our service worker, shut down the http-server service with Ctrl + C, then refresh the application in your browser. You would usually see the offline page at this point because the application is no longer running, but with the magic that is a service worker, you can still see your application home page.
Adding a manifest file
To finish off our PWA creation process, we need to create a manifest file that will facilitate the Add To Home Screen feature of our application. This defines how our application is installed on the device in which it is being browsed.
Create a manifest.json file in the root of the project and paste the following in it:
{
  "name": "My PWA",
  "short_name": "My PWA",
  "background_color": "#ffffff",
  "display": "standalone",
  "orientation": "portrait",
  "scope": "/index.html",
  "start_url": "/index.html",
  "icons": [
    {
      "src": "icons/icon-128x128.png",
      "sizes": "128x128",
      "type": "image/png"
    },
    {
      "src": "icons/icon-144x144.png",
      "sizes": "144x144",
      "type": "image/png"
    },
    {
      "src": "icons/icon-152x152.png",
      "sizes": "152x152",
      "type": "image/png"
    },
    {
      "src": "icons/icon-192x192.png",
      "sizes": "192x192",
      "type": "image/png"
    },
    {
      "src": "icons/icon-512x512.png",
      "sizes": "512x512",
      "type": "image/png"
    }
  ]
}
You can generate icons for your PWAs and also generate a manifest file here. In the above file, the name of the application, the preferred orientation, and the background_color for the splash screen are defined.
Note: It is a best practice to add the short_name, an optional field that specifies the name that will be displayed in the app launcher or a new tab page. Otherwise, the name will be used, and it will be truncated if it is more than 12 characters long.
This is a very simple, lean app, so I have ignored features like theme_color, splash_pages, some standard icon sizes, and iOS icon support.
The application home page is set at /index.html, and the installation icon sizes for different devices are defined in the icons property. I have also moved the icons directory containing all my icons to the root of the project. Now we have all we need for our application to function as a PWA.
To confirm this, let’s run a Lighthouse test in Chrome developer tools. Go to the Lighthouse tab in Chrome developer tools. You will see the screen below. There may be slight variations due to your Chrome version.

Now click Generate Report Analyze page load to generate an audit report for our PWA. Results similar to the screenshot below will be displayed.

Click on the PWA icon on the far right to jump to the results for the PWA compatibility test.
Note: The failing check, Does not redirect HTTP traffic to HTTPS, will pass when you deploy your site and enable HTTPS.
If you want to learn more about getting a clean build, check out these links:
- https://web.dev/themed-omnibox/
- https://web.dev/pwa-checklist/
- https://web.dev/apple-touch-icon/
- https://web.dev/redirects-http
Adding tests
To begin adding tests to our application, let’s quickly scaffold a package.json file for the npm packages that we will be installing. Run the following command which will skip all the Q/A process for creating a package.json file and just dumps a basic one at the root of your project:
npm init -y
To set up tests in the application, we will need to install the following packages:
- JSDOM: To simulate the browser DOM
- DOM Testing Library: Standard library for DOM testing
- Jest: Our test runner
- Jest DOM: Jest plugin for running DOM tests
Install all these packages at once with the following command:
npm install --save-dev @testing-library/dom @testing-library/jest-dom jsdom jest
Once these are installed, create a test file named index.test.js in the root folder of the application and paste the following code in it:
// ./index.test.js

const { getByText } = require("@testing-library/dom");
require("@testing-library/jest-dom/extend-expect");
const { JSDOM } = require("jsdom");
const fs = require("fs");
const path = require("path");

const html = fs.readFileSync(path.resolve(__dirname, "./index.html"), "utf8");

let dom;
let container;

describe("Test for elements on Home page", () => {
  beforeEach(() => {
    dom = new JSDOM(html, { runScripts: "dangerously" });
    container = dom.window.document.body;
  });

  it("Page renders a heading element", () => {
    expect(container.querySelector("h2")).not.toBeNull();
    expect(getByText(container, "Welcome to my Progressive Web Application.")
    ).toBeInTheDocument();
  });
});
In the above file, we start by fetching all the necessary dependencies. We then load in our HTML file and in the beforeEach method in the describe block, we create our DOM with JSDOM.
We then run a test in the it block to check for the occurrence of our header element text that reads Welcome to my progressive web application. on the page.
Let’s set up our test script in the package.json file. Edit the existing test key-value pair with what is shown below:
...
"scripts": {
    "test": "jest"
},
...
Now run the test file with the following command:
npm run test
Our tests will all pass. Now we can start building our CI pipeline.

Building the CI pipeline
In order to create a CI pipeline for our application, we will need to take the following steps:
- Add a pipeline configuration script to our application
- Push the project to a remote repository (GitHub, in this case)
- Add the repository as a project on CircleCI
- Run the pipeline using the configuration file in our project
At the root of your project, create a folder named .circleci and a file within it named config.yml. Inside the config.yml file, enter the following code:
version: 2.1
jobs:
  build:
    working_directory: ~/repo
    docker:
      - image: cimg/node:17.4.0
    steps:
      - checkout
      - run:
          name: Update NPM
          command: "sudo npm install -g npm"
      - restore_cache:
          key: dependency-cache-{{ checksum "package-lock.json" }}
      - run:
          name: Install Dependencies
          command: npm install
      - save_cache:
          key: dependency-cache-{{ checksum "package-lock.json" }}
          paths:
            - ./node_modules
      - run:
          name: Run tests
          command: npm run test
In the file above, we begin by checking out the application from the repository and updating the npm version for our Node.js environment. Then we install our dependencies and cache the node_modules folder. Finally, we run our tests.
Push your project changes to the GitHub repository. Make sure to add a .gitignore file to the node_modules folder.
The next step is to set up the repository for our project as a CircleCI project. On the CircleCI dashboard, locate your the project and click Set Up Project to begin.
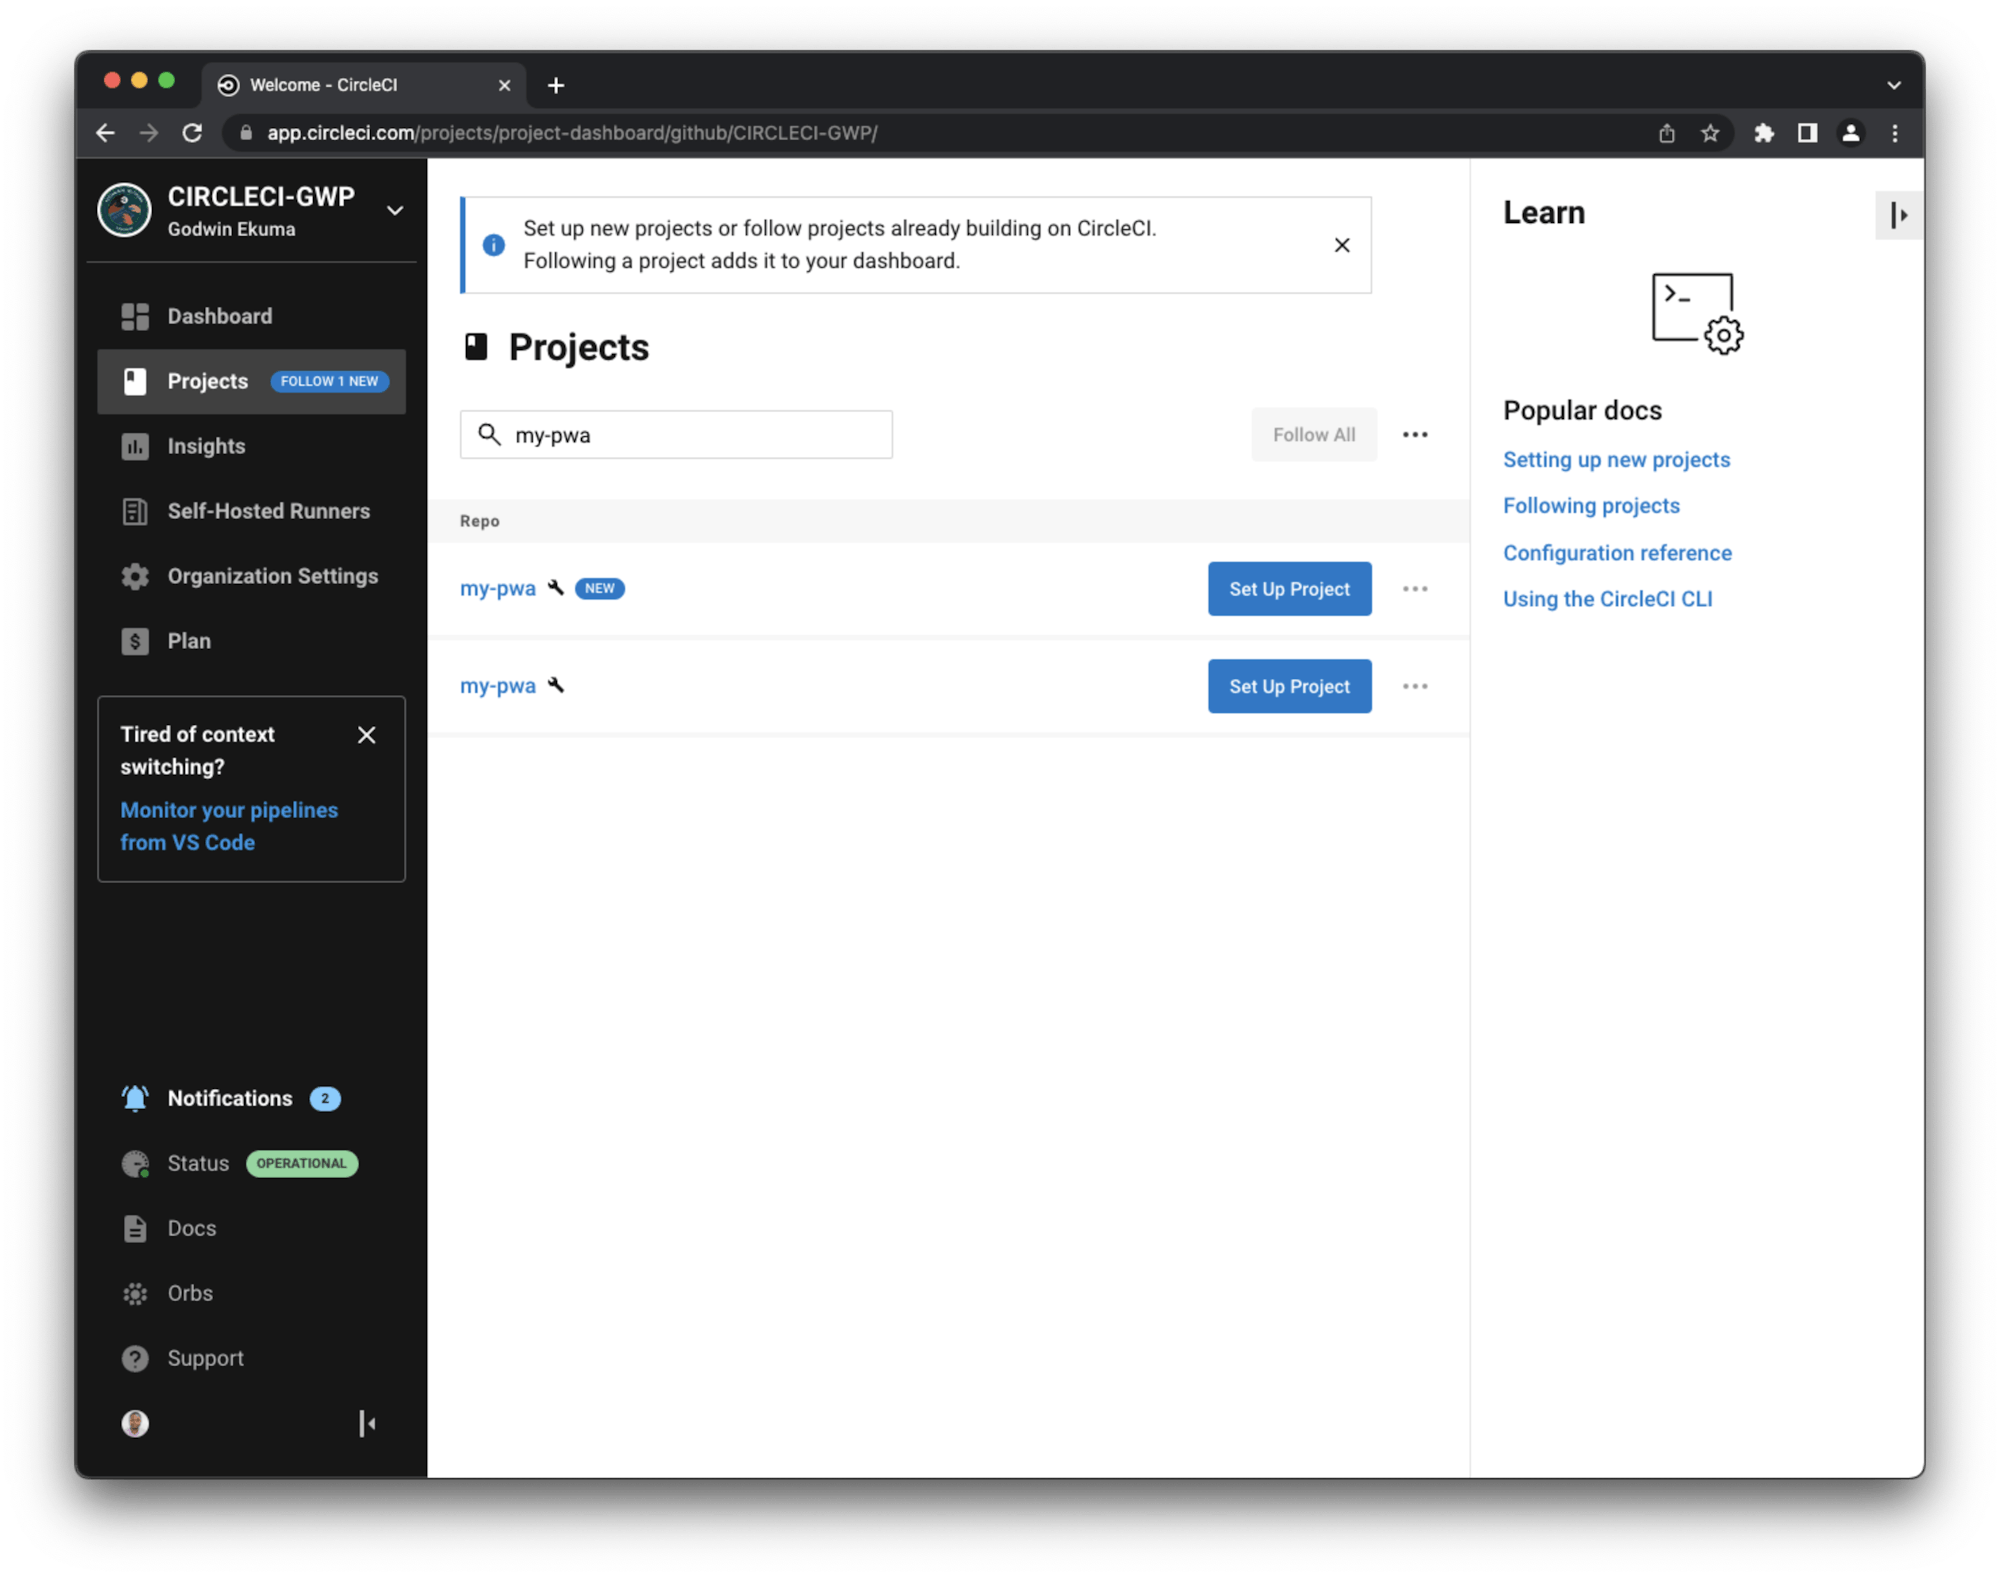
This will prompt you to either write a new configuration file or use the existing one. Select the existing one and enter the name of the branch where your code is housed on GitHub. Click Set Up Project.
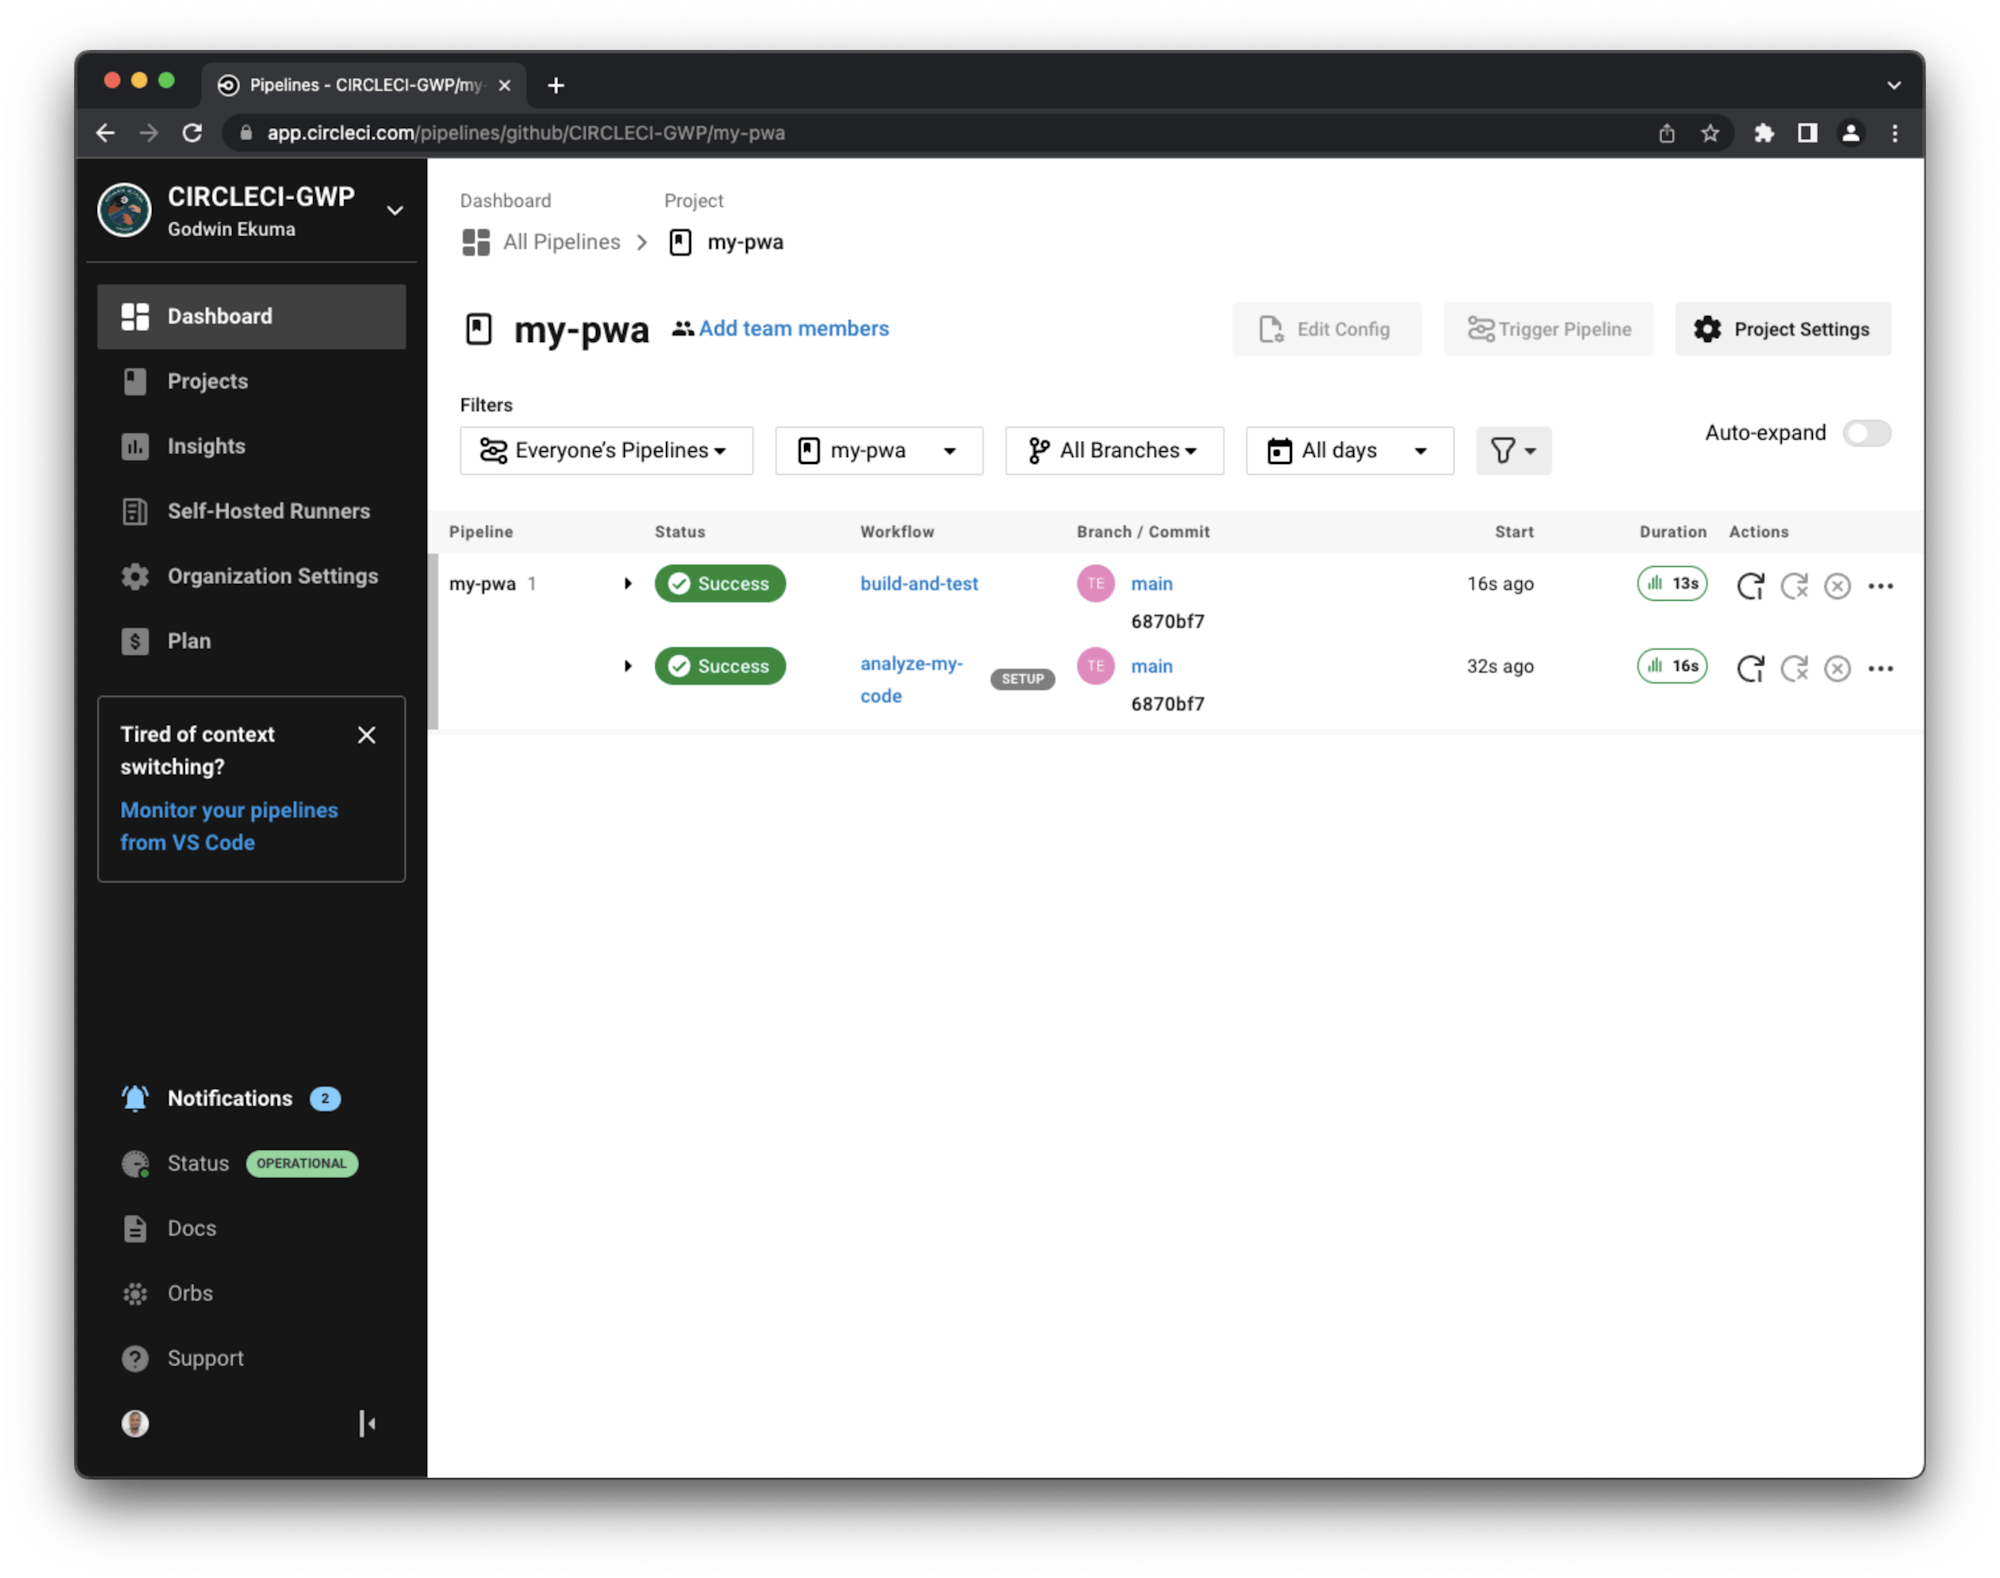
This will trigger the CI pipeline to run the build process which can be viewed on the Pipelines page of your CircleCI account. You will now have a successful build as shown below.
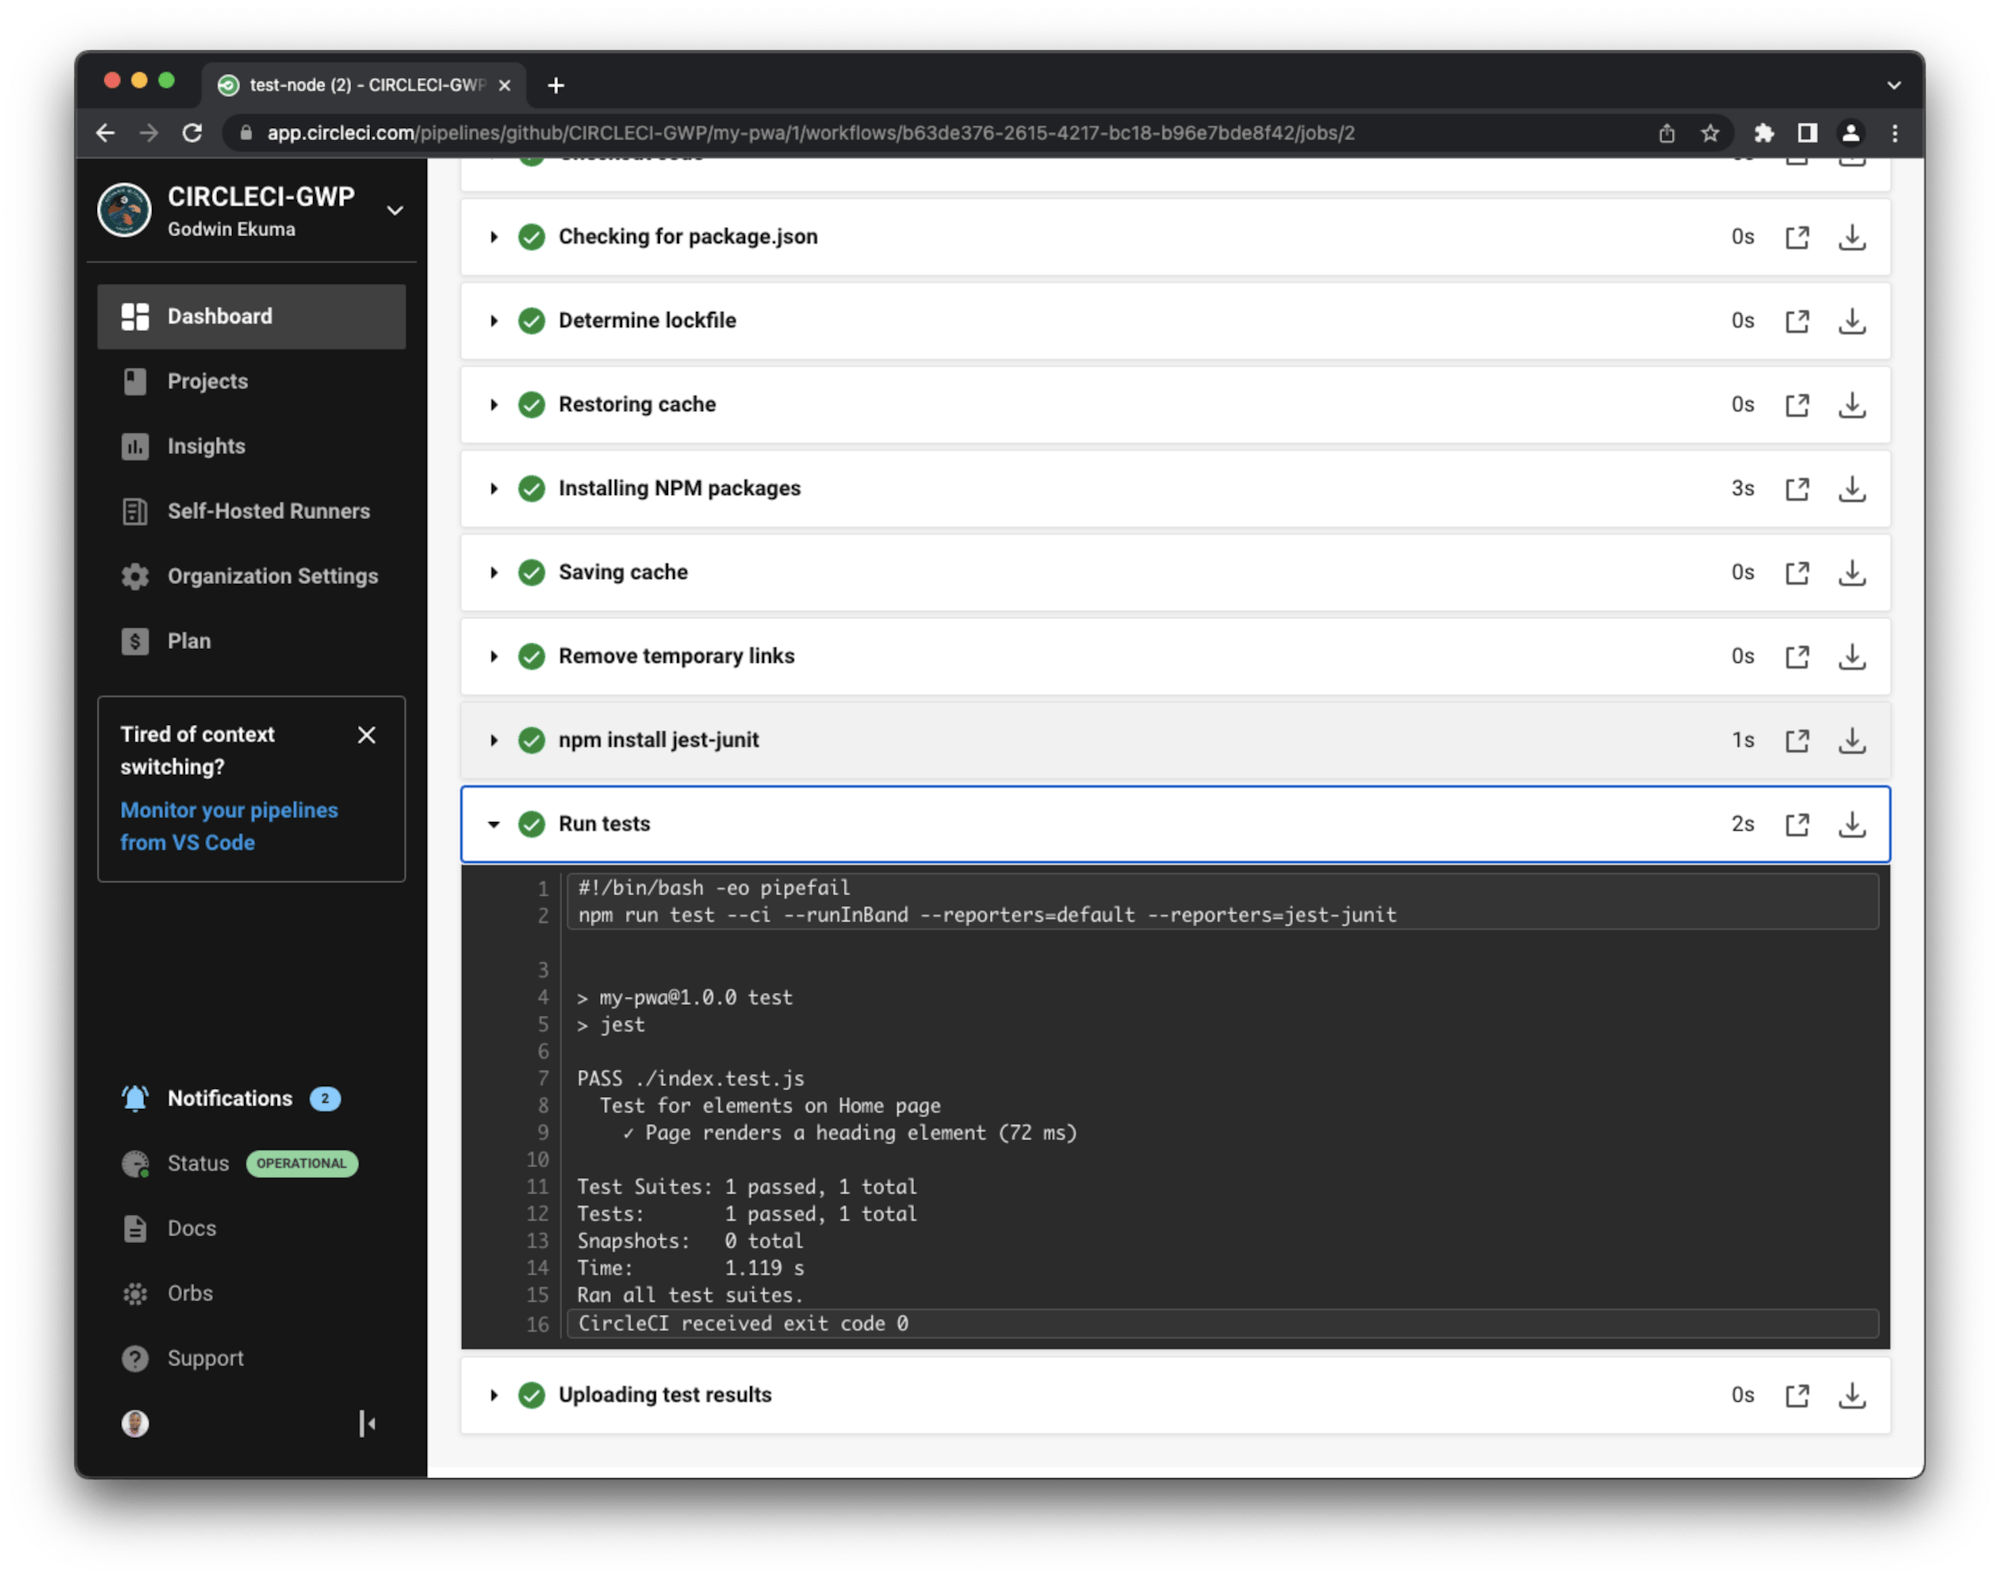
All steps ran fine and our tests passed successfully. Now you have everything set up for CI and all you need to do is push your code changes to your repository and the CI pipeline will automatically build and test your app.
Conclusion
In this article, we successfully built a PWA and set up a CI pipeline for test automation.
Happy Coding!


