Getting started with Nest.js and automatic testing

Fullstack Developer and Tech Author

Nest.js is a scalable and efficient server-side Node.js framework built with TypeScript. Nest.js was created to provide a structural design pattern to the Node.js development world. It was inspired by Angular.js and uses Express.js under the hood. Nest.js is compatible with most Express.js middleware.
In this tutorial, you will learn how to build a RESTful API with Nest.js. The tutorial will familiarize you with the fundamental principles and building blocks of Nest.js, as well as the recommended approach to writing tests for each API endpoint. You will wrap up the tutorial by learning how to automate the testing process using CircleCI continuous integration.
Prerequisites
There are a few things you will need for you to get the most out of this tutorial:
- Node version
v10.24.1( lts/dubnium ) - MySQL version
>=8.0.20 - Nest CLI version
>=nestjs/cli@10.1.18 - A GitHub account
- A CircleCI account
- It is also helpful know a few things about TypeScript
Our tutorials are platform-agnostic, but use CircleCI as an example. If you don’t have a CircleCI account, sign up for a free one here.
The RESTful API that we build in this post will provision endpoints to create a product with a name, description, and price. We will edit, delete, and retrieve a single product, and also retrieve the entire list of products saved in the database.
This tutorial uses MySQL as the preferred relational database choice and combines it with TypeORM. Nest.js is database agnostic though, so you can choose to work with any database you prefer. You can find more details about databases and Nest.js here.
Setting up the Nest.js application
Run this command to create a new application:
nest new ci-nest-js-api
After running the nest command, you will be prompted to choose a package manager. Select npm and press the Enter key to start installing Nest.js. This process creates a new project in a ci-nest-js-api folder and installs all of its required dependencies.
Before running the application, use npm to install a validation library that you will use later in the tutorial.
// move into the project
cd nest-starter-testing

npm install class-validator --save
Go to the application folder and start the application using these commands:
// start the server
npm run start:dev
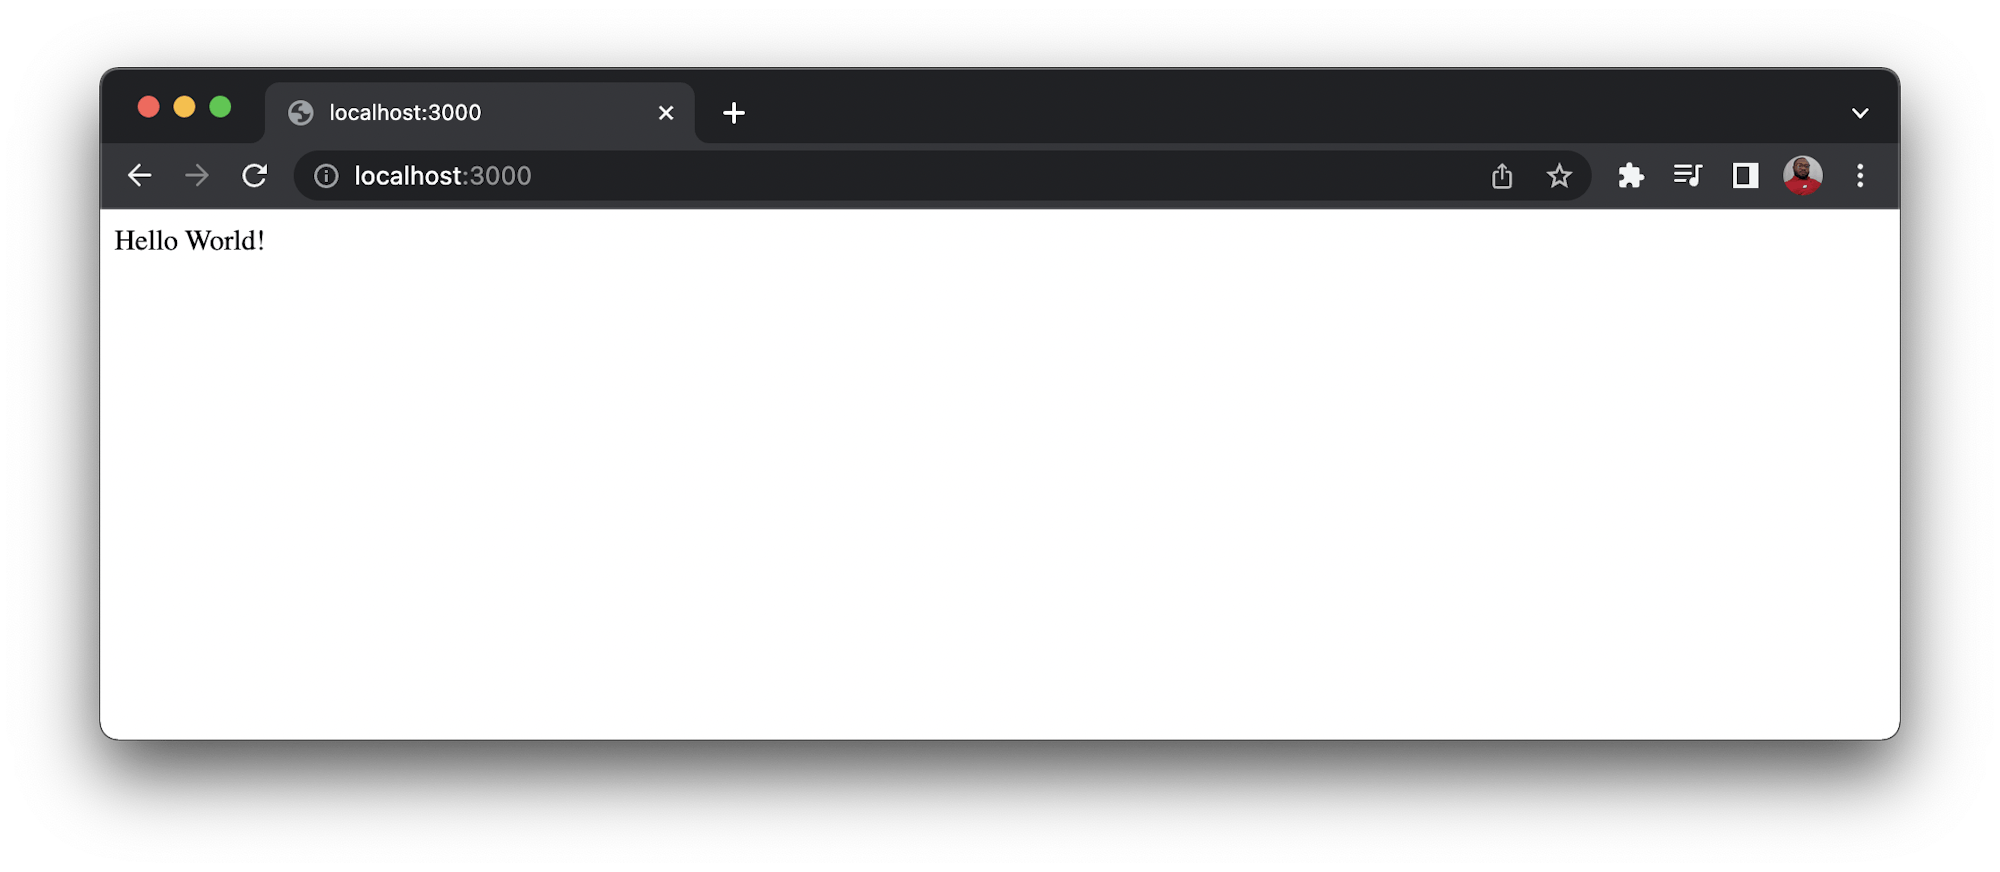
This will start the application on the default 3000 port. Go to http://localhost:3000 in your favorite browser to view it.
Configuring and connecting Nest.js to the database
TypeORM is a popular object-relational mapper (ORM) used for TypeScript and JavaScript applications. To facilitate its integration with Nest.js applications, you need to install an accompanying package for it, along with a Node.js driver for MySQL. To do that, stop the app from running by pressing CTRL + C. Then run this command:
npm install --save @nestjs/typeorm typeorm mysql
When the installation process is complete, you can import the TypeOrmModule into the root of the application.
Updating the TypeScript root module
The building blocks of Nest.js, modules are TypeScript files decorated with @Module. Modules provide the metadata that Nest.js uses to organize the application structure. The root module in ./src/app.module.ts is the top-level module. Nest.js recommends breaking a large application into multiple modules, which helps to maintain the structure of the application.
To create a connection with the database, open the ./src/app.module.ts file and replace its content with this code:
import { Module } from "@nestjs/common";
import { AppController } from "./app.controller";
import { AppService } from "./app.service";
import { TypeOrmModule } from "@nestjs/typeorm";
import { join } from "path";

@Module({
  imports: [
    TypeOrmModule.forRoot({
      type: "mysql",
      host: "127.0.0.1",
      port: 3306,
      username: DB_USER,
      password: DB_PASSWORD,
      database: "test_db",
      entities: [join(__dirname, "**", "*.entity.{ts,js}")],
      synchronize: true,
    }),
  ],
  controllers: [AppController],
  providers: [AppService],
})
export class AppModule {}
Note: Replace DB_USER and DB_PASSWORD with your own credentials.
You have established a connection with the database by importing TypeOrmModule into the root AppModule and specifying the connection options. These include the database details and the directory where the entity files will be stored. I will go into more detail about entity files in the next section of this tutorial.
Configure the database connection
In the prerequisites at the start of this tutorial, I referred to the MySQL download page. After you download, you will need to configure the database so that it works for this application.
In your terminal, log in to MySQL by running:
mysql -u root -p
Enter the password you set during MySQL installation. Now run:
ALTER USER 'root'@'localhost' IDENTIFIED WITH mysql_native_password BY 'password';
Replace password with your own password.
This command sets the preferable authentication for Node.js drivers for MySQL. To create the database, run:
CREATE DATABASE test_db;
Creating the product module, service, and controller for the Nest.js app
Now that you have configured the database connection, you can start creating more structure for the application.
Generating a module
The module for Product will be used to group all items related to the product. To create it, run:
nest generate module product
This command creates a new product folder within the src directory and defines the ProductModule in the product.module.ts file. It automatically updates the root module in the app.module.ts file by importing the newly created ProductModule. The ./src/product/product.module.ts file will be empty for now:
import { Module } from "@nestjs/common";
@Module({})
export class ProductModule {}
Creating an entity
To create a proper database schema for a Nest.js application, TypeORM supports the creation of an entity. An entity is a class that maps to a particular database table. In this case, it is the product table.
Following the proper structure for a Nest.js app, create a new file within the src/product folder and name it product.entity.ts. Then paste this code into it:
import { PrimaryGeneratedColumn, BaseEntity, Column, Entity } from "typeorm";

@Entity()
export class Product extends BaseEntity {
  @PrimaryGeneratedColumn()
  id: number;

  @Column()
  name: string;

  @Column()
  description: string;

  @Column()
  price: string;
}
This code uses the decorators imported from the typeorm module to create four columns for the product table. Among them is a primary key column to uniquely identify a product.
Creating a data transfer object
A data transfer object (DTO) helps to create and validate a proper data structure for data coming into an application. For example, when you send an HTTP POST request from the front end to a Node.js back end, you need to extract the content posted from the form and parse it into a format that your back-end code can easily consume. DTO helps specify shapes of objects extracted from the body of a request and provides a way to plug in validation easily.
To set up the DTO for this application, create a new folder within the src/product directory and name it dto. Then create a file within the new folder and call it create-product.dto.ts. Use this content for it:
import { IsString } from "class-validator";

export class CreateProductDTO {
  @IsString()
  name: string;

  @IsString()
  description: string;

  @IsString()
  price: string;
}
This code defines a class to represent CreateProductDTO. It also adds a bit of validation to ensure that the data type of the fields is string.
Generating a Nest.js service
A service, also known as a provider, is another building block in Nest.js that is categorized under the separation of concerns principle. It is designed to handle and abstract complex business logic away from the controller and return the appropriate responses. All services in Nest.js are decorated with the @Injectable() decorator. This makes it easy to inject services into any other file, such as controllers and modules.
Create a service for a product using this command:
nest generate service product
You will get output on the terminal similar to this:
CREATE /src/product/product.service.spec.ts (467 bytes)
CREATE /src/product/product.service.ts (91 bytes)
UPDATE /src/product/product.module.ts (167 bytes)
The nest command has created two new files within the src/product folder. These are:
- The
product.service.spec.tsfile will be used to write unit tests for the methods that will be created within the product service file. - The
product.service.tsfile holds all the business logic for the application.
The nest command has also imported the newly created service and added it to the product.module.ts file.
Next, you will populate the product.service.ts file with methods for creating and retrieving all products, as well as fetching, updating, and deleting the details of a particular product. Open the file and replace its content with this:
import { Injectable, NotFoundException } from "@nestjs/common";
import { InjectRepository } from "@nestjs/typeorm";
import { Product } from "./product.entity";
import { CreateProductDTO } from "./dto/create-product.dto";
import { Repository } from "typeorm";

@Injectable()
export class ProductService {
  constructor(
    @InjectRepository(Product)
    private productRepository: Repository<Product>
  ) {}

  public async createProduct(createProductDto: CreateProductDTO): Promise<Product> {
    return await this.productRepository.save(createProductDto);
  }

  public async getProducts(): Promise<Product[]> {
    return await this.productRepository.find();
  }

  public async getProduct(productId: number): Promise<Product> {
    return await this.productRepository.findOne({
      where: { id: productId },
    });
  }

  public async editProduct(
    productId: number,
    createProductDto: CreateProductDTO
  ): Promise<Product> {
    const editedProduct = await this.productRepository.findOne({
      where: { id: productId },
    });

    if (!editedProduct) {
      throw new NotFoundException("Product not found");
    }
    await this.productRepository.update({ id: productId }, createProductDto);
    return editedProduct;
  }

  public async deleteProduct(productId: number): Promise<void> {
    await this.productRepository.delete(productId);
  }
}
This imported the required modules for the application and created individual methods to:
- Create a new product:
createProduct() - Get all created products:
getProducts() - Retrieve the details of a single product:
getProduct() - Edit the details of a particular product:
editProduct() - Delete a single product:
deleteProduct()
The ProductRepository property in this service will enable you to easily interact and communicate with the database.
Generating a Nest.js controller
The responsibility of controllers in Nest.js is to receive and handle the incoming HTTP requests from the client side of an application and return the appropriate responses based on the business logic. The routing mechanism, which is controlled by the decorator @Controller() attached to the top of each controller, usually determines which controller receives which requests. To create a new controller file for your project, run this command from the terminal:
nest generate controller product --no-spec
You will see this output.
CREATE /src/product/product.controller.ts (103 bytes)
UPDATE /src/product/product.module.ts (261 bytes)
Because you will not be writing a test for this controller, the --no-spec option instructs the nest command not to generate a .spec.ts file for the controller. Open the src/product/product.controller.ts file and replace its code with this:
import { Controller, Post, Body, Get, Patch, Param, Delete } from "@nestjs/common";
import { ProductService } from "./product.service";
import { CreateProductDTO } from "./dto/create-product.dto";
import { Product } from "./product.entity";

@Controller("product")
export class ProductController {
  constructor(private productService: ProductService) {}

  @Post("create")
  public async createProduct(@Body() createProductDto: CreateProductDTO): Promise<Product> {
    const product = await this.productService.createProduct(createProductDto);
    return product;
  }

  @Get("all")
  public async getProducts(): Promise<Product[]> {
    const products = await this.productService.getProducts();
    return products;
  }

  @Get("/:productId")
  public async getProduct(@Param("productId") productId: number) {
    const product = await this.productService.getProduct(productId);
    return product;
  }

  @Patch("/edit/:productId")
  public async editProduct(
    @Body() createProductDto: CreateProductDTO,
    @Param("productId") productId: number
  ): Promise<Product> {
    const product = await this.productService.editProduct(productId, createProductDto);
    return product;
  }

  @Delete("/delete/:productId")
  public async deleteProduct(@Param("productId") productId: number) {
    const deletedProduct = await this.productService.deleteProduct(productId);
    return deletedProduct;
  }
}
This file imports the modules needed to handle the HTTP requests and injects the ProductService that was created earlier into the controller. The constructor makes use of the functions that are already defined within ProductService. These asynchronous methods were created:
- The
createProduct()method is used to process a POST HTTP request sent from the client-side to create a new product and persist it in the database. - The
getProducts()method fetches the entire list of products from the database. - The
getProduct()method takes theproductIdas a parameter and uses it to retrieve the details of the product with that uniqueproductIdfrom the database. - The
editProduct()method is used for editing the details of a particular product. - The
deleteProduct()method also accepts the uniqueproductIdto identify a particular product and delete it from the database.
Also of note here is that each of the defined asynchronous methods has a metadata decorator as the HTTP verb. They take in a prefix that Nest.js uses to further identify and point to the method that should process a request and respond accordingly.
For example, the ProductController has a prefix of product and a method named createProduct() that takes in the prefix create. This means that any GET request directed to product/create (http://localhost:3000/product/create) will be handled by the createProduct() method. This process is also the same for other methods defined within this ProductController.
Updating the product module
The controller and service have been created and automatically added to the ProductModule, using the nest command. Next you need to update the ProductModule. Open ./src/product/product.module.ts and update its content with this code:
import { Module } from "@nestjs/common";
import { ProductController } from "./product.controller";
import { ProductService } from "./product.service";
import { TypeOrmModule } from "@nestjs/typeorm";
import { Product } from "./product.entity";

@Module({
  imports: [TypeOrmModule.forFeature([Product])], // add this
  controllers: [ProductController],
  providers: [ProductService],
})
export class ProductModule {}
This code passes ProductRepository class to the TypeOrm.forFeature() method to enable usage of the ProductRepository class.
The application is now ready for you to test all the endpoints created so far. Run this from the terminal:
npm run start:dev
This starts the application on http://localhost:3000. At this point, you can use a tool like Postman to test the API. Postman is a testing tool used to confirm and check the behavior of your API before deploying it to production.
Creating a product using the Nest.js application
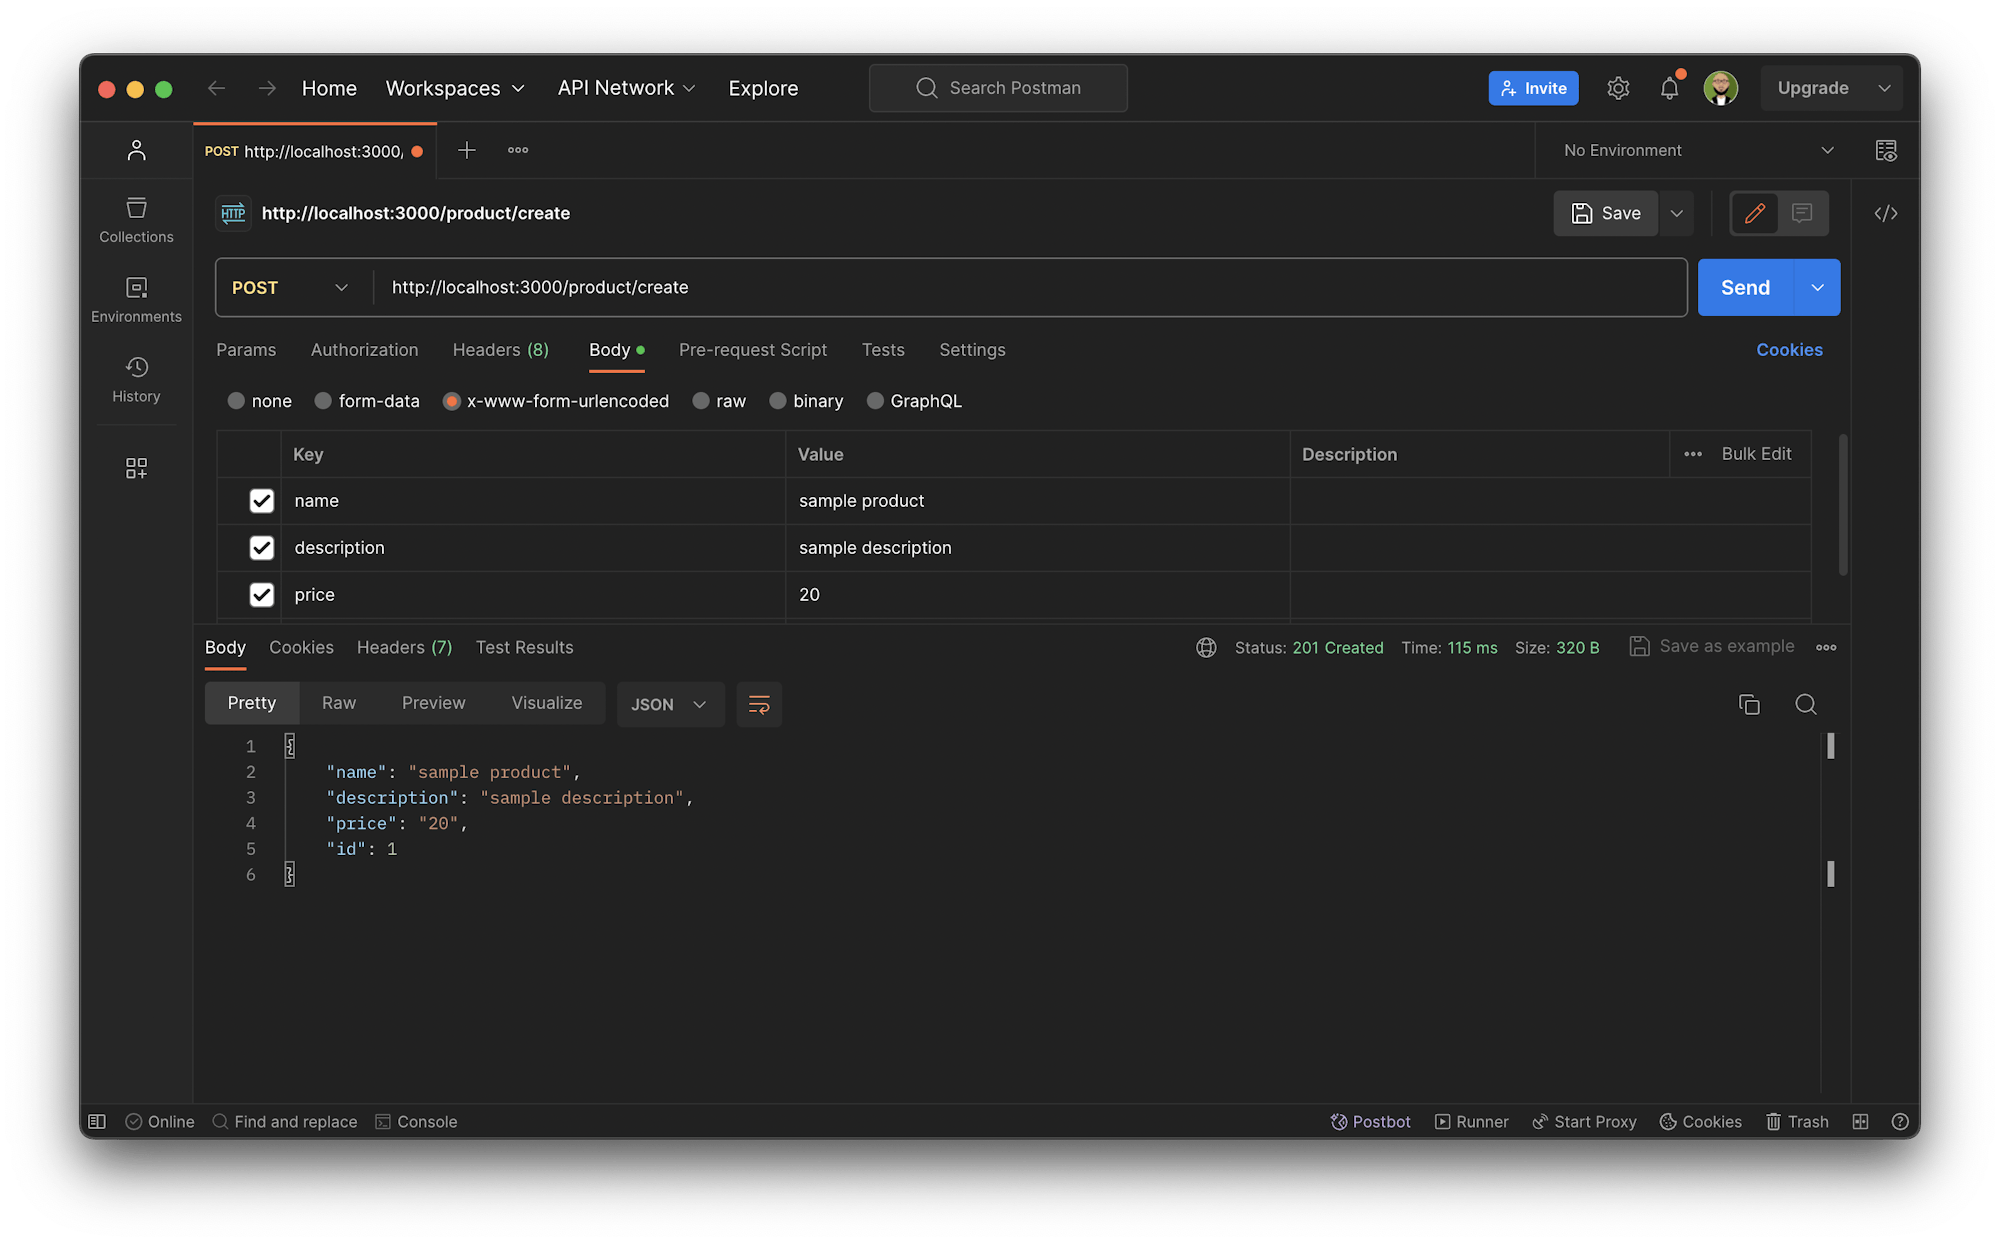
Create a POST HTTP request to the http://localhost:3000/product/create endpoint with the name, description, and price of a product.
Get all products
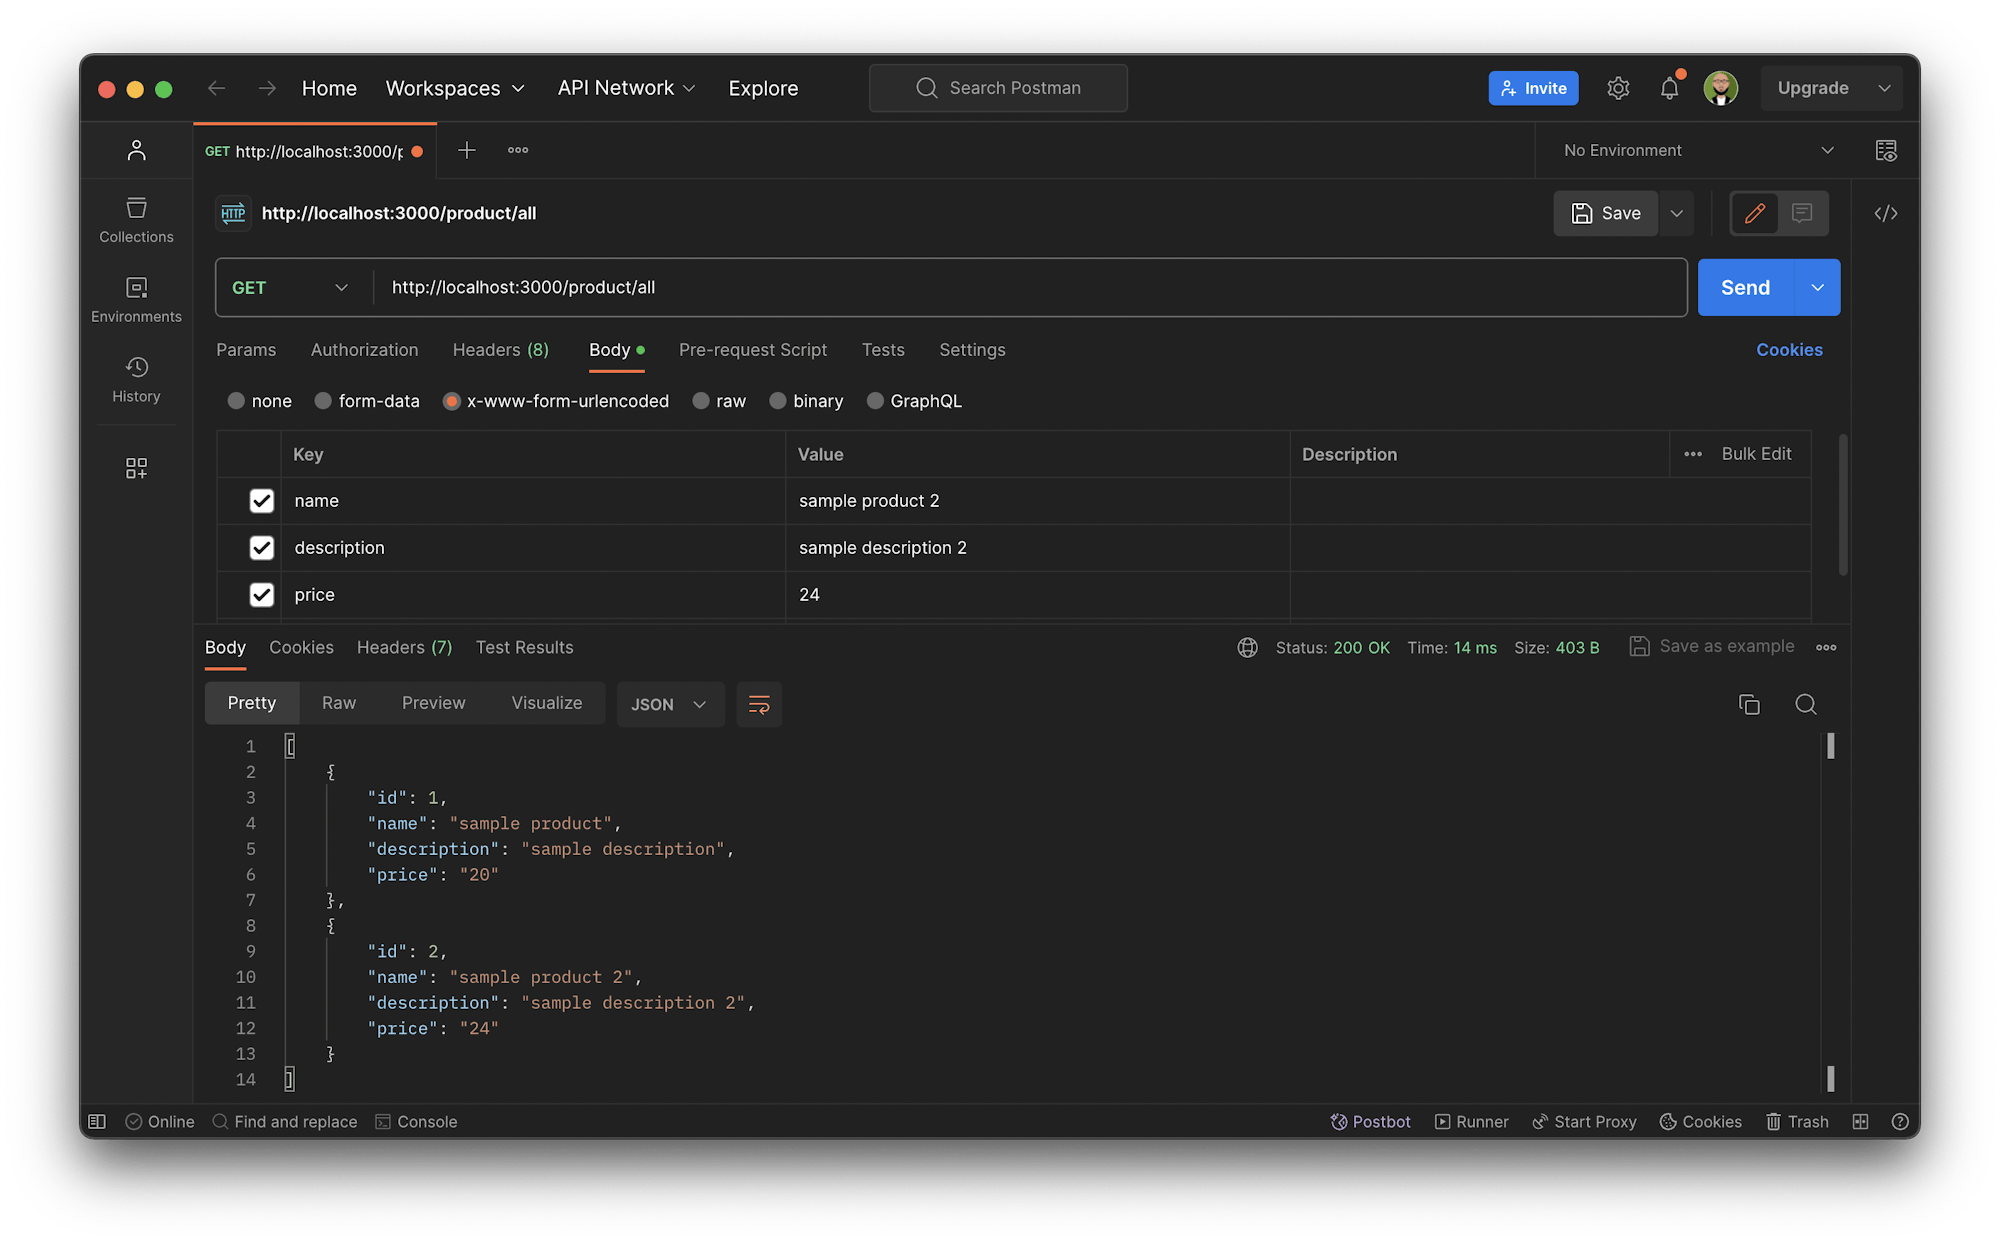
Make a GET HTTP request call to http://localhost:3000/product/all to retrieve the entire list of products.
Get product
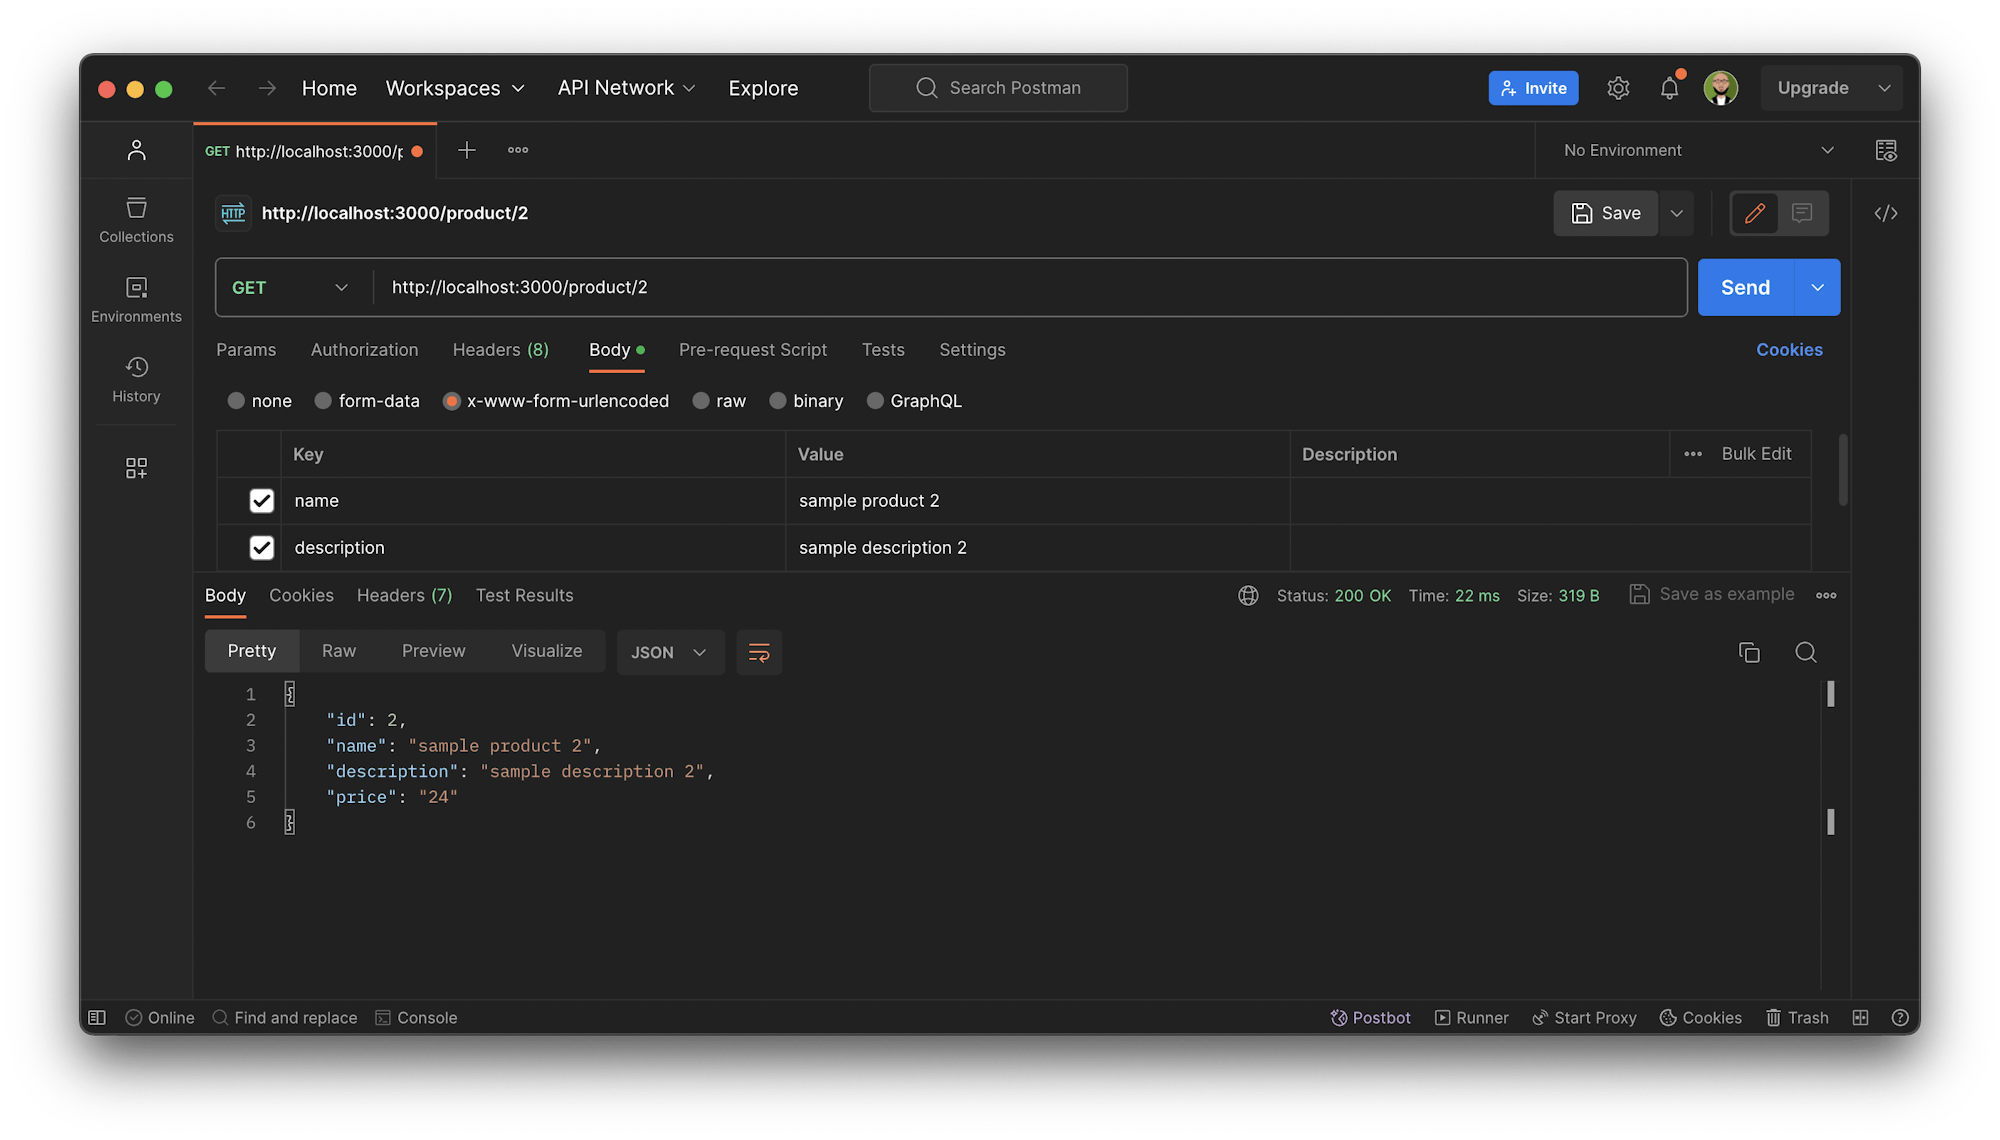
To retrieve the details of a single product, send a GET HTTP request to the http://localhost:3000/product/2 endpoint. Note that 2 is the unique productId of the product requested. You can try other values too.
Edit a product
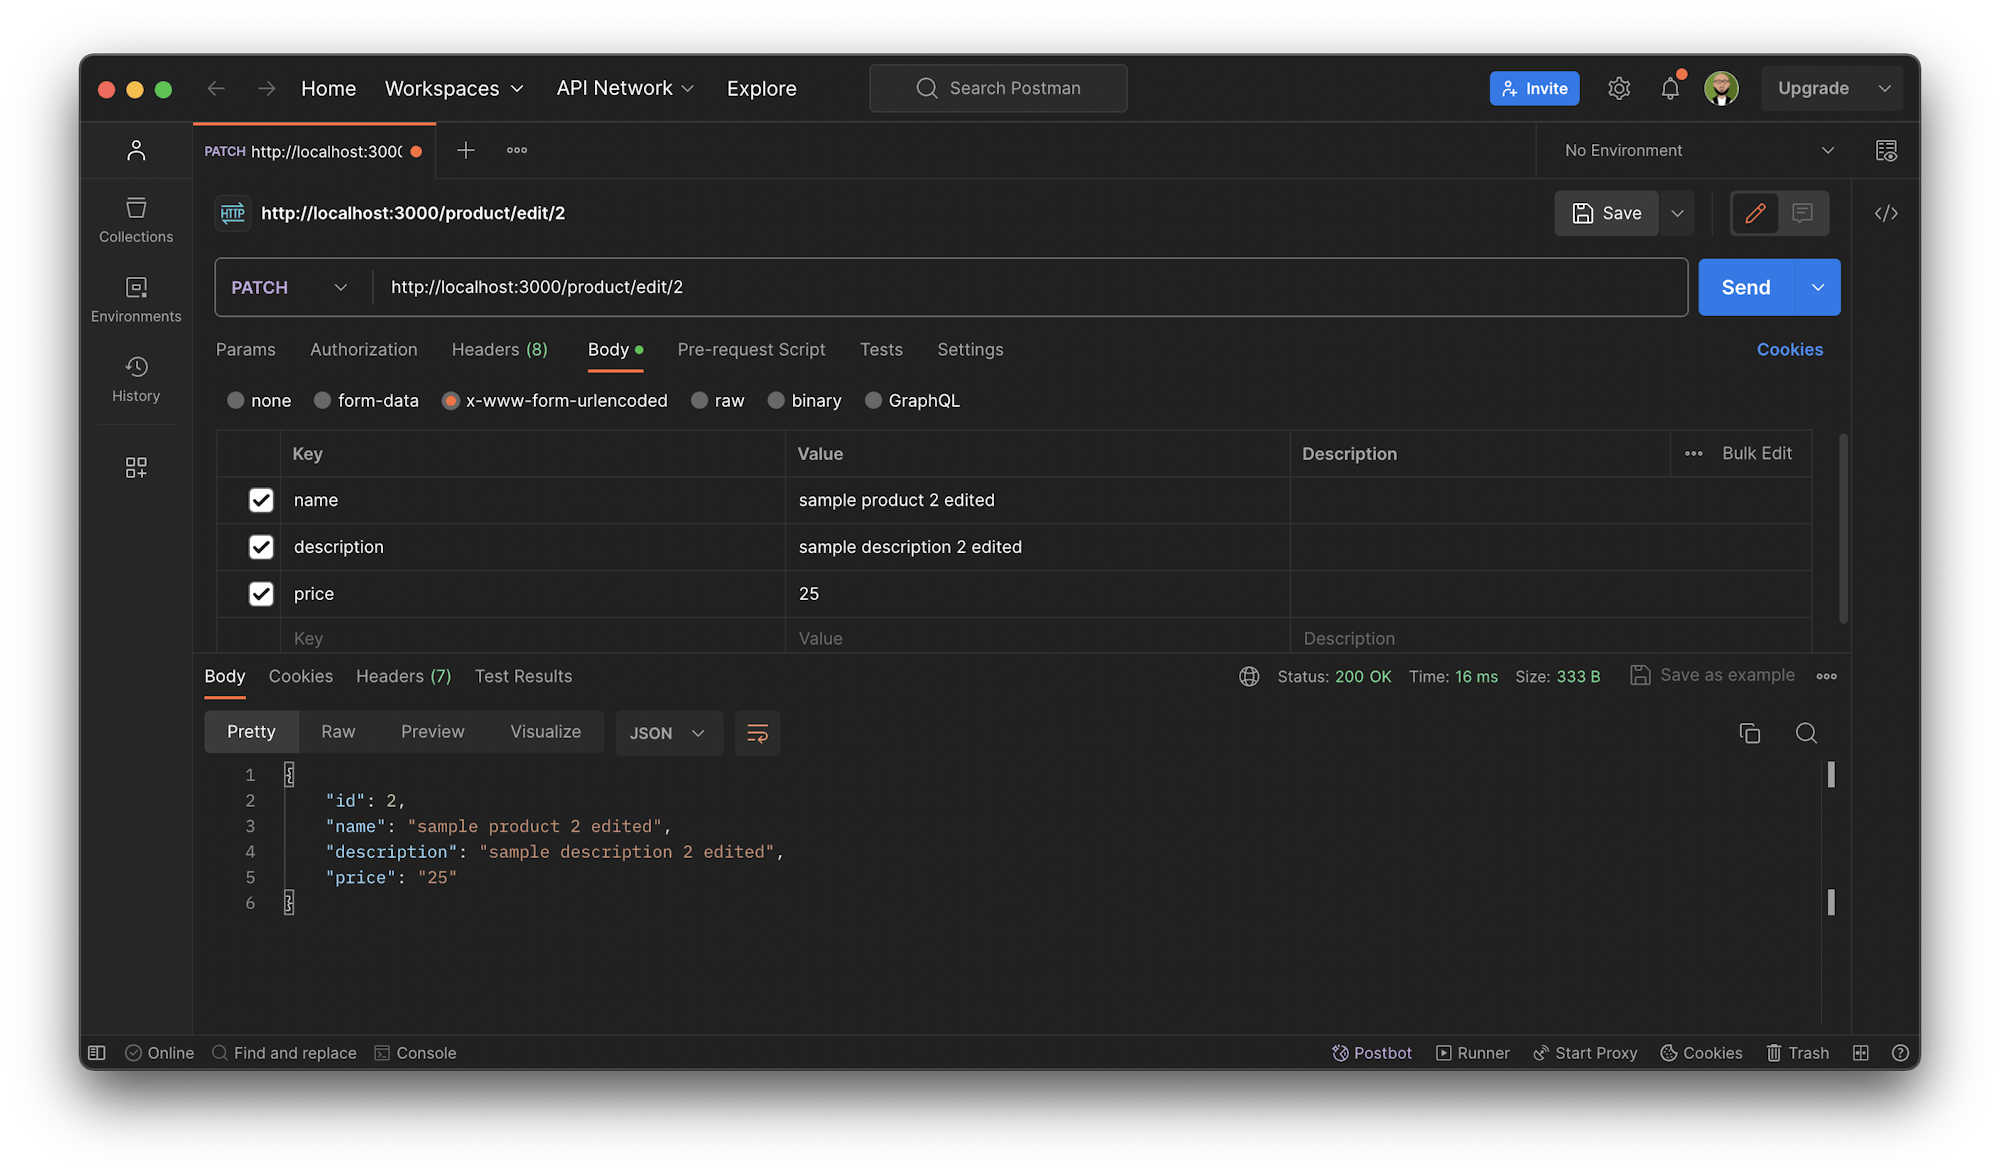
Send a PATCH HTTP request to the http://localhost:3000/product/edit/2 endpoint and update the details of the product identified with the productId of 2.
Writing tests for the Nest.js application
Now that your API is working as expected, you can start writing tests for the methods defined in the ProductService class you created earlier. This part of the application handles most of the business logic.
Nest.js comes with a built-in testing infrastructure, which means you don’t have to set up much testing configuration . Though Nest.js is agnostic to testing tools, it provides integration with Jest out of the box. Jest will provide assert functions and test-double utilities that help with mocking.
Currently, the product.service.spec.ts file has this code:
import { Test, TestingModule } from "@nestjs/testing";
import { ProductService } from "./product.service";

describe("ProductService", () => {
  let service: ProductService;

  beforeEach(async () => {
    const module: TestingModule = await Test.createTestingModule({
      providers: [ProductService],
    }).compile();
    service = module.get<ProductService>(ProductService);
  });

  it("should be defined", () => {
    expect(service).toBeDefined();
  });
});
You will add more tests to make this fully cover all the methods defined within the ProductService.
Writing a test for the ‘create’ and ‘get’ products methods
Remember, you did not start this project using the test-driven development approach. So, you’ll write the tests to ensure that all business logic within the ProductService receives the appropriate parameters and return the expected response. To start, open the product.service.spec.ts file and replace its content with this:
import { Test, TestingModule } from "@nestjs/testing";
import { ProductService } from "./product.service";
import { Repository } from "typeorm";
import { Product } from "./product.entity";
import { getRepositoryToken } from "@nestjs/typeorm";

export type MockType<T> = {
  [P in keyof T]?: jest.Mock<{}>;
};

const repositoryMockFactory: () => MockType<Repository<any>> = jest.fn(() => ({
  save: jest.fn((entity) => entity),
  find: jest.fn((entity) => entity),
  findOne: jest.fn((entity) => entity),
  delete: jest.fn((entity) => entity),
  // ...
}));

const mockProduct = {
  id: 1,
  name: "Test name",
  description: "Test description",
  price: "20",
};

describe("ProductService", () => {
  let service: ProductService;
  let repositoryMock: MockType<Repository<Product>>;

  beforeEach(async () => {
    const module: TestingModule = await Test.createTestingModule({
      providers: [
        ProductService,
        {
          provide: getRepositoryToken(Product),
          useFactory: repositoryMockFactory,
        },
      ],
    }).compile();
    service = await module.get<ProductService>(ProductService);
    repositoryMock = await module.get(getRepositoryToken(Product));
  });

  describe("createProduct", () => {
    it("should save a product in the database", async () => {
      repositoryMock.save.mockReturnValue("someProduct");
      expect(repositoryMock.save).not.toHaveBeenCalled();
      const createProductDto = {
        name: "sample name",
        description: "sample description",
        price: "10",
      };
      const result = await service.createProduct(createProductDto);
      expect(result).toEqual("someProduct");
    });
  });

  describe("getProducts", () => {
    it("should get all products", async () => {
      repositoryMock.find.mockReturnValue(mockProduct);
      expect(repositoryMock.find).not.toHaveBeenCalled();
      const result = await service.getProducts();
      expect(repositoryMock.find).toHaveBeenCalled();
      expect(result).toEqual(mockProduct);
    });
  });
});
This imports the Test and TestingModule packages from the @nestjs/testing module. These packages provide the method createTestingModule, which creates a testing module that will act as the module defined earlier within the test. In this testingModule the providers array is composed of ProductService and a repositoryMockFactory to mock the ProductRepository using a factory.
Two different components of the test suite are created to ensure that you can create a product and retrieve the lists of products.
You can add more scripts to test the functionality of retrieving and deleting a single product within the application. Still within the product.service.spec.ts file, update it by adding this code (just below your existing test script):
...

describe('ProductService', () => {
  ...
  describe('getProduct', () => {
    it('should retrieve a product with an ID', async () => {
      repositoryMock.findOne.mockReturnValue(mockProduct);
      const result = await service.getProduct(mockProduct.id);
      expect(result).toEqual(mockProduct);
      expect(repositoryMock.findOne).toHaveBeenCalledWith({
        where: { id: mockProduct.id },
      });
    });
  });

  describe('deleteProduct', () => {
    it('should delete product', async () => {
      repositoryMock.delete.mockReturnValue(1);
      expect(repositoryMock.delete).not.toHaveBeenCalled();
      await service.deleteProduct(1);
      expect(repositoryMock.delete).toHaveBeenCalledWith(1);
    });
  });
});
To get a particular product, this script creates a mockProduct with some default details and verified that you can retrieve and delete a product.
You can find the complete test script here on GitHub.
Running the test locally
Before running the test, delete the test file created for the AppController located in src/app.controller.spec.ts. You can create it manually later if you wan to write a test for it. Run the test:
npm run test
The output will be something like this:
> ci-nest-js-api@0.0.1 test
> jest

 PASS  src/app.controller.spec.ts
 PASS  src/product/product.service.spec.ts

Test Suites: 2 passed, 2 total
Tests:       5 passed, 5 total
Snapshots:   0 total
Time:        1.944 s
Ran all test suites.
Automating the tests
Now you have a fully built a RESTful API with Nest.js and tests for its business logic. Your next step is to add the configuration file to set up continuous integration with CircleCI. Continuous integration helps ensure that an update on the code will not break any existing functionality. The tests will run automatically after it is pushed to a GitHub repository.
To begin, create a folder called .circleci and in it, create a new file named config.yml. Open the new file and paste this code into it:
version: 2.1
orbs:
  node: circleci/node@5.1.0
jobs:
  build-and-test:
    executor:
      name: node/default
    steps:
      - checkout
      - node/install-packages
      - run:
          command: npm run test
workflows:
  build-and-test:
    jobs:
      - build-and-test
This code specifies the version of CircleCI to use and uses CircleCI Node orb to set up and install Node.js. It then installs all the dependencies for the project. The last command is the actual test command, which runs the test.
Setting up the project on CircleCI
Create an account on CircleCI. Select the organization you want your repository to be part of.
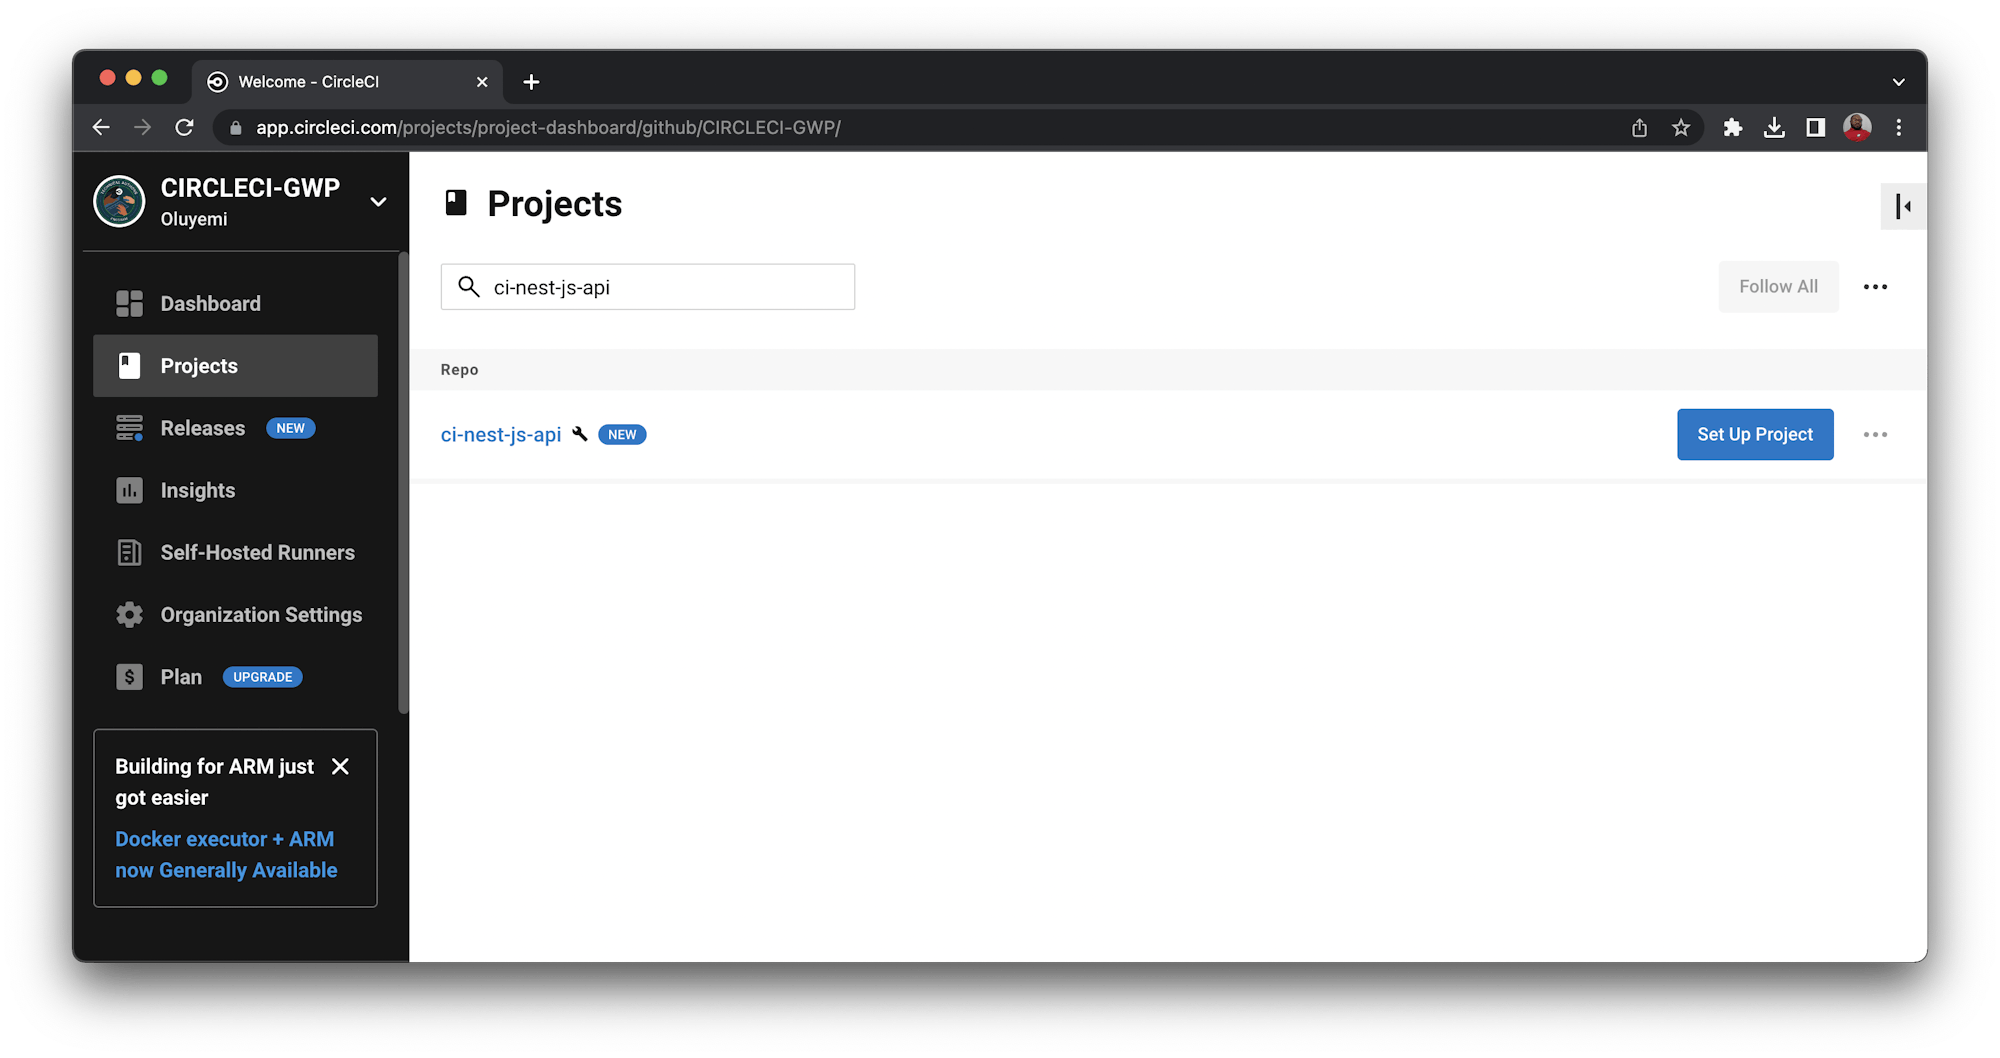
Once you’re on the Project page, find the project you created on GitHub and click Set Up Project.
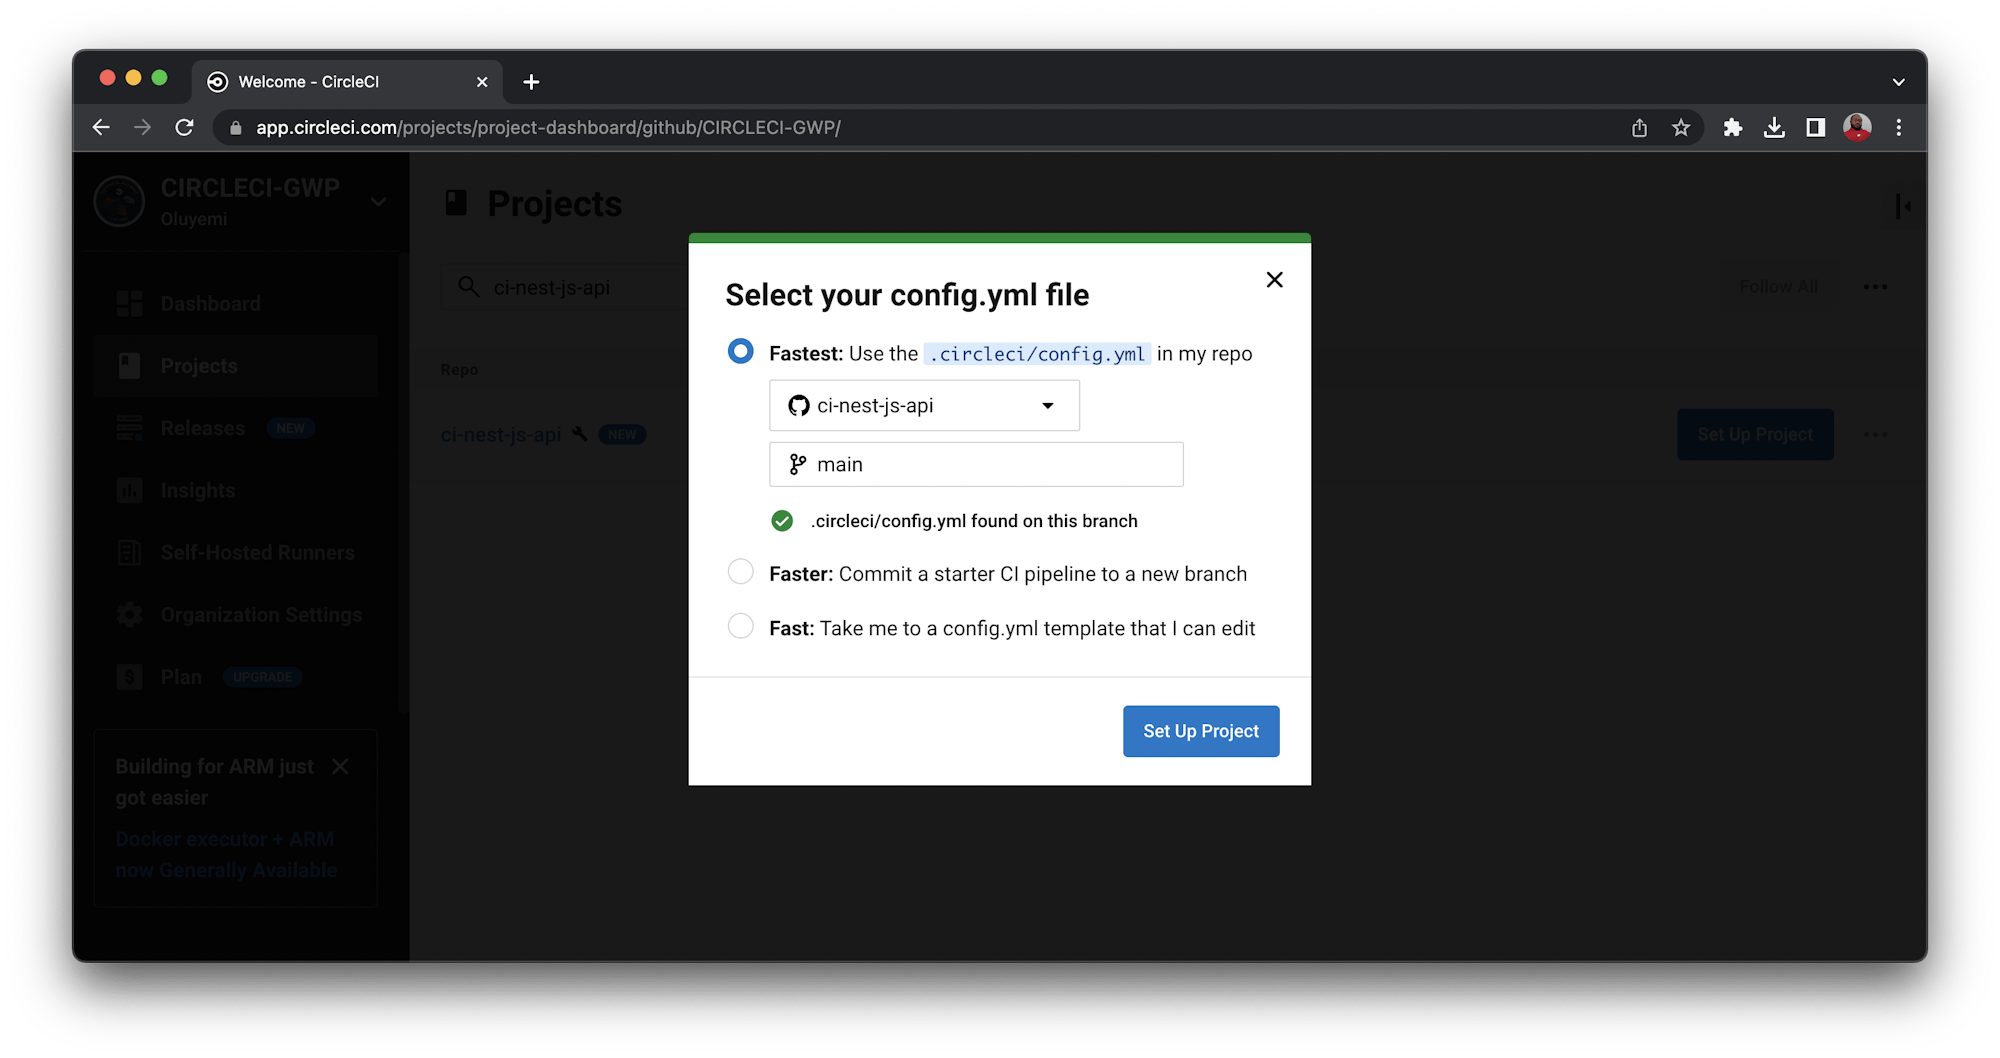
You will be prompted to input the branch where your configuration file is. Enter main and click Set Up Project.
Your pipeline starts to run automatically and will succeed.
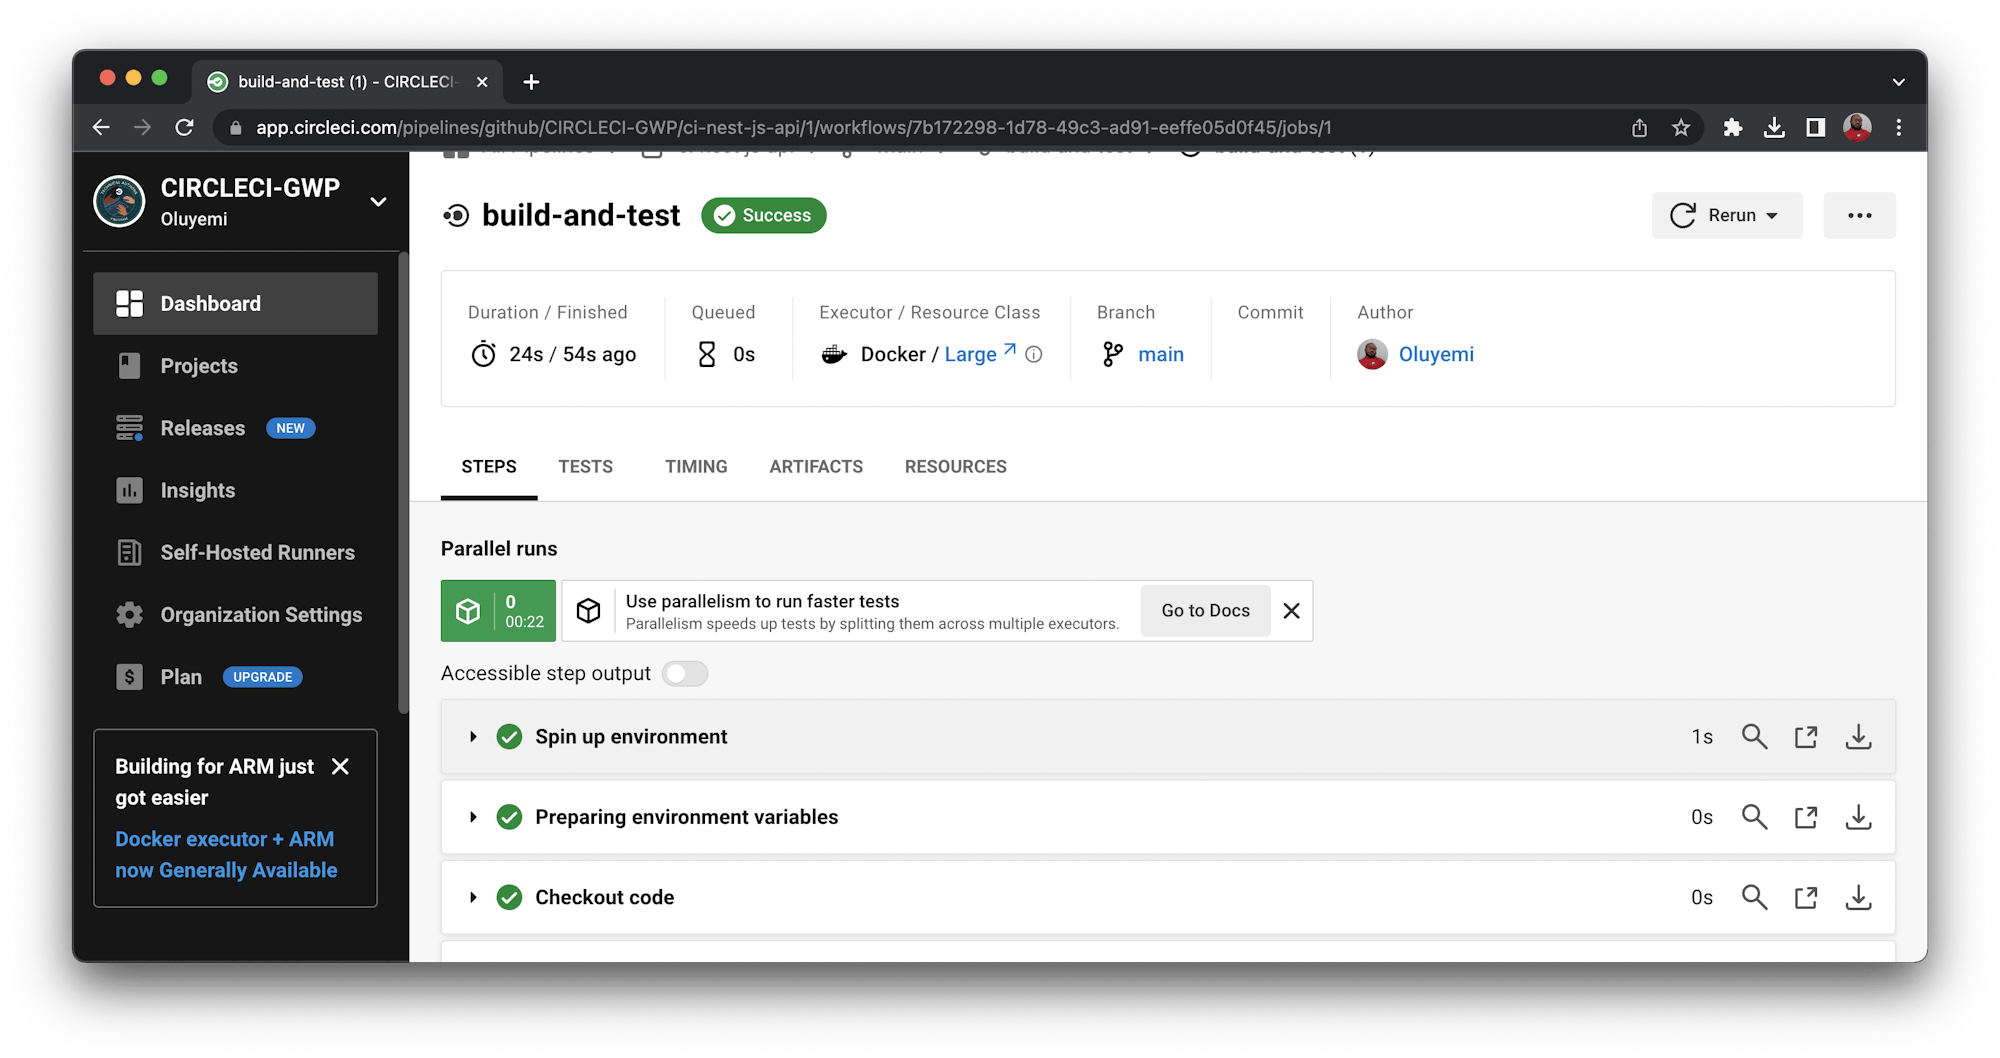
All the tests ran successfully and showed outputs similar to the local test runs. Now you can add more features to your project, write more tests, and push changes to GitHub. The continuous integration pipeline will automatically run and the tests will be executed.
Using what you have learned to build your own RESTful API with Nest.js
Nest.js encourages and enforces excellent structure for web applications. It helps your team organize work and follow best practices. In this tutorial, you learned how to build RESTful APIs with Nest.js and test functionality using Postman. You wrote tests and automated them using CircleCI.
This tutorial focused on testing the ProductService. You can apply what you learned to other parts of the application if you would like to explore further.
The complete source code for this application is here on GitHub.
To learn how to add unit and integration tests to a NestJS GraphQL project and automate the testing process with CircleCI, review the Continuous integration for NestJS GraphQL projects blog post.


