If you have been around for a while in the field of software development, especially web development, then you know how tedious and stressful it can be to deploy your source code to a webserver. Historically, this was accomplished by uploading it using File Transfer Protocol (FTP). Fortunately there are now many ways of automating the deployment process. In this tutorial, you will learn how to set up continuous deployment of a Nest.js application to Heroku using CircleCI.
Prerequisites
The following are required for you to get the most out of this tutorial:
- Node.js installed on your computer
- Nest CLI installed on your computer
- A GitHub or GitLab account
- A CircleCI account
- A Heroku account
- Although not mandatory, you should know a few things about TypeScript.
Scaffolding a new Nest.js application
To create a new Nest.js application, go to the root of your development folder from the terminal and run this command:
nest new heroku-nest-demo-app
You will be prompted to choose your preferred package manager. Select npm, then press the ENTER key. A new Nest.js application will be created within a folder named heroku-nest-demo-app. All dependencies will be installed.
Once the installation process is complete, move into the newly created project folder and run the application:
// move into the project
cd heroku-nest-demo-app

// start the server
npm run start:dev
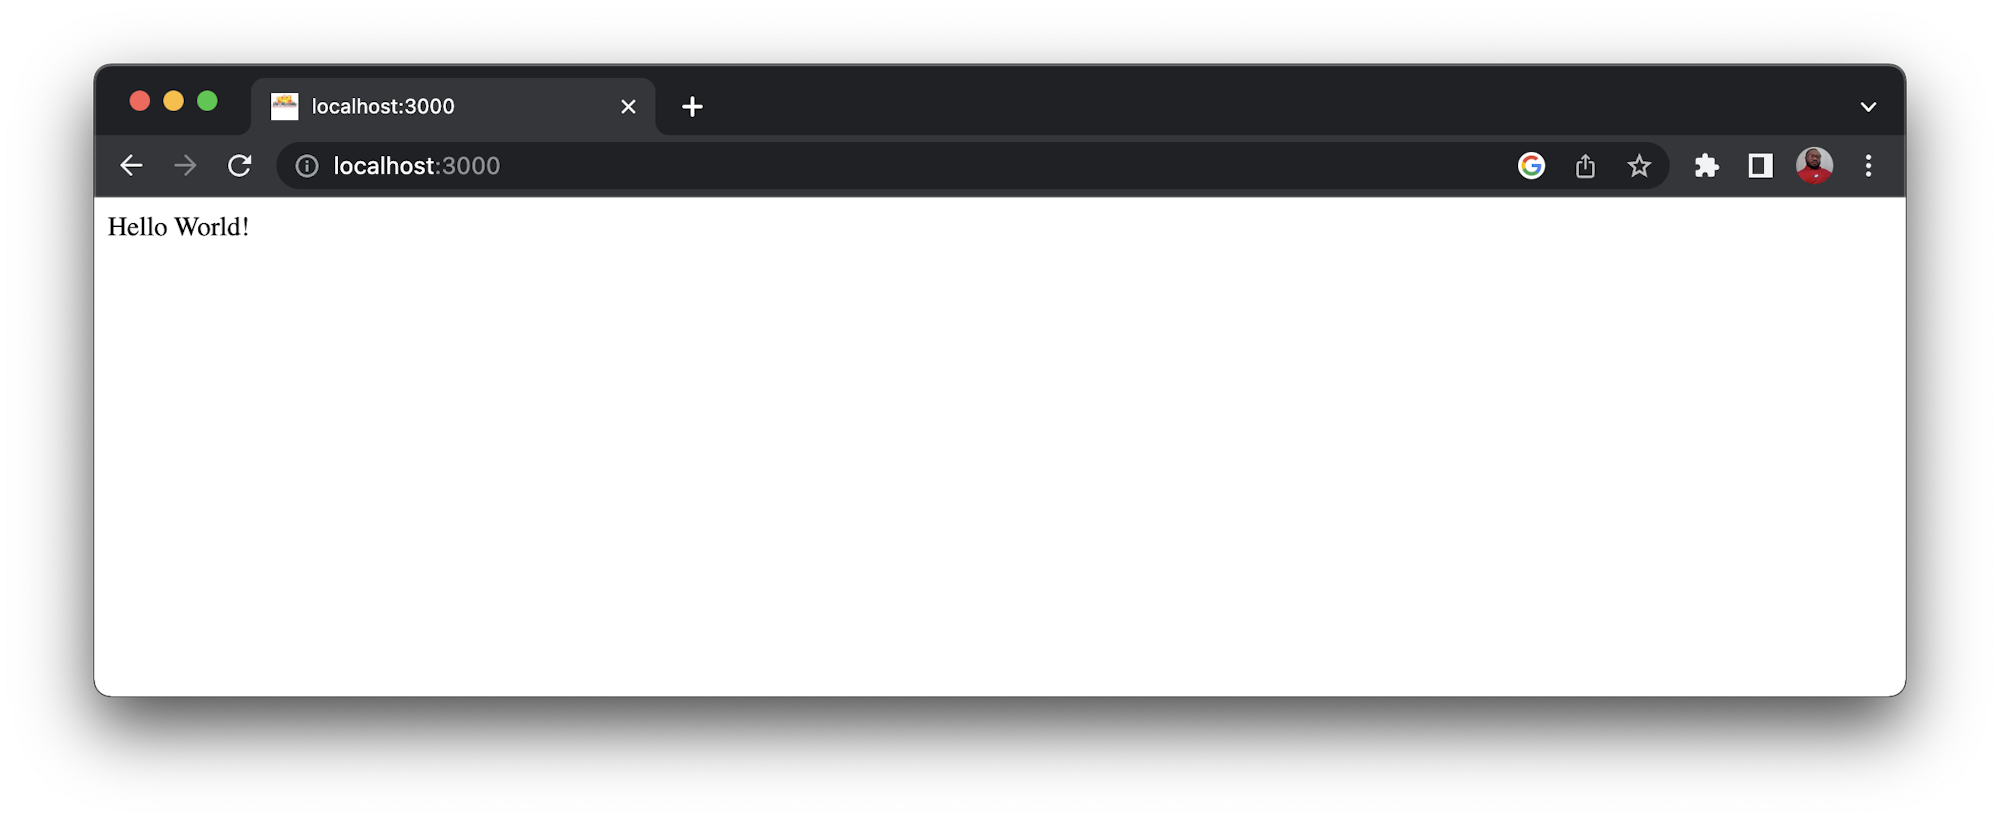
You can view the welcome page on the default port 3000.
Creating the demo application
You will quickly create a basic Nest.js application with a single endpoint that will be used to render a list of products. To keep things simple, you will create a mock list of products and return it as a response. To begin, stop the application from running on the terminal with CTRL + C and open the project in your code editor. Next, create a folder named mock within the src folder. Within it, create a file named products.mock.ts. Paste this content into that file (src/mock/products.mock.ts):
export const PRODUCTS = [
  {
    id: 1,
    name: "First product",
    description: "This is the description for the first product",
    price: "200",
  },
  {
    id: 2,
    name: "Second product",
    description: "This is the description for the second product",
    price: "500",
  },
  {
    id: 3,
    name: "Third product",
    description: "This is the description for the third product",
    price: "800",
  },
  {
    id: 4,
    name: "Fourth product",
    description: "This is the description for the fourth product",
    price: "100",
  },
  {
    id: 5,
    name: "Fifth product",
    description: "This is the description for the fifth product",
    price: "250",
  },
];
The list of products exported here will be returned as a response once an HTTP GET request is sent to the /products endpoint. I will provide more details about this endpoint a bit later on.
Setting up a service
You are going to use the default AppService to return the list of products. Replace the content of src/app.service.ts with this code:
import { Injectable } from "@nestjs/common";
import { PRODUCTS } from "./mock/products.mock";

@Injectable()
export class AppService {
  products = PRODUCTS;

  async getProducts() {
    return await this.products;
  }
}
This code imports PRODUCTS from the mock file, and returns the list within the getProducts() method.
Creating the products endpoint
Next, you will create the /products endpoint within the default AppController. To do that, go to the src/app.controller.ts file and replace its contents with this:
import { Controller, Get } from "@nestjs/common";
import { AppService } from "./app.service";

@Controller()
export class AppController {
  constructor(private readonly appService: AppService) {}

  @Get("/products")
  getProducts() {
    return this.appService.getProducts();
  }
}
The AppService has already been injected into this controller by default. Here, you created a new method named getProducts with a prefix of /products and called the getProducts() method within the AppService.
Running the application
From within the root of the project, start the application again with npm run start:dev and go to http://localhost:3000/products. You will see a page displaying the list of the mocked products in JSON.
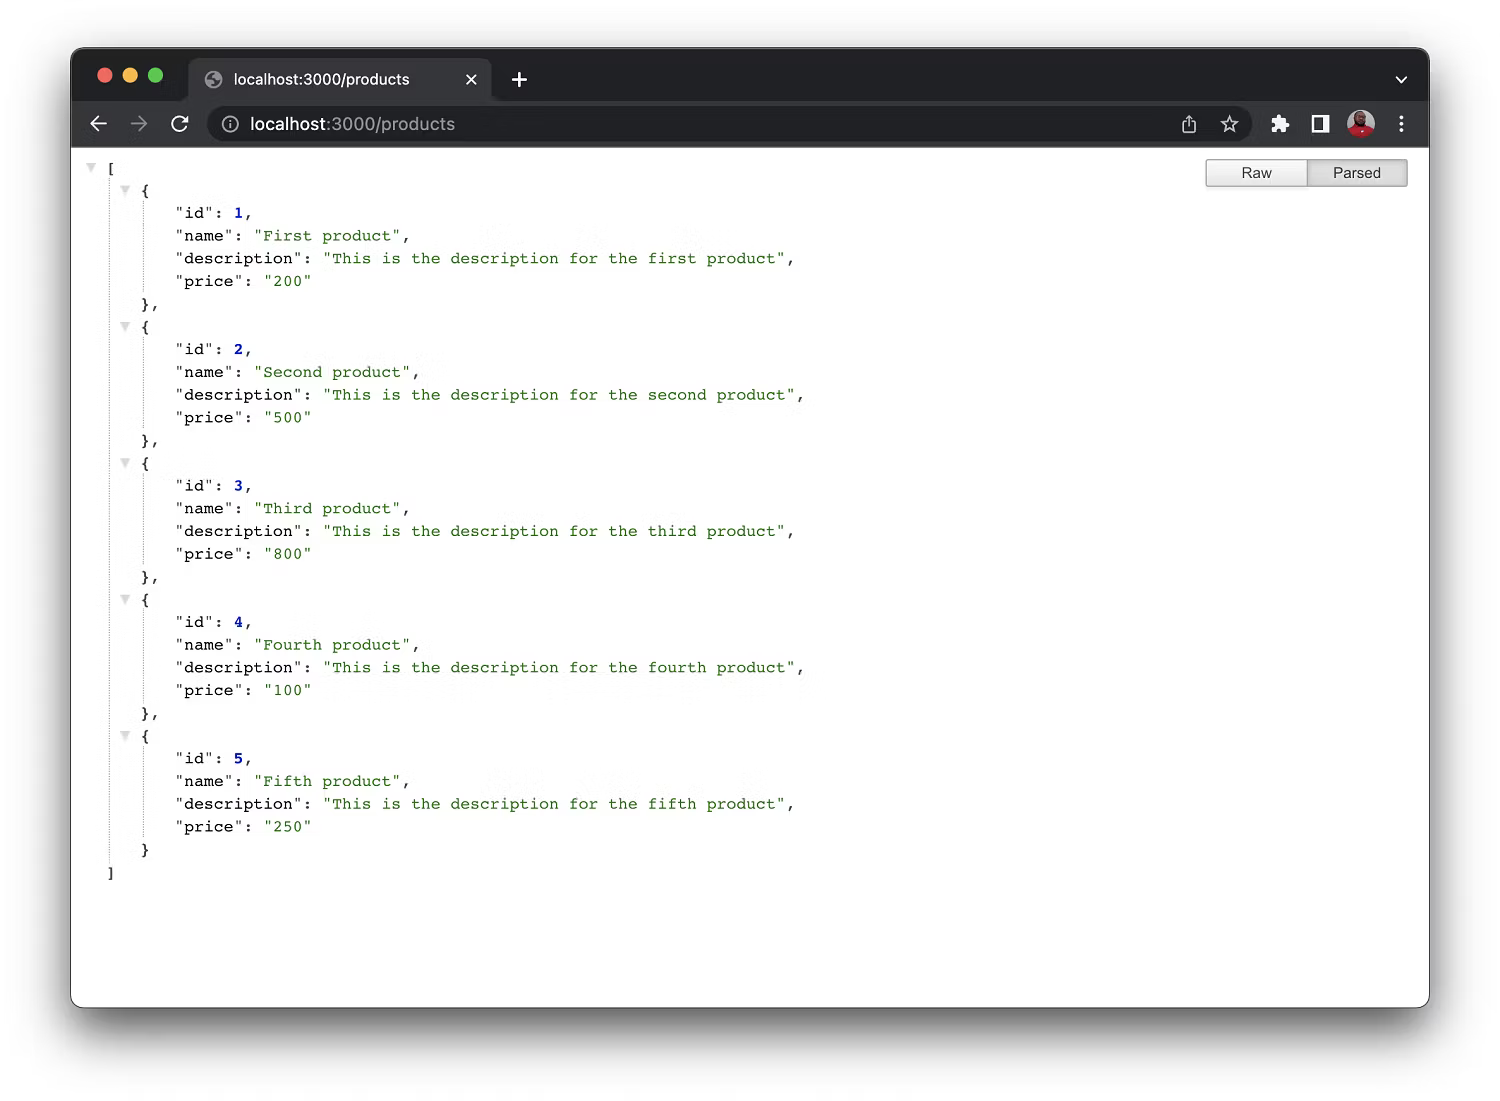
Note: I have an extension installed to prettify the JSON.
Pushing to GitHub or GitLab
See this guide to learn how to push a project to GitHub or push a project to GitLab.
Creating a Heroku app
Setting up a Heroku app is required for deployment. This helps Heroku prepare to receive your source code. To begin:
- Log into Heroku.
- Go to your dashboard and click New.
- Select Create new app.
You will be redirected to a page where you will input the basic details for your app.
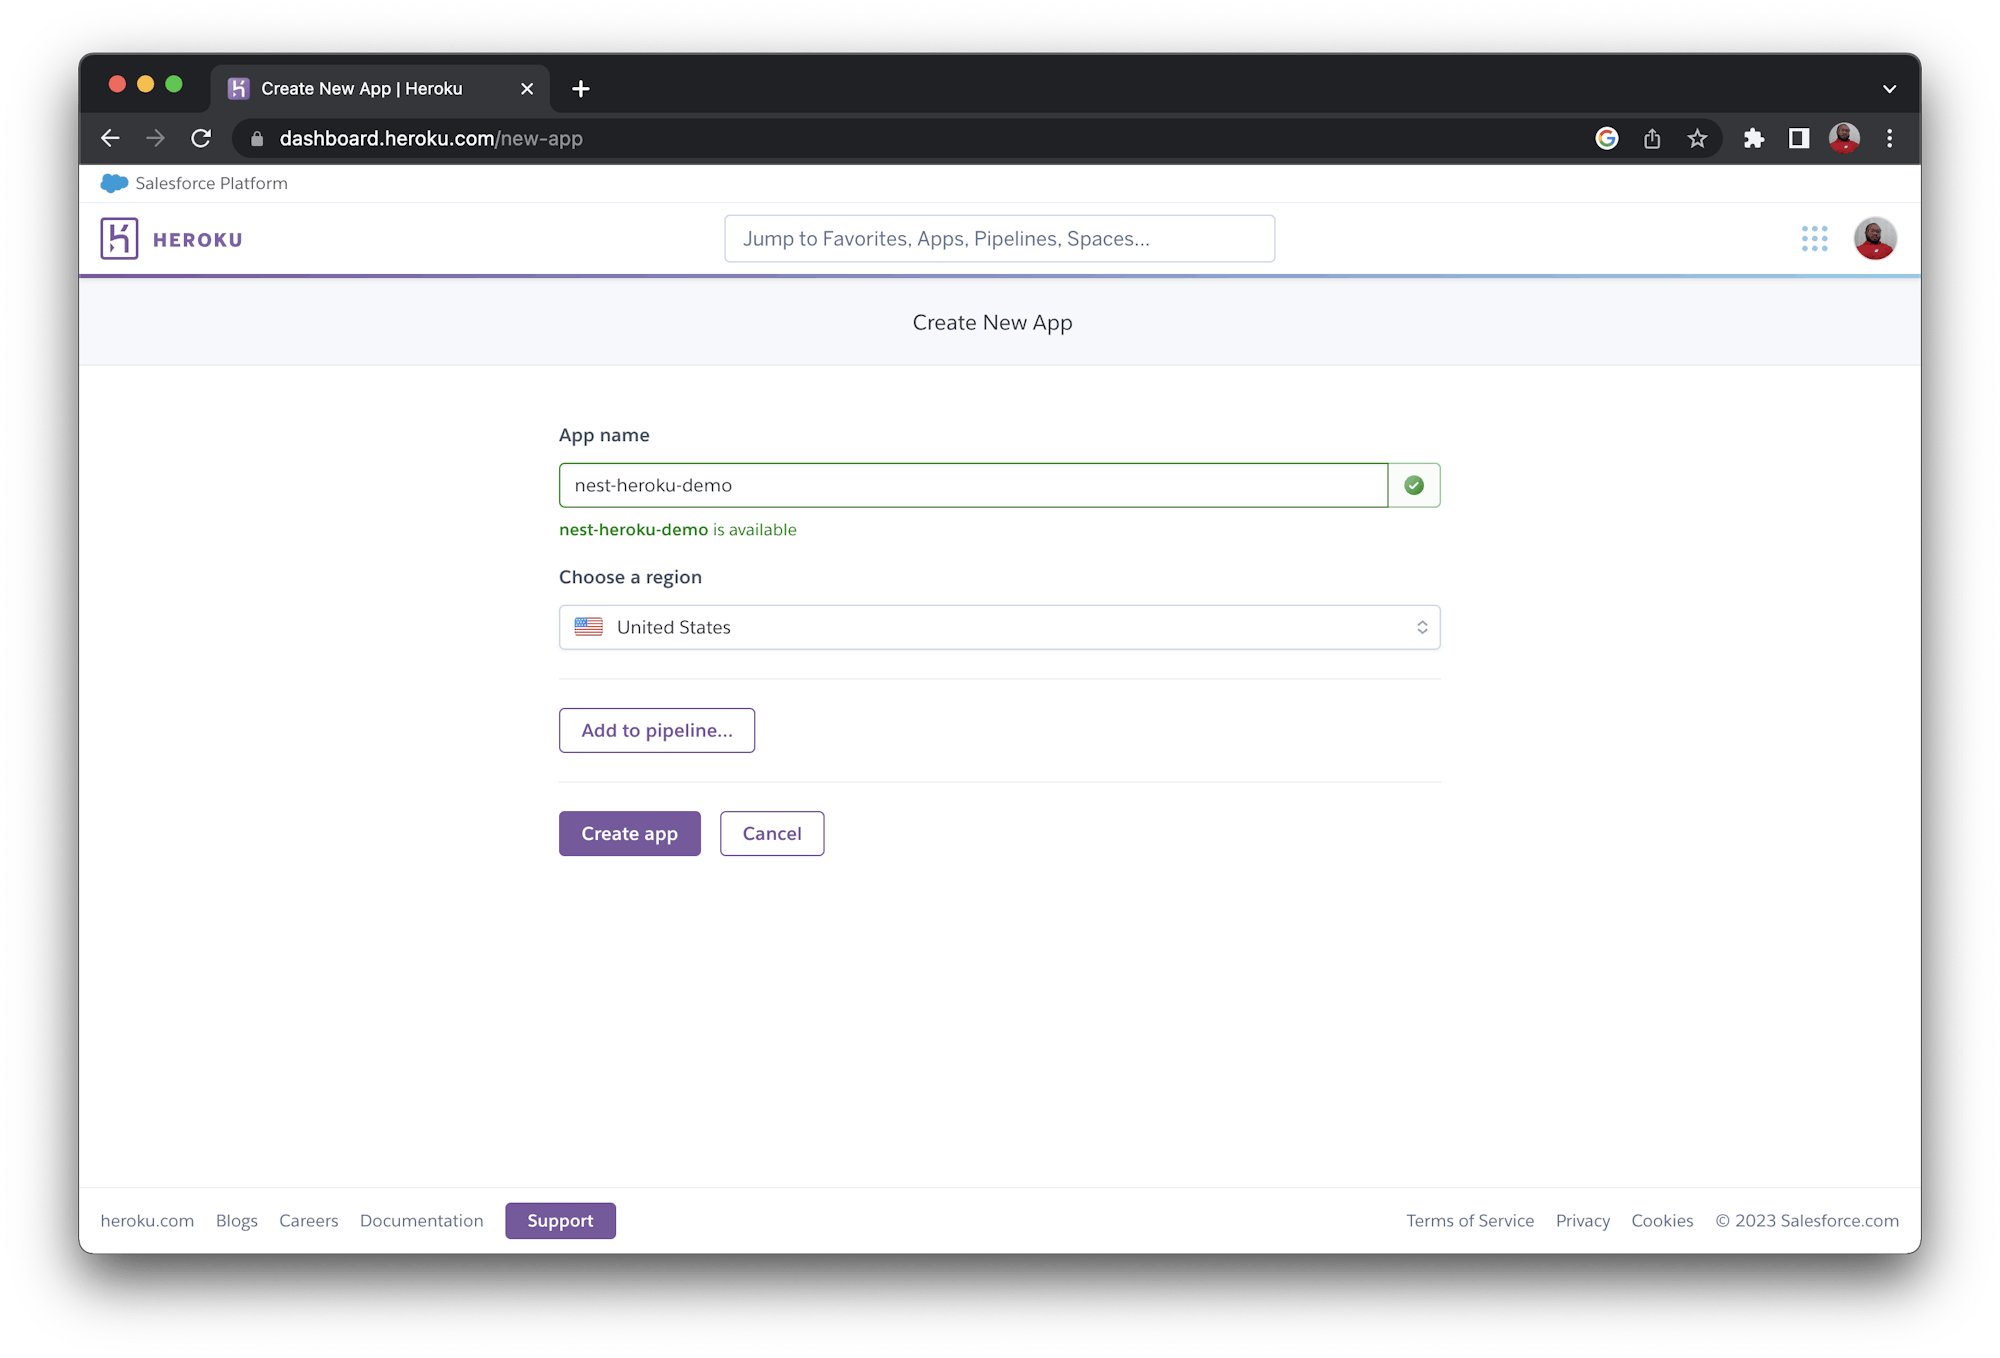
I named the application nest-heroku-demo. Heroku app names need to be unique, so feel free to use any name you like. Click Create app.
For CircleCI to uniquely identify the Heroku application and automatically make a deployment to it, you need to create environment variables. This will be the name of the application you just created and the API Key for your Heroku account. To view your Heroku API key, click on your profile picture and select Account settings from the dropdown.
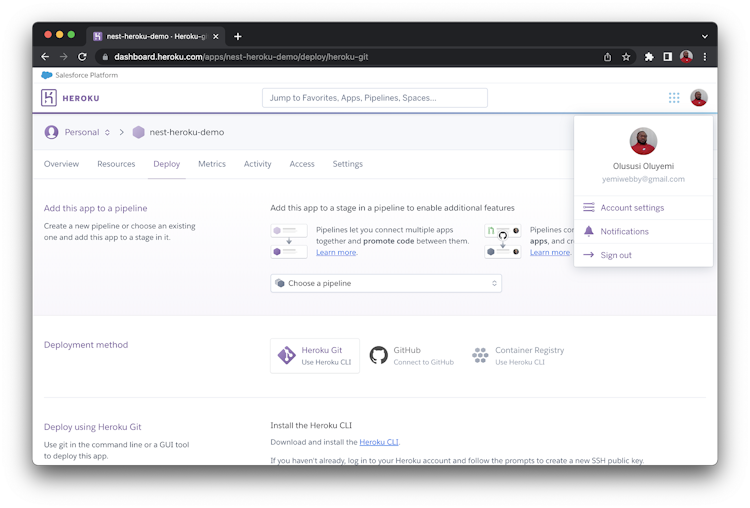
This will take you to a page to manage your account. Ensure that you are on the Account tab and scroll down to the API Key section.
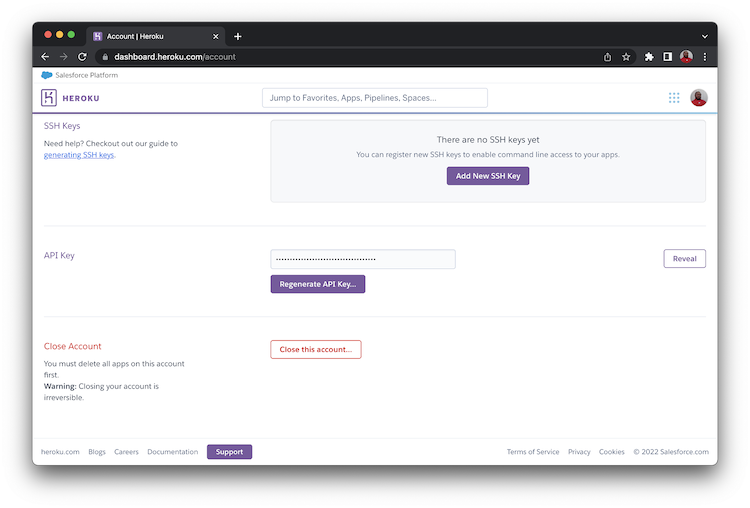
Click Reveal to view the API key, then copy it. Keep it safe; you will need it later.
Adding the CircleCI configuration for continuous deployment
In this section, you will create a CircleCI configuration file where you will write the deployment script for the application. First, create a folder within the root of the application with the name .circleci. Then create a file within it and call it config.yml. Paste this code into the new file:
version: 2.1
orbs:
  heroku: circleci/heroku@2.0
workflows:
  heroku_deploy:
    jobs:
      - heroku/deploy-via-git:
          app-name: ${HEROKU_APP_NAME}
This configuration file specifies the version of CircleCI configuration for this project. In the orbs key you invoked the latest version of the Heroku orb available at the time of writing. This orb abstracted the complexity involved in setting up the Heroku CLI. It will be automatically installed and used to deploy the application to Heroku.
Setting up the project on CircleCI
You have created a Heroku app and set up the configuration to facilitate deployment of your Nest.js application to Heroku by CircleCI. Your next step is to configure your project on CircleCI.
Log in to your CircleCI account with the linked GitHub account that contains the repository for your Nest.js application. (GitLab users can follow our instructions on setting up CI/CD pipeline with GitLab.) On the Project page, find the name of your project and click Set Up Project.
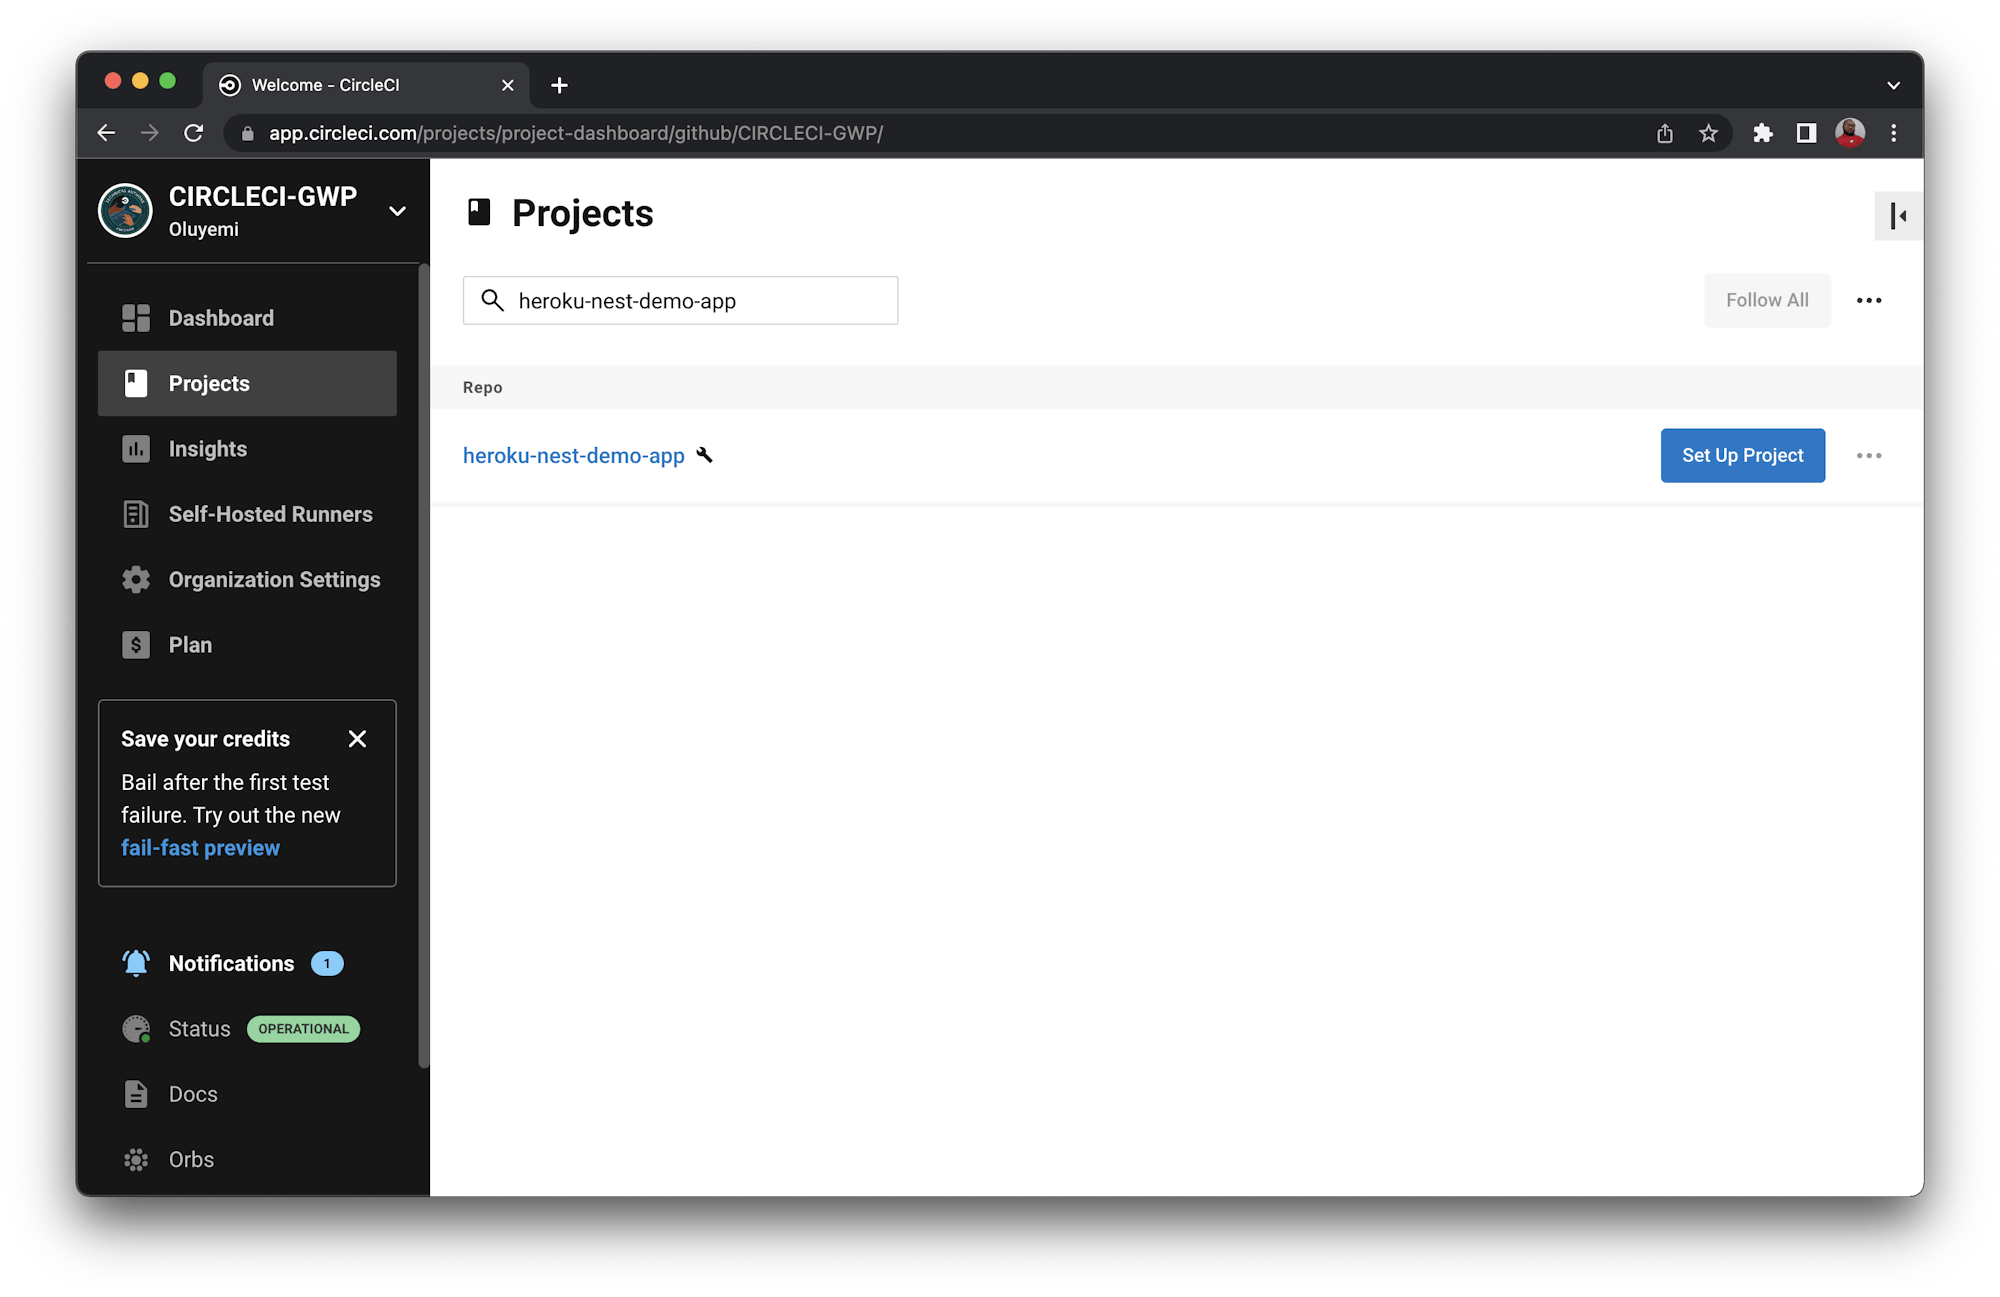
You will be prompted with a couple of options for the configuration file. Select the option to use the .circleci/config.yml in your repo. Enter the name of the branch where your code is housed on GitHub, then click Set Up Project.
Your first workflow will start running, but it will fail.
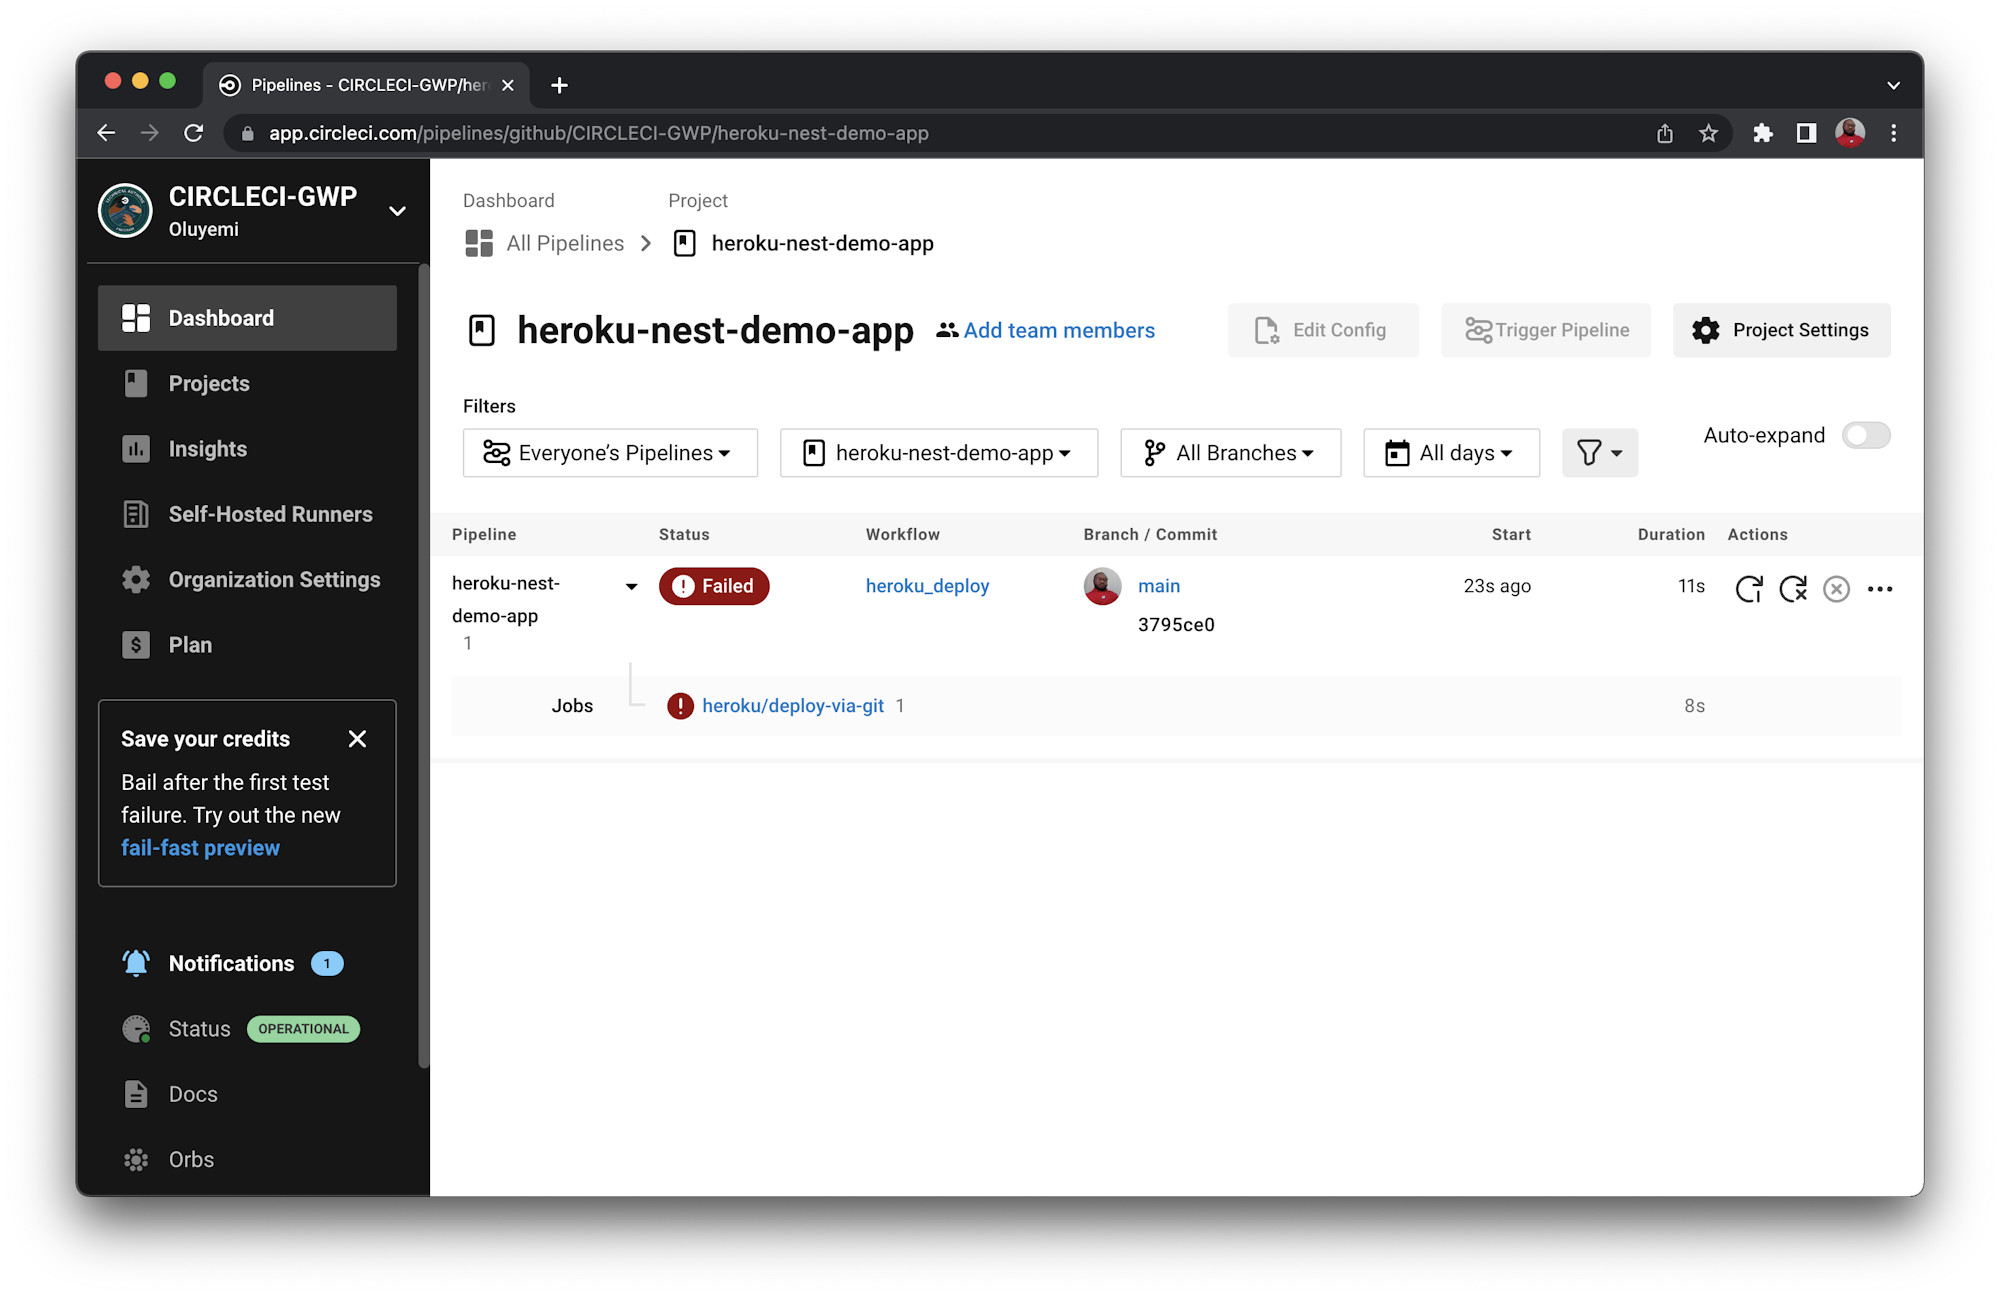
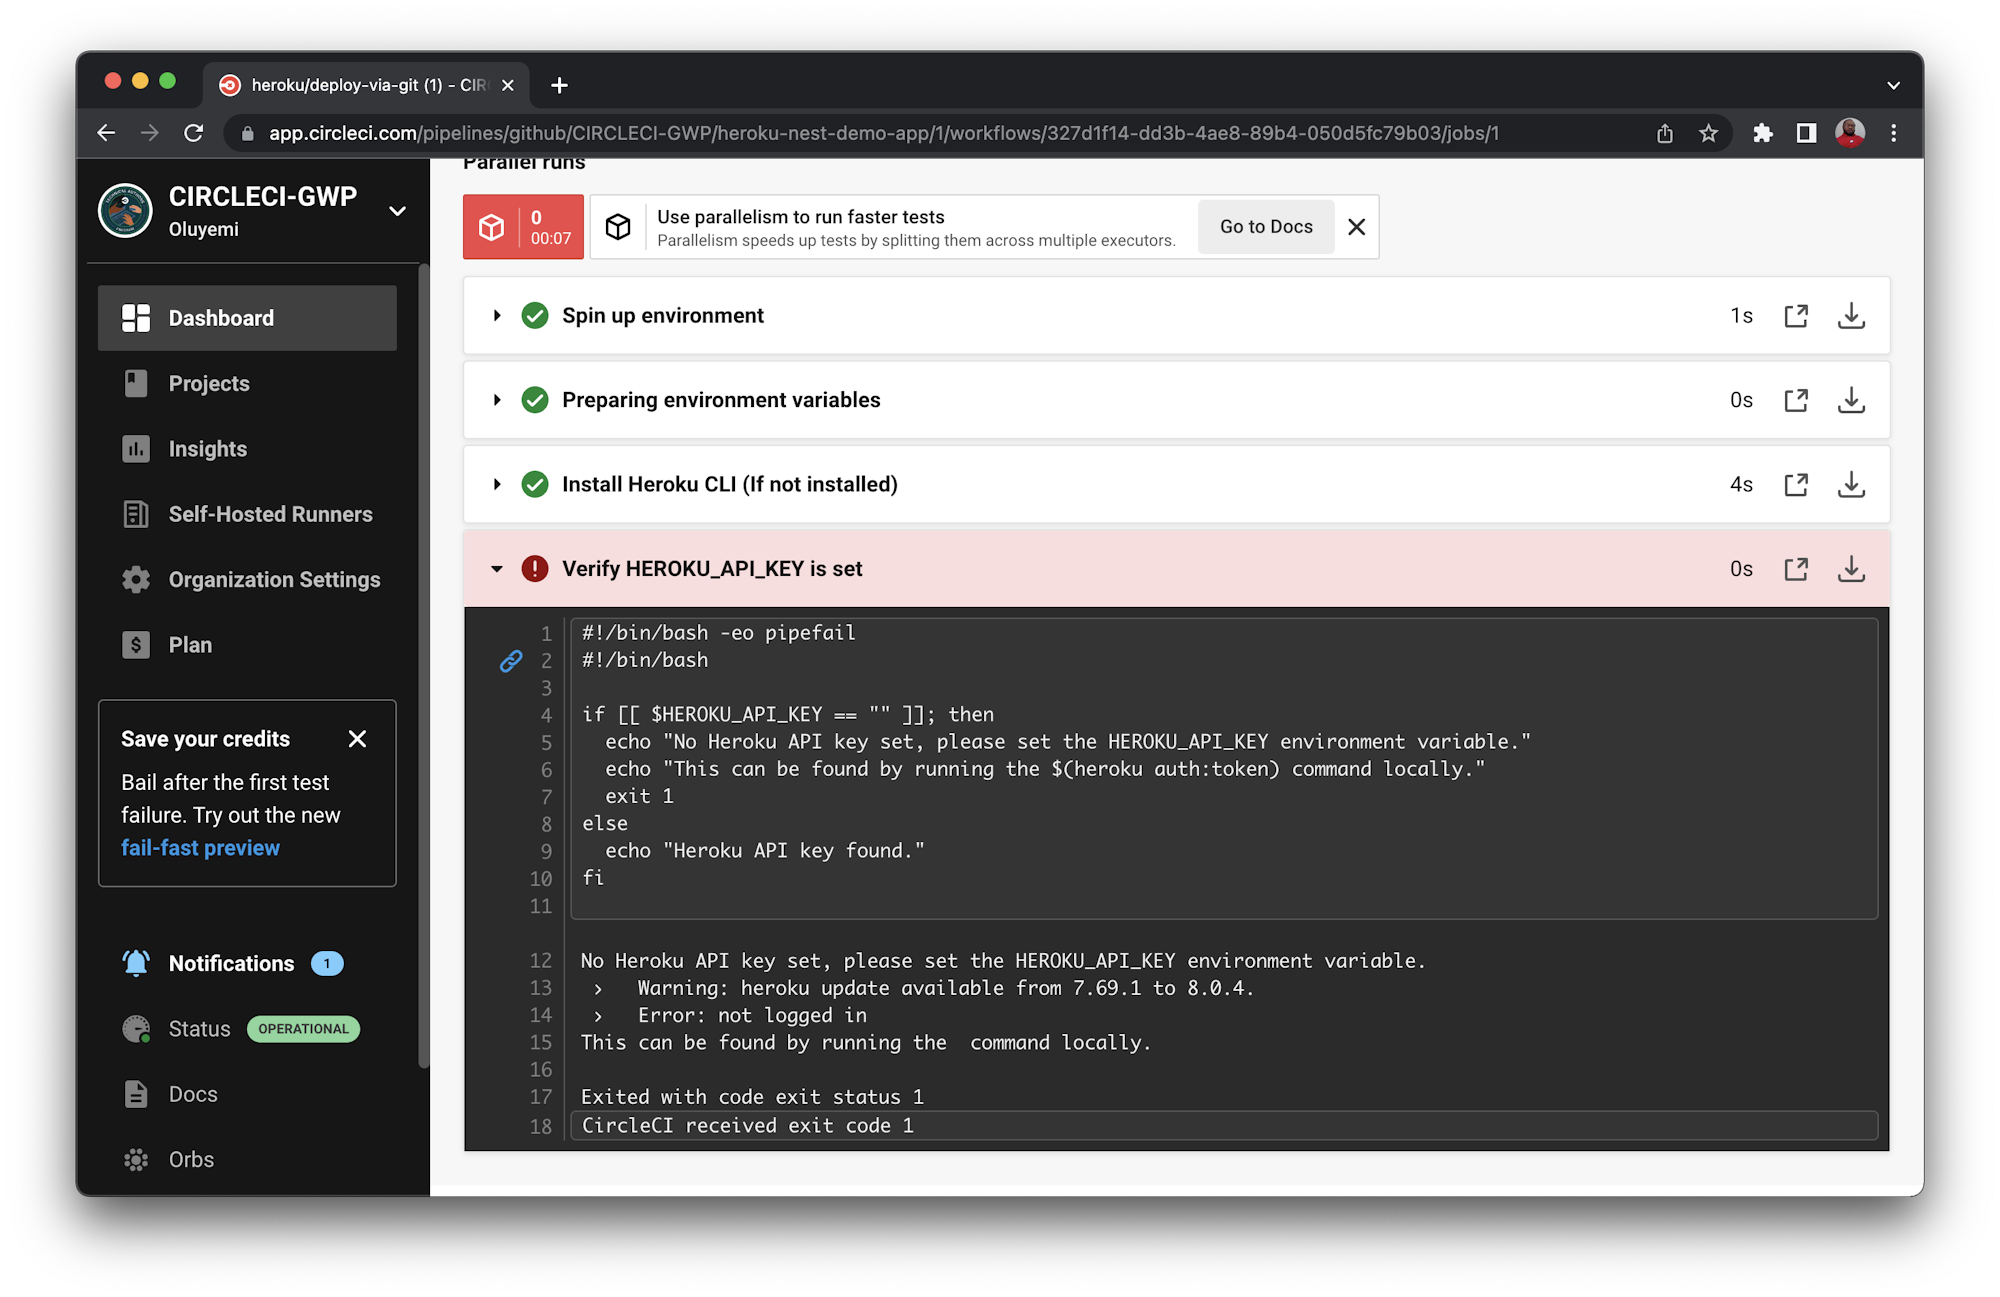
Click the heroku/deploy-via-git job to find out why the deployment was not successful.
 { : .zoomable }
Don’t worry; here’s what you need to do:
- Add the details of your Heroku application as environment variables.
- Update the port in
src/main.tswithin your project. - Create a
Procfile.
These steps are covered in the next section.
Adding environment variables to CircleCI
For CircleCI to have authenticated access to the Heroku application for the deployment process, you need to add two environment variables from your Heroku account to your CircleCI pipeline.
Go to your project’s settings by clicking Project Settings from the Pipelines page. Make sure your project is the currently selected one.
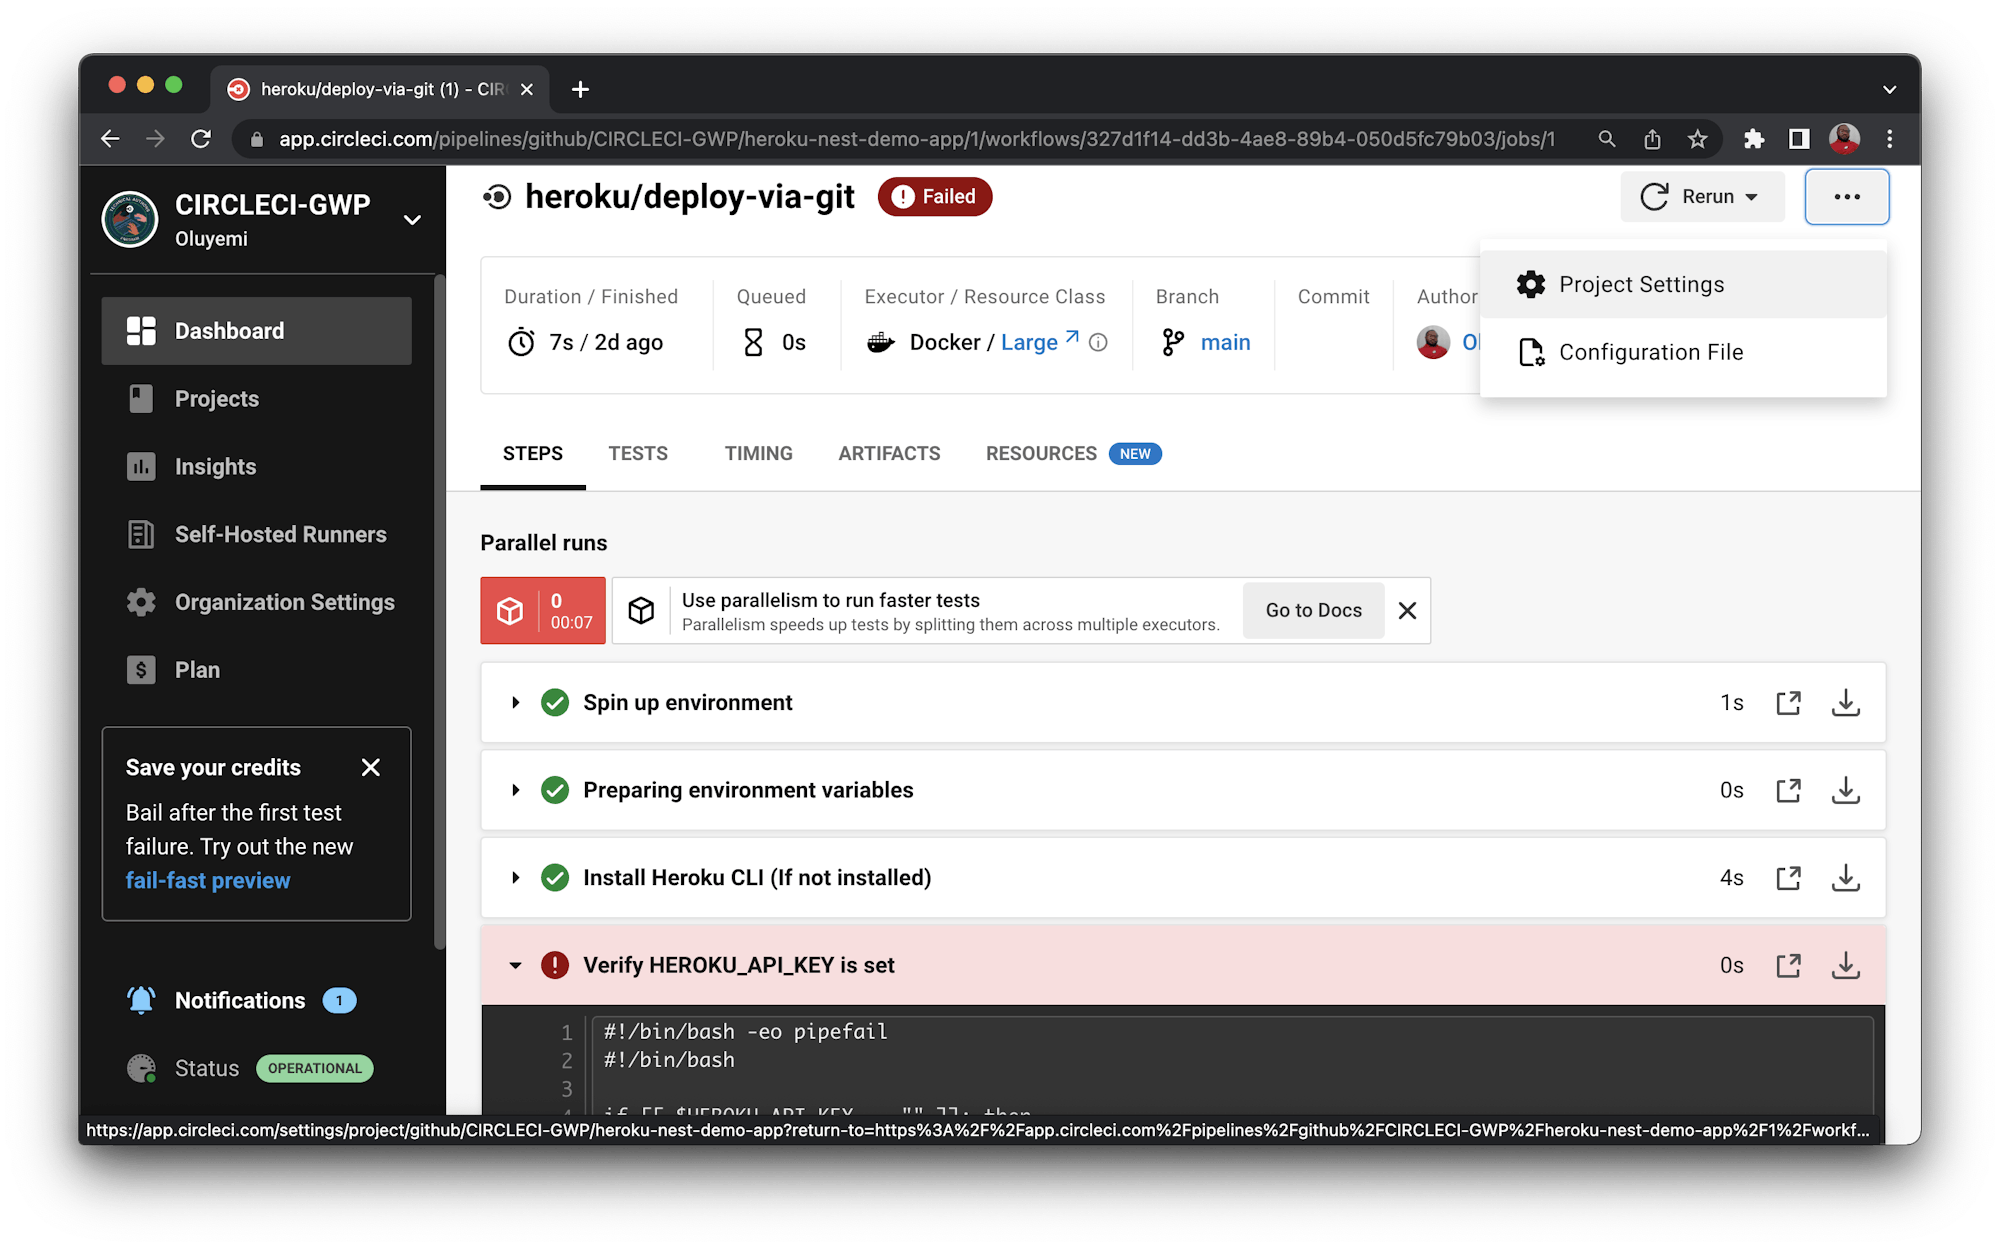
On the sidebar menu of the settings page, click Environment Variables.
Click Add Environment Variable. You will be prompted to enter the variable name and value. The variables you need to enter are:
HEROKU_APP_NAME: The name of the Heroku application created earlier.HEROKU_API_KEY: The Heroku API key that was obtained from your account dashboard on Heroku.
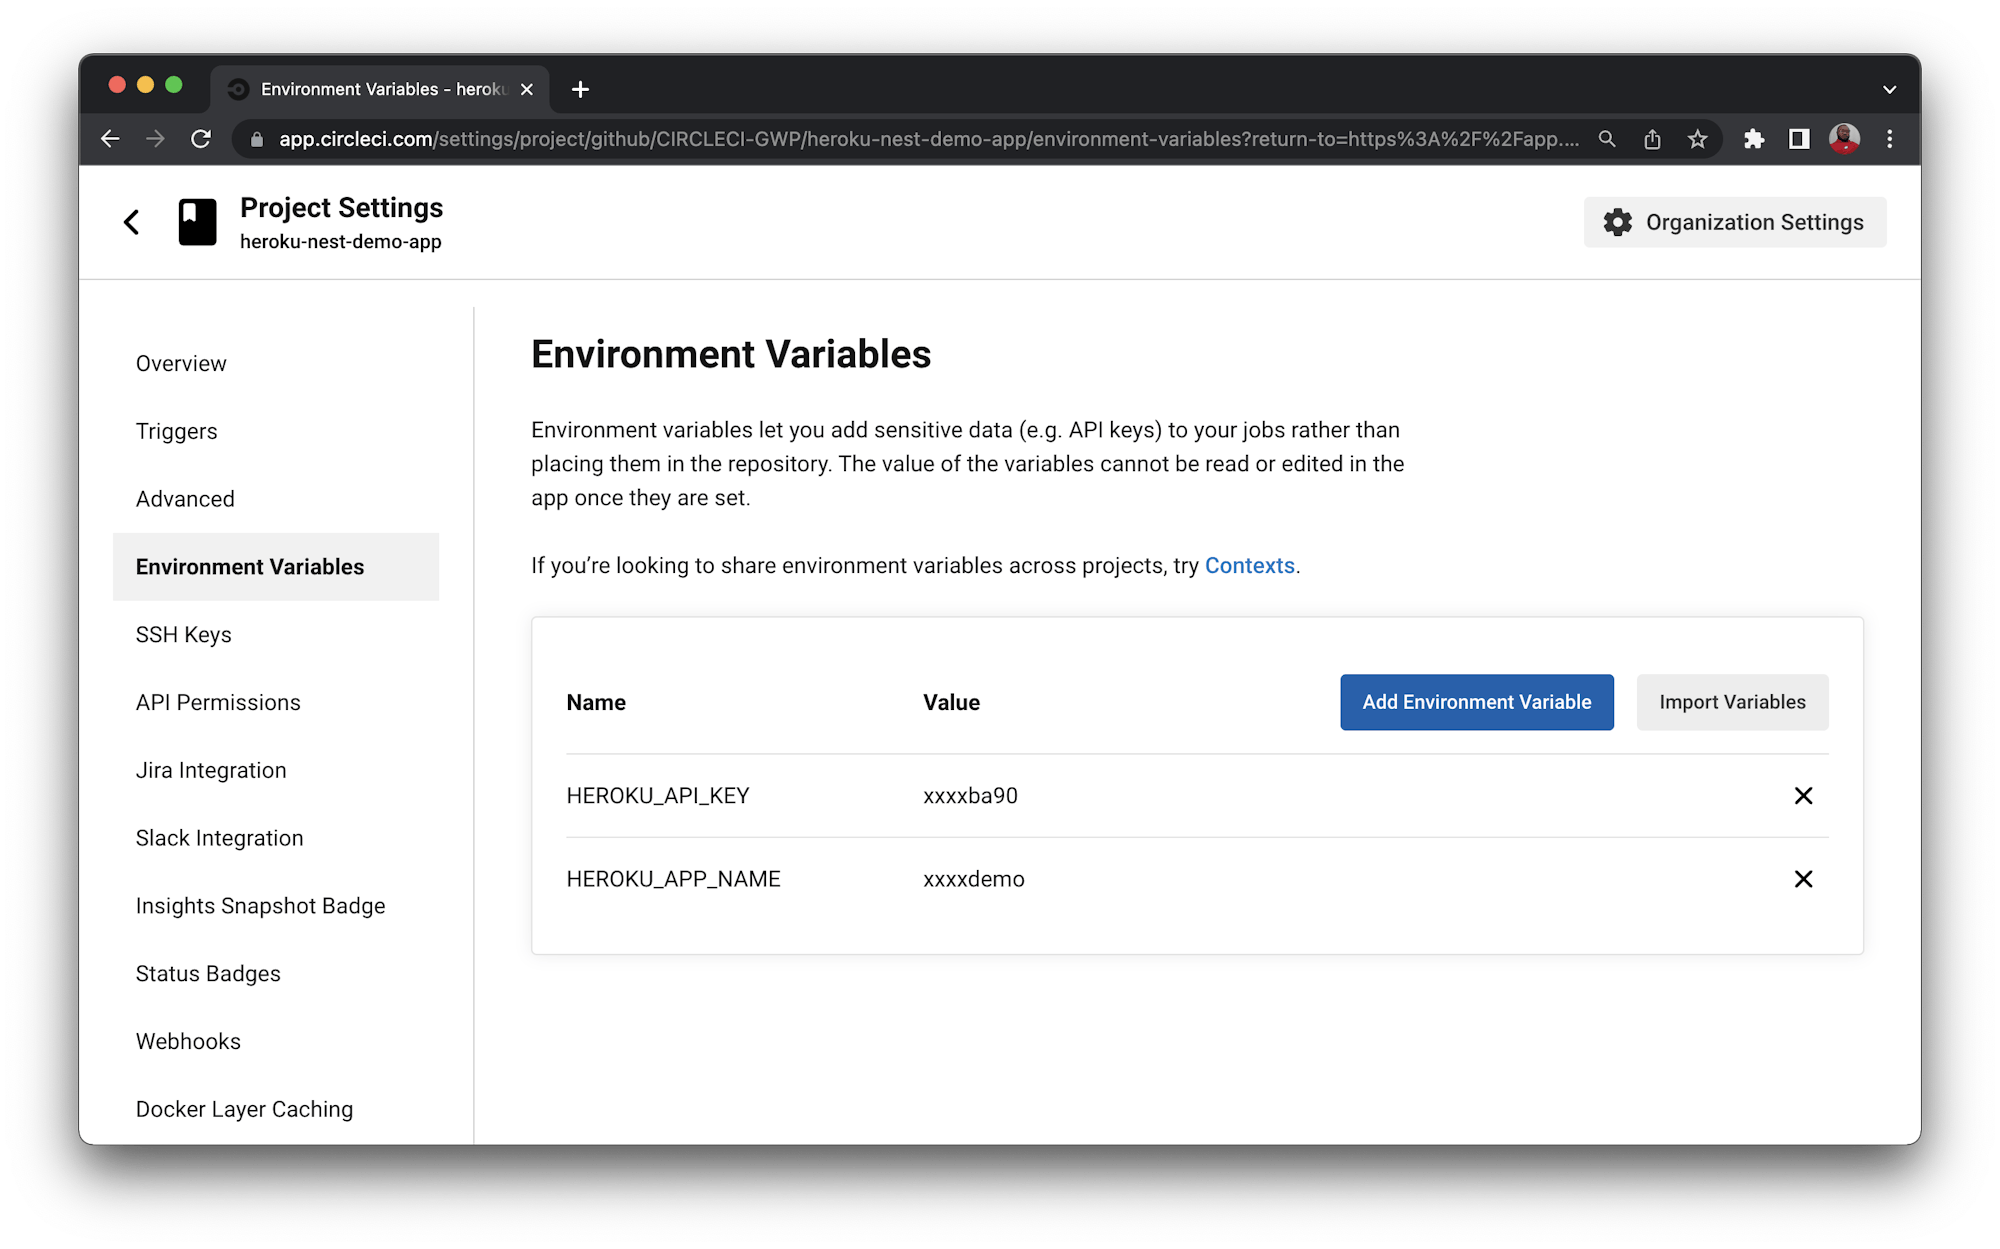
You are almost done setting up all the configuration needed to automate the deployment of your application.
Updating the port in the application
In the codebase, you need to update the main.ts file with an option to use a fixed port or a dynamically assigned value. This is because Heroku often dynamically assigns a port to every new application. Setting a fixed value (the default for a Nest.js application) will result in an error. Open src/main.ts and update its content as shown here:
import { NestFactory } from "@nestjs/core";
import { AppModule } from "./app.module";
async function bootstrap() {
  const app = await NestFactory.create(AppModule);
  await app.listen(process.env.PORT || 3000); // update this line
}
bootstrap();
With this option, the application can run on either the fixed port of 3000 or any dynamic port specified in a .env file.
Creating a Procfile
Finally, you need to create a new file named Procfile within the root of your application. Paste this content into it:
web: npm run start:prod
This file tells Heroku the command that will be used to execute the application on startup.
Save this file and push your changes to the GitHub repository. Now watch your CircleCI dashboard to see the progress of the deployment.
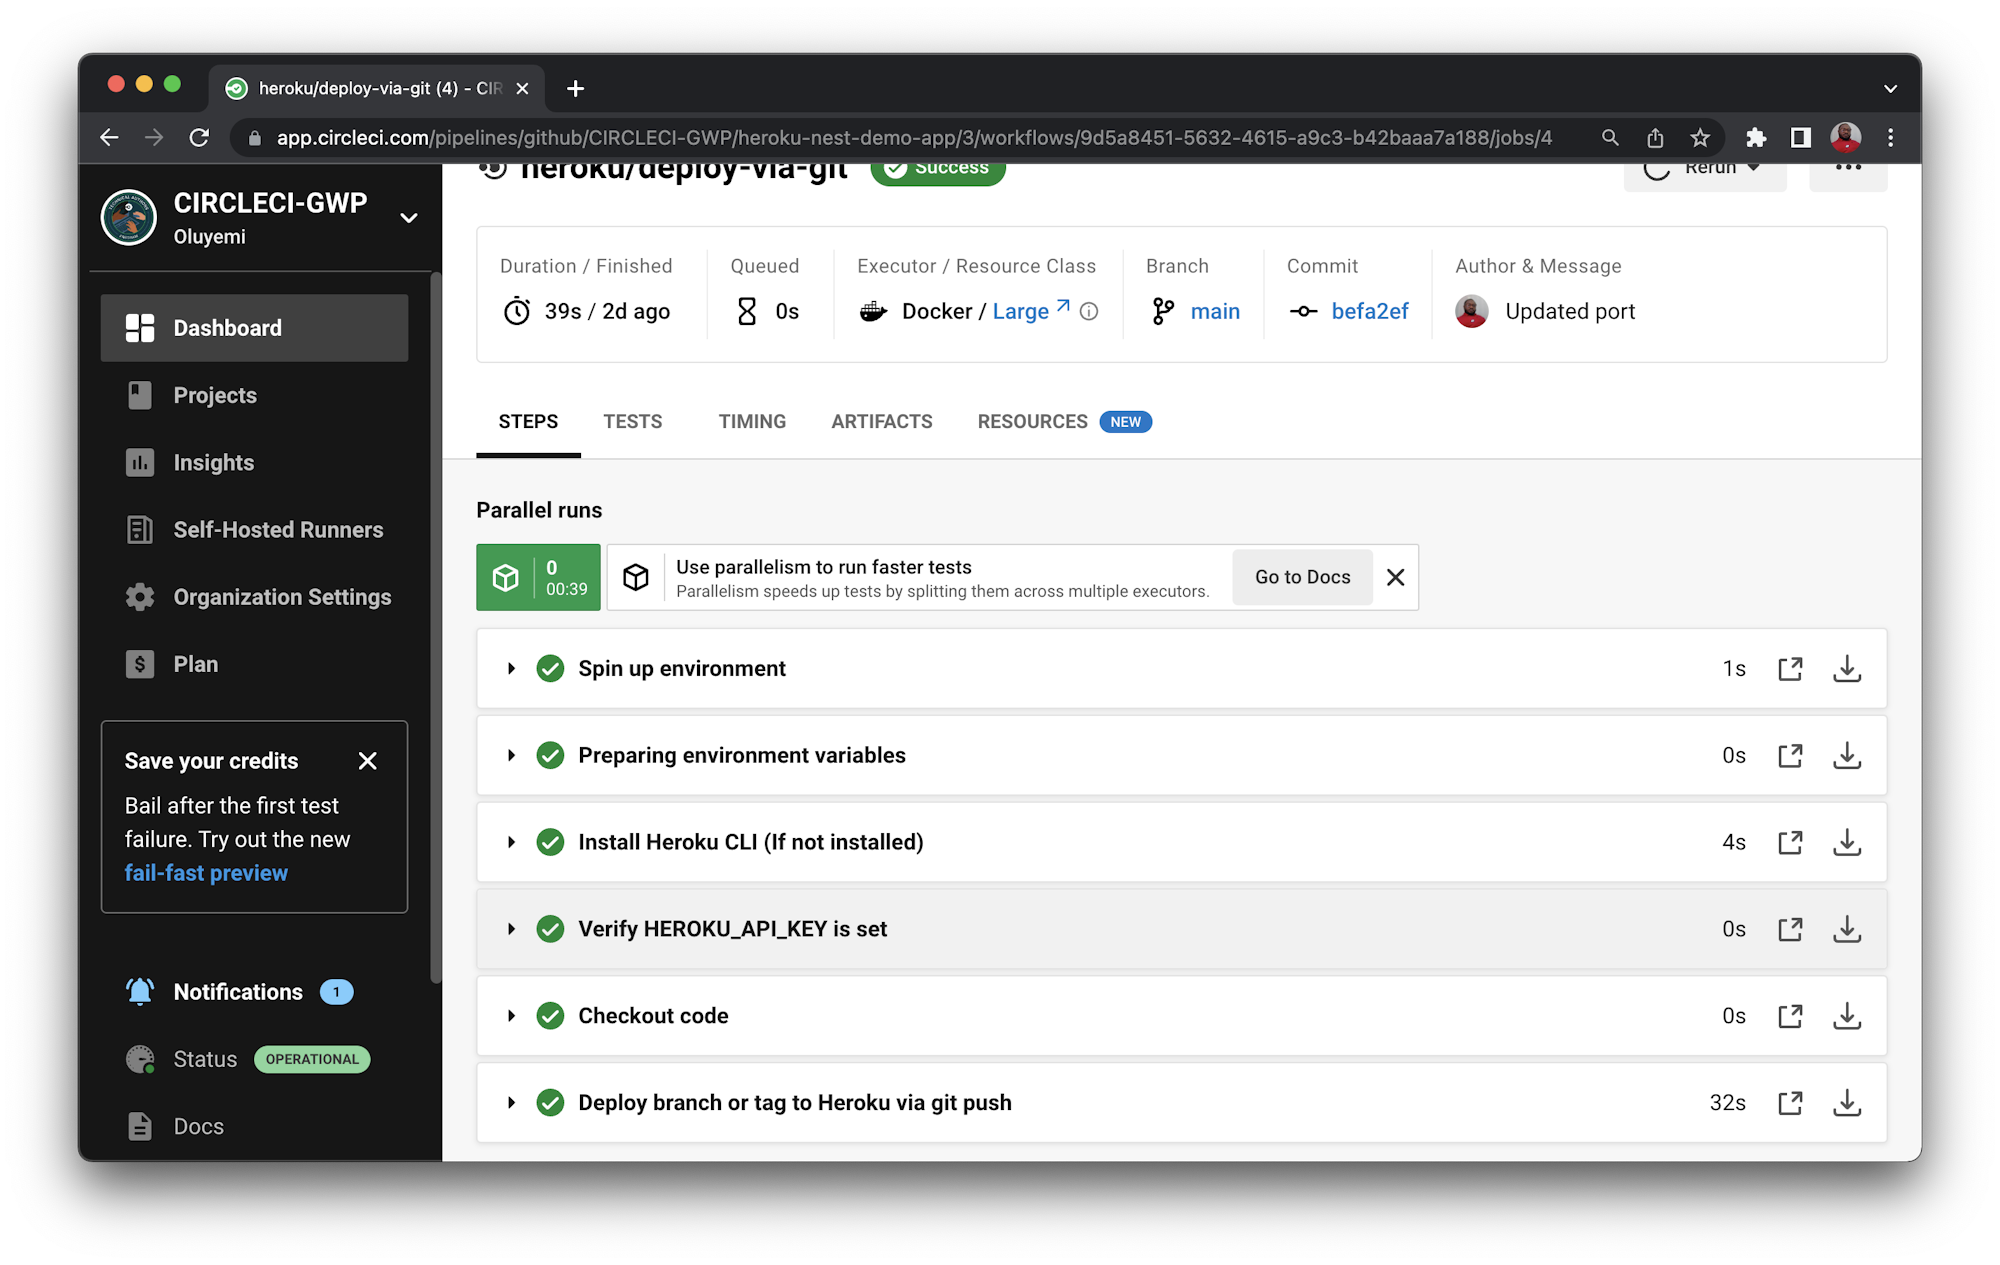
The status of the CircleCI pipeline for the project indicates that the build was successful and the application has been deployed. You can confirm this by navigating to the link generated for the application by Heroku. The format of the URL is always the same: https://YOUR_HEROKU_APP_NAME.herokuapp.com/. You can also check out the endpoint of my running instance.
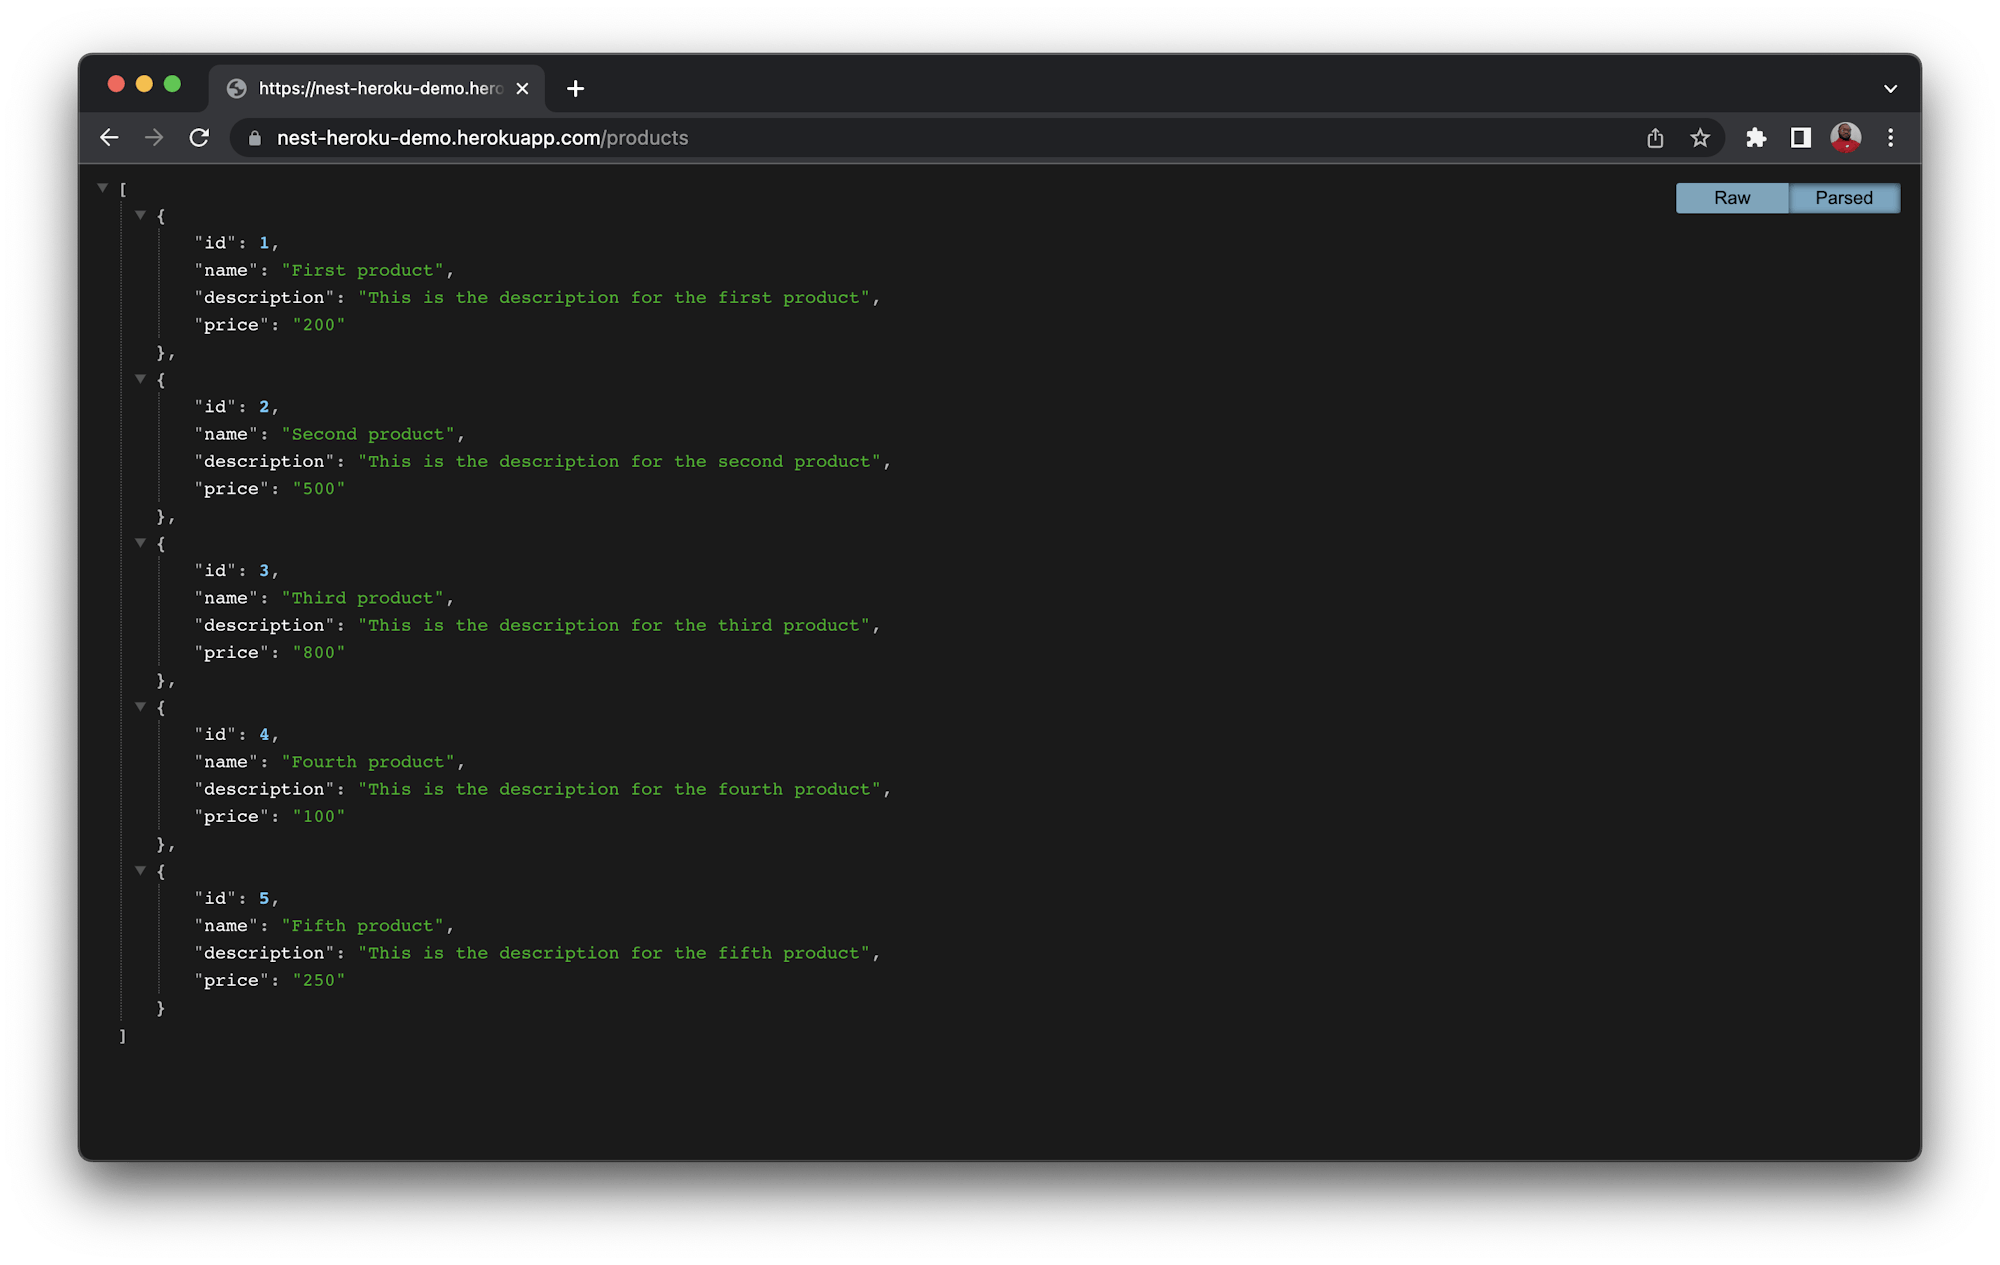
Congratulations! You have just deployed a Nest.js application to Heroku.
Conclusion
In this tutorial, you were able to build a simple Nest.js application, set up a Heroku app, and automate the deployment of our Nest.js application to Heroku. The complete source code for this project can be found here on GitHub.
Oluyemi is a tech enthusiast with a background in Telecommunication Engineering. With a keen interest in solving day-to-day problems encountered by users, he ventured into programming and has since directed his problem solving skills at building software for both web and mobile. A full stack software engineer with a passion for sharing knowledge, Oluyemi has published a good number of technical articles and blog posts on several blogs around the world. Being tech savvy, his hobbies include trying out new programming languages and frameworks.


