Streamline your LangChain deployments with Langserve on GCP

Full Stack Engineer

Deploying Large Language Model (LLM) applications can transform ideas into valuable services. But, deployment challenges can slow down even experienced developers.
In this tutorial, you will build and deploy a LangChain application using LangServe and CircleCI on Google Cloud Run. You will create a text summarization tool powered by Google’s Gemini model. You will use Langserve to expose it as an API. You will automate testing and deployment to Google Cloud Run using CircleCI.
Here is a demo of what you will build.

Prerequisites
Before you begin, make sure you have:
- Install Python 3.9 or higher
- A CircleCI account
- A DockerHub account
- A Google Cloud account (free tier is enough)
- A Google API key from Google AI Studio
- Basic familiarity with Docker and REST APIs
Deploying LLM applications into production
In this part, you will learn about the challenges of deploying AI apps, how to structure them, and modern deployment approaches.
Challenges in deploying LLM applications
LLM applications face unique deployment challenges:
- Customization needs: Big companies like OpenAI and Google make general-purpose AI models. You often need to adjust them with prompts or fine-tuning to work for your specific needs.
- Resource intensity: LLMs consume significant computational resources. You might need to pay for API calls or build your own systems to handle their memory and processing needs.
- Performance optimization: You need to monitor key metrics (latency, accuracy, and costs). This is crucial for maintaining smooth user experience. Low latency is particularly important for interactive applications.
- Working with other systems: Your AI app needs to connect smoothly with the other systems.
Structuring an LLM Application
A well-designed LLM application includes (at least) these components:
- Model layer: The core LLM for processing inputs and generating outputs
- Prompt engineering layer: Logic for transforming user inputs into effective prompts
- API layer: Endpoints allowing other applications to interact with your LLM
- Monitoring layer: For tracking performance, errors, and usage metrics
- Integration layer: For making connections to external systems and data sources
Methods for deploying LLMs into production
When deploying LLM applications, you have several approaches to consider:
- On-premises deployment: Gives you more control over your data and equipment but costs a lot to set up.
- Cloud-based deployment: Offers high scalability, flexibility, and minimal upfront costs
- Hybrid fployment: Offers a balances between control and scalability
Several open-source tools simplify LLM deployment, including:
- LangServe: Customized for deploying LangChain applications as REST APIs
- Kubernetes: For container orchestration and management
- TensorFlow Serving: Optimized for serving machine learning models
- MLflow: For end-to-end management of machine learning lifecycle
Building and deploying an LLM application using LangServe
In this part, you will learn what LangServe is and build the text-summarizer using a Gemini model.
Understanding LangServe for LangChain APIs
LangServe is a specialized tool for deploying LangChain applications as REST APIs. The LangChain team created LangServe to simplify the deployment process for LLM applications.
Key benefits of using LangServe include:
- Quick setup: Gives you starter code that turns your AI apps into APIs without much work
- Built-in documentation: Generates interactive API documentation
- Testing playground: a browser-based interface for testing and debugging
- Consistent interface: Creates well-structured APIs that integrate with other services
LangServe uses FastAPI and Pydantic to create a system that packages your LLM apps into APIs.
You are ready to build a text summarization service. Think about making a tool for a company that helps college students write better. You will build an LLM app that helps students summarize any article and use proper APA citations.
Setting up the environment
-
To begin, you need to clone the project’s GitHub repo, and set up a virtual environment. Run this code:
-
Next, create a virtual environment called
langserve_envand activate it: -
Install the required dependencies from the
requirements.txtfile:Now you need to have a Google API key ready. You can obtain your GOOGLE API key from Google AI Studio.
-
Create a
.envfile in the project root directory and add your Google API key:
Creating the summarization chain
To build a summarization LangChain you will use a file named chain.py. Here is a breakdown of the contents of this file.
from langchain.chains import LLMChain
from langchain.prompts import PromptTemplate
from langchain_google_genai import ChatGoogleGenerativeAI
from langchain.schema.output_parser import StrOutputParser
import os
from dotenv import load_dotenv
Import the libraries you need for building the summarization chain:
This loads the environment variables from the .env file (your Google API key).
summarization_template = """
You are an expert summarizer who helps college students...
"""

summarization_prompt = PromptTemplate(
    input_variables=["text"],
    template=summarization_template
)
This creates a prompt template for the summarization chain. It provides guidance to the LLM on how to summarize the text. You can learn more about prompting techniques to enhance your prompt. The PromptTemplate class formats the prompt to receive an input variable text.
def create_summarization_chain():
    llm = ChatGoogleGenerativeAI(
        model="gemini-2.0-flash",
        google_api_key=os.getenv("GOOGLE_API_KEY"),
        temperature=0.3
    )
    chain = summarization_prompt | llm | StrOutputParser()
    return chain
What this chain function does:
- Initializes a
ChatGoogleGenerativeAIinstance with the Gemini model and your API key. - Combines the prompt template with the LLM and output parser.
- Returns the chain.
The function provides a concise, academically-styled summary of your text.
Setting up LangServe for LangChain APIs
The app.py file that will serve your summarization chain. The file provides a web service that summarizes text. The user can paste text into the text field or upload a pdf file.
from fastapi import FastAPI, UploadFile, File, HTTPException
from fastapi.responses import HTMLResponse
import pypdf
import tempfile
import uvicorn
from pydantic import BaseModel
import logging

# Move langserve import to the top.
from langserve import add_routes

from chain import create_summarization_chain

class SummarizeBatchRequest(BaseModel):
    text: str
This imports FastAPI components for building the webservice. It also imports PDF tools and the summarization chain created in chain.py.
logging.basicConfig(
    level=logging.INFO,
    format='%(asctime)s - %(name)s - %(levelname)s - %(message)s'
)

logger = logging.getLogger("llm-summarizer")
This configures logging to track the application’s behavior and potential issues.
app = FastAPI(
    title="Text Summarization API",
    description="An API for summarizing text using Google's Gemini model",
    version="1.0.0",
)
Here you create the FastAPI application with metadata.
@app.get("/", response_class=HTMLResponse)
def read_root():
    return """
    <html>
        <head>...</head>
        <body>...</body>
    </html>
    """
You create a basic homepage with links to the LangServe playground and SwaggerUI.
# Create the summarization chain
summarization_chain = create_summarization_chain()

# Add LangServe route with explicit input/output typing
add_routes(
    app,
    summarization_chain,
    path="/summarize",
    input_type=SummarizeBatchRequest,
)
This initializes your summarization chain and adds LangServe routes at/summarize path.
@app.post("/summarize-pdf/", description="Upload a PDF file for summarization"
async def summarize_pdf(file: UploadFile = File(...)):
This creates a new endpoint for handling PDF uploads. The function:
- Checks if the file is a PDF
- Creates a temporary file to store the uploaded PDF
- Extracts text from all pages of the PDF using pypdf
- Verifies that text was successfully extracted
- Logs the amount of text extracted (helpful for debugging)
- Sends the extracted text to your summarization chain
- Returns both the original filename and the generated summary
- Has error handling for various failure cases
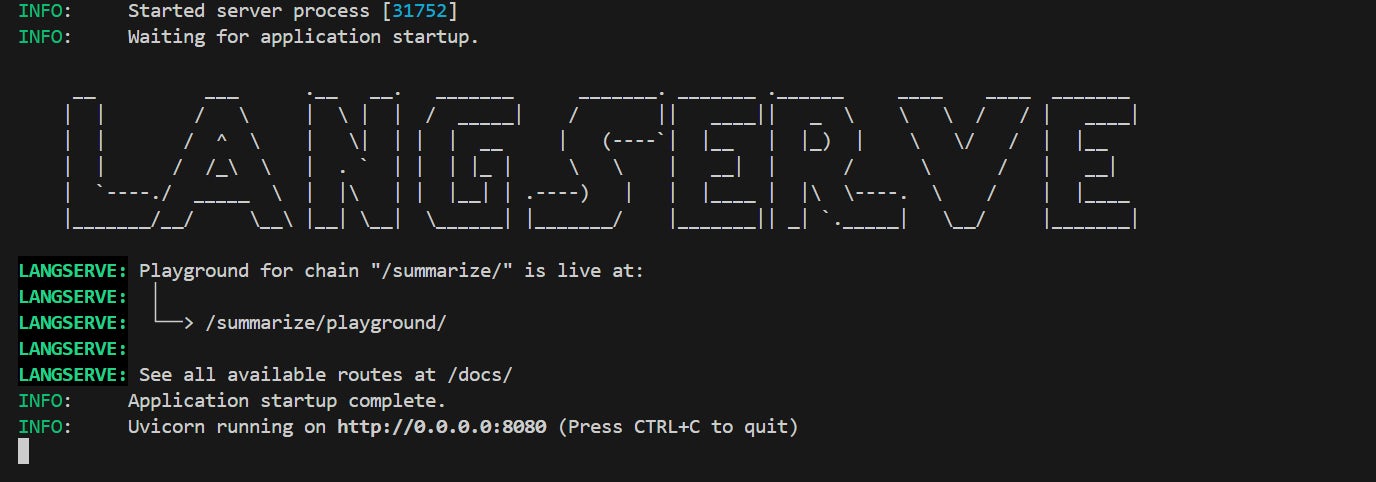
Running the script starts a server, making it available at port 8080.
Running the service locally
Start the service with:
The service will be available at http://localhost:8080. You can explore the API documentation at http://localhost:8080/docs.
Your app is now live! Go to http://localhost:8080.
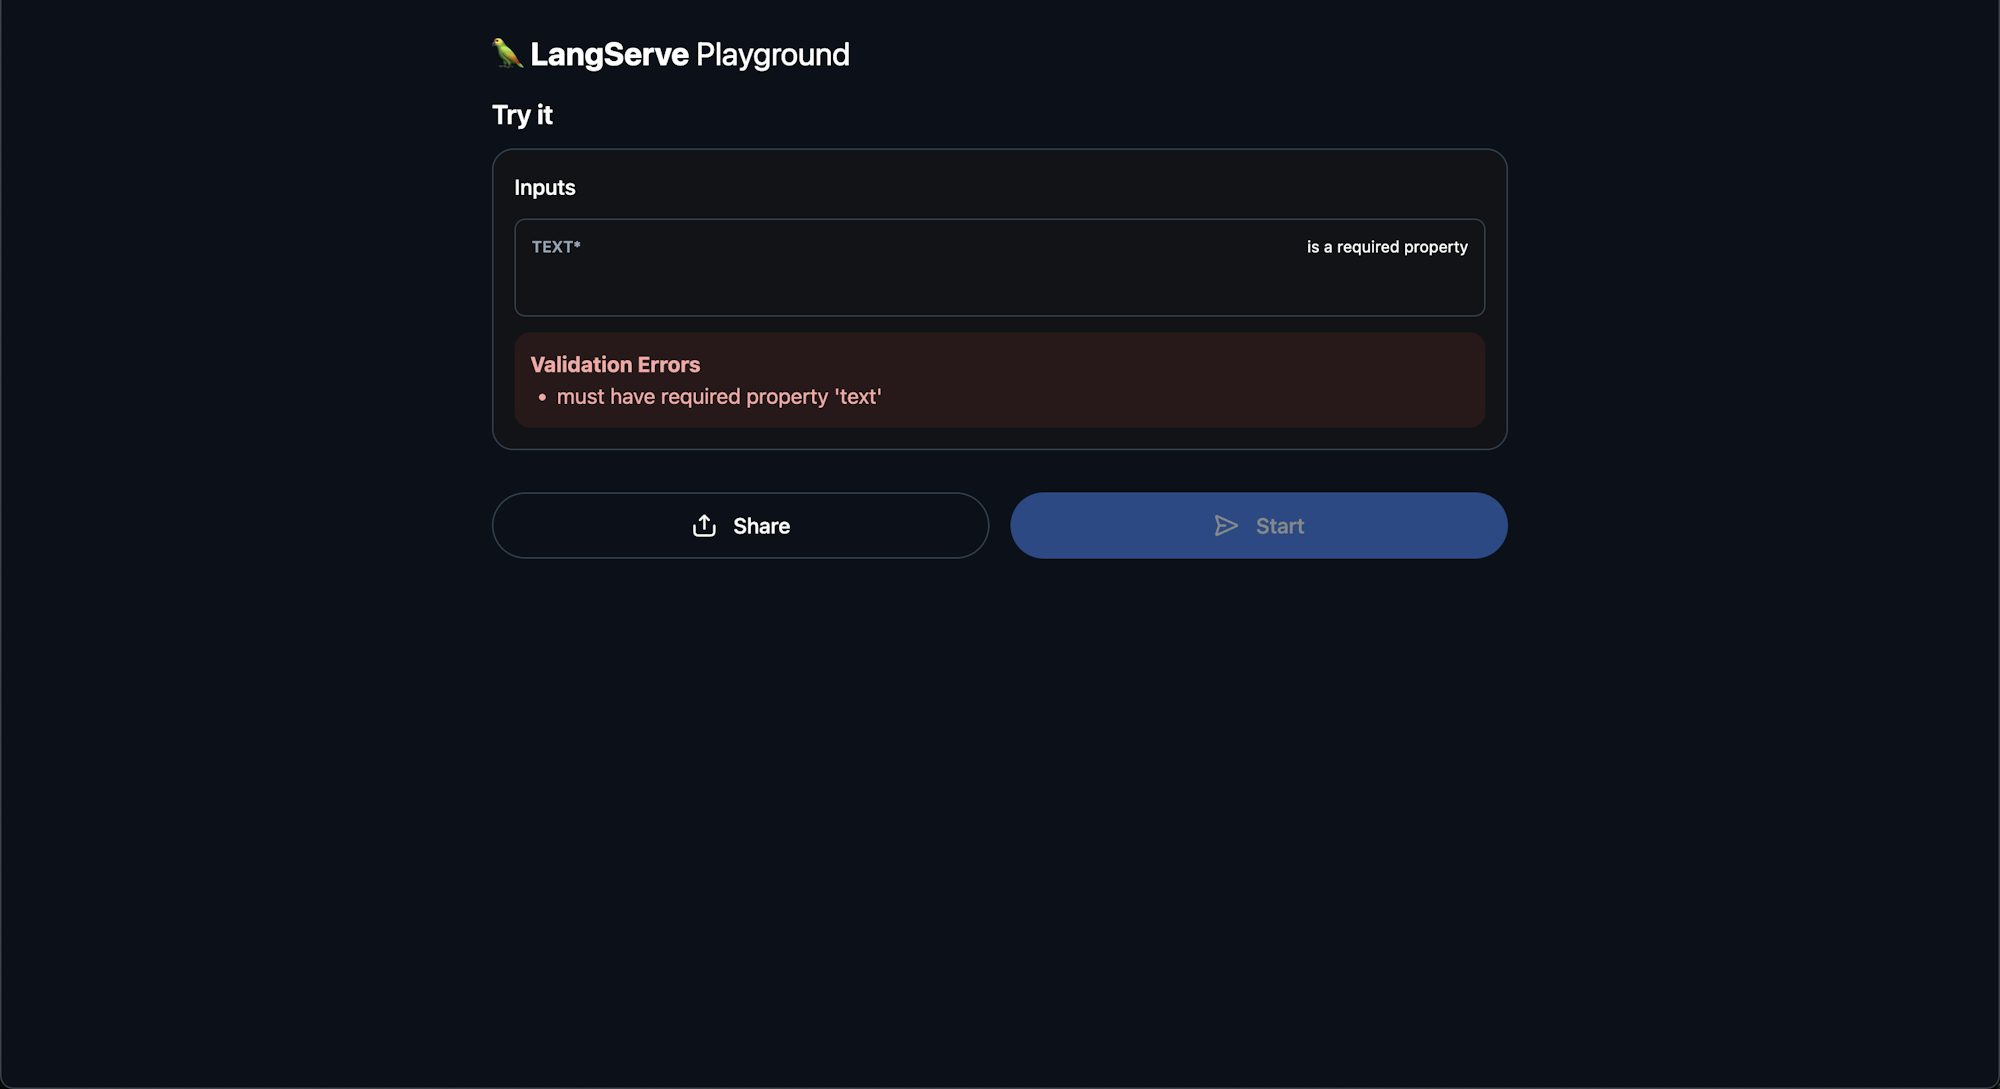
You can review the LangServe playground.
You can also explore the API documentation at http://localhost:8080/docs.
Containerizing the LLM application with Docker
You will now containerize your application for portability and cloud deployment. The project has a Dockerfile defined at the project’s root. The contents of the Dockerfile uses a lightweight Python 3.9 image.
FROM python:3.12.9

# Set the working directory to `/app`
WORKDIR /app
# Copy the requirements file and install dependencies. The `--no-cache-dir` prevents pip from storing package archives.
COPY requirements.txt .
RUN pip install --no-cache-dir -r requirements.txt

# Copy the rest of the application:
COPY chain.py app.py ./
COPY tests/ ./tests/

# Make port 8000 available to the world outside this container
EXPOSE 8080

# You will create a non-root user and switch to it to enhance the security
RUN useradd -m appuser && chown -R appuser /app
USER appuser

# Run app.py when the container launches
CMD ["uvicorn", "app:app", "--host", "0.0.0.0", "--port", "8080"]
Build and test the Docker image locally:
docker build -t text-summarizer:latest .
docker run -p 8080:8080 -e GOOGLE_API_KEY=your_api_key_here text-summarizer:latest
Setting up Google Cloud Run
- First, create a Google project (if you don’t have one) in GCP and enable billing for the project.
- Open the gcloud command line tool on Google Cloud console (you don’t need to download the gcloud CLI). Review the previous image for how to run gcloud CLI.
Run this command:
-
Next, run this command to create the service account:
-
Enable the Artifact Registry API. Run:
-
Enable the Cloud Run API. Run:
-
Set the project ID variable for easy reuse by running:
-
Also set your service account email variable for easy reuse:
-
To grant the service account create, push and, pull permissions to the Artifact Registry, run:
-
Now run this command to grant Cloud Run Admin permissions to the service account:
gcloud projects add-iam-policy-binding "${PROJECT_ID}" \ --member="serviceAccount:${SERVICE_ACCOUNT_EMAIL}" \ --role="roles/run.admin"This grants the “Cloud Run Admin” role to the service account. This allows the service account to deploy and manage Cloud Run services.
-
Run this command to grant Service Account User role to the service account:
-
To create the service account key file, run:
-
Convert the key to base64 encoding for safety transport and storage of your key:
-
Run this command to download the service account key:
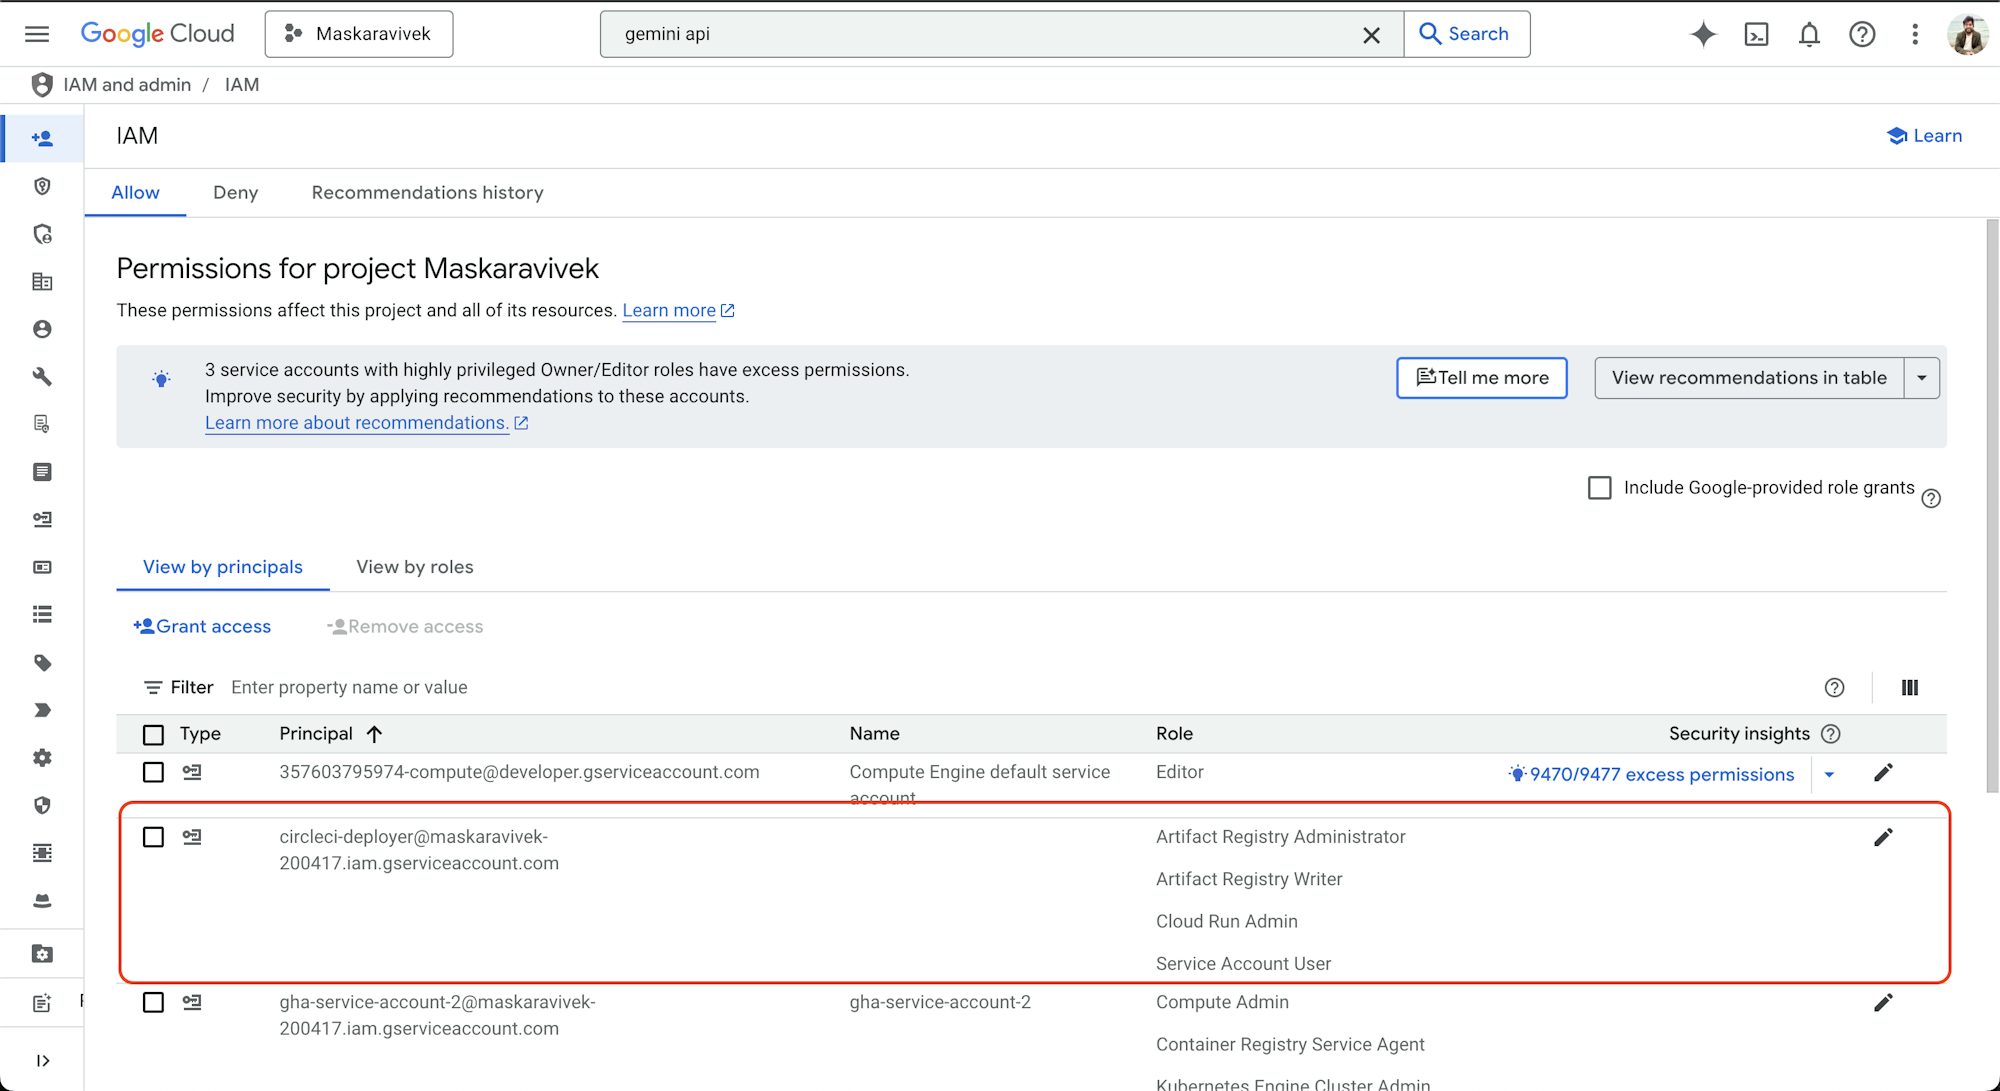
Your service account is ready. Check your Google Console to confirm your permissions.
Configuring CircleCI for CI/CD with Google Cloud Run
CircleCI automates testing and deployment to Google Cloud Run. In this section of the tutorial, you will create a CircleCI pipeline and deploy the application.
Add environment variables to CircleCI
In CircleCI, go to your organization settings. Go to contexts and create a context named gcp_deploy. Add these environment variables:
GOOGLE_CLOUD_KEYFILE_JSON: Contents of thekey.bs64fileGOOGLE_CLOUD_PROJECT: Your GCP project IDGOOGLE_API_KEY: Your Google API key for Gemini
The environment variables should be in the context. Or, you can add your credentials under your project.
Now you have environment variables set up in circleCI.
Setting up CircleCI CI/CD pipeline for Google Cloud Run
Go to the .circleci folder in your project directory. You will create a config.yml file in this folder.
The config.yml file defines an automated CI/CD pipeline for your app. Let me walk you through it:
Defining version and jobs
This specifies the CircleCI version and sets up your build job to run in a Python 3.12.9 container. Note that while the local docker file used Python 3.9, our CI uses Python 3.12.9. Any version above 3.9 should work, but this tutorial is tested against CI Python version 3.12.9.
Initial setup steps
This checks out your code and enables Docker support with layer caching to speed up builds.
Google Cloud SDK installation
- run:
    name: Install Google Cloud SDK
    command: |
    curl https://sdk.cloud.google.com | bash > /dev/null 2>&1
    source $HOME/google-cloud-sdk/path.bash.inc
This installs the Google Cloud SDK, which you’ll need for deploying to Google Cloud Run.
Dependency management
- restore_cache:
    keys:
    - v1-dependencies-{{ checksum "requirements.txt" }}
- run:
    name: Install Dependencies
    command: |
    python -m venv venv
    . venv/bin/activate
    pip install --no-cache-dir -r requirements.txt
- save_cache:
    paths:
    - ./venv
    key: v1-dependencies-{{ checksum "requirements.txt" }}
This restores any cached dependencies and creates a virtual environment. It also installs dependencies, and caches them for future builds.
Running tests
This runs your tests to ensure everything works before deployment.
For this project you have a tests directory with a test_gemini.py file. This test file tests your app’s connection to Gemini AI service before deployment.
Here is what it does:
def test_gemini_api_connection():
    # Load environment variables
    load_dotenv()
    # Configure Google Gemini
    api_key = os.getenv("GOOGLE_API_KEY")
First, it loads your environment variables and authenticates their existence.
    try:
        genai.configure(api_key=api_key)
        # List available models
        models = [m.name for m in genai.list_models()]
        assert models, "No models found in the Gemini API."
It then configures the Gemini client and retrieves the list of available models.
# Try to use the model
model = genai.GenerativeModel('gemini-2.0-flash-lite-001')
response = model.generate_content("Say hello!")
assert response.text, "Gemini API did not return a response."
Finally, it sends a request to ensure the API can generate content and returns a valid response. The test ensures that the pipeline only runs when connection to Gemini model is successful.
Google Cloud authentication
- run:
    name: Authenticate Google Cloud
    command: |
    export PATH=$HOME/google-cloud-sdk/bin:$PATH
    echo $GOOGLE_CLOUD_KEYFILE_JSON | base64 -d > ${HOME}/gcloud-service-key.json
    gcloud auth activate-service-account --key-file=${HOME}/gcloud-service-key.json
    gcloud config set project $GOOGLE_CLOUD_PROJECT
    gcloud auth configure-docker us-docker.pkg.dev
This sets up authentication with Google Cloud using service account credentials.
Creating the Artifact Registry Repository
- run:
    name: Create Artifact Registry Repository
    command: |
    export PATH=$HOME/google-cloud-sdk/bin:$PATH
    if ! gcloud artifacts repositories describe images --location=us-central1 --project=$GOOGLE_CLOUD_PROJECT > /dev/null 2>&1; then
        gcloud artifacts repositories create images \
        --repository-format=docker \
        --location=us-central1 \
        --project=$GOOGLE_CLOUD_PROJECT
    fi
This creates a Docker repository in Google Artifact Registry, if it does not already exist.
Building and pushing the Docker image
- run:
    name: Build Docker Image
    command: |
    docker build -t us-central1-docker.pkg.dev/$GOOGLE_CLOUD_PROJECT/images/text-summarizer:latest .
- run:
    name: Explicit Docker Login
    command: |
    export PATH=$HOME/google-cloud-sdk/bin:$PATH
    docker login -u _json_key -p "$(cat ${HOME}/gcloud-service-key.json)" us-central1-docker.pkg.dev
- run:
    name: Push Docker Image
    command: |
    export PATH=$HOME/google-cloud-sdk/bin:$PATH
    docker push us-central1-docker.pkg.dev/$GOOGLE_CLOUD_PROJECT/images/text-summarizer:latest
This builds your Docker image and pushes it to the Artifact Registry.
Cloud Run deployment
- run:
    name: Deploy to Google Cloud Run
    command: |
    export PATH=$HOME/google-cloud-sdk/bin:$PATH
    gcloud run deploy text-summarizer \
        --image=us-central1-docker.pkg.dev/$GOOGLE_CLOUD_PROJECT/images/text-summarizer:latest \
        --platform=managed \
        --region=us-central1 \
        --allow-unauthenticated \
        --update-env-vars GOOGLE_API_KEY=$GOOGLE_API_KEY
This deploys your containerized application to Google Cloud Run. Users can access it via a webservice.
Define the workflow
The gcp_deploy context in CircleCI stores and provides access to essential environment variables.
The config.yml file defines a workflow that runs your build-and-deploy job.
CircleCI automatically tests, builds, and deploys your application to Google Cloud Run.
Setting up your project on CircleCI
Next, log in to your CircleCI account.
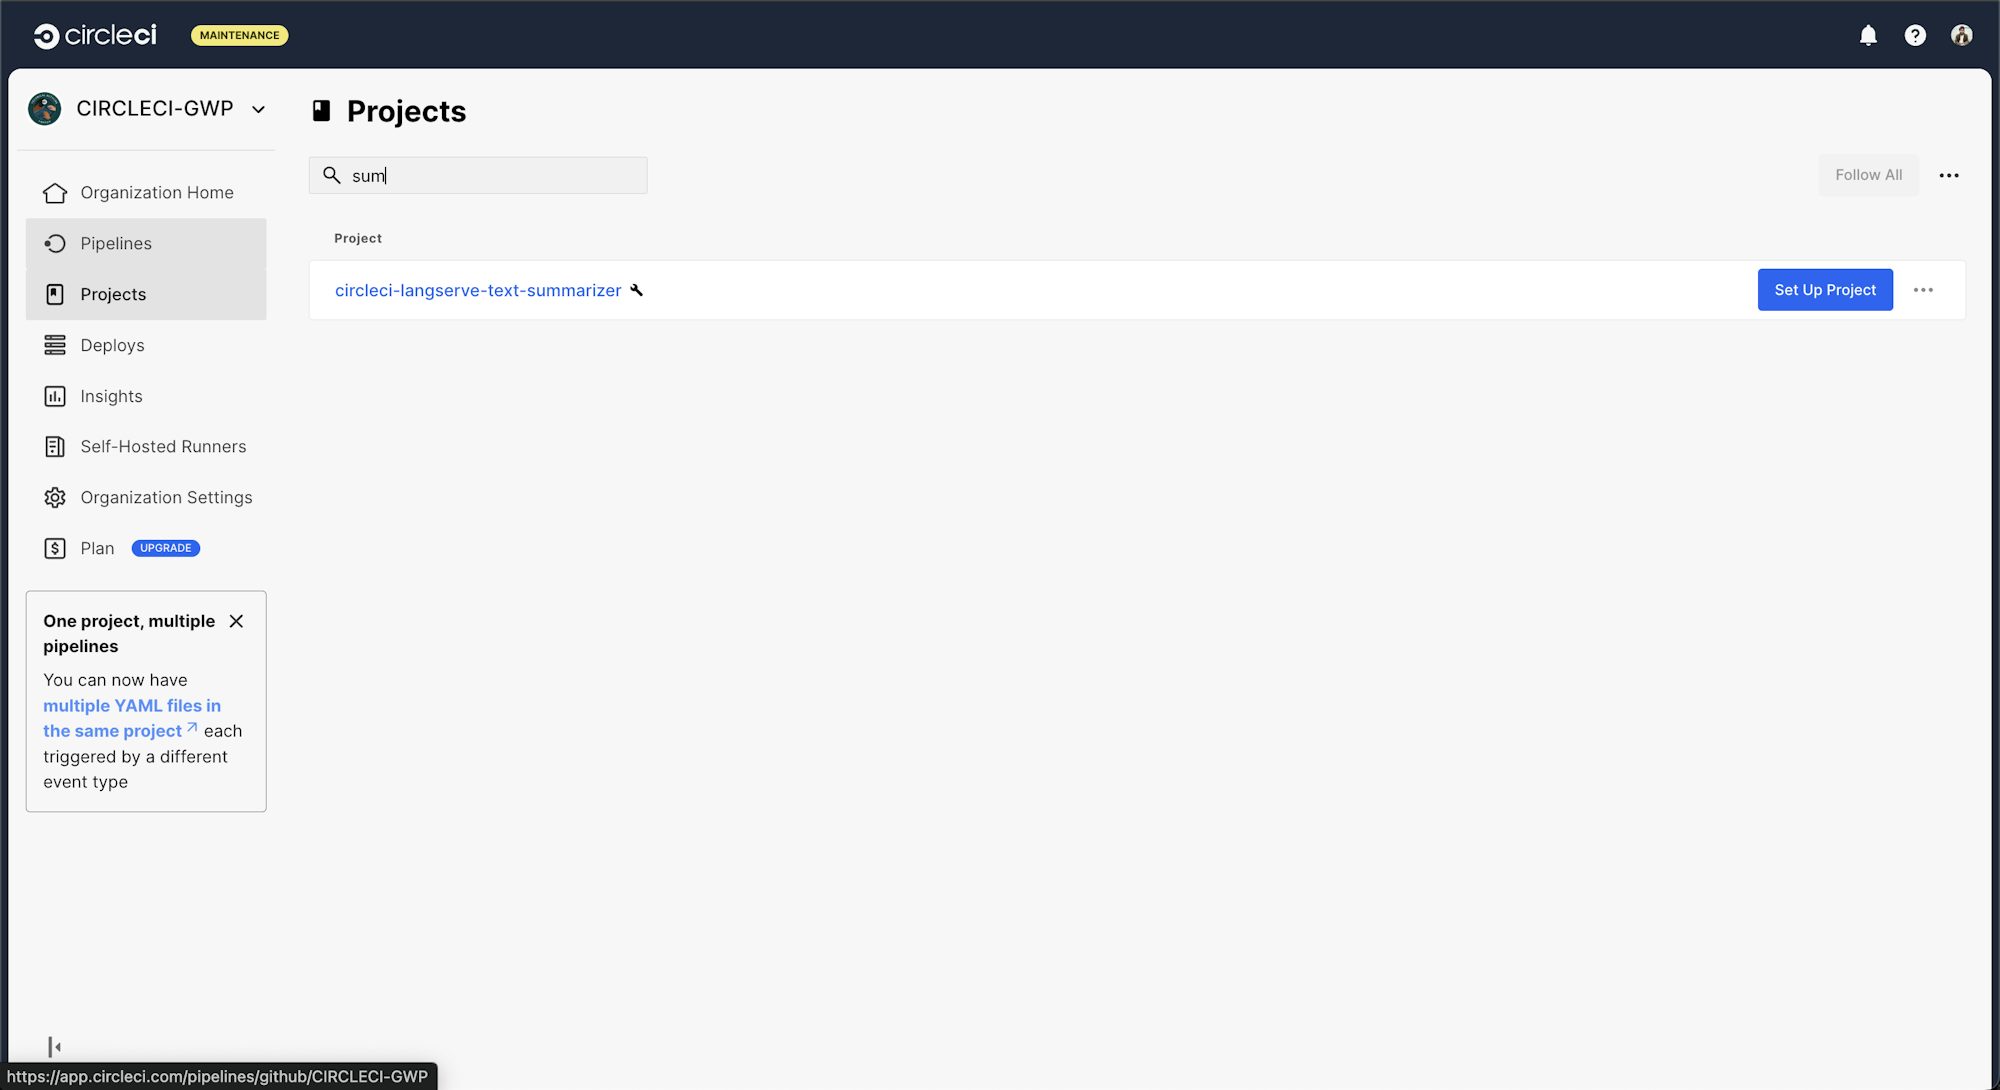
On the CircleCI dashboard, click the Projects tab, search for the GitHub repo name and click Set Up Project for your project.
You will be prompted to add a new configuration file manually or use an existing one. Since you have already pushed the required configuration file to the codebase, select the Fastest option and enter the name of the branch hosting your configuration file. Click Set Up Project to continue.
Completing the setup will trigger the pipeline.
Deploying and running your text summarization API
To trigger subsequent pipeline runs, you need to create a new commit and push code to the main branch:
CircleCI automatically detects the push to your repository. You can also trigger the build using CircleCI dashboard.
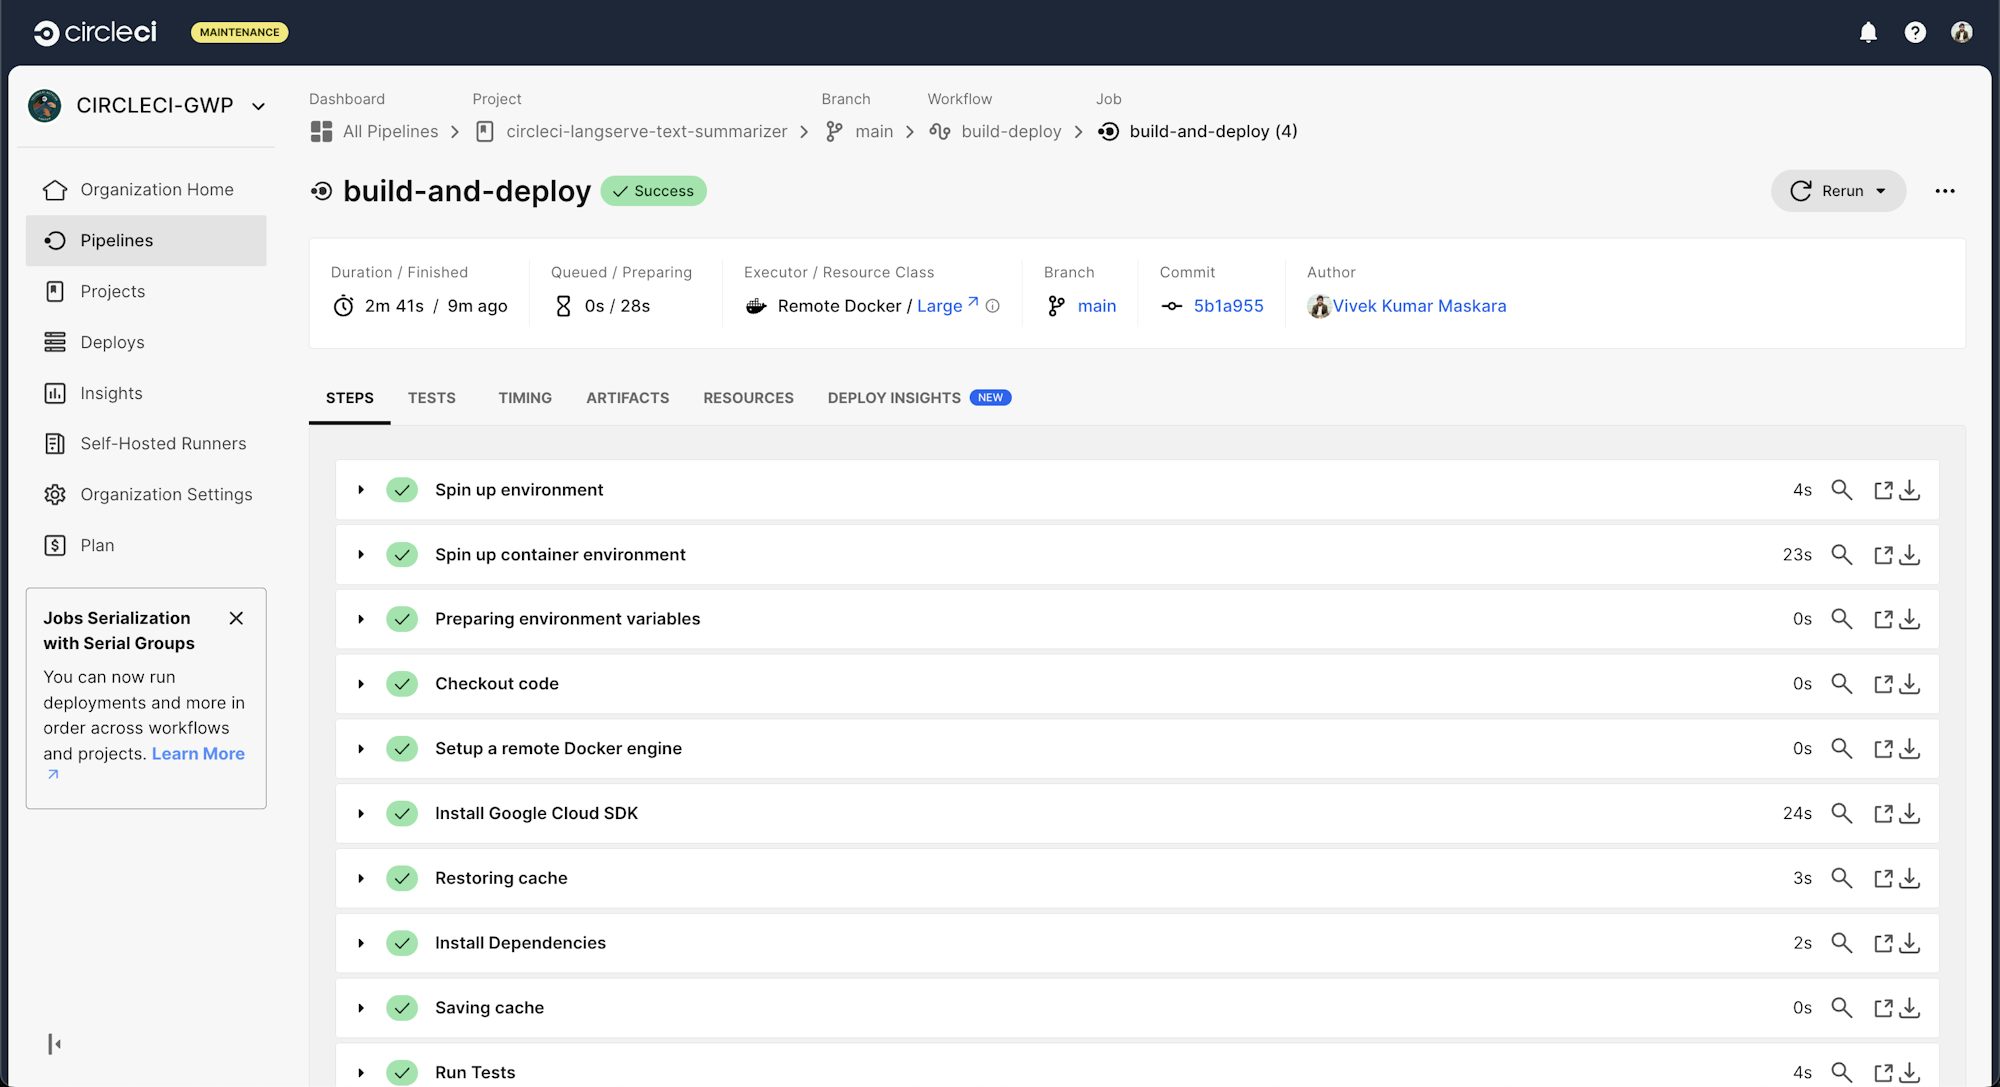
Visit the CircleCI dashboard to monitor the build process.
The pipeline will run tests, build your Docker image, and deploy to Cloud Run. You will see green checkmarks when each step completes successfully.
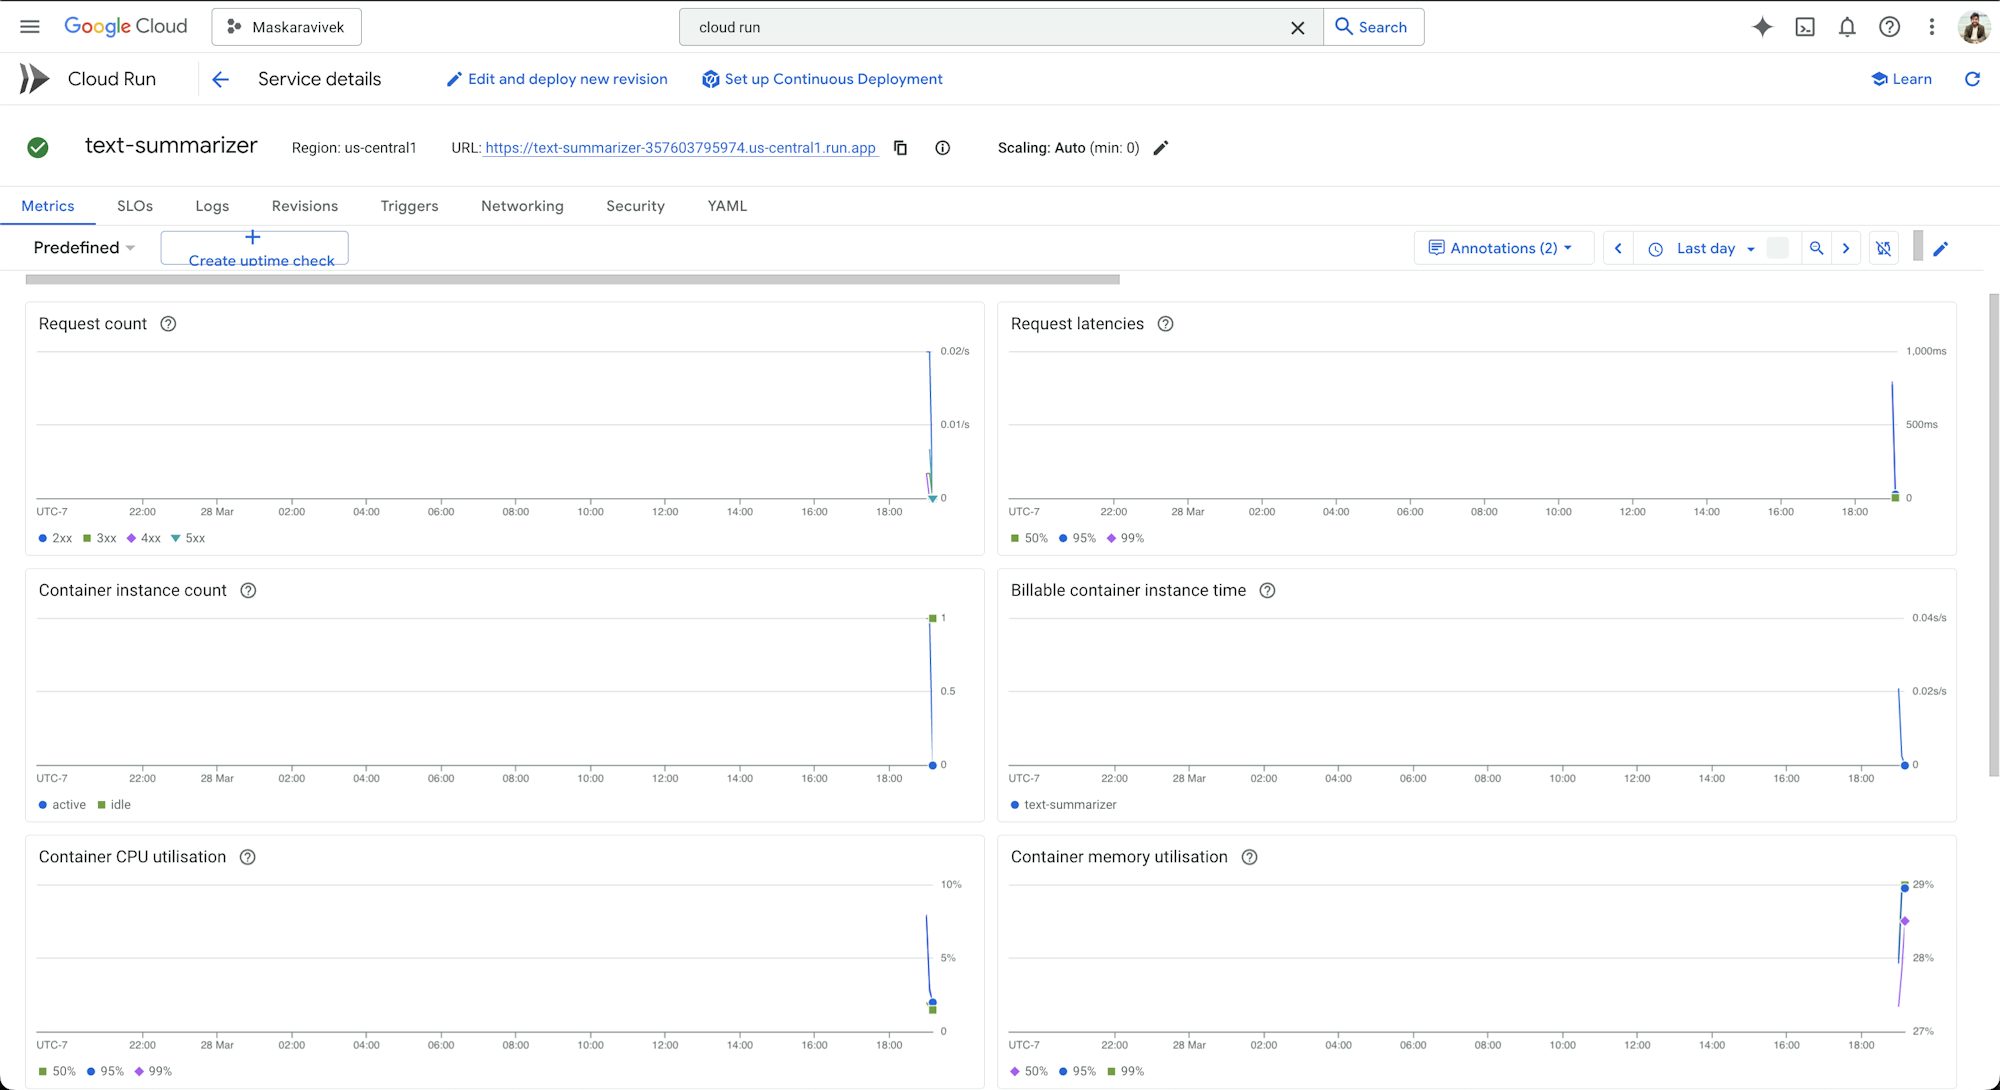
Once deployment completes, you will go to the Google Cloud Console. Go to Cloud Run, select your “text-summarizer” service. Click the URL displayed at the top (for example https://text-summarizer-abc123-uc.a.run.app) to review your app.
Use /docs to access the Swagger UI and /summarize/playground to interactively test the API. You could also use a tool like Postman or curl to send PDF files to the /summarize-pdf/ endpoint.
The deployment process is not only efficient but also fully automated. When you make changes to your app, you simply push your code to GitHub, and CircleCI handles everything else. Your application will be accessible worldwide using its Cloud Run URL. Google provides automatic scaling based on demand.
Monitoring your summarization API with Google Cloud Run
You can access built-in monitoring capabilities without additional configuration. These include:
- Request metrics: Track the number of requests, latency, and error rates for your API endpoints.
- Container metrics: Monitor CPU and memory usage.
- Log analysis: View application logs directly in the Cloud Console. You can troubleshoot issues with PDF processing or the Gemini API.
- Error reporting: Automatically group and notify you about application errors. Useful for catching issues with text extraction or API calls.
To review monitoring data for your summarization API:
- Go to the Google Cloud Console
- Select your Cloud Run service (text-summarizer)
- Click on the “Metrics” tab to view performance data
- Use the “Logs” tab to review application logs
The metrics available include:
- Request latency: PDF processing and AI summarization can be time-intensive operations
- Memory usage: Processing large PDFs may need significant memory
- Error rates: Watch for issues with PDF parsing or Gemini API connectivity
- Request concurrency: Monitor how many simultaneous summarization requests your service handles
Consider setting up alerts for conditions that might show issues:
- Latency spikes above 10 seconds
- Error rates exceeding 5%
- Memory usage consistently above 80%
This built-in monitoring gives you visibility into your application’s performance. You don’t need additional tools or code changes. It is an ideal starting point for ensuring your summarization API runs reliably.
Conclusion
Congratulations! You have created a powerful, automated engine that can summarize text. Your application is not just smart, its features make it ready for production:
- A sleek API layer powered by LangServe that makes your AI accessible
- A containerized setup that runs consistently anywhere
- A deployment pipeline that handles testing and deployment automatically
- Built-in monitoring that keeps you informed about your app’s health
The combination of LangServe, CircleCI, and Google Cloud Run is a ideal for AI deployments.
Now you can:
- Save time: LangServe handles API complexities, while you can focus on other capabilities.
- Minimize errors: CircleCI tests your code before it goes live.
- Handle viral success: Google Cloud Run scales automatically to meet demand.
- Spot issues early: The monitoring tools let you catch and fix problems before they impact your users.
Where to go from here
You can take your summarizer to the next level by:
- Adding authentication to keep your API for authorized users only
- Setting up cost monitoring to track your Gemini API usage
- Fine-tuning the model to better understand your specific content types
Sign up for CircleCI today and experience the joy of watching your app automatically test and deploy itself!
