Configuring notifications for your CI builds with Slack and Twilio

Fullstack Developer and Tech Author

CircleCI notification orbs were built to deliver messages to the appropriate channels when a build is successful or when it fails. This helps everyone involved in a project stay up-to-date with the status of the latest build.
In this tutorial, you will explore and implement notifications sent to a Slack channel and also sent via SMS. To accomplish this task, you will make use of the Slack and Twilio orbs from the CircleCI orb registry. This would be a cumbersome feature to implement from scratch, but with orbs you can set this up with just a few lines of code.
Prerequisites
You need these items to get the most from this tutorial:
- Node.js installed on your computer
- Nest CLI installed on your computer
- GitHub account
- CircleCI account
- Twilio account
- Slack workspace
Creating the Nest.js application
The first step is to build a Nest.js application that returns a simple message. Then, you will write a test to assert that the application returns the correct message. You will push your code to GitHub, which triggers the build on CircleCI. Once the build is successful, a custom message will be sent as an SMS to a preferred phone number and a specified Slack channel. This same process will be repeated in case the build fails.
To begin, run this command:
nest new nest-slack-notifications
Go to the newly created project and run the application:
// change directory
cd nest-slack-notifications

// run the application
npm run start:dev
Go to http://localhost:3000 to review the default homepage.

This process returns a Hello World! message, which will work for the use case in this tutorial.
Running the test locally
By default, a Nest.js application comes with a built-in testing framework (Jest) to provide assert functions. Also, a test script file located at src/app.controller.spec.ts has been provided to confirm that Hello World! was returned from the application. Use this command to run the test:
npm run test
You will see output similar to what is below.
> nest-slack-notifications@0.0.1 test
> jest

 PASS  src/app.controller.spec.ts
  AppController
    root
      ✓ should return "Hello World!" (6 ms)

Test Suites: 1 passed, 1 total
Tests:       1 passed, 1 total
Snapshots:   0 total
Time:        1.183 s
Ran all test suites.
The test passes, which means you can continue with the tutorial.

Adding CircleCI configuration to automate the test
Now you can add the configuration file to set up continuous integration with CircleCI. Create a folder named .circleci at the root of the application and create a new file named config.yml in it. Paste this code into the new file (.circleci/config.yml):
version: 2.1
orbs:
  node: circleci/node@5.0.3
jobs:
  build-test-and-notify:
    executor:
      name: node/default
    steps:
      - checkout
      - run: sudo npm install -g npm@latest
      - run:
          name: Install dependencies
          command: npm install
      - run: npm test
workflows:
  build-and-notify:
    jobs:
      - build-test-and-notify
In this config file, you have specified the Node.js orb version to be used from the CircleCI orbs registry and installed all the dependencies for the project. Then you set up the command to run the test for the application.
Setting up the project on CircleCI
Begin by pushing the project to GitHub.
Great work! You have successfully created the project, installed all of its dependencies, and set up the configuration to automatically run the test once you push new code to GitHub. You now need to connect the project to CircleCI. To do that, log in to CircleCI with your account details and select the organization on GitHub where your project was pushed.
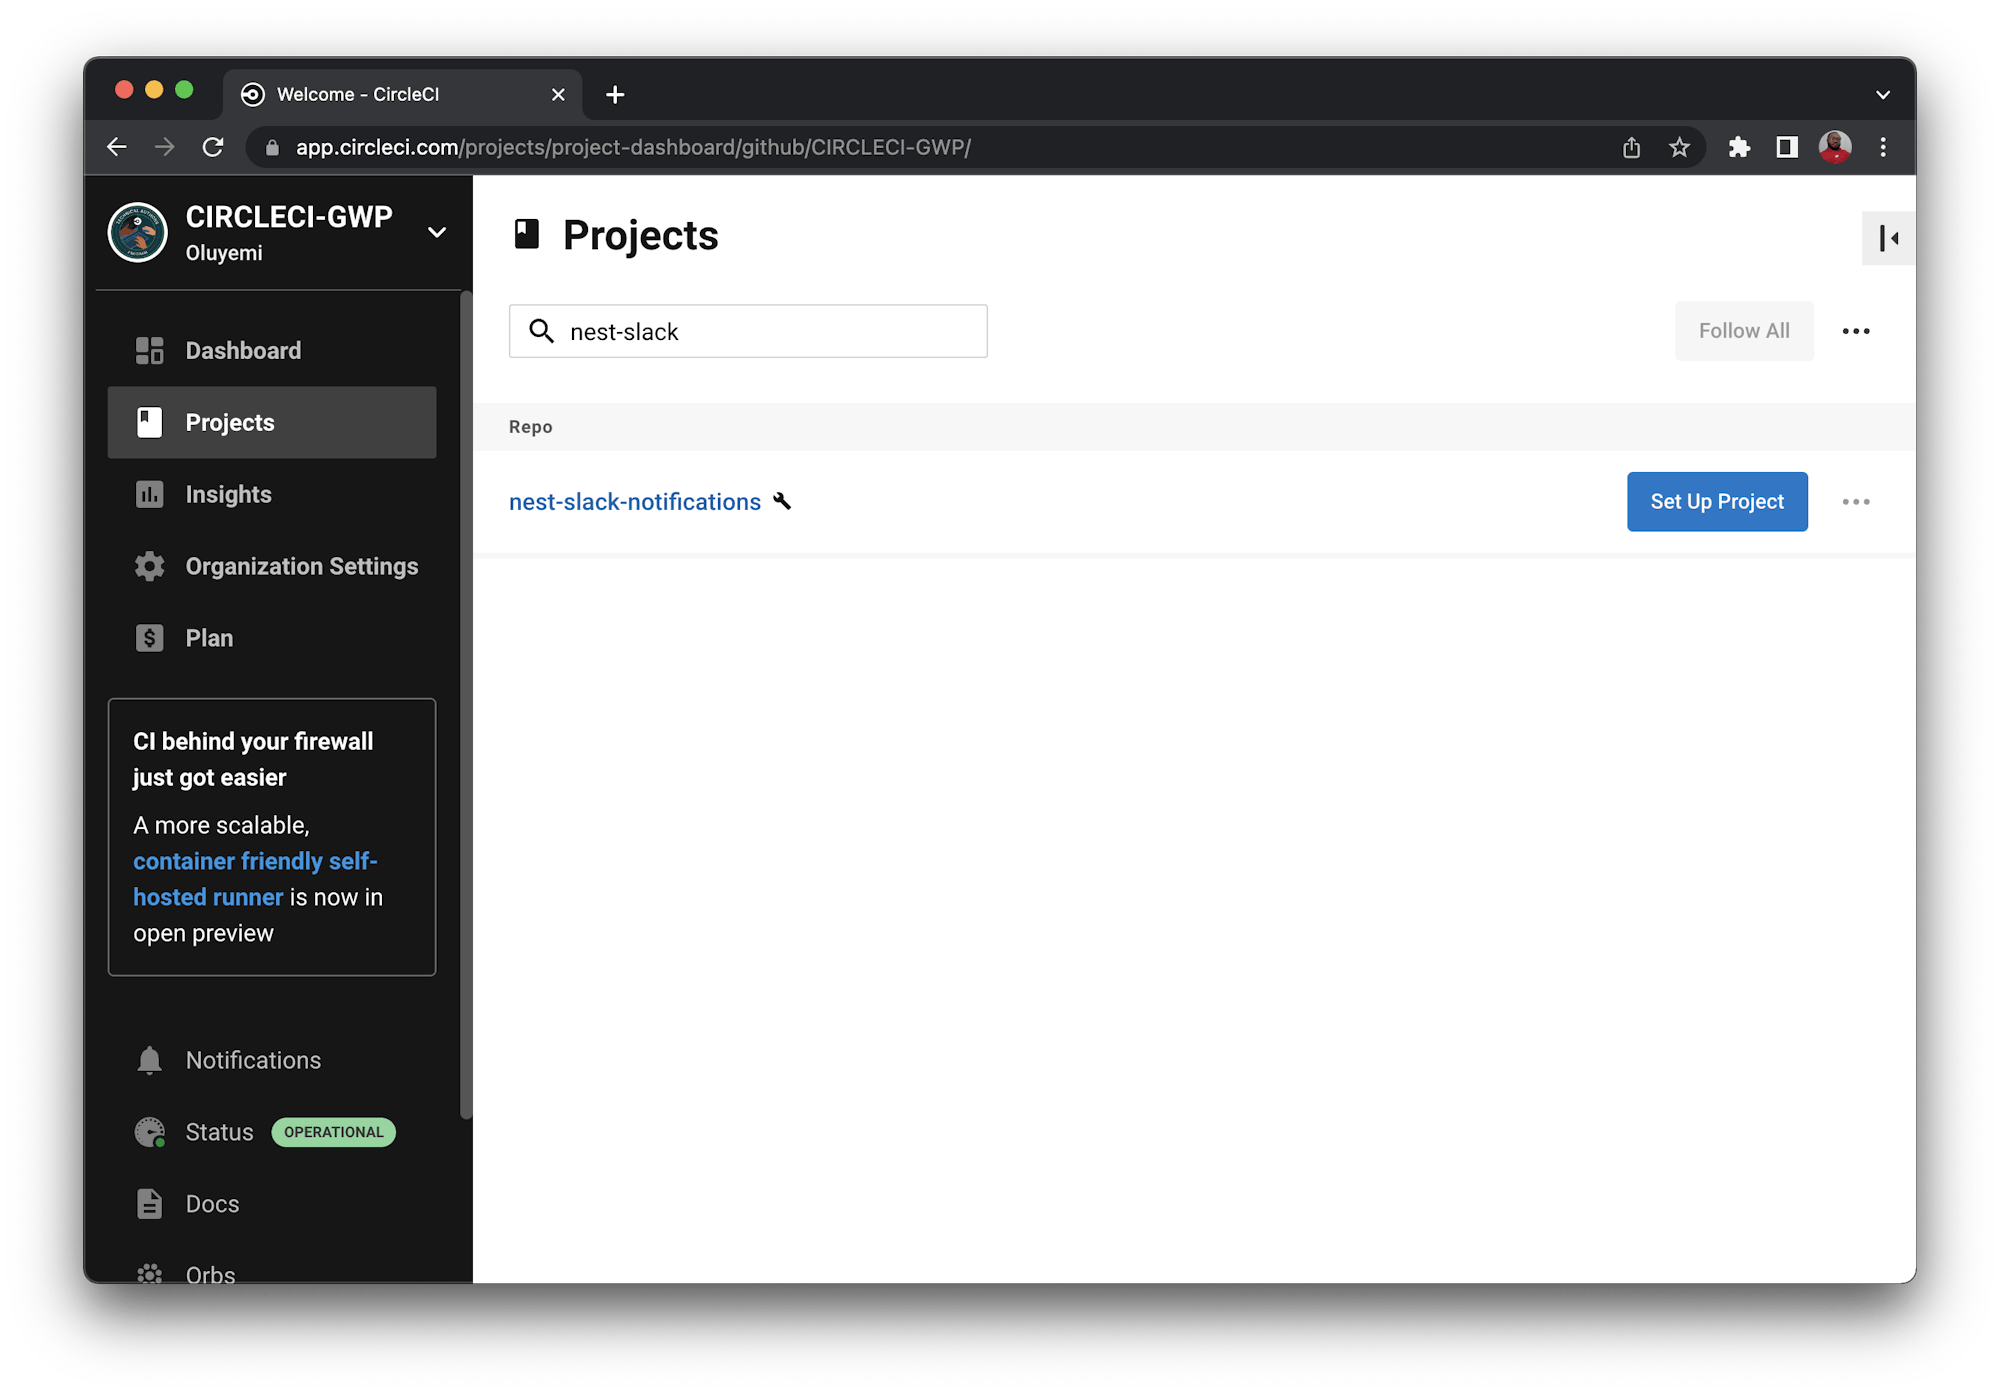
In this case, the name of the project is nest-slack-notifications. Locate it using the name of the project as you have defined it on GitHub and click Set Up Project.

On the Select your config.yml file screen, select the Fastest option. Type main as the branch name. CircleCI will automatically locate the config.yml file. Click Set Up Project to start the workflow.
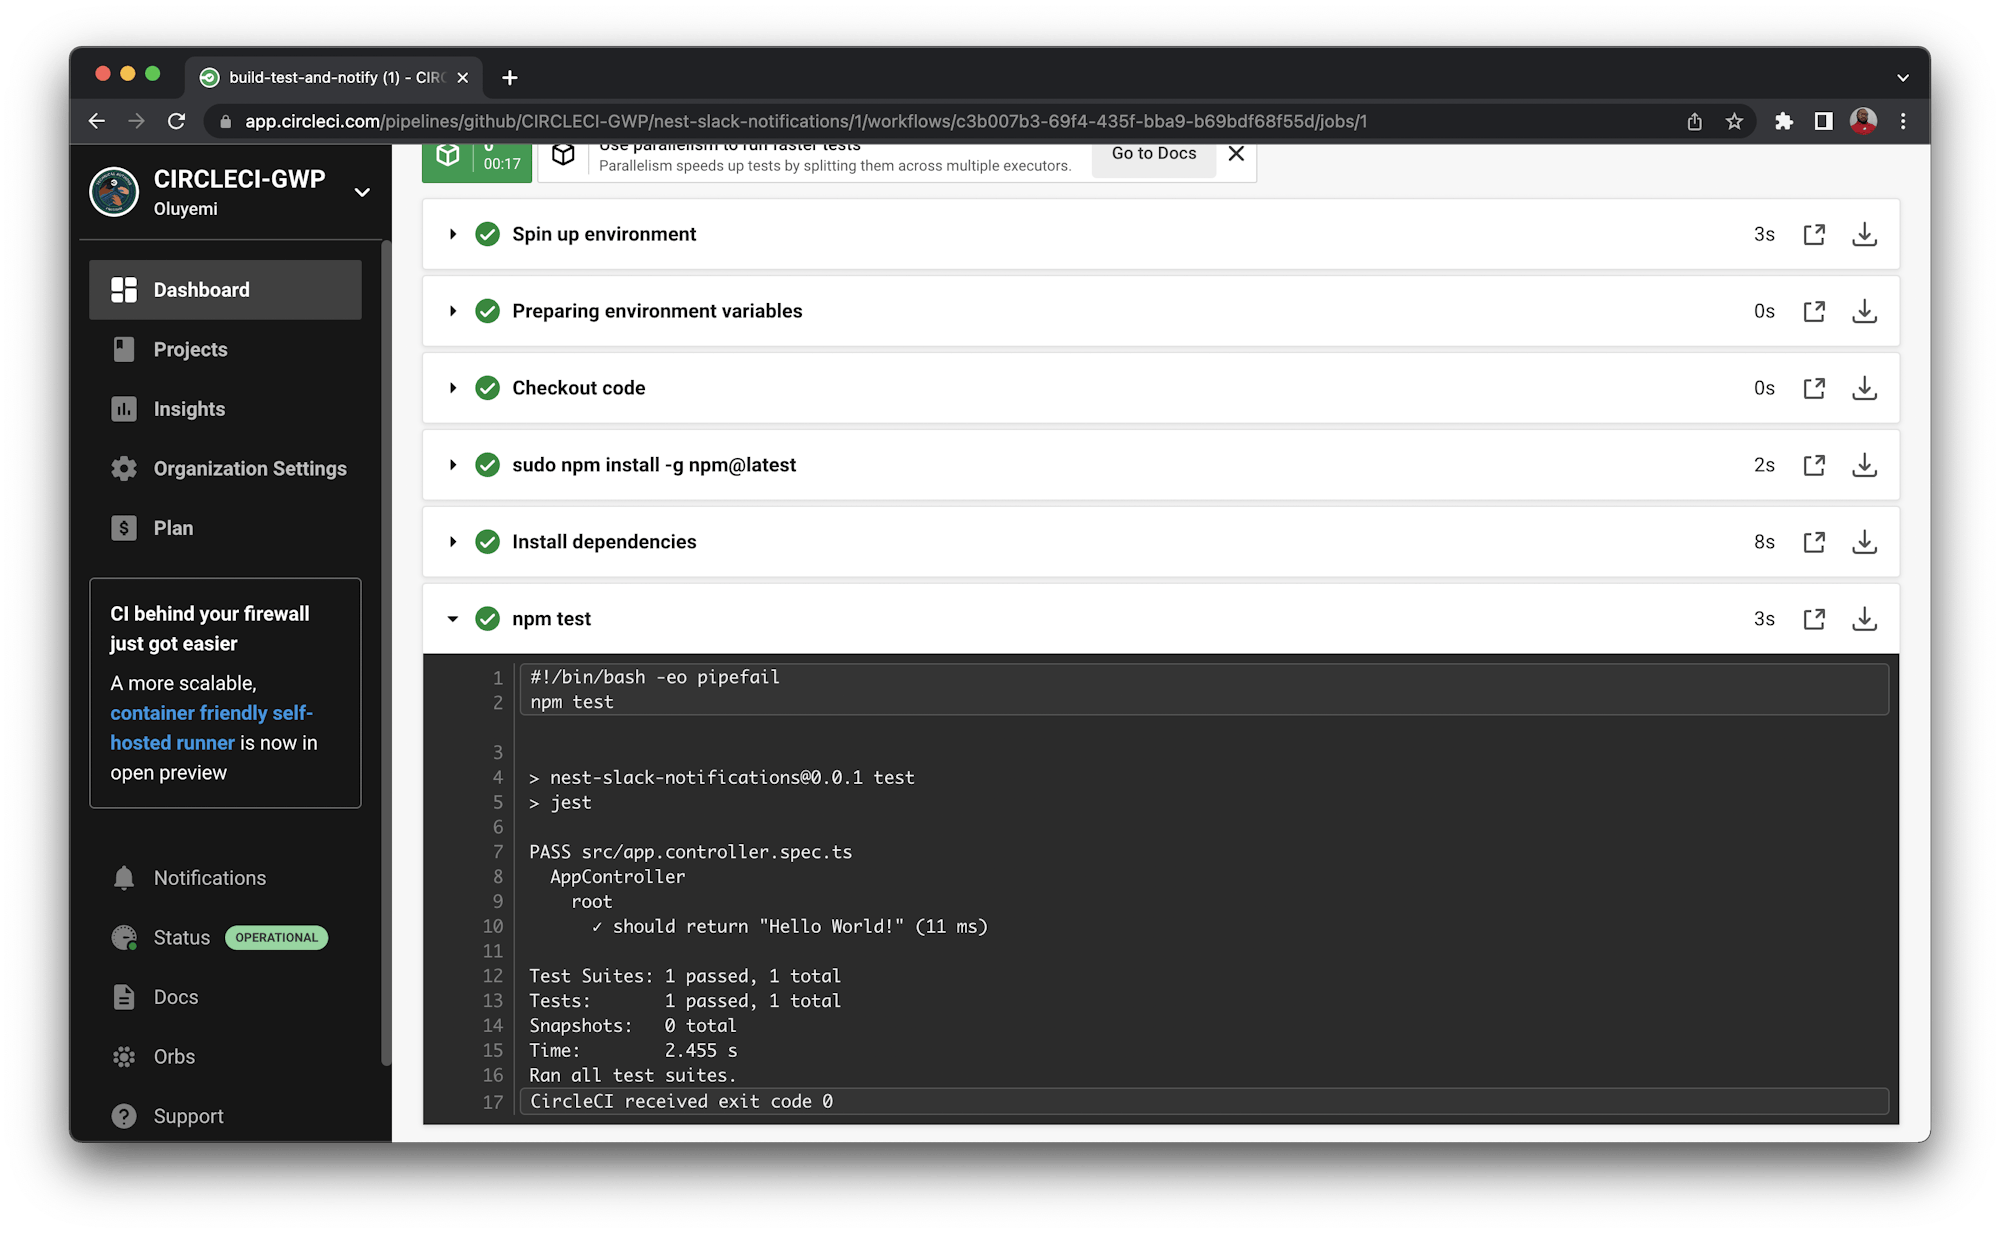
This immediately triggers the pipeline using the configuration in the project. And, you will get a successful build message.

Success! It worked as expected. Now you can start working on notifications that will indicate the status of the build process.
Adding Slack integration
In this section you will integrate Slack into CircleCI so that you can easily set up notifications after a build process.
To carry out this integration, I have created a workspace on Slack named CircleCI-Notify.

Adding the CircleCI app
Once you have a workspace in place, set up your Slack OAuth token for authentication. Sign into your Slack work space using a browser. Next, visit your apps on the Slack API website. Click Create New App from scratch. You will be prompted to add an app name and select the workspace that you have just signed in to. Please note that it is useful if you name your application using CircleCI or CircleCi-<modifier>.

On the next page, you can select features to add to your app. For this tutorial, select the “Permissions” area, where you will add scopes, which will provide the proper permissions.
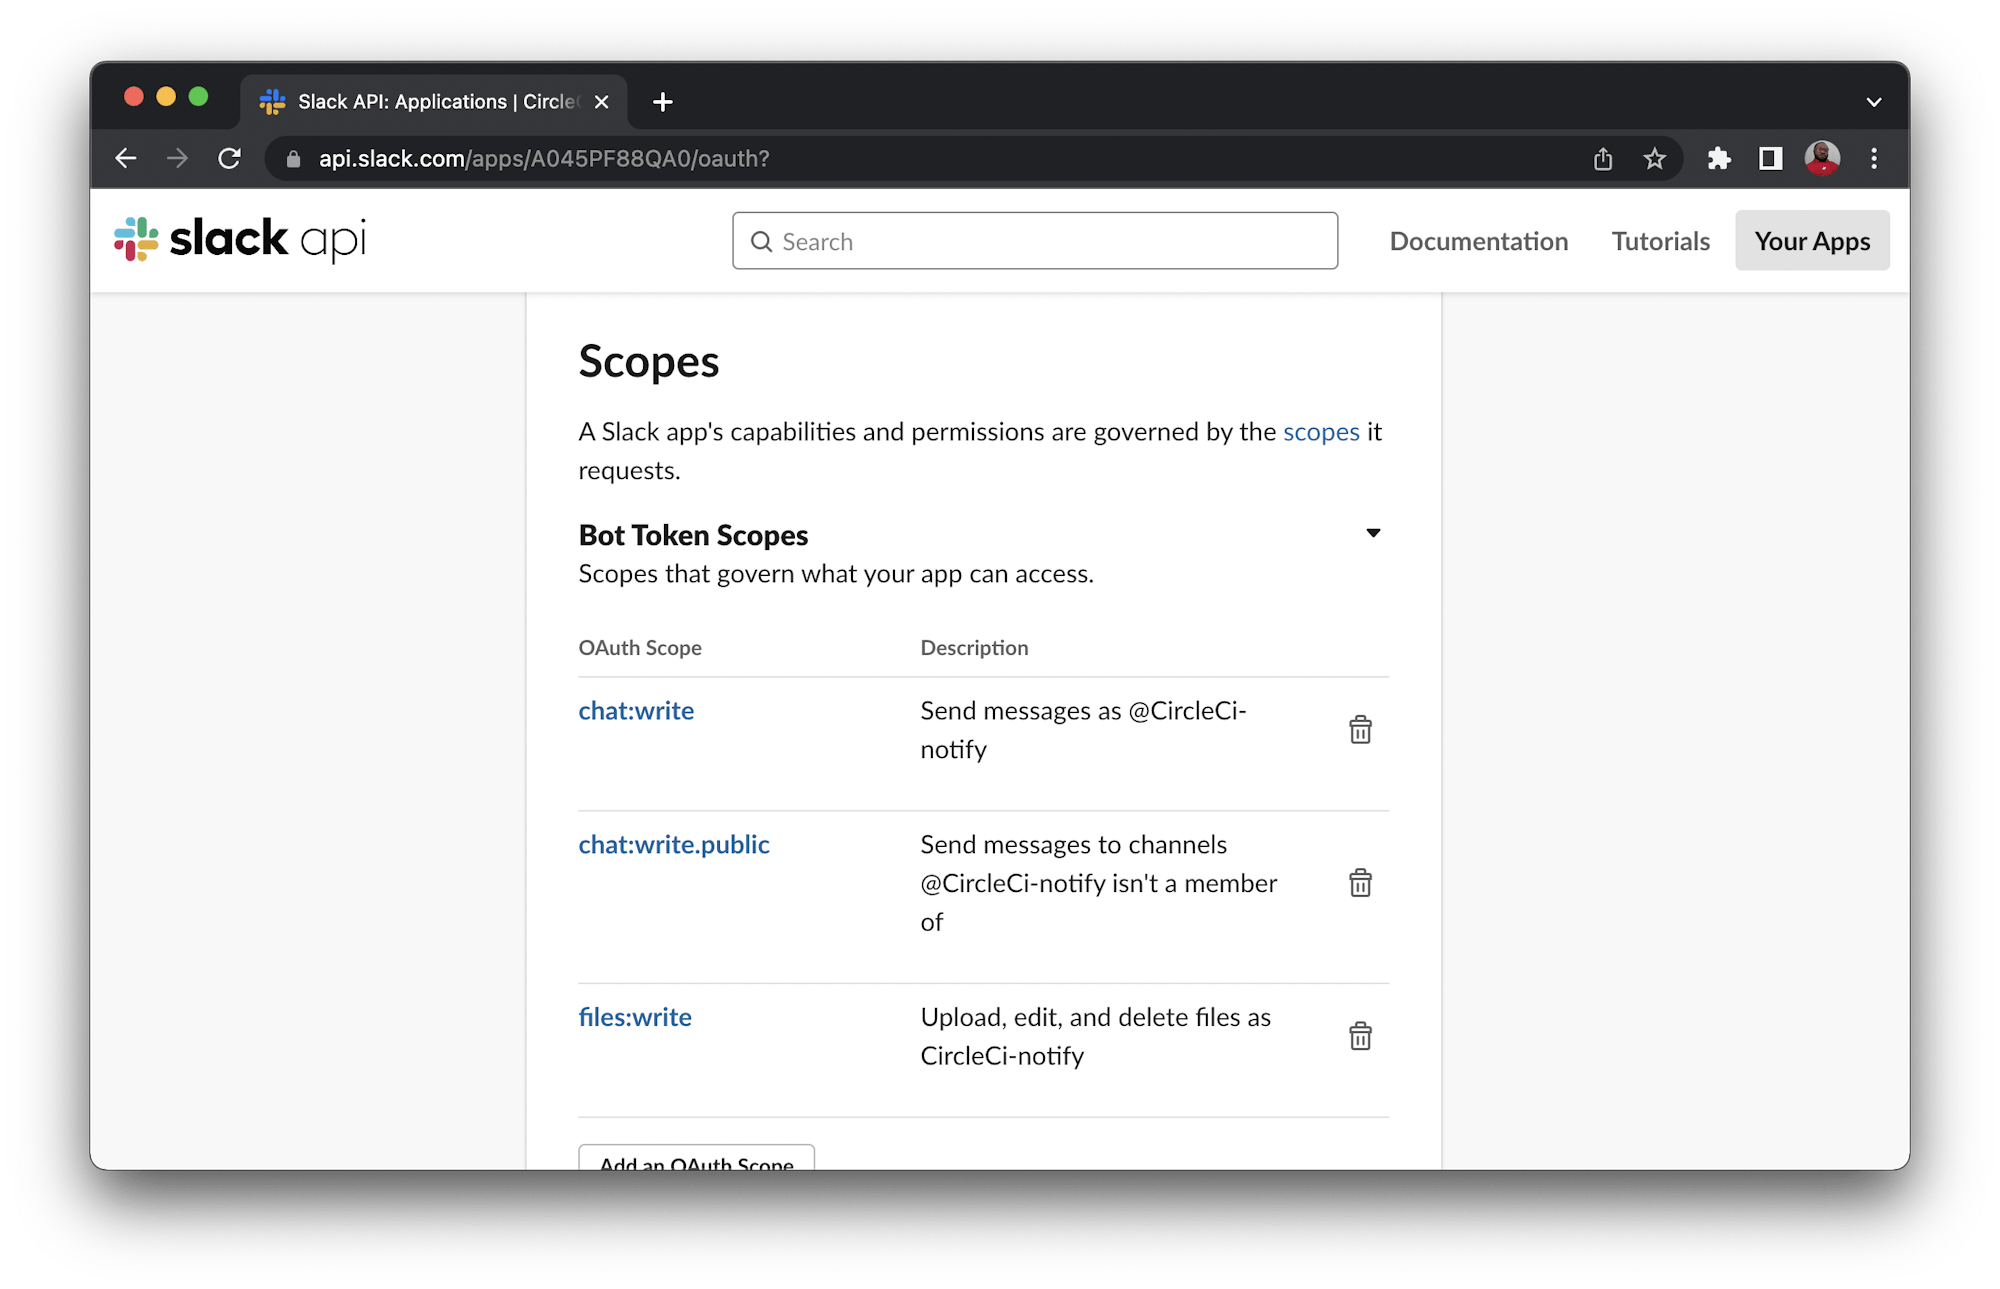
The Slack orb requires only the ability to post chat messages and upload files. You can supply these three using Oauth Scope. Click Add an OAuth Scope to select the scopes.

Next, scroll through OAuth Tokens for Your Workspace and click Install to Workspace.

This generates a token for your workspace. Copy this newly generated token and keep it handy so that you can use it later in the tutorial.

Update the CircleCI configuration
To complete the Slack integration, you need to update the CircleCI configuration file to include the CircleCI orb for Slack. Open .circleci/config.yml and update its content with this:
version: 2.1
orbs:
  node: circleci/node@5.0.3
  slack: circleci/slack@4.10.1
jobs:
  build-test-and-notify:
    executor:
      name: node/default
    steps:
      - checkout
      - run:
          name: Install dependencies
          command: npm install
      - run: npm test
      - slack/notify:
          event: pass
          template: success_tagged_deploy_1
      - slack/notify:
          event: fail
          mentions: "@yemiwebby"
          template: basic_fail_1
workflows:
  build-and-notify:
    jobs:
      - build-test-and-notify
The changes you made in this file, included another orb in the pipeline for the Slack integration. A new command called slack/notify sends a message to the Slack channel once a build fails or is successful.
These are all the updates you need to have custom messages sent to a Slack workspace to track the status of the build on CircleCI. Before updating the repository with the latest code, though, you need to integrate with Twilio for SMS notifications.
Integrating with Twilio for notifications
In this section, you will take notifications for the CircleCI build a step further by integrating it with Twilio. As mentioned earlier, the CircleCI orbs registry already has a Twilio orb for sending custom SMS notifications for a CircleCI job.
To integrate with Twilio, you will need:
TWILIO_FROMis a Twilio phone number that you own, formatted with a+and country code, e.g. +16175551212 (E.164 format)TWILIO_TOis a parameter that determines the destination phone number for your SMS message and uses the same format asTWILIO_FROMTWILIO_ACCOUNT_SIDis your TwilioAccount SIDwhich you can find on your Twilio account dashboardTWILIO_AUTH_TOKENis your TwilioAUTH TOKENbodyis a custom message that will be displayed instead of the default notification messages
Adding environment variables on CircleCI
Gather all the credentials mentioned in the previous section from your Twilio account dashboard. Go back to the Project Settings page on CircleCI. Click Environment Variables on the side menu. Then click Add Variable and input your Twilio credentials.

Go back to the Project Settings page when you are done.
Update the CircleCI configuration file
Now you need to update the CircleCI configuration file with the CircleCI Twilio orb details and the required commands. Open the .circleci/config.yml file and update its content with this:
version: 2.1
orbs:
  node: circleci/node@5.0.3
  slack: circleci/slack@4.10.1
  twilio: circleci/twilio@1.0.0
jobs:
  build-test-and-notify:
    executor:
      name: node/default
    steps:
      - checkout
      - run:
          name: Install dependencies
          command: npm install
      - run: npm test
      - slack/notify:
          event: pass
          template: success_tagged_deploy_1
      - slack/notify:
          event: fail
          mentions: "@yemiwebby"
          template: basic_fail_1
      - twilio/sendsms:
          body: Successful message from Twilio
      - twilio/alert:
          body: Send error message
workflows:
  build-and-notify:
    jobs:
      - build-test-and-notify
You made changes to this file by including the Twilio orb and these commands:
twilio/sendsmsis a command used to send SMS once the build is successfultwilio/alertis a command triggered to send SMS only if an error occurs during the build
Note: Enable your region in your Twilio account’s Messaging Geo-permissions settings to receive SMS as documented here. Also, make sure that your phone number is verified, especially if you are using a trial account.
Testing for a successful build
Commit all the code changes and push them to GitHub. This will automatically trigger the build on the CircleCI console. Once the process is completed and built successfully, you will receive the custom messages both in the channel you chose for your Slack workspace and by SMS.
Testing for a failed build
To make the build on CircleCI fail so that you can see it work, open src/app.service.ts file and update the return message:
import { Injectable } from "@nestjs/common";

@Injectable()
export class AppService {
  getHello(): string {
    return "Hello World";
  }
}
This changes the message so that the test will fail. Now, add all the new changes, commit them, and push them to GitHub. This will again trigger the build, but it will fail this time around. You will receive a message, as expected, both on Slack and Twilio.
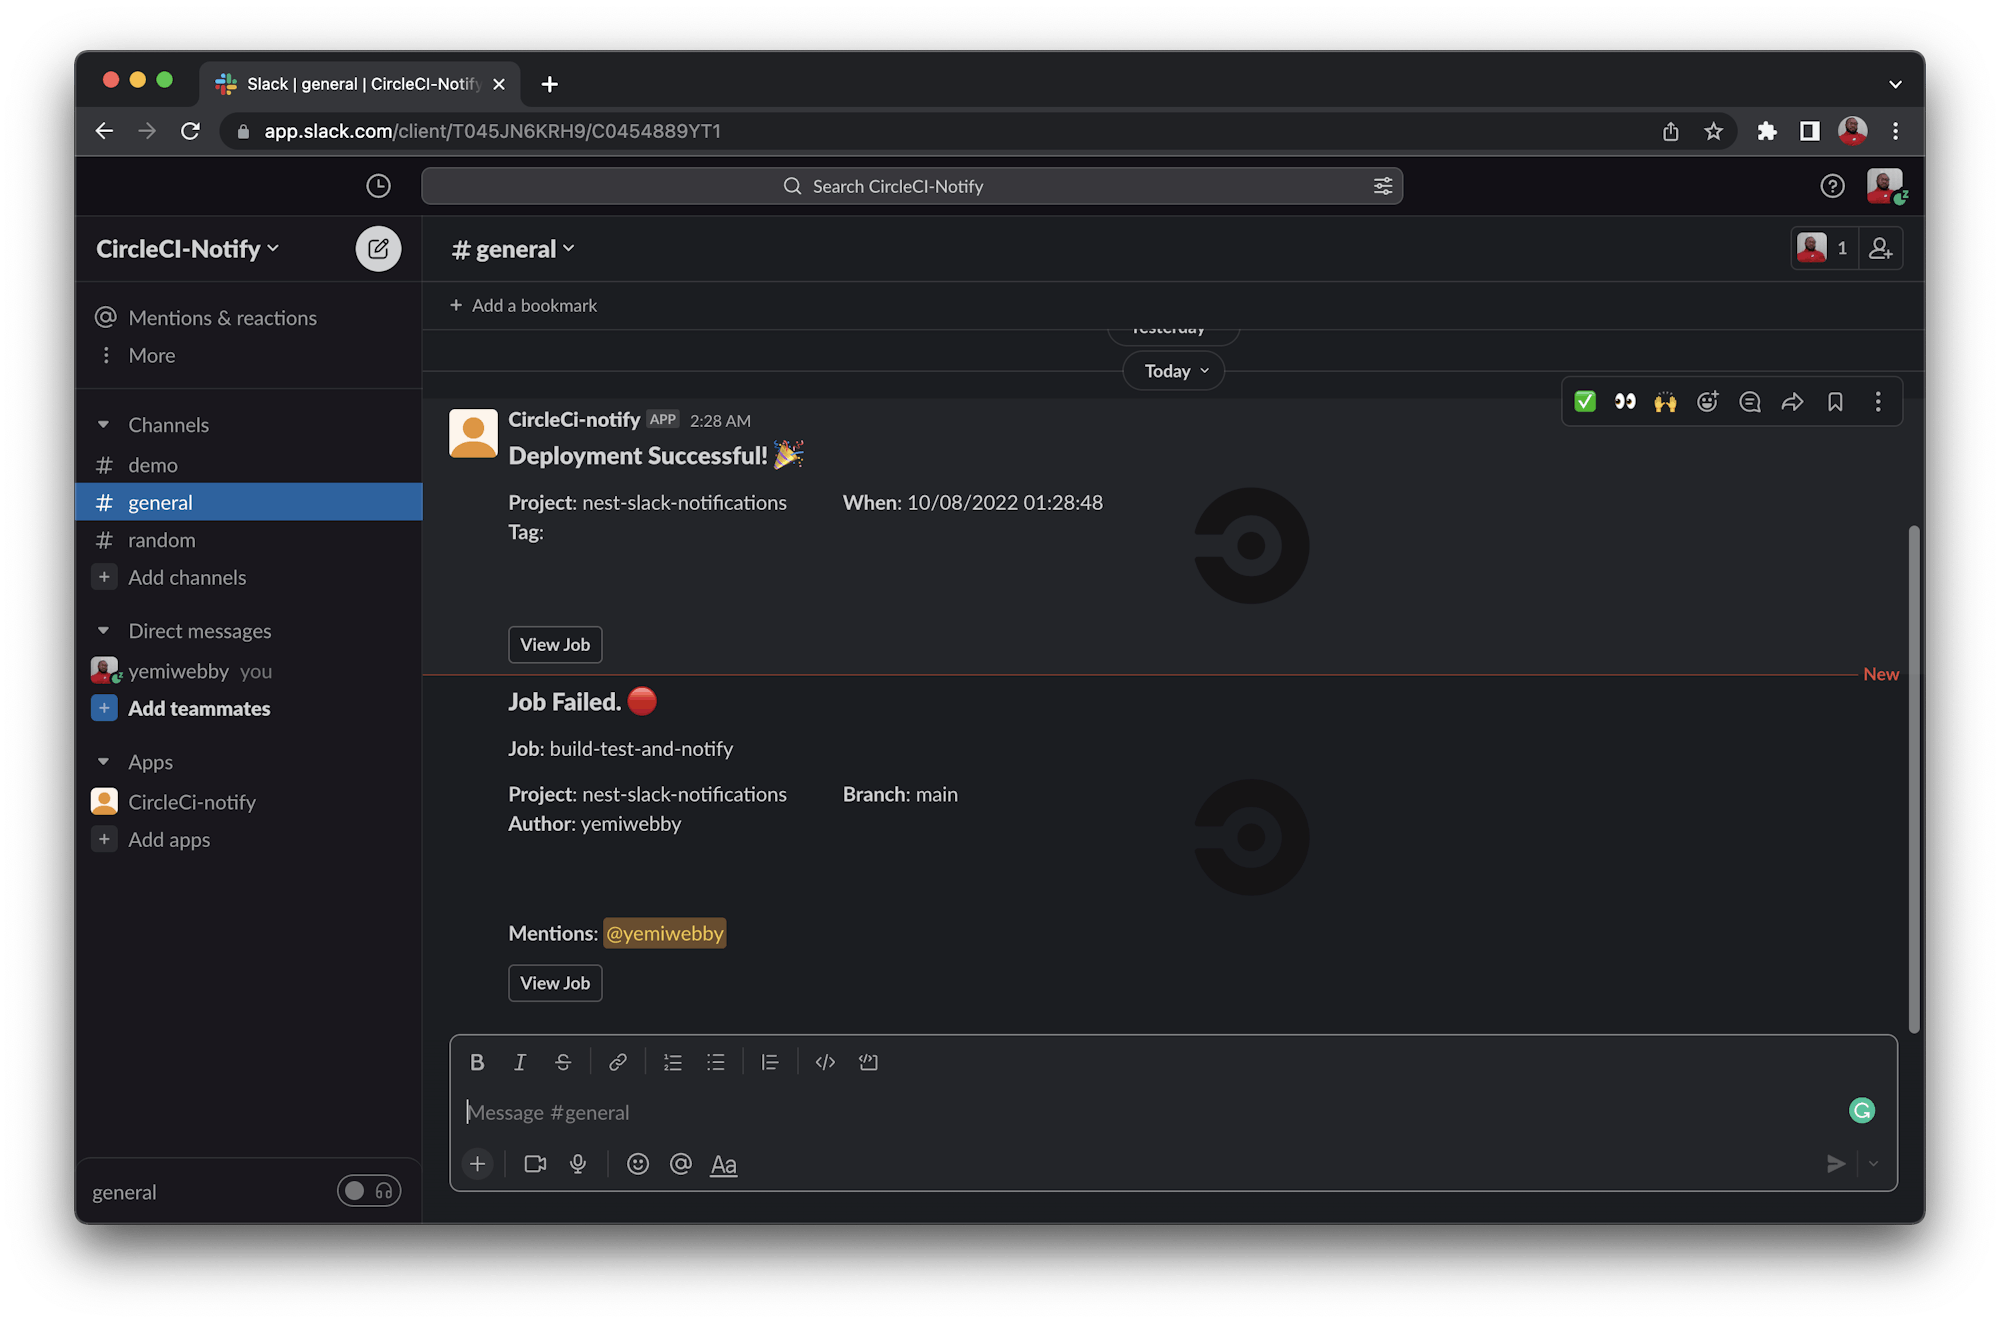
Here are the messages I set up to appear in the #general channel of the CircleCI-Notify workspace.

And here is the SMS from Twilio.

Conclusion
The best thing about what you learned in this tutorial is that implementing these notification features is so simple and seamless. These notifications can be easily integrated into any of your existing projects.
Also, this process is not limited to Node.js applications. You can easily transfer and use the knowledge gained here to other projects regardless of the framework or programming language you are using. Check the CircleCI orbs registry to learn more about other available packages.
The complete source code can be found here on GitHub.


