
Containers and microservices have revolutionized the way applications are deployed on the cloud. Since its launch in 2014, Kubernetes has become a de-facto standard as a container orchestration tool.
In this tutorial, you will learn how to deploy a Node.js application on Azure Kubernetes Service (AKS) with continuous integration and continuous deployment (CI/CD). You will create a CI/CD pipeline using CircleCI orbs, which are reusable packages of YAML configuration that condense repeated pieces of config into a single line of code. Your pipeline will be automatically triggered after you push the code in the GitHub repository.
Using this automation, you will always have the latest version of the application running on the Kubernetes cluster.
Prerequisites
To follow along with this tutorial, you will need a few things first:
- Docker Hub account
- GitHub account
- Microsoft Azure account
- CircleCI account
- Kubectl installed on your system
- Azure CLI installed on your system
- Node JS installed on your system
- Docker Engine installed on your system
After you have all the pre-requisites complete you can go to the next section.
Cloning the Node.js application
In this tutorial, your main focus is on deploying the application on Kubernetes. Therefore, you can directly clone the Node.js application to your GitHub and continue with the rest of the process.
To clone the project, run:
git clone https://github.com/CIRCLECI-GWP/deploy-node-kubernetes.git
This repository contains the Node.js application code along with all YAML files that you will create in this tutorial.
The Node.js application lives in the app.js file:
const express = require("express");
const path = require("path");
const morgan = require("morgan");
const bodyParser = require("body-parser");

/* eslint-disable no-console */

const port = process.env.PORT || 1337;
const app = express();

app.use(morgan("dev"));
app.use(bodyParser.json());
app.use(bodyParser.urlencoded({ extended: "true" }));
app.use(bodyParser.json({ type: "application/vnd.api+json" }));

app.use(express.static(path.join(__dirname, "./")));

app.get("*", (req, res) => {
  res.sendFile(path.join(__dirname, "./index.html"));
});

app.listen(port, (err) => {
  if (err) {
    console.log(err);
  } else {
    console.log(`App at: http://localhost:${port}`);
  }
});
module.exports = app;
The key takeaway from this code is the port number on which the application will be running, which is 1337.
You can run the application locally by first installing the dependencies. In the project’s root, type:
npm install
Then run the application with the command:
node app.js
The application should now be up and running at the address http://localhost:1337.
Now create a new repository for this project on your GitHub account and push the project to the repository you just created.
Containerizing the Node.js application
To deploy the application to Kubernetes, you must first containerize it. Using Docker as the container runtime tool, create a Dockerfile. A Dockerfile is a text document that contains all the commands a user could call on the command line to assemble an image.
Create a new file in the root directory of the project and name it Dockerfile. Copy the following content in the file:
# Set the base image to use for subsequent instructions
FROM node:alpine

# Set the working directory for any subsequent ADD, COPY, CMD, ENTRYPOINT,
# or RUN instructions that follow it in the Dockerfile
WORKDIR /usr/src/app

# Copy files or folders from source to the dest path in the image's filesystem.
COPY package.json /usr/src/app/
COPY . /usr/src/app/

# Execute any commands on top of the current image as a new layer and commit the results.
RUN npm install --production

# Define the network ports that this container will listen to at runtime.
EXPOSE 1337

# Configure the container to be run as an executable.
ENTRYPOINT ["npm", "start"]
If you have Docker installed, you can build and run the container locally for testing.
Later in this tutorial, you will learn how to automate this process with CircleCI orbs.
To build and tag the container, type:
docker build -t nodejs-aks-app:latest .
Confirm that the image was successfully created by running this command from your terminal:
docker images
Then run the container with the command:
docker run -it -p 1337:1337 nodejs-aks-app:latest
The application should now be up and running at the address http://127.0.0.1:1337.
Commit and push the changes to your GitHub repository.
Configuring Kubernetes manifests for deployment
To deploy containers on Kubernetes, you need to configure Kubernetes to incorporate all the settings required to run your application. Kubernetes uses YAML for configuration.
Create a directory named manifests in the root directory of the project.
Then, create the following files within the newly created folder:
namespace.yamldeployment.yamlservice.yamlkustomization.yaml
In Kubernetes, namespaces provides a mechanism for isolating groups of resources within a single cluster.
Contents of the namespace.yaml file are:
apiVersion: v1
kind: Namespace
metadata:
  name: nodejs
  labels:
    name: nodejs
This file creates a namespace named nodejs inside the Kubernetes cluster. All the resources would be created in this namespace.
Kubernetes Deployments manage stateless services running on your cluster. Their purpose is to keep a set of identical pods running and upgrade them in a controlled way – performing a rolling update by default. Contents of the deployment.yaml are as follows:
apiVersion: apps/v1
kind: Deployment
metadata:
  name: nodejs
  namespace: nodejs
  labels:
    app: nodejs
spec:
  replicas: 3
  selector:
    matchLabels:
      app: nodejs
  template:
    metadata:
      labels:
        app: nodejs
    spec:
      nodeSelector:
        "beta.kubernetes.io/os": linux
      containers:
        - name: nodejs-aks-app
          image: nodejs-aks-app
          ports:
            - name: http
              containerPort: 1337
Here are the key takeaways from this code :
containerPortis the port on which the application will be running.- The container
imageis the Docker image that will be pulled and deployed in the mentioned namespace on the Kubernetes cluster.
Kubernetes Service is an abstraction that defines a logical set of pods and a policy by which to access them. You need a Kubernetes Service of the type LoadBalancer to make the deployment accessible to the outside world. Contents of the service.yaml:
apiVersion: v1
kind: Service
metadata:
  name: nodejs
  namespace: nodejs
  labels:
    app: nodejs
spec:
  type: LoadBalancer
  ports:
    - port: 80
      targetPort: 1337
  selector:
    app: nodejs
Here are the key takeaways from this code:
targetPortis the container port.portis where the application will be running.typeis the type of service (LoadBalancerin this case).
To deploy the latest version of the application on the Kubernetes cluster, resources must be customized to maintain the updated information. This is managed by Kustomize, a tool for customizing Kubernetes configurations. Contents of the kustomization.yaml:
apiVersion: kustomize.config.k8s.io/v1beta1
kind: Kustomization
resources:
  - deployment.yaml
  - service.yaml
  - namespace.yaml
namespace: nodejs
images:
  - name: nodejs-aks-app
    newName: nodejs-aks-app
    newTag: v1
The key takeaway here is that newName and newTag will be automatically updated with the latest Docker image information during the continuous integration process.
Commit and push these files to the GitHub repository you cloned earlier.
Launching the Azure Kubernetes Service (AKS) cluster
Now you are ready to deploy the application on the AKS cluster. To create the AKS cluster, you need a Microsoft Azure account and Azure CLI installed on your computer. The CLI should be connected to your Azure account. Do that by issuing this command from your terminal.
az login
This opens a new window in your browser. Provide your email address and password to complete the authentication process. In your terminal, once the authentication process is completed, the subscription details will be printed out. Make a special note of the id key as it will be used when creating a service principal.
Azure service principal is an identity created for use with applications, hosted services, and automated tools. Read more about it here.
Next, create a new service principal using the following command.
az ad sp create-for-rbac --name <service_principal_name> --scopes /subscriptions/<subscription_id> --role owner
In the command, service_principal_name can be any name you choose, and subscription_id is the value of the id key in the terminal output of the successful login. On successful completion, the service principal information will be printed on the terminal. The information displayed includes the appId and password which will be used when creating an AKS cluster.
Create a Resource Group using this command:
az group create --name NodeRG --location eastus
Launch a two-node cluster with this command:
az aks create --resource-group NodeRG --name NodeCluster \
   --node-count 2 --enable-addons http_application_routing \
   --generate-ssh-keys --service-principal <SERVICE_PRINCIPAL_ID> \
   --client-secret <SERVICE_PRINCIPAL_PASSWORD>
Replace the SERVICE_PRINCIPAL_ID and SERVICE_PRINCIPAL_PASSWORD placeholders with your information.
Note: If you generated any SSH keys in your system previously, you need to add an optional parameter --generate-ssh-keys to the above command. This will auto-generate SSH public and private key files if they are missing. The keys will be stored in the ~/.ssh directory.
The AKS cluster will take 10-15 minutes to launch.
Creating the CI/CD pipeline
The objective of this tutorial is to show how you can deploy applications on Kubernetes through a CI/CD pipeline. The pipeline should trigger the process of building the container, pushing it to Docker Hub and deploying it on the cluster.
To create the CI/CD pipeline, you will use CircleCI integrated with your GitHub account. The CircleCI configuration file (config.yml) lives in the .circleci directory in the project’s root folder. The path to the configuration is .circleci/config.yml.
Here are the contents of config.yml:
version: 2.1

orbs:
  docker: circleci/docker@2.4.0
  azure-aks: circleci/azure-aks@0.3.0
  kubernetes: circleci/kubernetes@1.3.1

jobs:
  aks-deploy:
    docker:
      - image: cimg/base:current
    parameters:
      cluster-name:
        description: |
          Name of the AKS cluster.
        type: string
      resource-group:
        description: |
          Resource group that the cluster is in
        type: string
    steps:
      - checkout
      - run:
          name: Pull Updated code from repo
          command: git pull origin $CIRCLE_BRANCH
      - azure-aks/update-kubeconfig-with-credentials:
          cluster-name: << parameters.cluster-name >>
          install-kubectl: true
          perform-login: true
          resource-group: << parameters.resource-group >>
      - kubernetes/create-or-update-resource:
          resource-file-path: manifests/$APP_NAME.yaml
          resource-name: kustomization/$APP_NAME

  bump-docker-tag-kustomize:
    docker:
      - image: cimg/base:current
    steps:
      - run:
          name: Install kustomize
          command: |
            URL=https://github.com/kubernetes-sigs/kustomize/releases/download/kustomize/v4.5.2/kustomize_v4.5.2_linux_amd64.tar.gz
            curl -L $URL | tar zx
            [ -w /usr/local/bin ] && SUDO="" || SUDO=sudo
            $SUDO chmod +x ./kustomize
            $SUDO mv ./kustomize /usr/local/bin
      - checkout
      - run:
          name: Bump Docker Tag
          command: |
            cd manifests
            kustomize edit set image $APP_NAME=$DOCKER_LOGIN/$APP_NAME:$CIRCLE_SHA1
            kustomize build . > $APP_NAME.yaml
      - add_ssh_keys:
          fingerprints:
            - "$SSH_FINGERPRINT"
      - run:
          name: Commit & Push to GitHub
          command: |
            git config user.email "$GITHUB_EMAIL"
            git config user.name "CircleCI User"
            git checkout $CIRCLE_BRANCH
            git add manifests/$APP_NAME.yaml
            git add manifests/kustomization.yaml
            git commit -am "Bumps docker tag [skip ci]"
            git push origin $CIRCLE_BRANCH

workflows:
  Deploy-App-on-AKS:
    jobs:
      - docker/publish:
          image: $DOCKER_LOGIN/$APP_NAME
          tag: $CIRCLE_SHA1,latest
      - bump-docker-tag-kustomize:
          requires:
            - docker/publish
      - aks-deploy:
          cluster-name: $CLUSTER_NAME
          resource-group: $RESOURCE_GROUP
          requires:
            - bump-docker-tag-kustomize
The CI workflow consists of three jobs:
docker/publishbuilds and pushes the container to Docker Hub.bump-docker-tag-kustomizeupdates the Docker image tag and generates a consolidated Kubernetes configuration file.aks-deployapplies the configuration file on the AKS cluster.
This workflow extensively uses CircleCI orbs, which are open-source, shareable packages of parameterizable reusable configuration elements, including jobs, commands, and executors. The orbs have been used either directly or to create custom jobs.
Commit and push the changes to your GitHub repository.
Setting up the project on CircleCI
The next step to deploying your application to AKS is connecting the application in your GitHub repository to CircleCI.
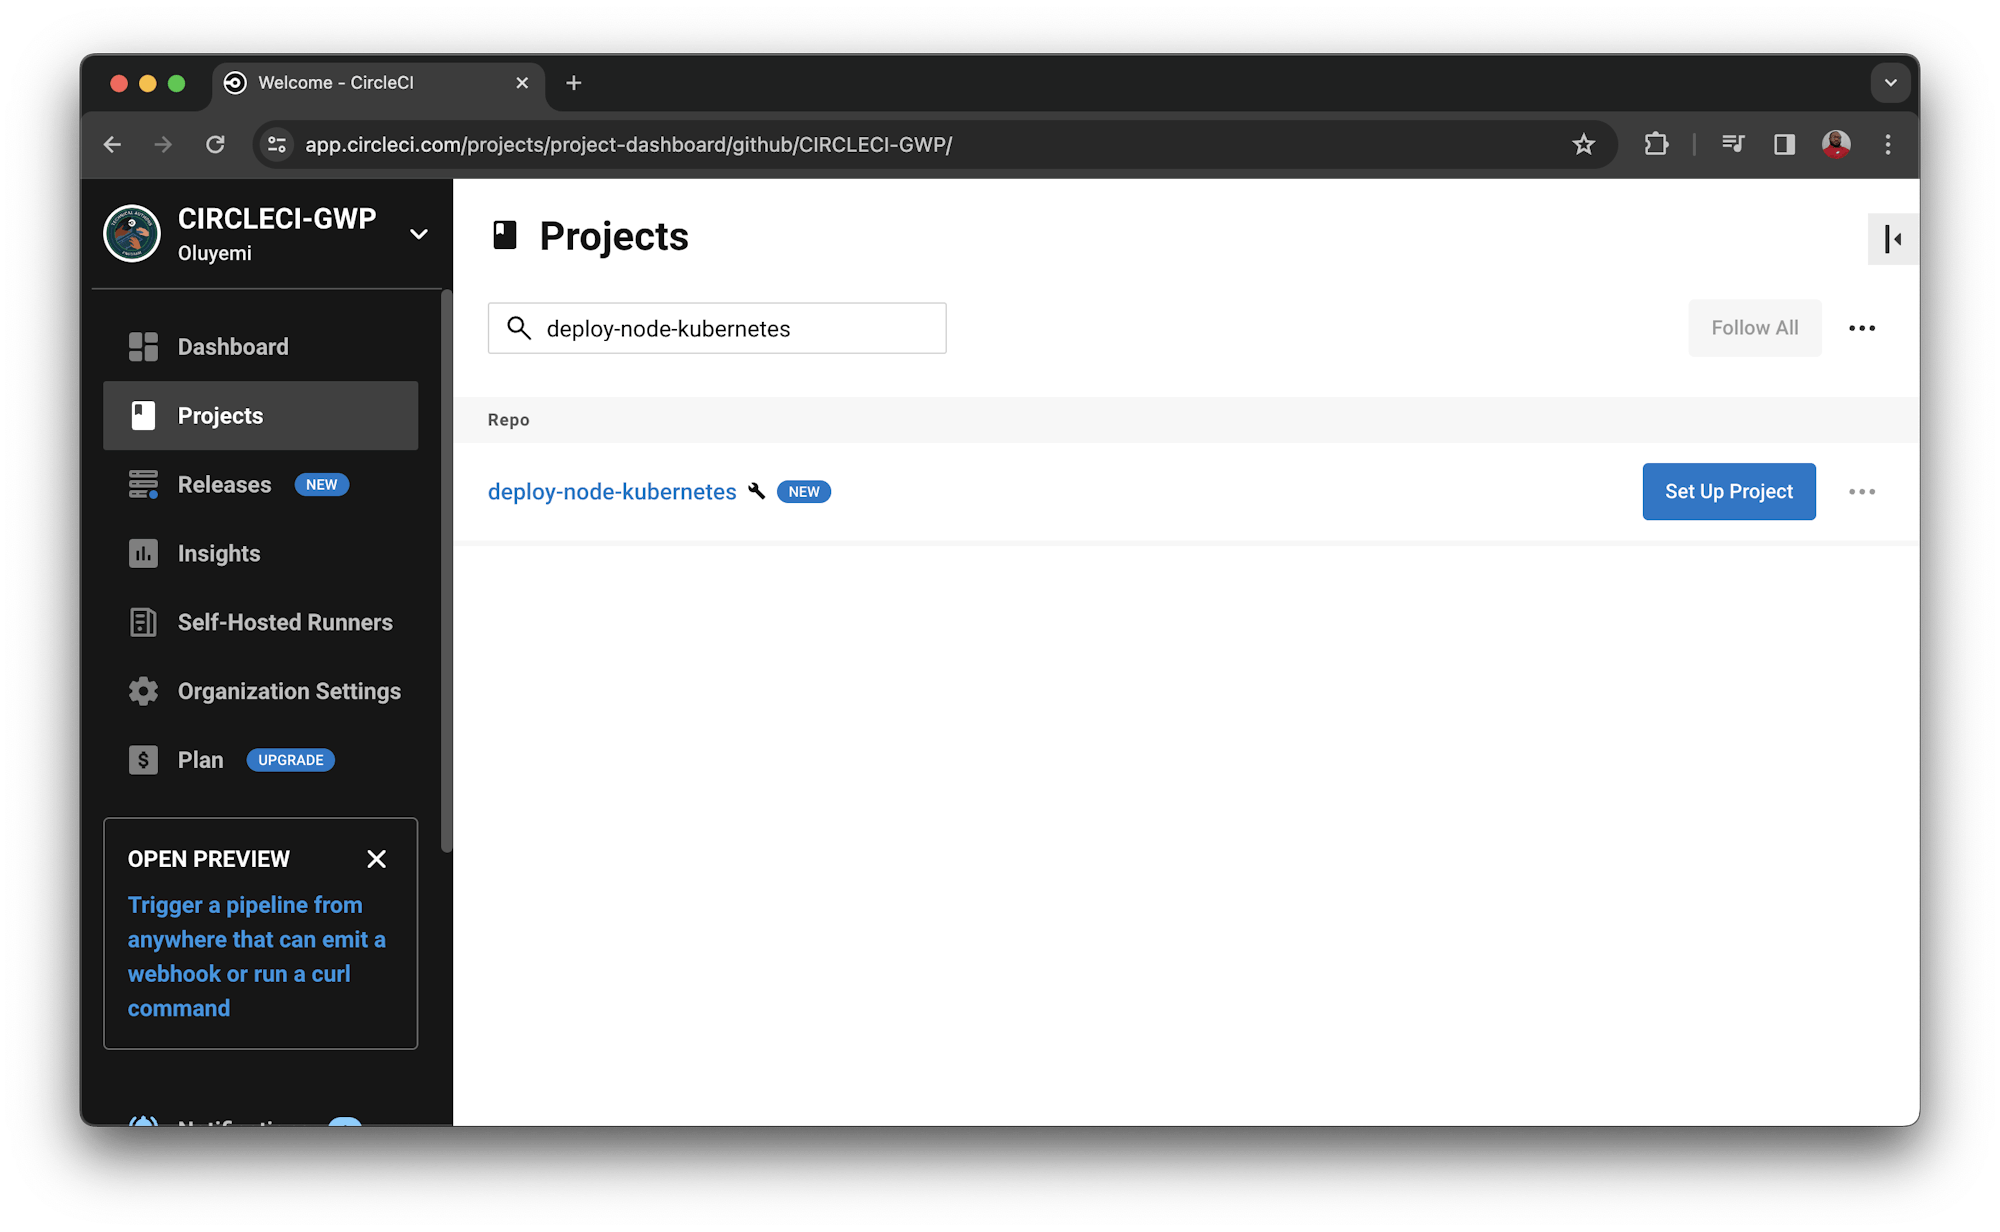
Go to your CircleCI dashboard and select the Projects tab on the left panel. Click the Set Up Project button corresponding to the GitHub repository which contains the code. For this tutorial the repo is named deploy-node-kubernetes.
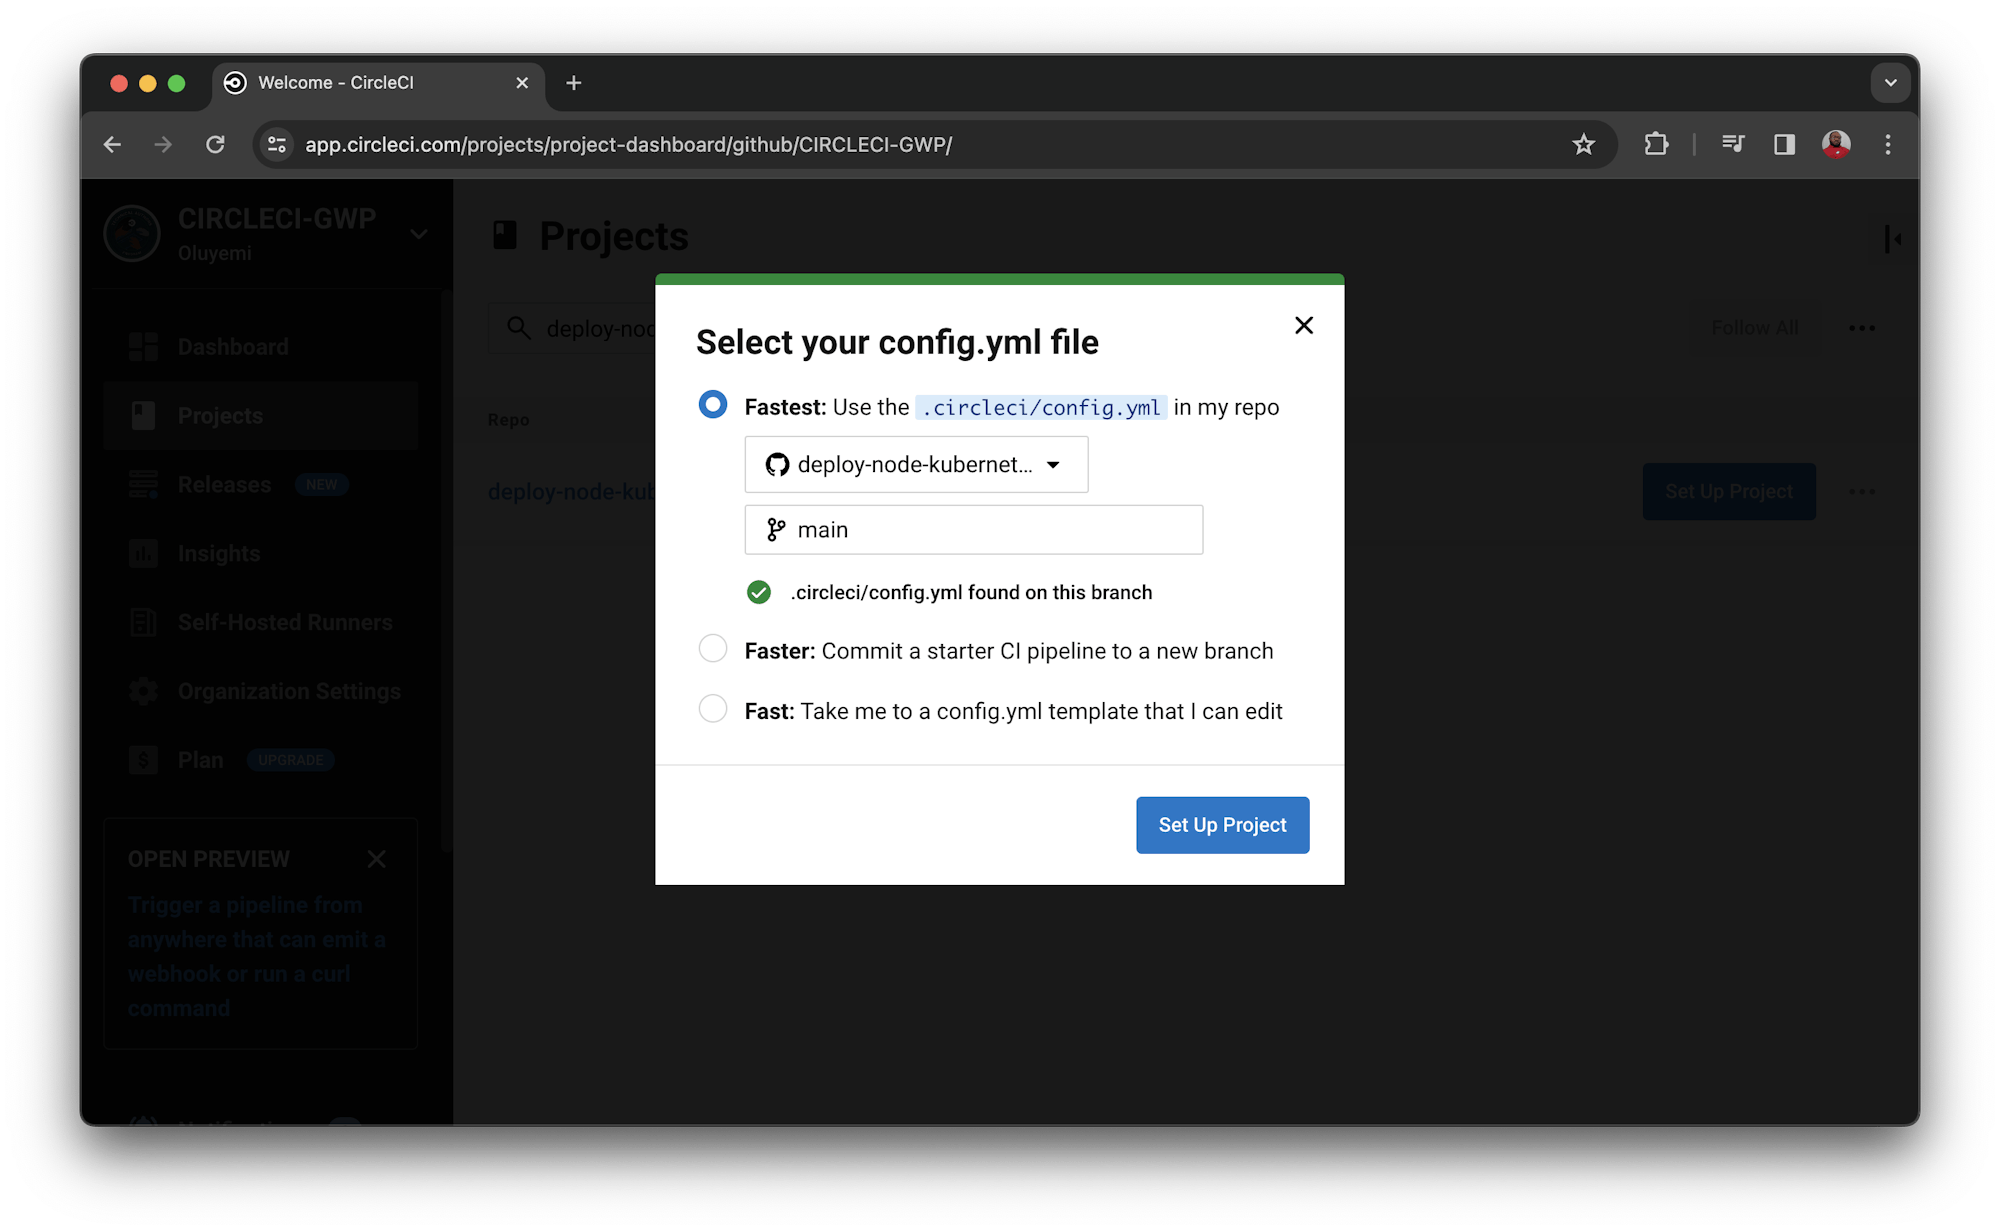
When you are prompted to select your config.yml file, select the Fastest option and type main as the branch name. CircleCI will automatically locate the config.yml file. Click Set Up Project.
The workflow will start running, but soon it will display the status as Failed. This is because you still need to set up a user key and configure the environment variables in the CircleCI project settings.
To set up the user key, select the SSH Keys option from the left panel of the Project Settings page. From the User Key section, click Authorize with GitHub. CircleCI uses the user key to push changes to your GitHub account on behalf of the repository owner, during the execution of the workflow.
To configure the environment variables, select the Environment Variables option from the left panel of the Project Settings page. Select Add Environment Variable. Next, type the environment variable and the value you want it to be assigned to.
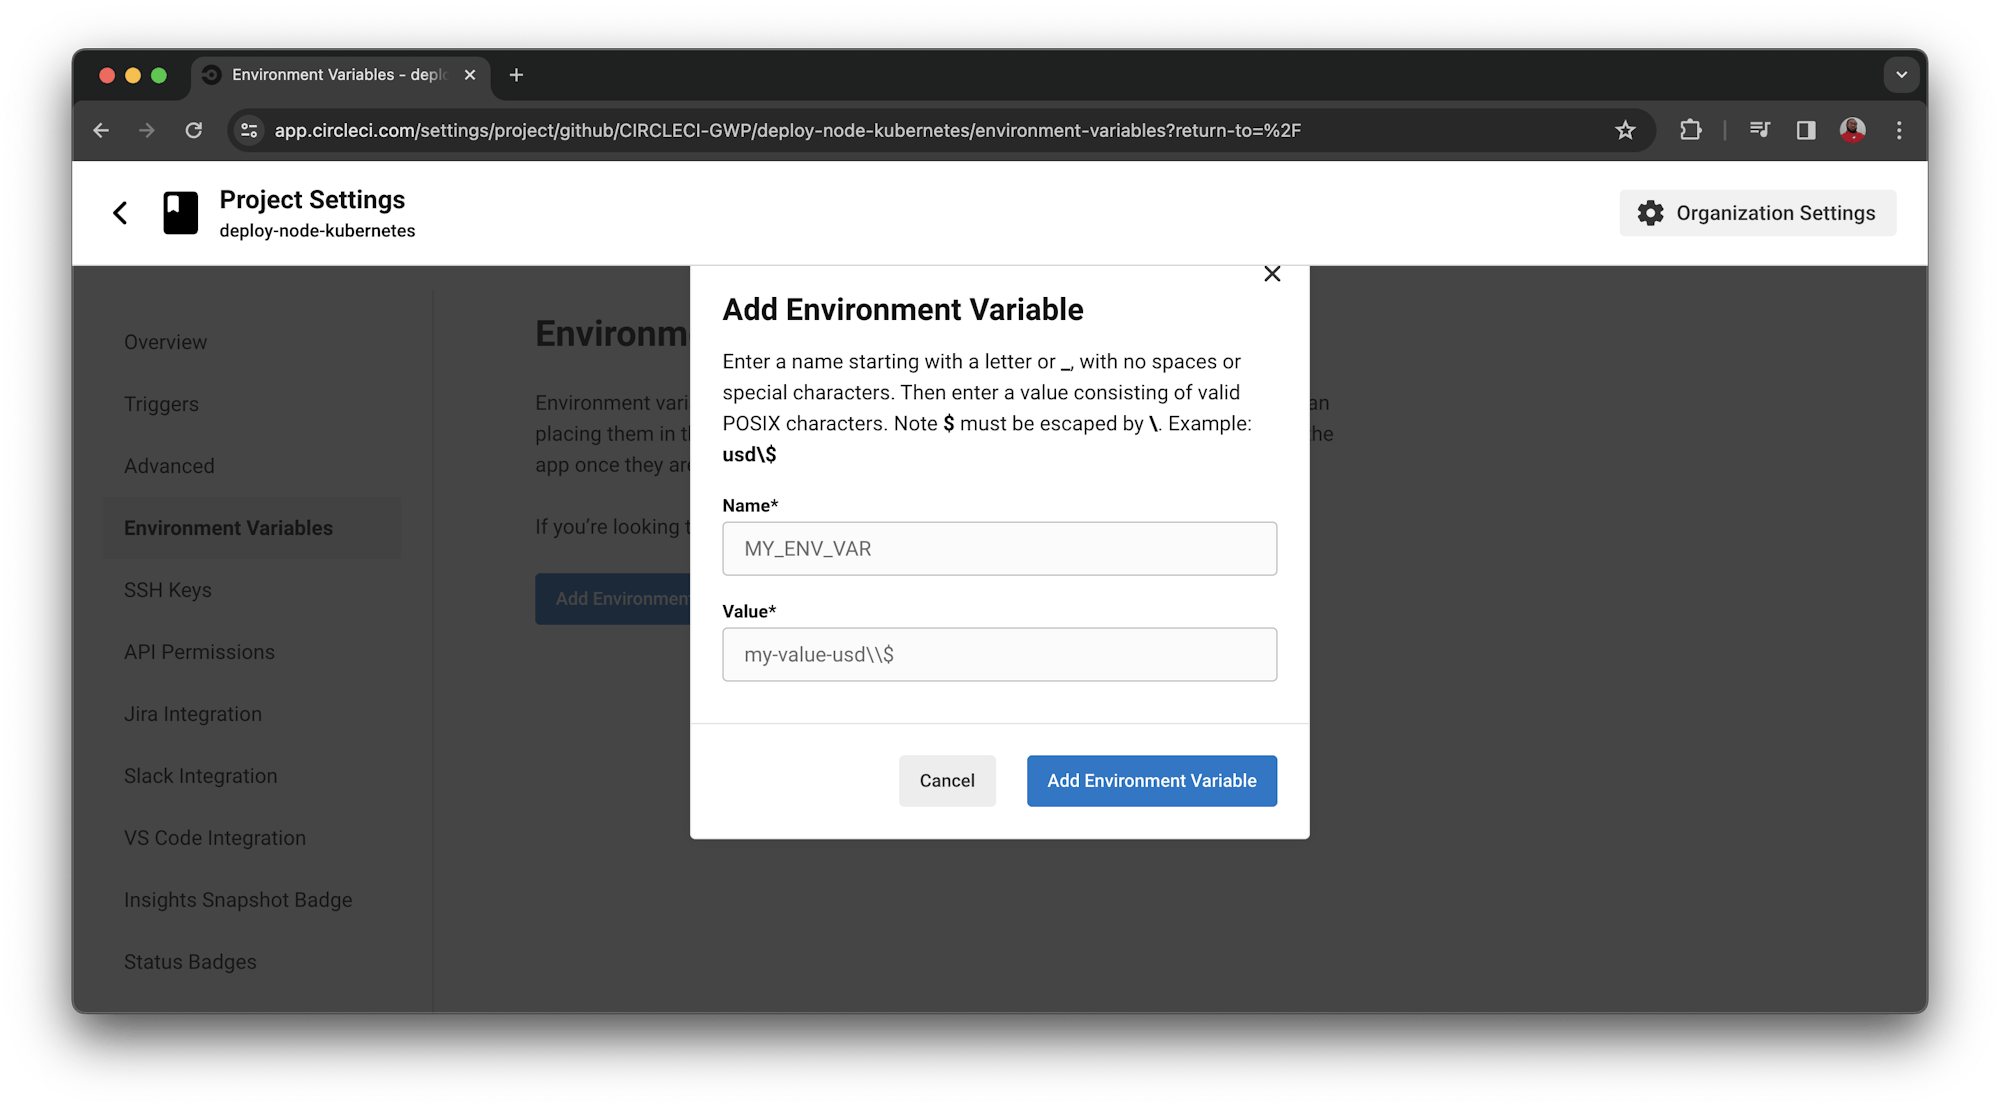
The environment variables used in the file are:
APP_NAMEis the Container Image Name (nodejs-aks-app).AZURE_SPis the username for your Azure Service Principal (appId)AZURE_SP_PASSWORDis the password for your Azure Service PrincipalAZURE_SP_TENANTis the tenant ID for your Azure Service PrincipalCLUSTER_NAMEis the AKS cluster name (NodeCluster).DOCKER_LOGINis your Docker Hub username.DOCKER_PASSWORDis your Docker Hub password.GITHUB_EMAILis your GitHub account email address.RESOURCE_GROUPis the AKS Resource Group (NodeRG).SSH_FINGERPRINTis the SSH Fingerprint of the user key used for pushing the updated Docker tag to GitHub.
Note: To locate the SSH_FINGERPRINT, go to Project Settings and select SSH Keys from the sidebar. Scroll down to the User Key section, then copy the key. This key is displayed only after you click the Authorize with GitHub button.
Now you can re-run the workflow. This time the status is Success.
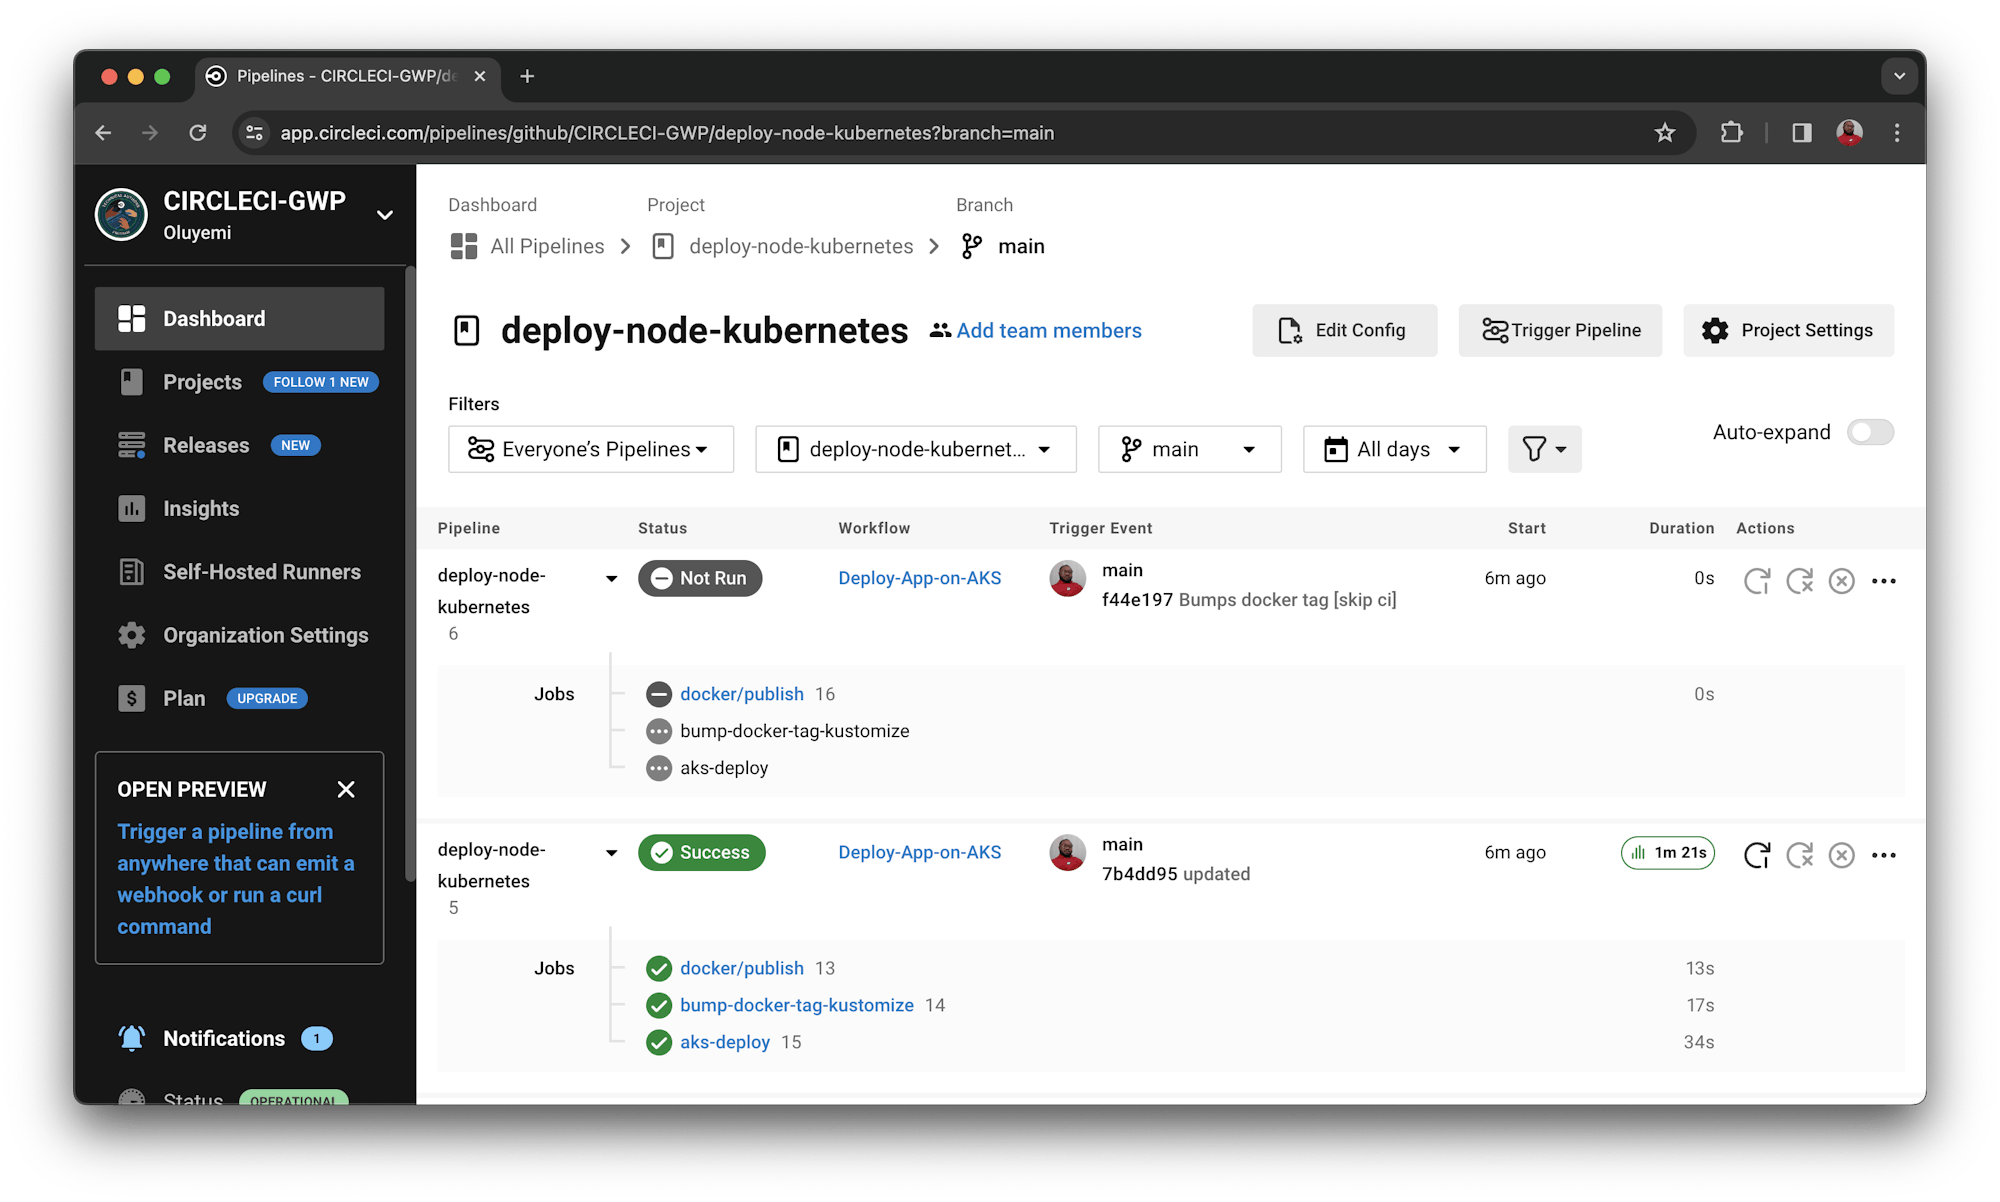
You will also find another pipeline with the status as Not Run. This happened because including the term [skip ci] in the commit message explicitly instructs CircleCI to skip the pipeline when it commits the updated configuration files to GitHub. This protects the workflow from a never-ending loop of self-triggering.
Accessing the application on AKS
Receiving a success status when the workflow was re-run means that the application has been deployed on the AKS cluster. To access the application, you need the external IP address of the cluster.
To find External-IP, you can use the Azure CLI again.
Configure kubectl to connect to AKS using this command:
az aks get-credentials --resource-group NodeRG --name NodeCluster
You created all the resources in the nodejs namespace. Get all the resources in the namespace:
kubectl get all --namespace nodejs
Copy the External-IP corresponding to service/nodejs.

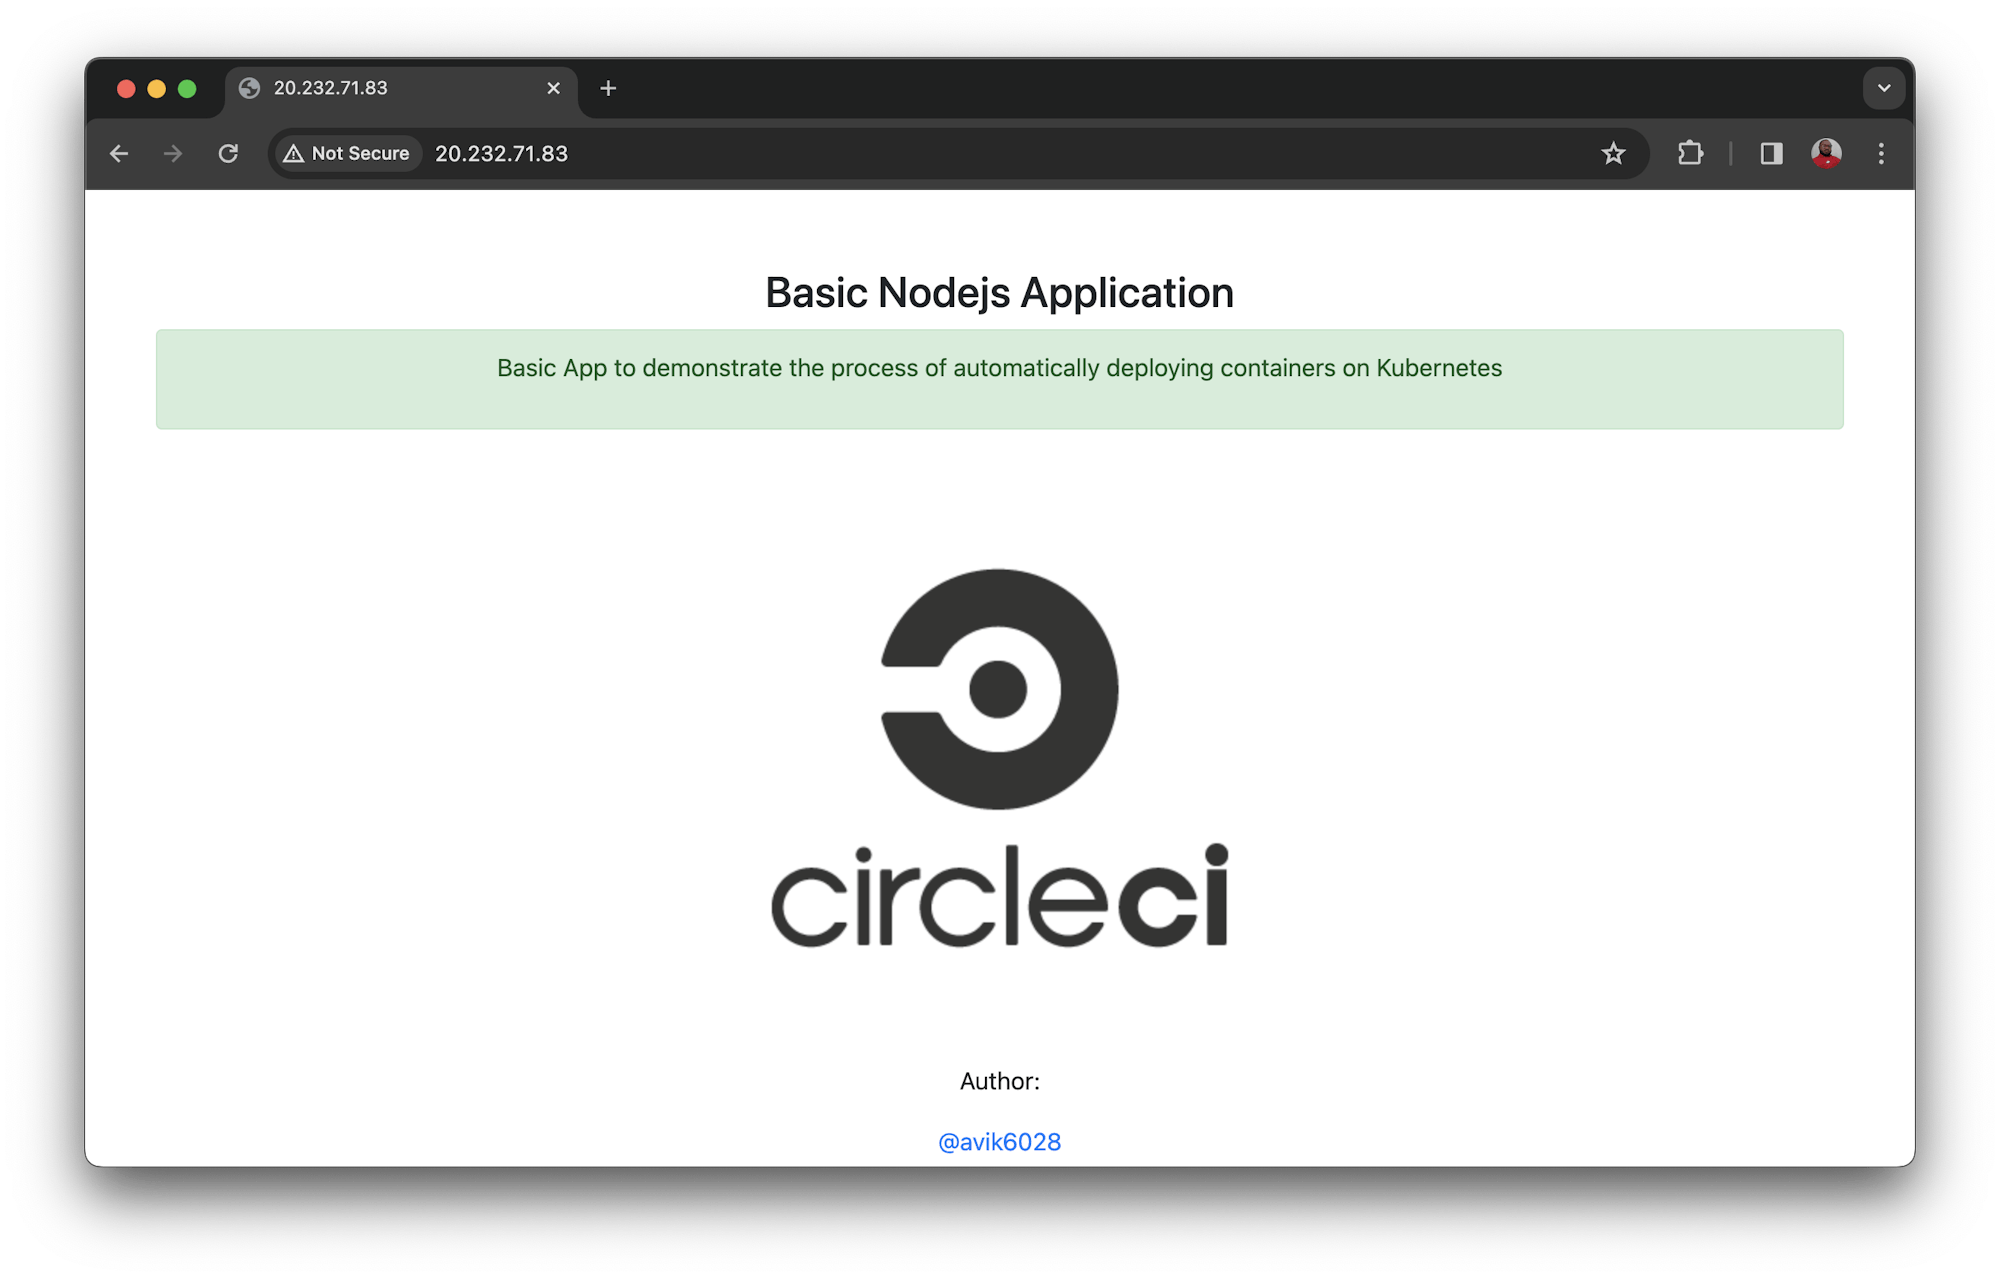
You can access the application at http://<EXTERNAL-IP>. In my case, that was http://20.232.71.83/.
Conclusion
Congratulations! You have reached the end of the tutorial. In this tutorial, you learned how to develop an automated CI/CD pipeline for deploying your applications continuously on a Kubernetes cluster. Now, any changes made to the application code will be instantly reflected on the application URL. There is no further need for manually configuring and deploying applications on Kubernetes.
You can change the values of the environment variables to use the CircleCI configuration file for similar applications. If you prefer GKE to AKS as your managed Kubernetes provider, we also have an article on Simplifying your CI/CD build a pipeline to GKE with CircleCI orbs.
The complete source code for this tutorial can also be found in the sample repository.


