

Note from the publisher: This post was updated by Gabriel Simmer on 8/11/2020 to add the new Salesforce SFDX Apex orb.
Great news, Salesforce application developers! 🎉 We’ve made it easier to build, test, and deploy your Salesforce apps with CircleCI. Now you can create an automated development pipeline with the help of our integrations with Salesforce: the Salesforce SFDX CLI orb and the new Salesforce SFDX Apex orb.
The Salesforce SFDX CLI orb has been updated to focus specifically on the SFDX CLI. We created a new orb, the Salesforce SFDX Apex orb, to focus on the process of testing and deploying your application.
This post will show you how to quickly get up and running with an automated development pipeline on CircleCI. We will utilize the ebikes-lwc sample application provided by Salesforce along withc our new Salesforce SFDX Apex orb. If you are completely new to Salesforce application development, this repository is also a great place to start learning. Or, if you have your own Salesforce application, you can follow along using it in place of the ebikes-lwc sample app.
What is a CI pipeline?
For those of you coming to CircleCI for the first time, I want to give a quick overview on how continuous integration can improve your development workflow.
CircleCI helps you build, test, and ship code faster. A CircleCI pipeline allows you to make changes to your application and quickly test those changes prior to deployment. If your tests fail, CircleCI lets you know right away. Once you have confidence in your code, you can manually or automatically deploy those changes to your users.
Setup
Before we begin creating our CI pipeline, we have a few setup tasks to complete:
-
The first one is easy, we need to enable the Dev Hub for your account. This allows you to create and manage scratch organizations, which are required for testing your applications in safe, disposable environments.
-
The next thing we need to do is create our own self-signed SSL certificate and private key. When authenticating with the Salesforce CLI, you typically launch a browser window and log in, but in our CI environment with no human interaction, we need an alternative authentication method.
For our JWT-based authorization, we will create a certificate, Salesforce will hold our certificate, and CircleCI will hold our private key. We’ll get back to that in a moment. Follow the instructions here to create your certificate and key.
-
Lastly, before we begin our pipeline, we have to create a connected app. A connected app is how we are going to connect to our Salesforce instance in the cloud environment. It will allow us to authenticate with JWT, utilizing the certificate we created in the last step.
You can follow the steps on the Salesforce site here for creating a connected app. You will see that we will be storing our
server.crtfile with Salesforce in this step. In a moment, we will be adding the server key to CircleCI. Be sure to mark down the consumer key value given by the created app.
At this point, it’s time to start prepping our project. If you already have a project, you can begin with that. Otherwise, start by cloning the ebikes-lwc example we mentioned before. We ultimately want a Salesforce application project hosted by a VCS provider such as GitHub or BitBucket.
Once we have a project hosted on GitHub or BitBucket, we can start assembling our pipeline.
Adding a project to CircleCI
Our project still isn’t complete, we need to add a CircleCI config file, but we’ll add that in just a moment. We have one last bit of prep work we need to take care of first.
Authorizing your VCS with CircleCI and log in. Once you are at your dashboard, click add projects, which should present a list of projects from your account. Click Set Up Project for your Salesforce application.

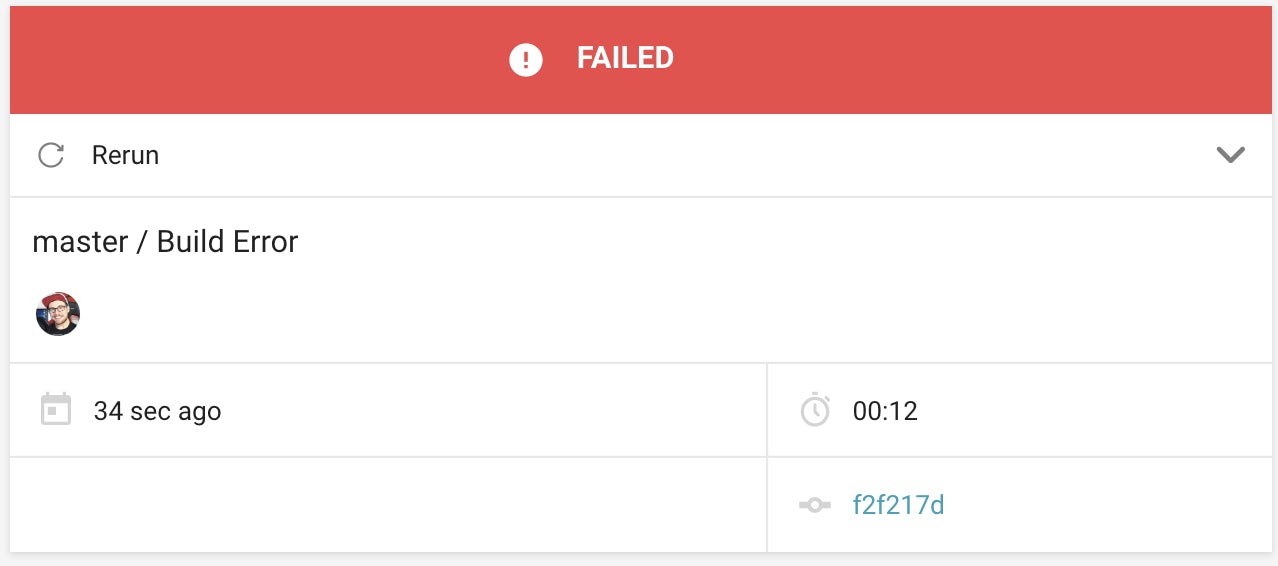
On the next page, you can ignore the defaults. We are going to come back to this in a moment. Click Start building.

On the next page you’ll see right away that our job has failed, but don’t worry! That’s to be expected. We have not yet added our config file with our integration, nor have we set up our environment variables.
Adding environment variables
Let’s add the required environment variables to this newly added project. In the nav bar on the left of the screen is a list of projects you have added to CircleCI with a cogwheel next to them. Click the cogwheel next to our Salesforce application to reach the settings page.

From there you can click Environment Variable located under BUILD SETTINGS.

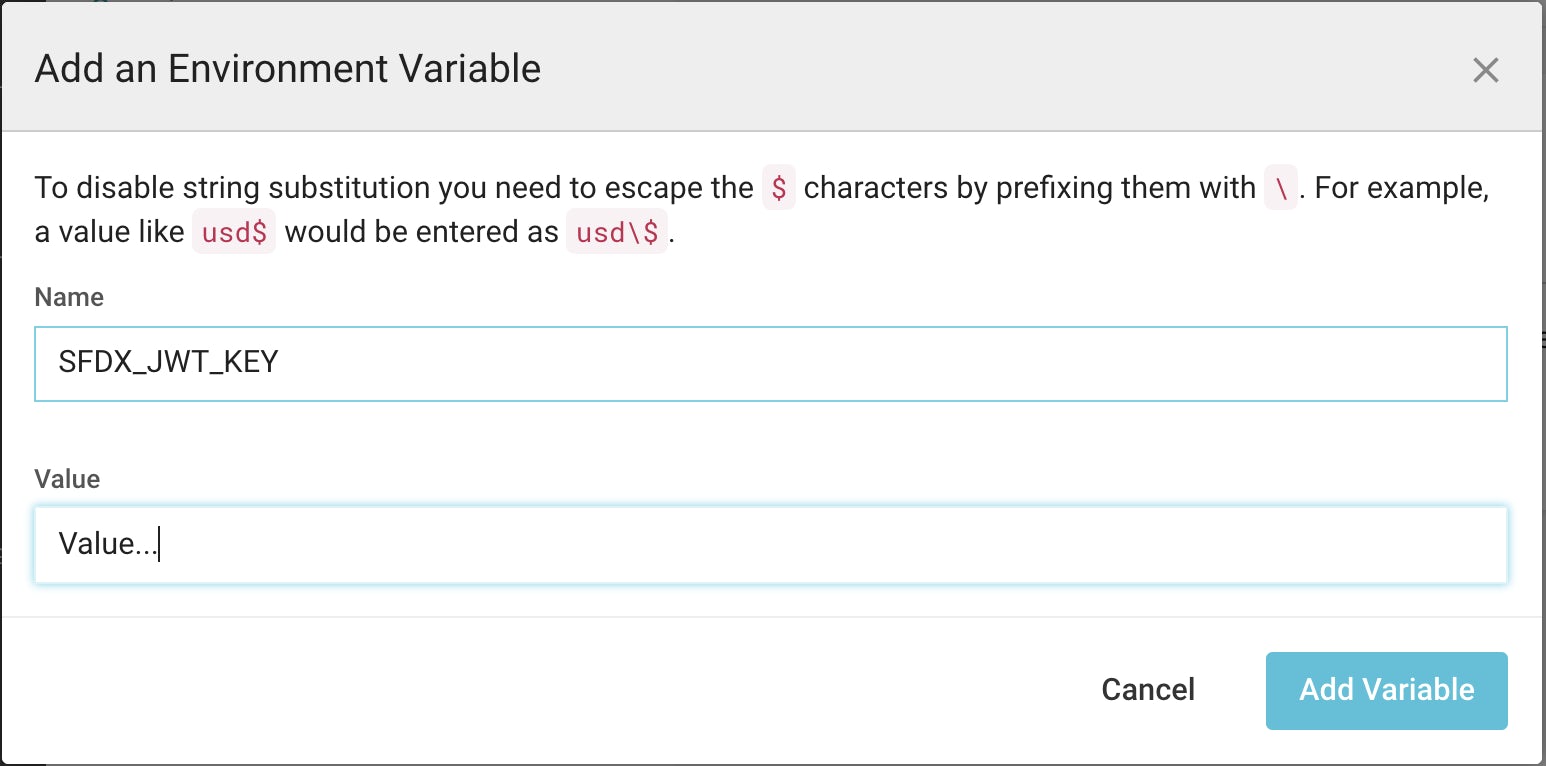
We have two secrets we must add for authentication.
| Environment Variable | Value |
|---|---|
| SFDX_JWT_KEY | This value must contain the base64 encoded value of the private server.key file. |
| SFDX_CONSUMER_KEY | The consumer key of the connected app for Salesforce. |
The consumer key was generated in a previous step. Simply add a new environment variable with the name SFDX_CONSUMER_KEY and the value from Salesforce.
To obtain the Base64 encoded JWT key, navigate to the directory containing the self-signed certificate files you created earlier and enter the following command: base64 server.key. Once you have the base64 encoded value, copy it and add it to your project’s environment variables under the SFDX_JWT_KEY key.
Adding your config
That is all of the setup needed! To recap, so far you have:
- Enabled the Dev Hub for your Salesforce account
- Created a connected app
- Enabled JWT authentication with your connected app
- Followed the project on CircleCI
- Added the required environment variables
At this point, CircleCI is able to authenticate with Salesforce. This will allow us to utilize the SFDX Apex orb commands in our config.
In the main directory of your project repository, add a top level .circleci folder, and inside that create a config.yml file. This is the file CircleCI will automatically be looking for when new changes get pushed to your repository. This will act as the blueprint for which actions to perform on each update. If you aren’t familiar with CircleCI config I would highly recommend taking a look at our getting started information.
Once you have created your config.yml file, let’s start by copying over the included usage example from the SFDX Apex orb.
version: 2.1
  orbs:
    apex: circleci/salesforce-apex@x.y
  jobs:
    install_authenticate:
      docker:
        - image: cimg/node:14.5
      steps:
        - checkout
        - apex/setup:
           defaultusername: user@email.com
        - run:
            name: Run your SFDX commands here
            command: |
              echo "You now have access to the sfdx cli and may execute commands against it. https://developer.salesforce.com/docs/atlas.en-us.sfdx_cli_reference.meta/sfdx_cli_reference/cli_reference.htm"
  workflows:
    basic-test:
      jobs:
        - install_authenticate
Config breakdown
Let’s break this down.
version: 2.1
 orbs:
   sfdx: circleci/salesforce-apex@x.y
Version 2.1 of CircleCI config is required to access “orbs”. It should be the default but it’s always a great idea to explicitly set the version of your config, especially because things will update in the future.
The orbs stanza is what allows us to define and import our orb packages. In this example, we only need the circleci/salesforce-apex orb. You can see that we are importing this as apex, which we will be able to reference elsewhere in our config.
Also, notice that there is a @x.y version tag at the end of our import statement. This is a placeholder value. I encourage you to visit the orb registry to view not only the most up-to-date documentation, but also to ensure that you are importing the most current version of the orb.
Orbs are semver versioned, so you can import a fully versioned release such as 1.0.0. However, we recommend utilizing the minor version so that you automatically pick up patch releases.
Jobs
Below the orb import you will find our jobs stanza with a single job in it named install_authenticate.
  jobs:
    install_authenticate:
This is a job we are manually defining in our config file. Your job can be named anything and it’s not uncommon to have multiple jobs depending on your workflow. In this workflow, we are going to show how to install the CLI tool and authenticate against it in a single job.
Docker image
CircleCI offers a wide range of pre-built Docker images. In this case, we will be utilizing the cimg/node:14.5 image. This image provides nodejs pre-installed, which allows us to install the Node version of the Salesforce CLI without needing to install Node and npm seperately.
      docker:
        - image: cimg/node:14.5
Steps
Steps are a collection of executable commands we wish to execute in order.
        - checkout
        - apex/setup:
           defaultusername: user@email.com
- checkout: A built-in command native to CircleCI, which will fetch the source code from your repository. This is not required for the integration, but is typically the first step of any project.
- apex/setup: An orb command supplied by the circleci/salesforce-apex orb, which will install the latest stand-alone version of the CLI, then authenticate with Salesforce using the credentials that have been set up.
From this point on, you can utilize other commands from the orb, or interact directly with SFDX with additional commands. Here is an example:
     - run:
         name: Check Auth List
         command: sfdx force:auth:list
Workflows
Workflows are a feature of CircleCI that allow you to orchestrate the jobs we want to run and the run order. We only have a single job in our workflow. In our case, we want it to run on every commit, so we won’t include any filters. We’ll create a single workflow named basic-test and list our install_authenticate job.
  workflows:
    basic-test:
      jobs:
        - install_authenticate
What else can you do with the Salesforce SFDX Apex orb?
- Automate: Utilize pre-configured jobs to automatically build and test your application in a scratch org.
- Contribute: Get involved and submit your own feature requests or pull requests to the open source repo for the Salesforce SFDX Apex orb or the Salesforce SFDX CLI orb.
We want to hear from Salesforce developers! Tweet @CircleCI and let us know how you use our orb.


