Start Building for Free
CircleCI.comAcademyBlogCommunitySupport

Hello world

1 week ago6 min read
Cloud
Server v4.x
Server v3.x
Server v2.x
On This Page

This page shows you how to get started with a basic pipeline using any execution environment. The steps described here assume you want to create a new project locally and push your changes to your VCS using Git. This page also assumes you have already signed up for CircleCI.

As an alternative, if you already have a repository you want to "plug in" to CircleCI you can set this up entirely within the CircleCI web app, including commiting a config file. This flow is outlined in the Quickstart guide.

Echo hello world

This example adds a job called hello-job that simply prints hello world to the console. To get started, complete the following steps:

  1. Create a directory called .circleci in the root directory of your local code repository.

  2. From the .circleci directory you just created, create a config.yml file and add the following content (select your execution environment using the tabs):

  3. Commit and push the changes to your VCS.

  4. Go to the Projects page in the CircleCI web app, then click the Set Up Project button next to your new project. If you do not see your project, make sure you have selected the correct organization at the top-left of the web app. See the Organization Switching for more information.

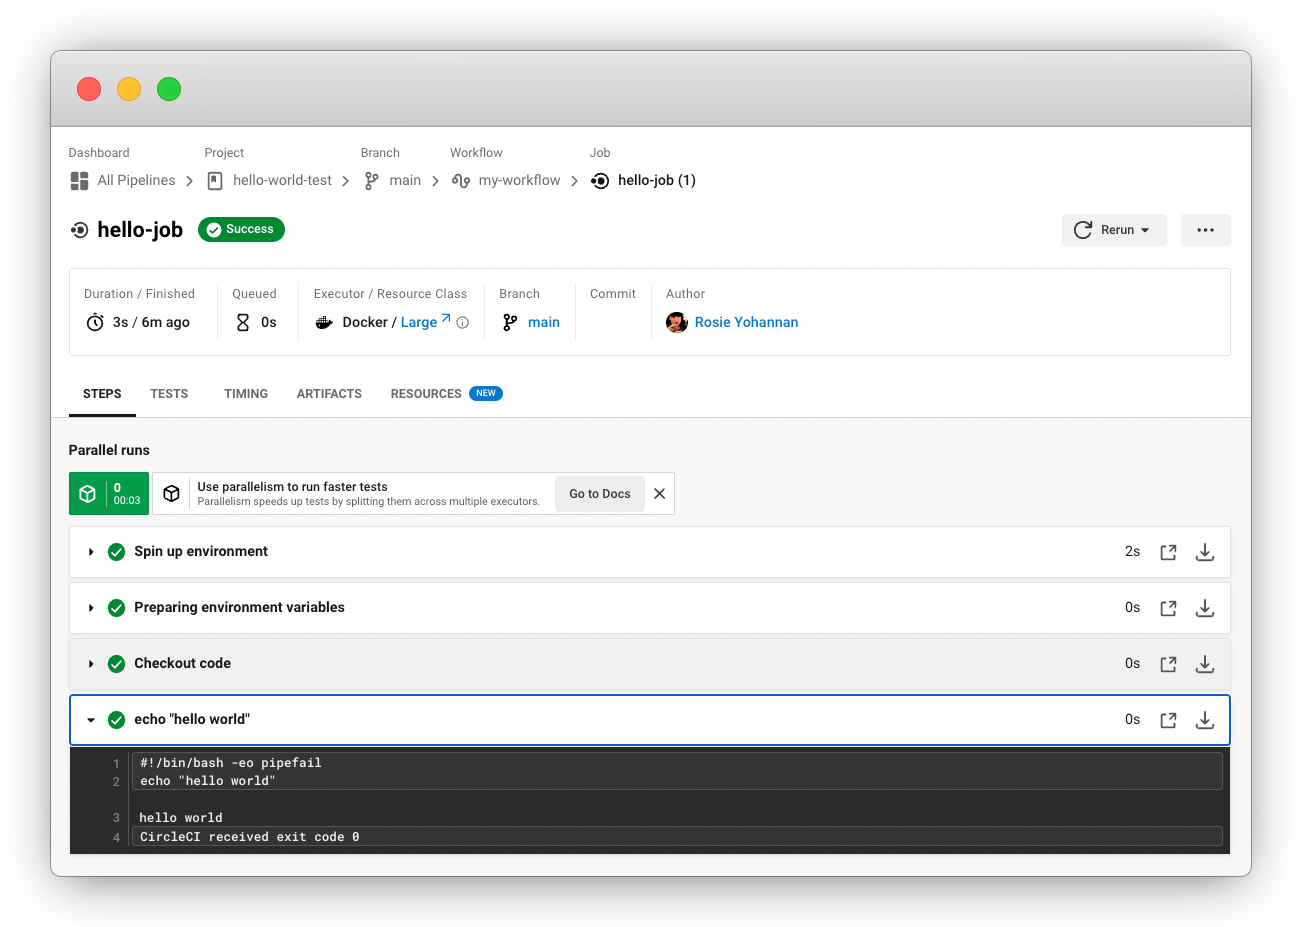
  5. Follow the steps in the pop-up to tell CircleCI to use the config.yml file you just created to trigger your first pipeline. Clicking through to the hello-job and then selecting the echo "hello world" step will show you hello world in the console.

    Screenshot showing hello world in the job step output

Tip: If you get a No Config Found error, it may be that you used .yaml file extension. Be sure to use .yml file extension to resolve this error.

Echo hello world on server v4.x

This example adds a job called hello-job that simply prints hello world to the console. To get started, complete the following steps:

  1. Create a directory called .circleci in the root directory of your local code repository.

  2. From the .circleci directory you just created, create a config.yml file and add the following content (select your execution environment using the tabs):

  3. Commit and push the changes to your VCS.

  4. Go to the Projects page in the CircleCI web app, then click the Set Up Project button next to your new project. If you do not see your project, make sure you have selected the correct organization at the top-left of the web app. See the Organization Switching for more information.

  5. Follow the steps in the pop-up to tell CircleCI to use the config.yml file you just created to trigger your first pipeline. Clicking through to the hello-job and then selecting the echo "hello world" step will show you hello world in the console.

    Screenshot showing hello world in the job step output

Tip: If you get a No Config Found error, it may be that you used .yaml file extension. Be sure to use .yml file extension to resolve this error.

Echo hello world on server v3.x

This example adds a job called hello-job that simply prints hello world to the console. To get started, complete the following steps:

  1. Create a directory called .circleci in the root directory of your local code repository.

  2. From the .circleci directory you just created, create a config.yml file and add the following content (select your execution environment using the tabs):

  3. Commit and push the changes to your VCS.

  4. Go to the Projects page in the CircleCI web app, then click the Set Up Project button next to your new project. If you do not see your project, make sure you have selected the correct organization at the top-left of the web app. See the Organization Switching for more information.

  5. Follow the steps in the pop-up to tell CircleCI to use the config.yml file you just created to trigger your first pipeline. Clicking through to the hello-job and then selecting the echo "hello world" step will show you hello world in the console.

    Screenshot showing hello world in the job step output

Tip: If you get a No Config Found error, it may be that you used .yaml file extension. Be sure to use .yml file extension to resolve this error.

Echo hello world on server v2.x

This example adds a job called hello-job that simply prints hello world to the console. To get started, complete the following steps:

  1. Create a directory called .circleci in the root directory of your local code repository.

  2. From the .circleci directory you just created, create a config.yml file and add the following content (select your execution environment using the tabs):

  3. Commit and push the changes to your VCS.

  4. Go to the Add Projects page in the CircleCI web app, then click the Start Building button. If you do not see your project, make sure you have selected the correct organization at the top-left of the web app. See the Organization Switching for more information. You will then see your job and workflow in the relevant pages in the app

Tip: If you get a No Config Found error, it may be that you used .yaml file extension. Be sure to use .yml file extension to resolve this error.

Next steps

  • See the Concepts page for a summary of CircleCI-specific concepts.

  • Refer to the Workflows page for examples of orchestrating job runs with concurrent, sequential, scheduled, and manual approval workflows.

  • Find complete reference information for all keys and execution environments in the CircleCI Configuration Reference.


Help make this document better

This guide, as well as the rest of our docs, are open source and available on GitHub. We welcome your contributions.

Need support?

Our support engineers are available to help with service issues, billing, or account related questions, and can help troubleshoot build configurations. Contact our support engineers by opening a ticket.

You can also visit our support site to find support articles, community forums, and training resources.