

Install machine runner 3 on macOS
This page describes how to install CircleCI’s machine runner 3 on macOS.
Prerequisites
To install machine runners and run jobs, you will need to have root access, and have the following utilities and tools installed on your system:
-
curl (installed by default on macOS).
-
sha256sum (if not pre-installed):
-
brew install coreutils
-
-
The CircleCI CLI if you wish to install runners from the command line.
Self-hosted runner terms agreement
-
Web app installation
-
CLI installation
Before you can install self-hosted runners through the web app, you will need to agree to the CircleCI Runner Terms. To access the Runners section of the CircleCI web app an organization admin must agree to the terms at .
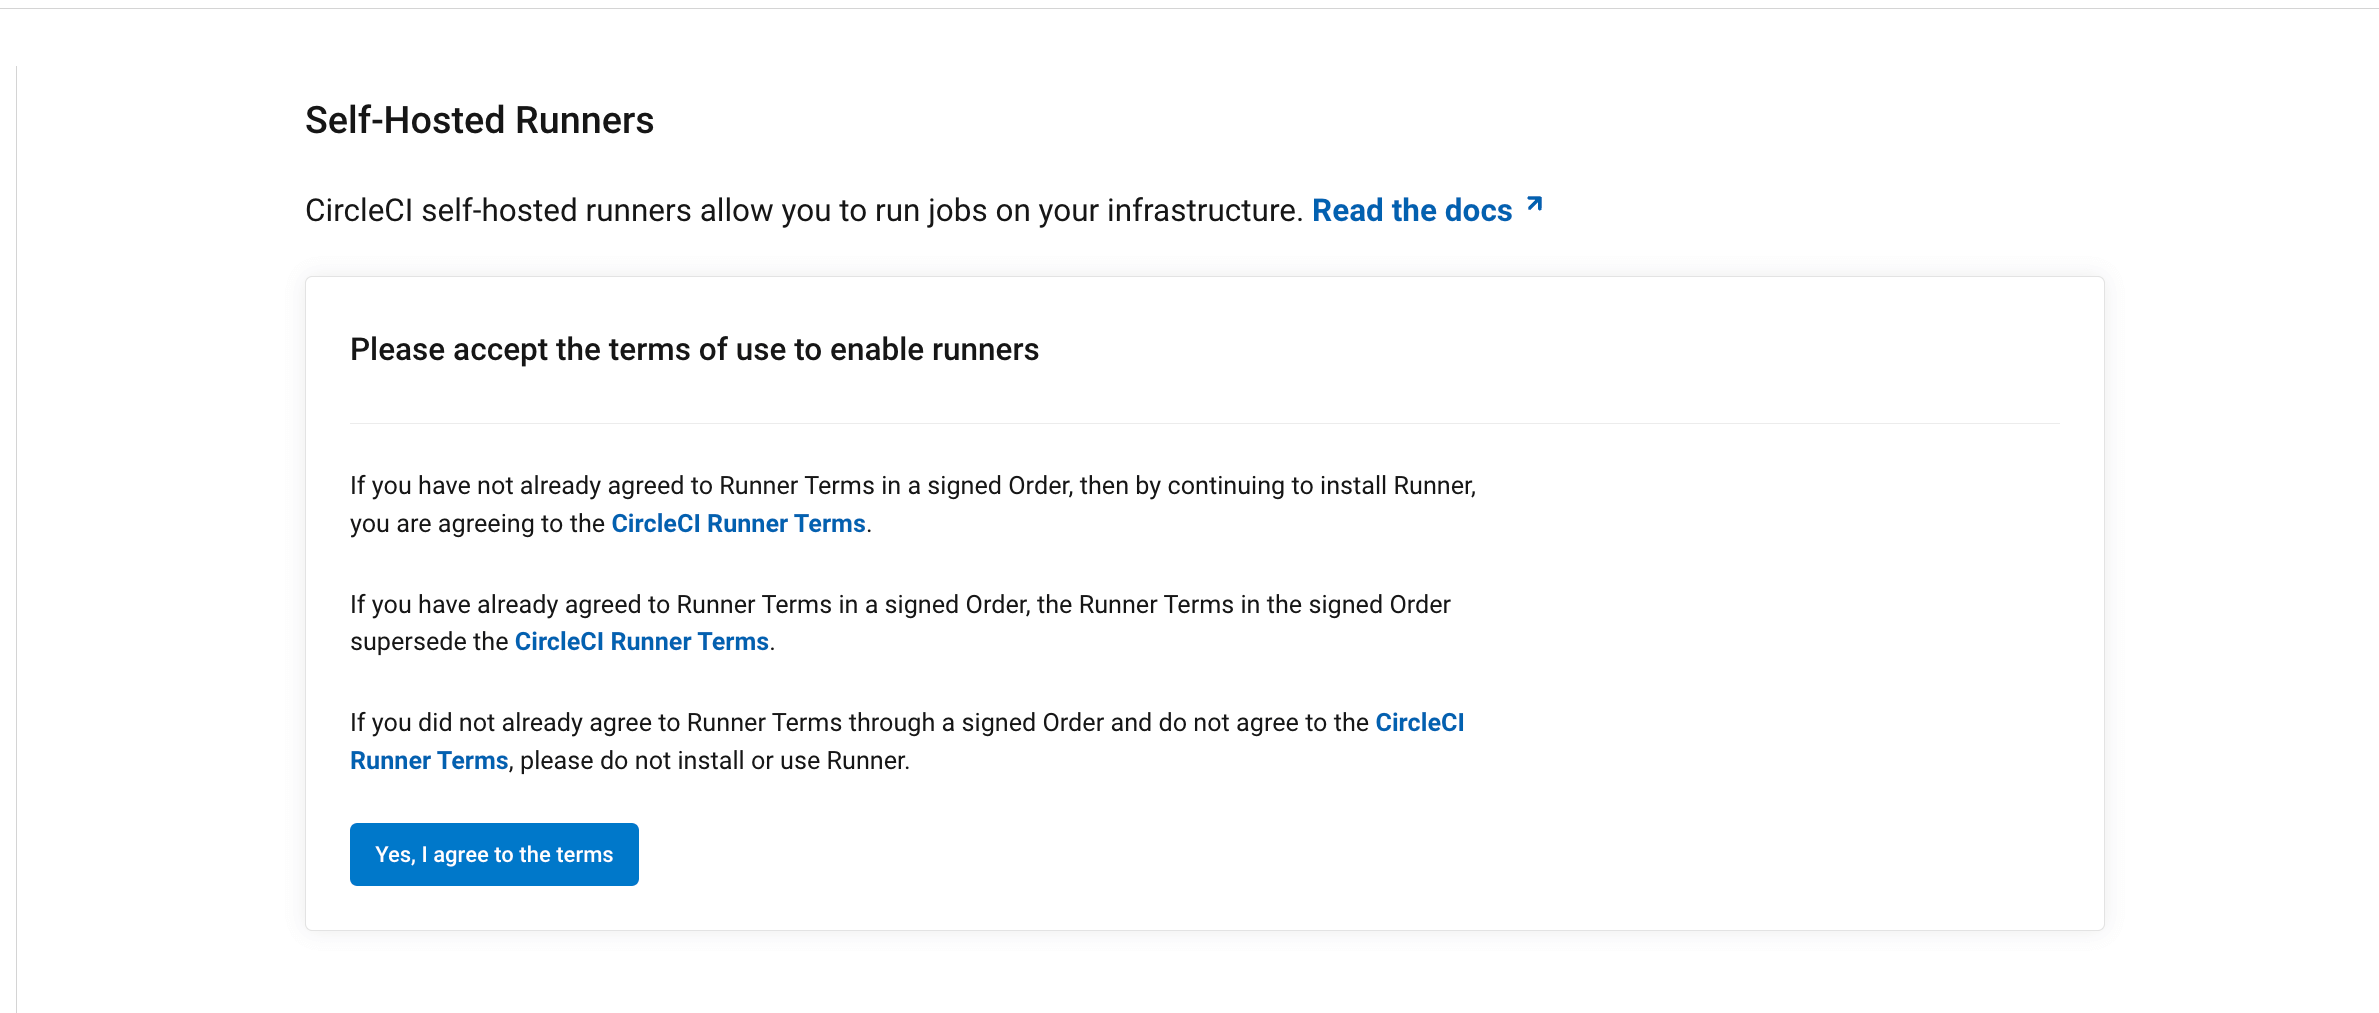
Once the terms have been accepted, Runners will appear permanently in the side navigation.
Your role within your org is determined differently depending on how you integrate with your code, as follows:
-
If you have a
githuborbitbuckettype organization, CircleCI mirrors VCS permissions for organizations. If you are an admin on your organization’s VCS, you are an admin on CircleCI. If you are unsure, check the admin permissions on your VCS. -
If you have a
circlecitype organization, you can check roles by navigating to . Full details on roles and permissions are available in the Roles and Permissions Overview.
| Find out about organization types in the Users, Organizations and Integrations Guide. |
If you are installing and using self-hosted runners through the CLI, you are agreeing to the CircleCI Runner Terms.
1. Create namespace and resource class
-
Web app installation
-
CLI installation
To install self-hosted runners, you need to create a CircleCI namespace and resource class. Once set up you will receive a resource class token. You must be an organization admin to complete this process. View your installed runners on the inventory page in the web app by selecting Runners from the sidebar.
| If you already create orb in your organization you will already have a namespace configured. You must use this same namespace for runners. Each organization can only create a single namespace. |
-
On the CircleCI web app, navigate to Runners and select Create Resource Class.
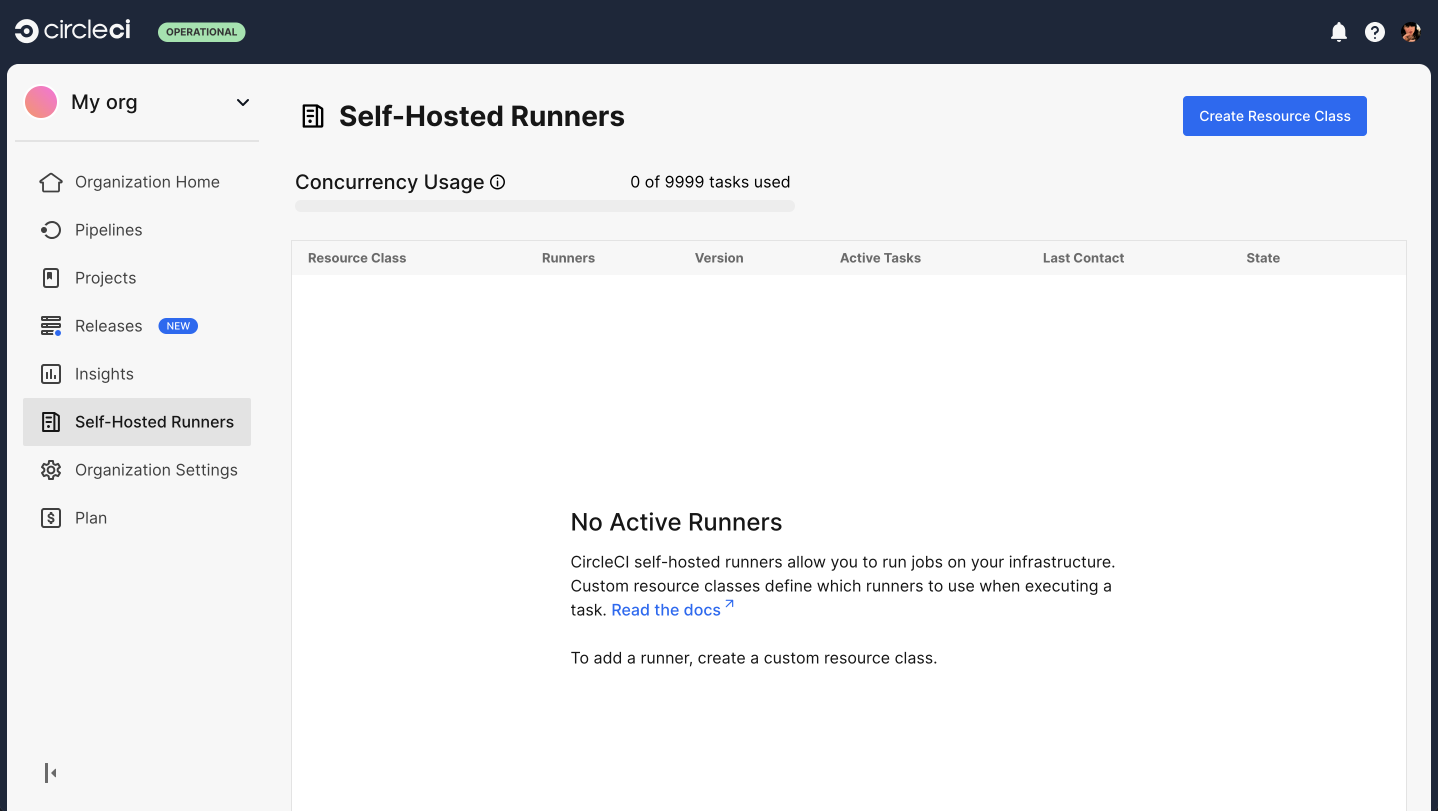 Figure 2. Runner set up, step one - Get started
 -
Create a custom Resource Class. You will configure jobs to use this resource class when you want them to run on your self-hosted runner.
We suggest using a lowercase representation of your CircleCI account name for your namespace. CircleCI will populate your org name as the suggested namespace by default in the UI.
Namespace and resource classes must follow specific naming conventions:
-
The namespace can contain lowercase letters, numbers, underscores, and dashes.
-
The resource class name can contain uppercase and lowercase letters, numbers, colons, underscores, dashes, and plus signs.
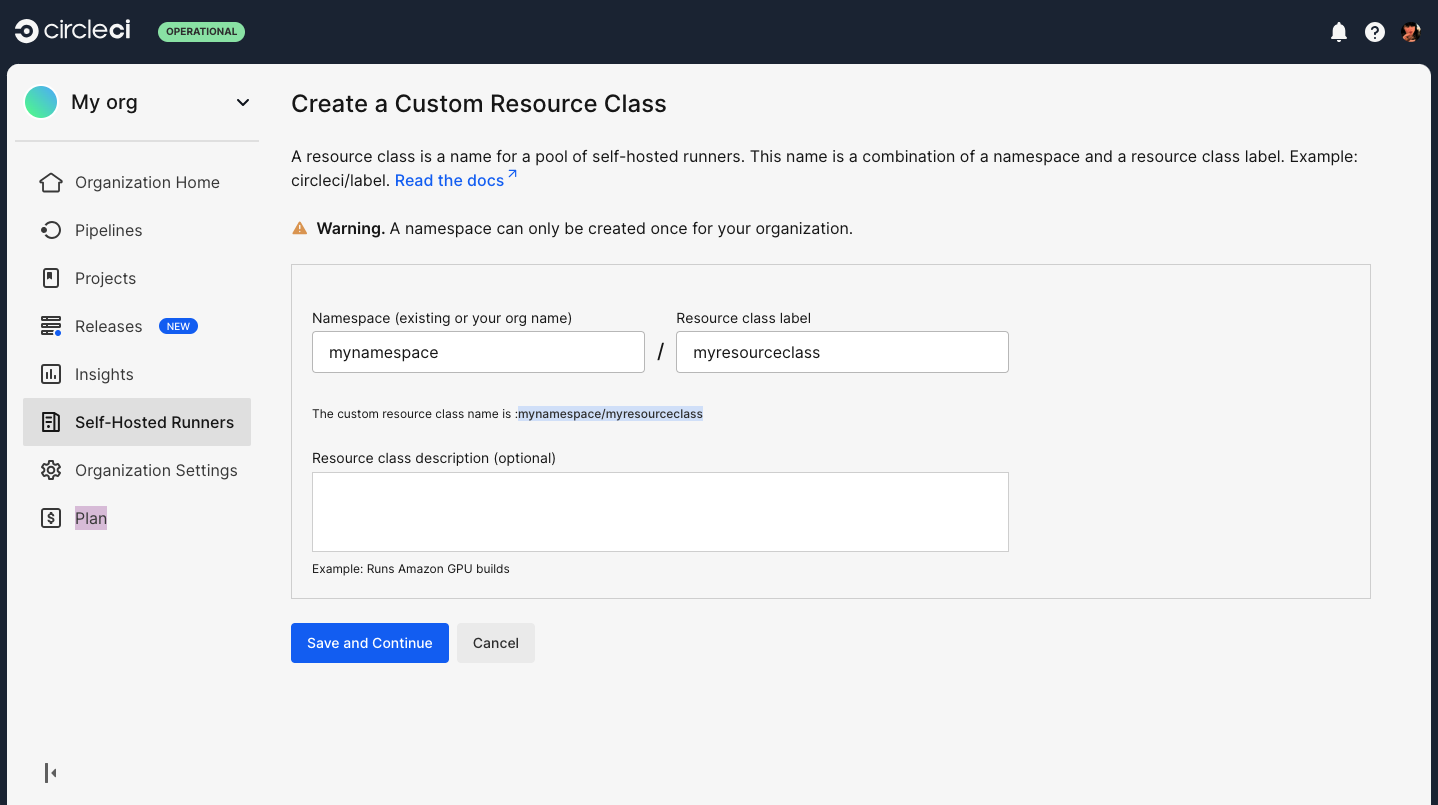 Figure 3. Runner set up, step two - Create a namespace and resource class
-
-
Enter a description for your resource class. The description is an optional field.
-
Select Save and continue to save and view your resource class token.
-
Copy and save the resource class token. Self-hosted runners use this token to claim work for the associated resource class.
The token is only displayed once, be sure to store it safely. 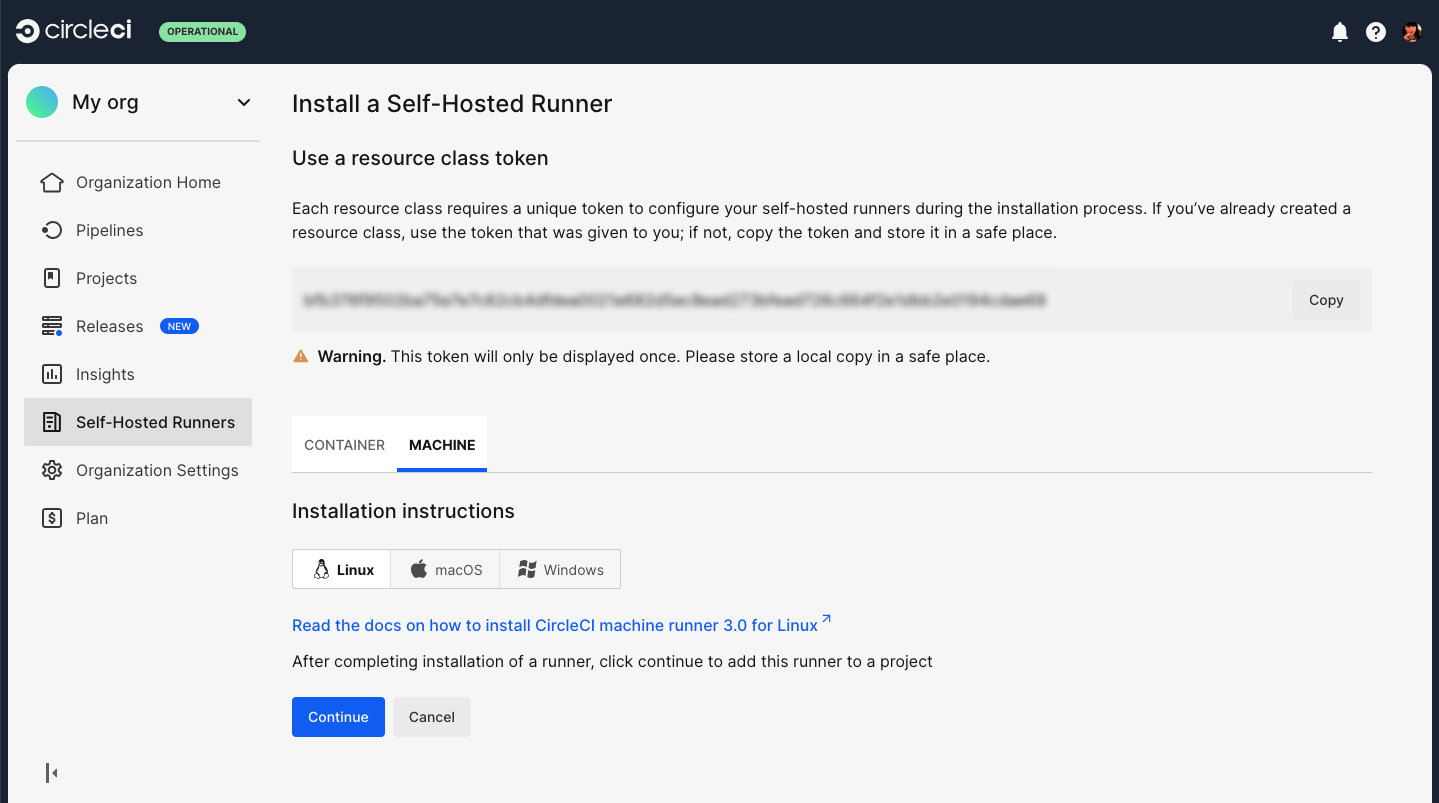 Figure 4. Runner set up, step three - Create a resource class token
 -
Select the Machine tab and progress on to the platform-specific instructions in the next section of this installation guide.
If you are installing self-hosted runners for server, the CircleCI CLI needs to be configured using your server API key. Run circleci setup to configure the CLI and access the option to supply a new API token if required.
|
To install self-hosted runners, you need to create a CircleCI namespace and resource class. Once set up you will receive a resource class token. You must be an organization admin to complete this process. View your installed runners on the inventory page in the web app by selecting Runners from the sidebar.
| If you already create orb in your organization you will already have a namespace configured. You must use this same namespace for runners. Each organization can only create a single namespace. |
-
Create a namespace for your organization’s self-hosted runners if you do not already have one configured. We suggest using a lowercase representation of your CircleCI organization’s account name.
Use the following command to create your CircleCI organization’s namespace:
$ circleci namespace create <name> --org-id <your-organization-id> -
Create a resource class for your runner using the following command. You will configure jobs to use this resource class when you want them to run on your slef-hosted runner:
$ circleci runner resource-class create <namespace>/<resource-class> <description> --generate-tokenMake sure to replace
<namespace>and<resource-class>with your org namespace and desired resource class name, respectively. You can add a description but this is optional.Resource class names must follow specific naming conventions.
-
The namespace can contain lowercase letters, numbers, underscores, and dashes.
-
The resource class name can contain uppercase and lowercase letters, numbers, colons, underscores, dashes, and plus signs.
The resource class token is returned after the runner resource class is successfully created.
The token is only displayed once, so be sure to store it safely.
-
2. Install CircleCI runner on macOS
You can install runner on macOS with Homebrew.
-
On the target macOS machine with Homebrew installed, run the following command to add the CircleCI repository:
brew tap circleci-public/circleci -
Run the following command to install the
circleci-runnerpackage:You may see a notification indicating a background item for Circle Internet Services Inc. has been added. brew install circleci-runner -
Open the runner
config.yamlfile with a text editor of your choice, and modify therunner.nameandapi.auth_tokenvalues.nano $HOME/Library/Preferences/com.circleci.runner/config.yamlrunner: name: "my-macos-runner" working_directory: "/Users/$USER/Library/com.circleci.runner/workdir" cleanup_working_directory: true api: auth_token: "your-auth-token"Replace
api.auth_tokenwith the token generated in the steps above, and choose a name for your runner. -
If you are using CircleCI Server you will need to provide the URL for your install. You can do this by either setting the
CIRCLECI_RUNNER_API_URLenvironment variable:export CIRCLECI_RUNNER_API_URL="your server domain"Or by adding the URL to
$HOME/Library/Preferences/com.circleci.runner/config.yamlusing text editor of your choice.api: auth_token: "your-auth-token" # On server, set url to the hostname of your server installation. url: https://your.domain.here
3. Review and accept the Apple signature notarization
The binary must be approved to run on your macOS system because the self-hosted runner is not compiled from source during installation. This can be done via the macOS UI by accepting the pop-up asking if you wish to run the binary from the internet, or programmatically.
-
Verify the signature and notarization with this command:
spctl -a -vvv -t install "$(brew --prefix)/bin/circleci-runner"The command returns output that looks like this:
/opt/homebrew/bin/circleci-runner: accepted source=Notarized Developer ID origin=Developer ID Application: Circle Internet Services Inc. -
When ready, run the command to accept the notarization. You will need to enter the macOS system password.
sudo xattr -r -d com.apple.quarantine "$(brew --prefix)/bin/circleci-runner"
4. Start macOS machine runner 3
To start the macOS machine runner 3 for the first time, you will need to bootstrap the service. Depending on whether you are using a GUI or non-GUI session (for example, when remotely tunneling into the machine), the commands to bootstrap the service will differ:
-
GUI domain
-
User domain
-
For running the agent in a GUI session, you can bootstrap the provided
.plistfile and enable the service by running the following commands:launchctl bootstrap gui/$(id -u) $HOME/Library/LaunchAgents/com.circleci.runner.plist launchctl enable gui/$(id -u)/com.circleci.runner launchctl kickstart -k gui/$(id -u)/com.circleci.runner -
Finally, you can check the service is running by invoking the following command:
launchctl print gui/$(id -u)/com.circleci.runner
-
When using a non-GUI (or headless) session, move the provided
.plistfile to/Library/LaunchAgents. This location is for per-user agents configured by the administrator, which allows the service to load after a reboot. Run the following command to do this:sudo mv $HOME/Library/LaunchAgents/com.circleci.runner.plist /Library/LaunchAgents/ -
Now you can bootstrap the
.plistfile and enable the service by running the following commands:launchctl bootstrap user/$(id -u) /Library/LaunchAgents/com.circleci.runner.plist launchctl enable user/$(id -u)/com.circleci.runner launchctl kickstart -k user/$(id -u)/com.circleci.runner -
Finally, you can check the service is running by invoking the following command:
launchctl print user/$(id -u)/com.circleci.runner
Machine runner configuration example
Once you have installed the runner, select Continue in the CircleCI web app. You will be presented with an example configuration snippet showing a job configured to use your new self-hosted runner resource class.
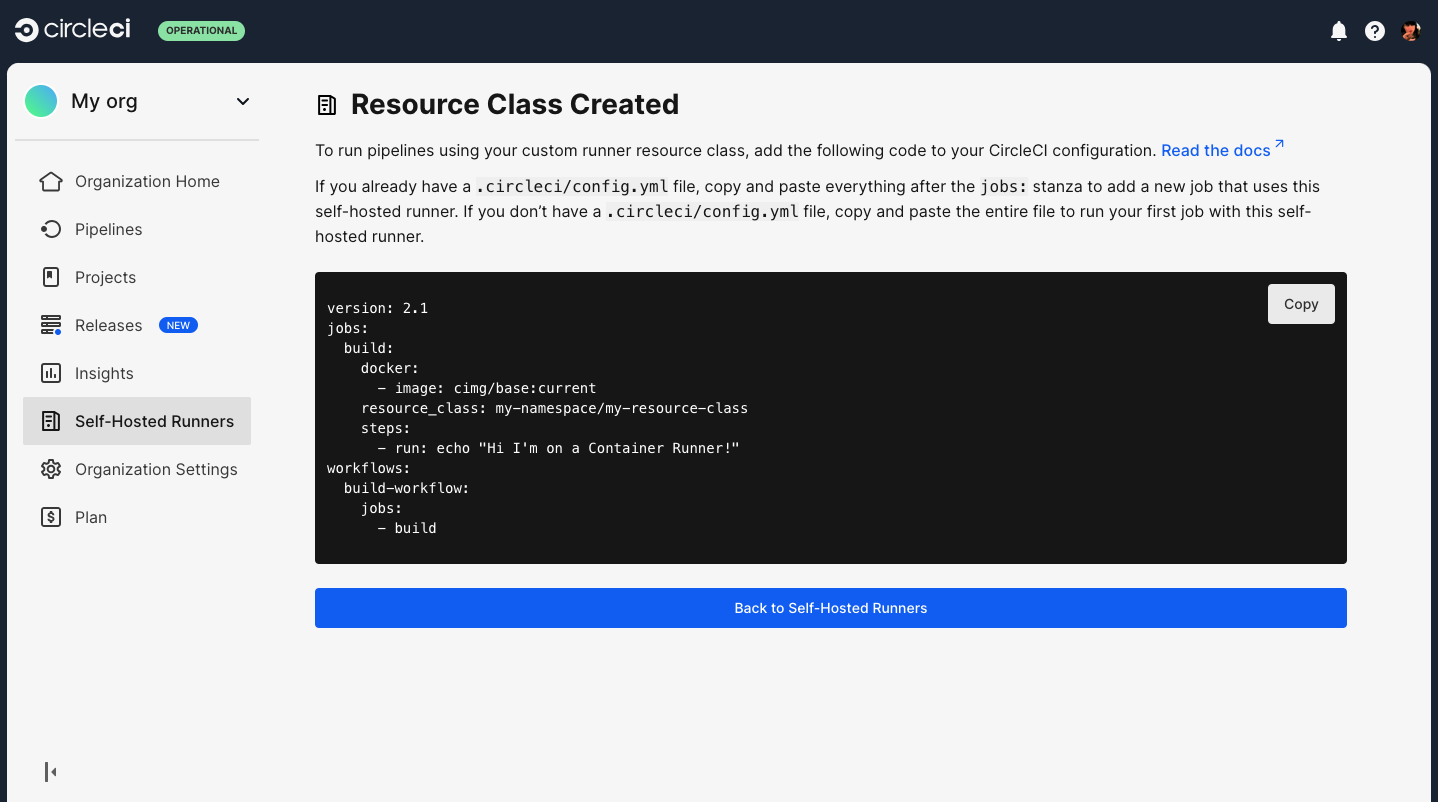
The fields you must set for a specific job to run using your machine runners are:
-
machine: true -
resource_class: <namespace>/<resource-class>
Simple example of how you could set up a job:
version: 2.1

workflows:
  build-workflow:
    jobs:
      - runner
jobs:
  runner:
    machine: true
    resource_class: <namespace>/<resource-class>
    steps:
      - run: echo "Hi I'm on Runners!"
The job will then execute using your self-hosted runner when you push the .circleci/config.yml to your VCS provider.
Stop macOS machine runner 3
To stop the machine runner service, run the following command to disable the machine runner service, depending on the service target used in the previous step:
-
GUI domain
-
User domain
launchctl disable gui/$(id -u)/com.circleci.runnerlaunchctl disable user/$(id -u)/com.circleci.runnerUninstall machine runner 3 on macOS
To uninstall machine runner 3 from your macOS device, follow these steps.
-
Stop the machine runner service by using the following command to disable it, depending on the service target used during installation:
-
GUI domain
-
User domain
Targeting the GUI domain:
launchctl bootout gui/$(id -u)/com.circleci.runnerTargeting the user domain:
launchctl bootout user/$(id -u)/com.circleci.runner -
-
Uninstall machine runner:
-
Keep logs and configuration
-
Purge logs and configuration
To uninstall without purging logs and configuration files, run the following command.
brew uninstall --cask circleci-public/homebrew-circleci/circleci-runnerThis command will purge all logs and configuration files. To uninstall and purge all logs and configuration files, run the following command.
brew uninstall --cask --zap circleci-public/homebrew-circleci/circleci-runner -