Set up the CircleCI release agent
Visualize and control deployments to your Kubernetes cluster with the CircleCI release agent. The steps outlined on this page guide you to set up the CircleCI release agent for deploy management and monitoring using the CircleCI web app onboarding process. Alternatively, once you have set up an environment integration, you can follow the guides linked below to install the release agent and configure components manually.
Introduction
In this tutorial you will set up an integration between CircleCI and your Kubernetes environment. Deploy status is reported to the CircleCI web app, and the following commands are executable in your cluster or service by the release agent via controls in the CircleCI UI:
-
Restore version
-
Scale version
-
Restart version
When using Argo Rollouts, the following commands are also available:
-
Retry Rollout
-
Promote Rollout
-
Cancel Rollout
Prerequisites
Before setting up your environment integration with CircleCI, run through the following prerequisites:
-
A CircleCI account connected to your code. You can sign up for free.
-
A Kubernetes cluster.
-
A project building on CircleCI that deploys to your Kubernetes cluster. See the Create a Project page for steps.
-
You must have write access to the project associated with the component being deployed. For full details of roles and permissions for
circlecitype organizations see the Roles and Permissions Overview. If you have agithuborbitbuckettype organization, you will need to be an org admin in Bitbucket/GitHub respectively.
We support the three latest Kubernetes minor releases and the two latest minor releases of Helm and of Argo Rollouts (optional). Release agent chart 1.6.2 with agent image 1.6.2 was end-to-end tested across every combination of the versions in the following table. Older versions may work but are not guaranteed:
| Tool | Tested versions |
|---|---|
Kubernetes |
1.36.1 |
Helm |
3.21.0 |
Argo Rollouts (optional) |
1.9.0 |
Labels and annotations
The following table shows a complete list of labels and annotations either required or available for configuring your environment integration. You will be guided to set these up in the in-app setup process. These are not strictly a prerequisite but will be required for the release agent to work.
| Label/Annotation | Value | Required? | |
|---|---|---|---|
|
|
A name for your application |
Yes |
|
|
Current version |
Yes |
|
|
See above |
Yes |
|
|
See above |
Yes |
|
|
Project ID for the CircleCI project associated with the job that deploys your component |
Yes |
|
|
A Go duration string, for example, 5m, 10m15s |
No. Only needed to set a custom timeout duration. This option is only available if you are using Helm to configure your Kubernetes resources. |
|
|
|
No. Only set if you want to disable the restore version feature for your component. |
|
|
|
No. Only set if you want to disable the scale component feature for your component. |
|
|
|
No. Only set if you want to disable the restart component feature for your component. |
|
|
|
No. Only set if you want to disable the retry deployment feature for your component. |
|
|
|
No. Only set if you want to disable the promote deployment feature for your component. |
|
|
|
No. Only set if you want to disable the cancel deployment feature for your component. |
Set up the CircleCI release agent
-
In the CircleCI web app, select Deploys in the sidebar.
-
Choose the Environments tab and select Create environment integration.
-
Enter a name for your environment, and a description if you would like.
-
Use the dropdown menu to choose your environment integration type: Kubernetes Cluster, then select Next: Release Agent Setup.
-
To install the release agent into your cluster and set up your components, follow the in-app setup steps. If you would rather continue the setup process manually, see the Optional manual setup section on this page.
The in-app setup is now spread across two pages:
-
Release agent setup, which has the following steps:
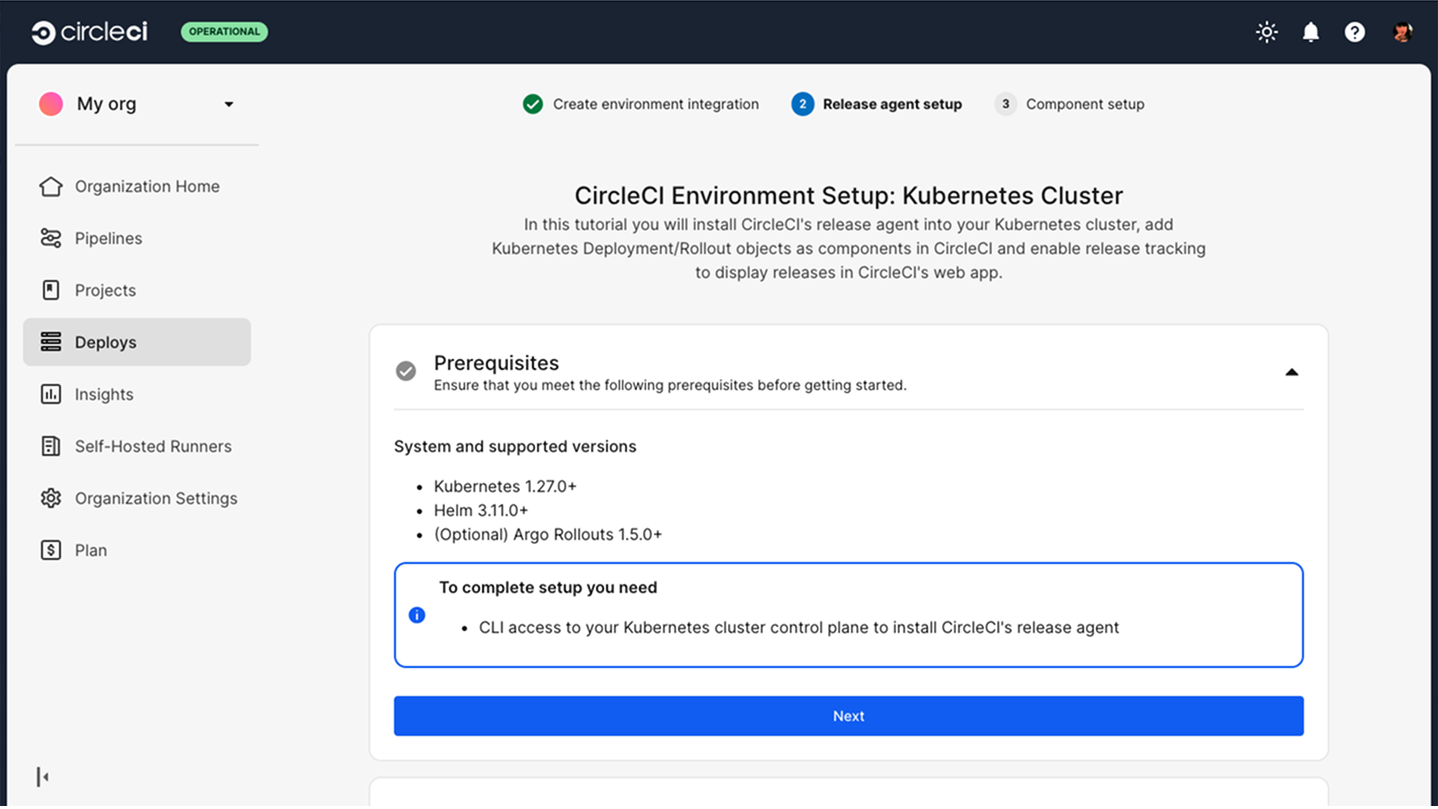 Figure 1. Release agent setup
-
Add CircleCI’s release agent Helm repository.
-
Install CircleCI’s release agent into your Kubernetes cluster with Helm.
-
-
Component setup, which has the following steps:
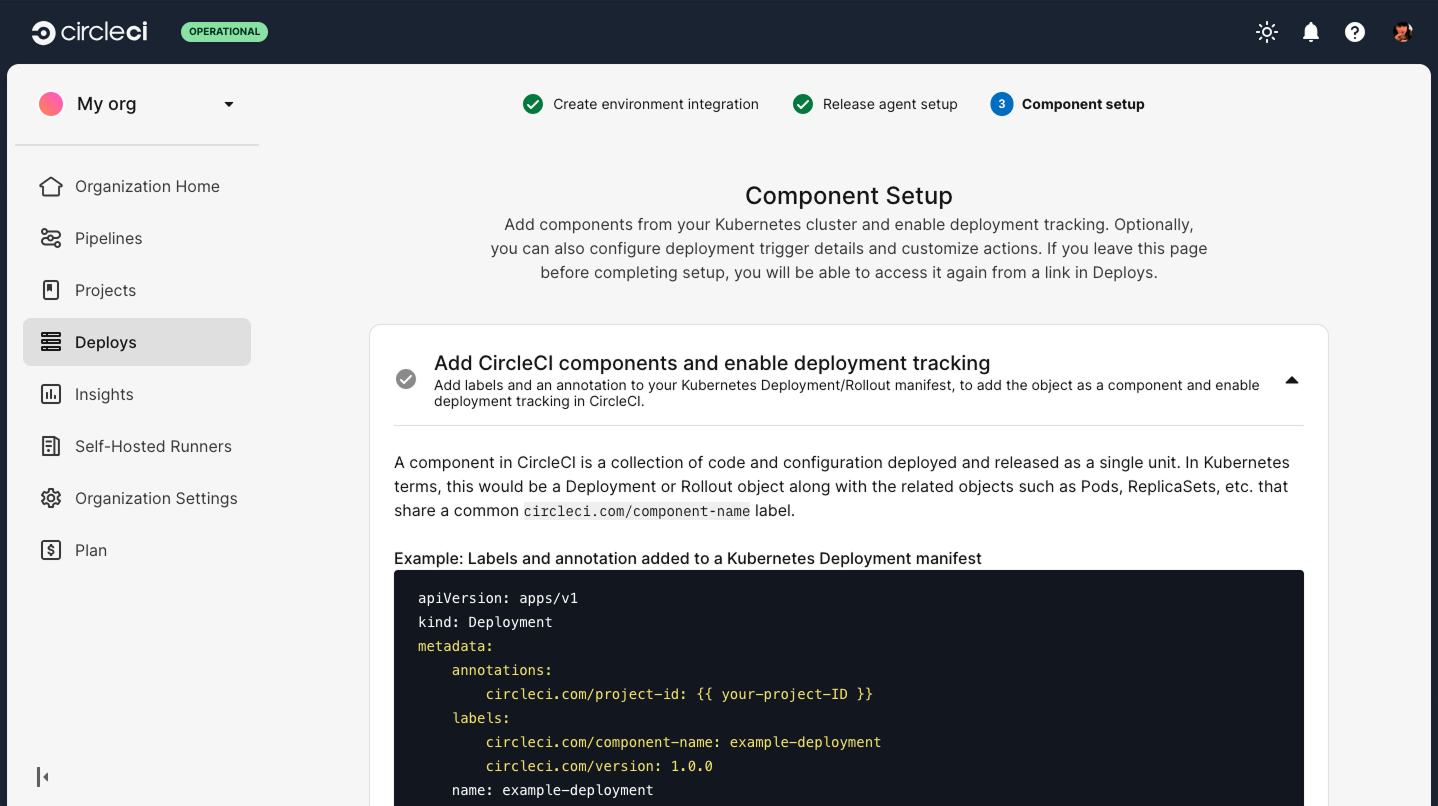 Figure 2. Component setup
-
Add CircleCI components and enable deployment tracking.
-
Display component deployment trigger (optional).
-
Configure component deployment actions (optional).
-
-
After completing all the setup steps in the app, you will have done the following:
-
Set up an environment integration.
-
Installed the release agent into your Kubernetes cluster.
-
Configured your Kubernetes components.
Alternatively, you can find manual setup instructions for your Kubernetes components in the Configure Your Kubernetes Components page.
Optional manual setup
This section shows how to manually install the CircleCI release agent into your Kubernetes cluster. This manual installation guide is an alternative to using the in-app deploys set up process as described in the sections above.
1. Add the release agent into your Kubernetes cluster
Use Helm to install the CircleCI release agent into your Kubernetes cluster.
-
Add the CircleCI release agent Helm repository by running the following command:
helm repo add release-agent https://circleci-public.github.io/cci-k8s-release-agent -
Then, update your local Helm chart repository cache:
helm repo update
2. Create an integration token
You will need a CCI_INTEGRATION_TOKEN to install the CircleCI release agent into your cluster. To create an integration token, follow these steps:
-
In the CircleCI web app, select Deploys in the sidebar.
-
Navigate to the Environments tab.
-
Select the gear icon

 corresponding to the environment you just created to enter the Environment Integration Settings page.
 -
Select Create Integration Token and then Create Token.
-
The new token will be displayed. Copy the token, then select Done.
The integration token is shown only once and cannot be retrieved from CircleCI later. Store the integration token in your organization’s secret manager. Examples of secret managers include HashiCorp Vault, AWS Secrets Manager, or a CircleCI context variable.
Pass the integration token to Helm at install or upgrade time. Use an environment variable (for example, --set tokenSecret.token="$CCI_INTEGRATION_TOKEN") or a values file that is not committed to source control.
After installation, the Helm chart stores the integration token in a Kubernetes Secret in the circleci-release-agent-system namespace. On subsequent helm upgrade runs, you do not need to supply the integration token again unless you use --reset-values. The same applies if you apply a values file that omits tokenSecret.token without also setting --reuse-values.
3. Install the release agent
Use the following command to install the Helm chart to integrate CircleCI’s release agent into your Kubernetes cluster.
If required, you can include a list of Kubernetes namespaces you want to monitor with --set managedNamespaces="{namespace1,namespace2}". If you only want to monitor the default namespace, you do not need to supply a list. The default namespace is monitored by default. If you struggle to pass the managedNamespaces value, try enclosing the array value or the whole parameter itself in a string, with double or single quotes.
helm upgrade --install circleci-release-agent-system release-agent/circleci-release-agent \
--set tokenSecret.token=[YOUR_CCI_INTEGRATION_TOKEN] --create-namespace \
--namespace circleci-release-agent-system \
--set managedNamespaces="{namespace1,namespace2}"| You can further customize the agent installation and check all available options in the release agent Helm repository. |
Once you have run this command, you can check your environment is set up by navigating to the environment details page to check the "last used" date has been populated. To navigate to the environment details page, follow these steps:
-
Select Deploys in the CircleCI web app sidebar.
-
Select the Environments tab.
-
Select the name of your environment integration to view the environment details page.
Configure managed namespaces mode
| Release agent v1.6.0 and Helm chart v1.6.0 or higher are required to use managed namespaces mode. |
Release agent v1.6.0 and Helm chart v1.6.0 introduce a managedNamespacesMode Helm value. This setting (exposed as MANAGED_NAMESPACES_MODE on the agent deployment) controls how the agent determines which namespaces to monitor. Managed namespaces mode has two options as follows:
-
static(default): The agent monitors the exact namespace names listed inmanagedNamespaces. This is the same behavior as prior versions and requires no additional RBAC permissions. -
dynamic: The agent discovers namespaces at runtime by matching the patterns inmanagedNamespacesagainst all cluster namespaces. Use glob patterns such asteam-*to monitor any namespace whose name matches the pattern.
Use static mode (default)
In static mode, managedNamespaces contains a list of exact namespace names. This mode requires no additional RBAC permissions beyond those granted in earlier chart versions.
To upgrade and use static mode, run the following command:
helm upgrade --install circleci-release-agent-system release-agent/circleci-release-agent \
  --set tokenSecret.token=[YOUR_CCI_INTEGRATION_TOKEN] --create-namespace \
  --namespace circleci-release-agent-system \
  --set managedNamespaces="{namespace1,namespace2}"
Use dynamic mode
In dynamic mode, managedNamespaces accepts glob patterns. The agent queries the Kubernetes API at runtime to resolve which namespaces match each pattern.
When installing or upgrading for dynamic mode, set rbac.clusterRoles=true, in addition to rbac.create=true. This enables the chart to create the required ClusterRole with get, list, and watch permissions on the namespaces resource.
To upgrade and use dynamic mode, run the following command:
helm upgrade --install circleci-release-agent-system release-agent/circleci-release-agent \
  --set tokenSecret.token=[YOUR_CCI_INTEGRATION_TOKEN] --create-namespace \
  --namespace circleci-release-agent-system \
  --set managedNamespaces="{team-*,platform-*}" \
  --set managedNamespacesMode=dynamic \
  --set rbac.create=true \
  --set rbac.clusterRoles=true
The rbac.clusterRoles=true flag also enables the RBAC permissions the agent needs to watch workloads across all matching namespaces. Both flags are required for dynamic mode to function correctly.
|
Upgrade from an earlier version
If you are upgrading from a version earlier than 1.6.0, your existing configuration uses static mode by default. No action is required. The agent continues to monitor the exact namespace names already listed in managedNamespaces, and no new RBAC permissions are granted.
To check your installed release agent version, run the following command and refer to the CHART and APP VERSION columns:
helm list --namespace circleci-release-agent-systemTo switch to dynamic mode after upgrading, re-run helm upgrade with --set managedNamespacesMode=dynamic --set rbac.clusterRoles=true and update managedNamespaces to use glob patterns where needed.