

CircleCI webhooks with Airtable
This document describes how to use webhooks with a third-party application. In this case, we use Airtable to demonstrate how you can capture and visualize the output of your pipelines.
Prerequisites
-
An account with CircleCI.
-
A familiarity with Outbound Webhooks on CircleCI.
-
An Airtable account, if you wish to follow along.
Get set up in Airtable
1. Create a new "Base" on Airtable
Log into Airtable and create a new "Base".
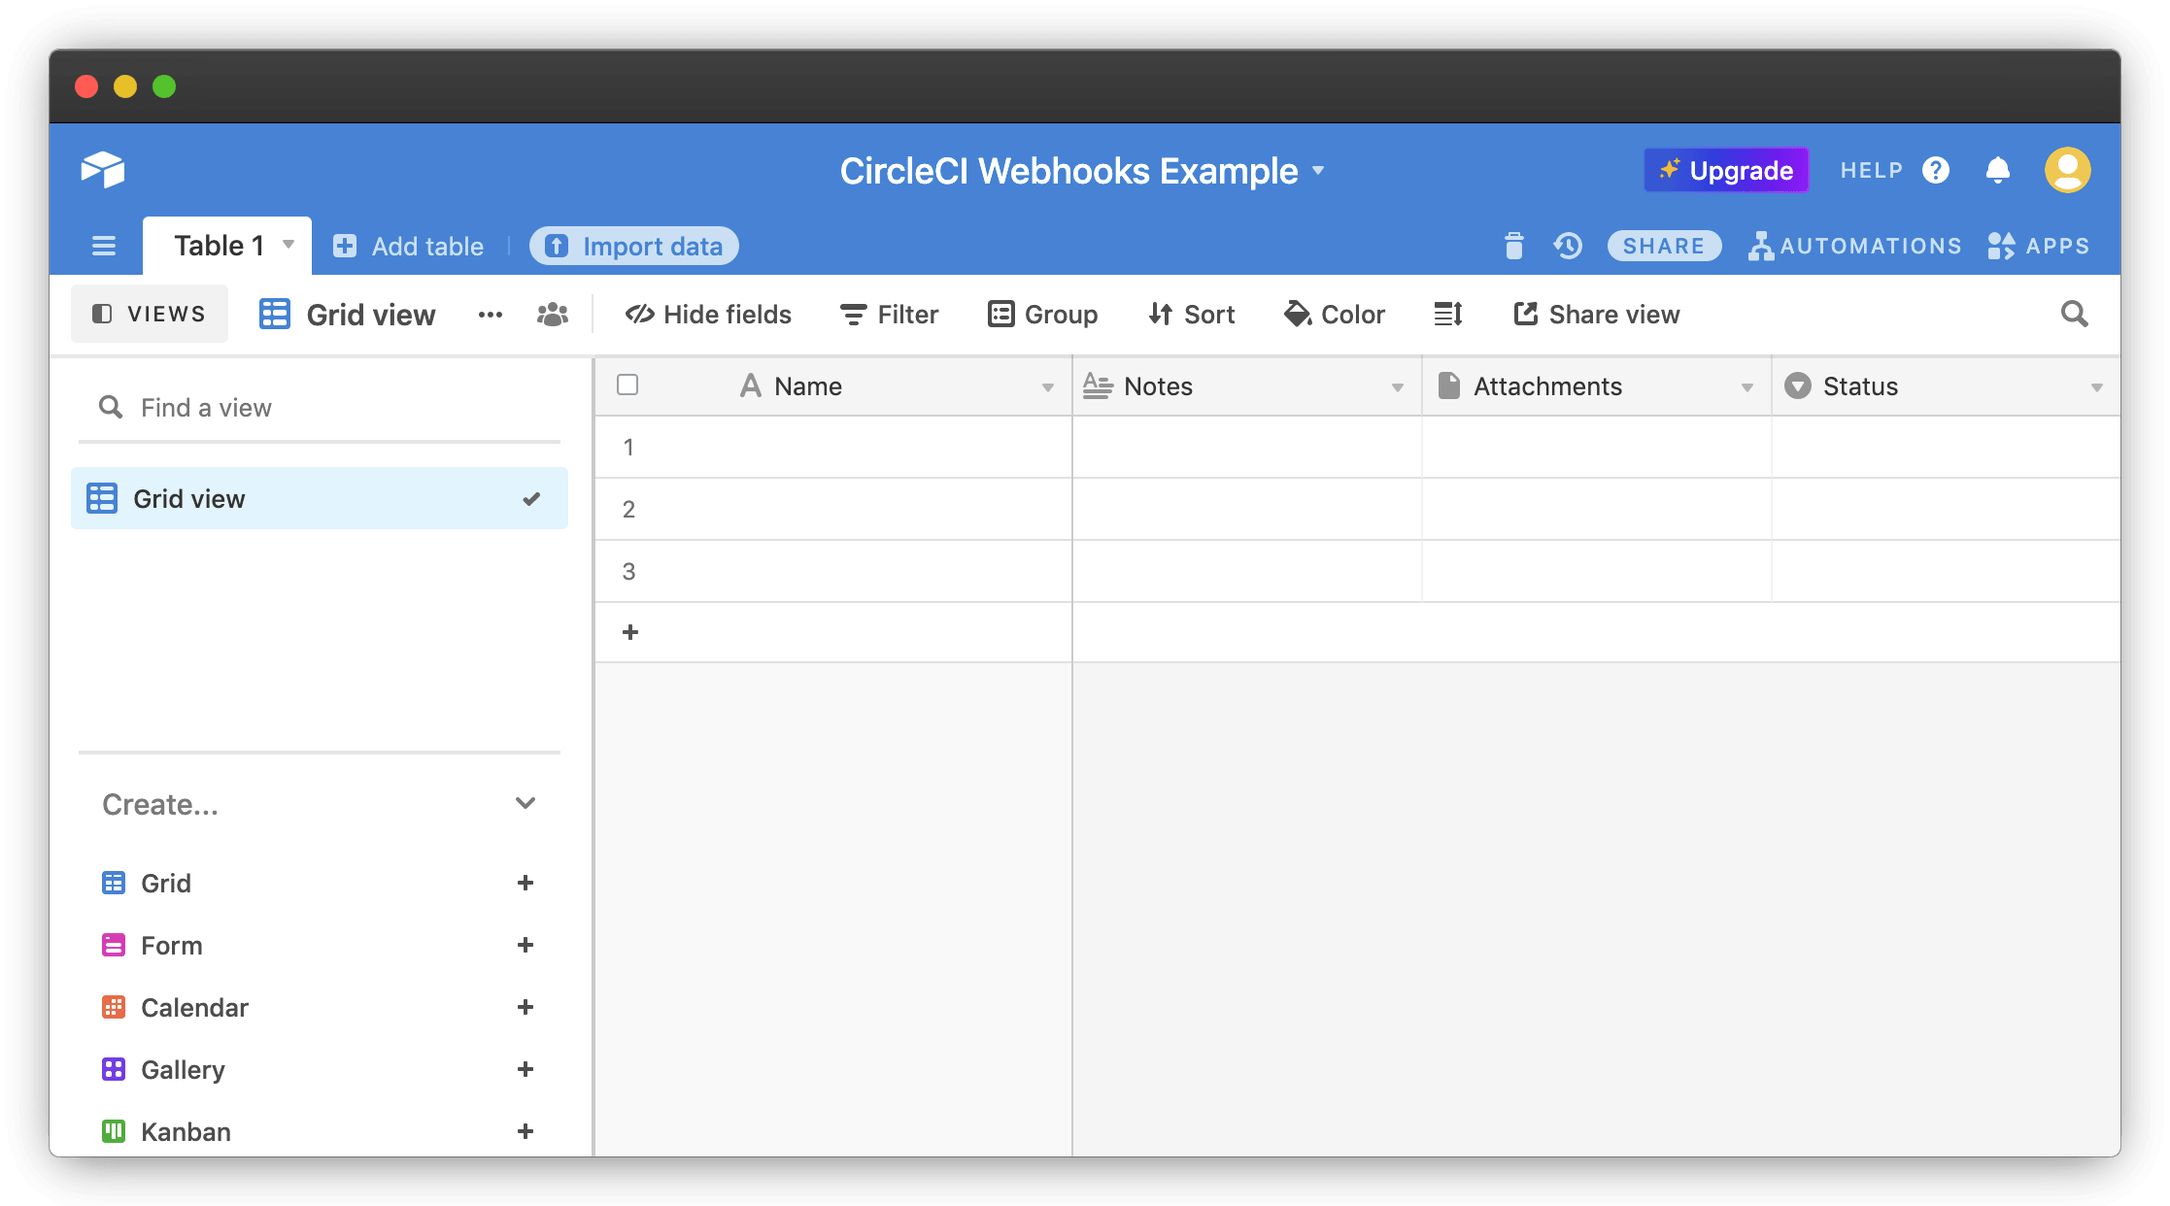
2. Set table and column data types
By default, your new "Grid view" will be named "Table 1" and will show several pre-defined columns, each with a different data type. We will replace these columns with what data we want to receive from CircleCI about our Project.
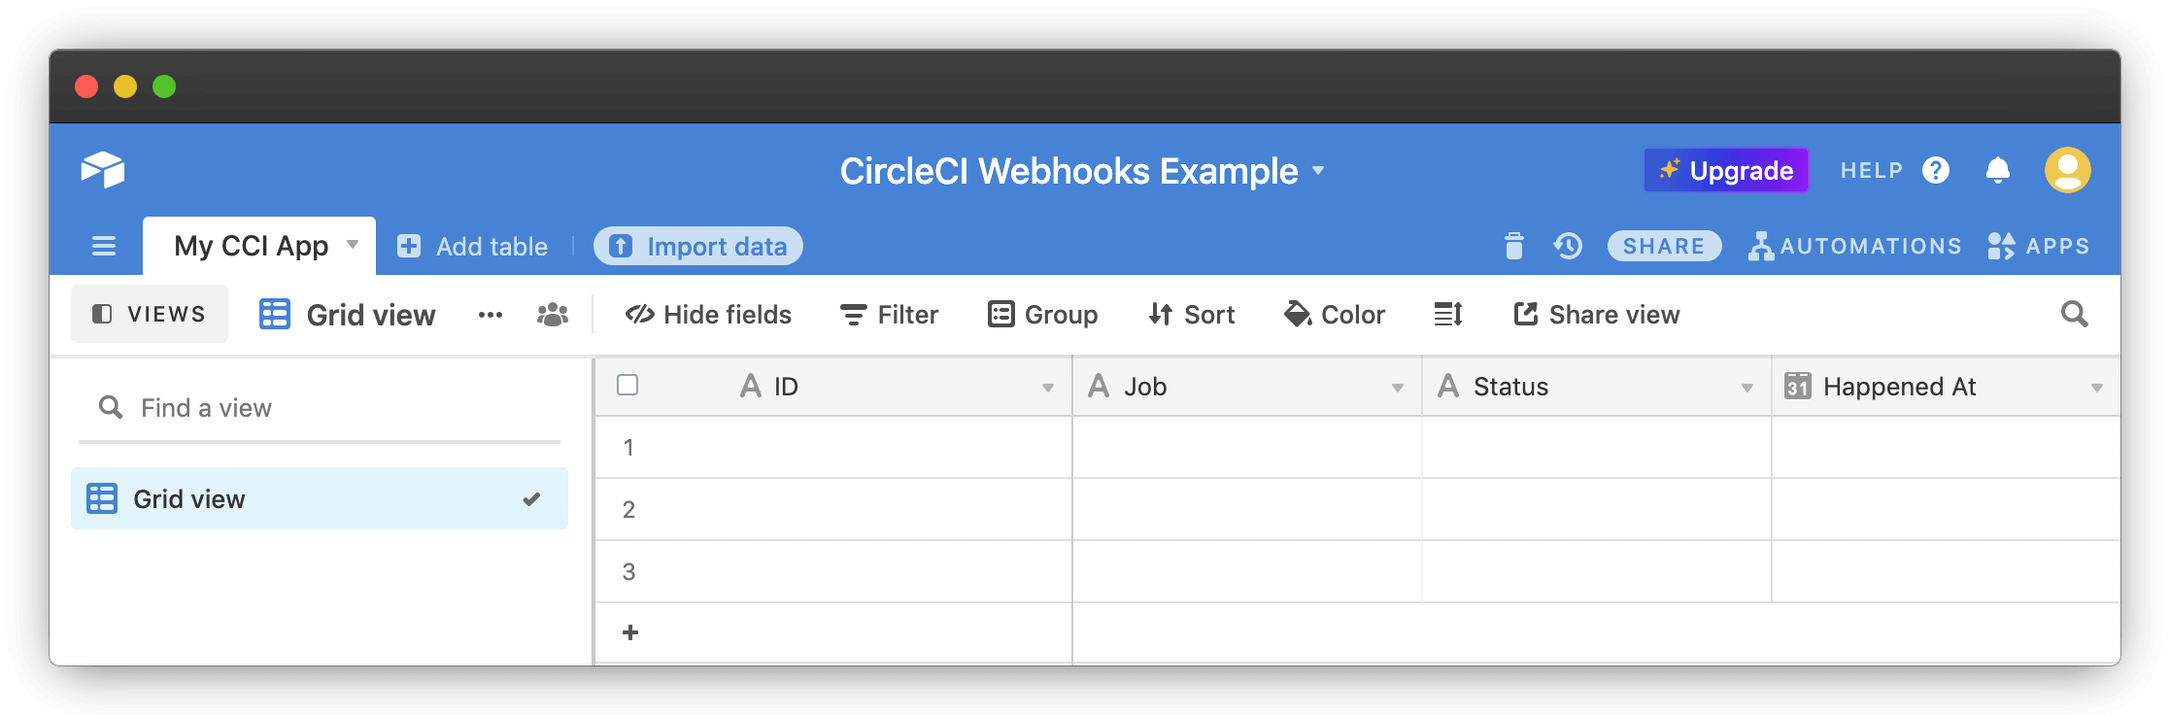
Most of our data will be "A single text line", but some values can use types like "date". For our example, remove the existing columns and enter the following three columns as "A single text line".
-
ID
-
Job Name
-
Status
Finally, add one last column, but this time use the "date" data type:
-
Happened At
3. Prepare the webhook Automation
-
In the top-right of Airtable, select the Automations button to open the right-side Automations panel, and select "Create a custom automation".
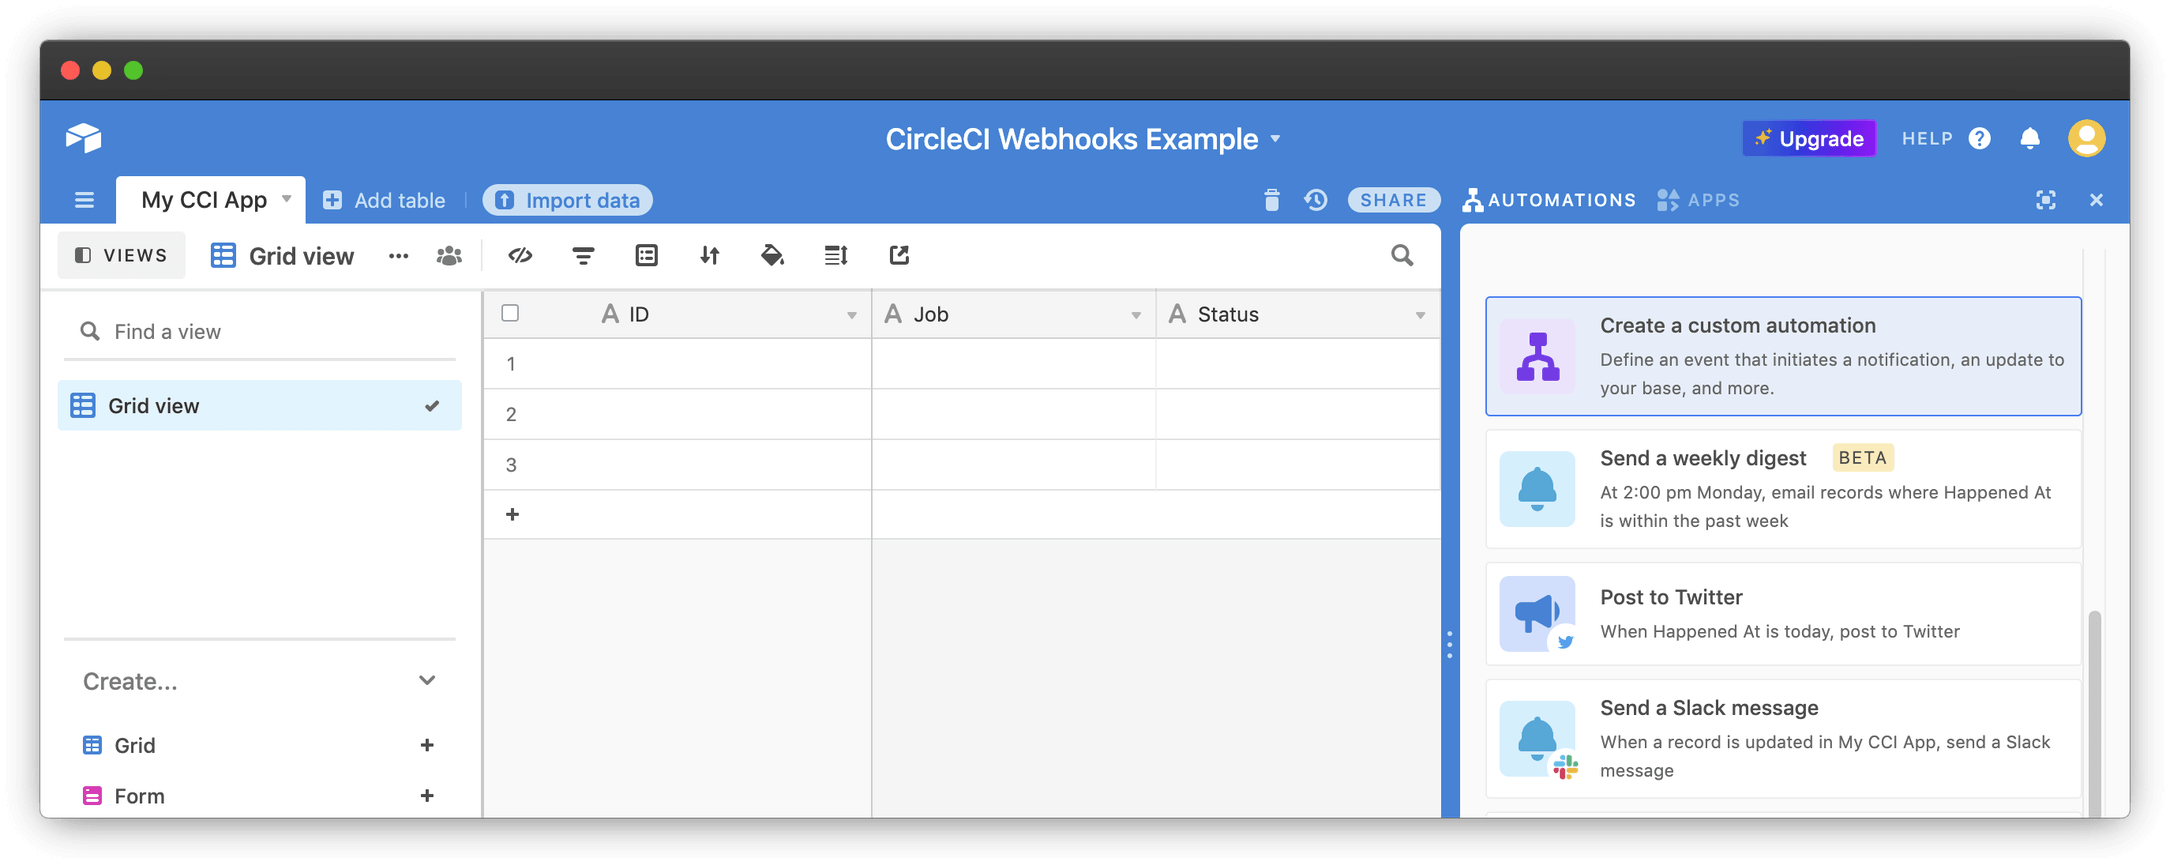 Figure 3. Open Automations
 -
The next screen asks you to select a "trigger" for the automation. Select the option "When webhook received" to see the screen that contains your Airtable webhook URL.
-
Copy the webhook URL here to your clipboard.
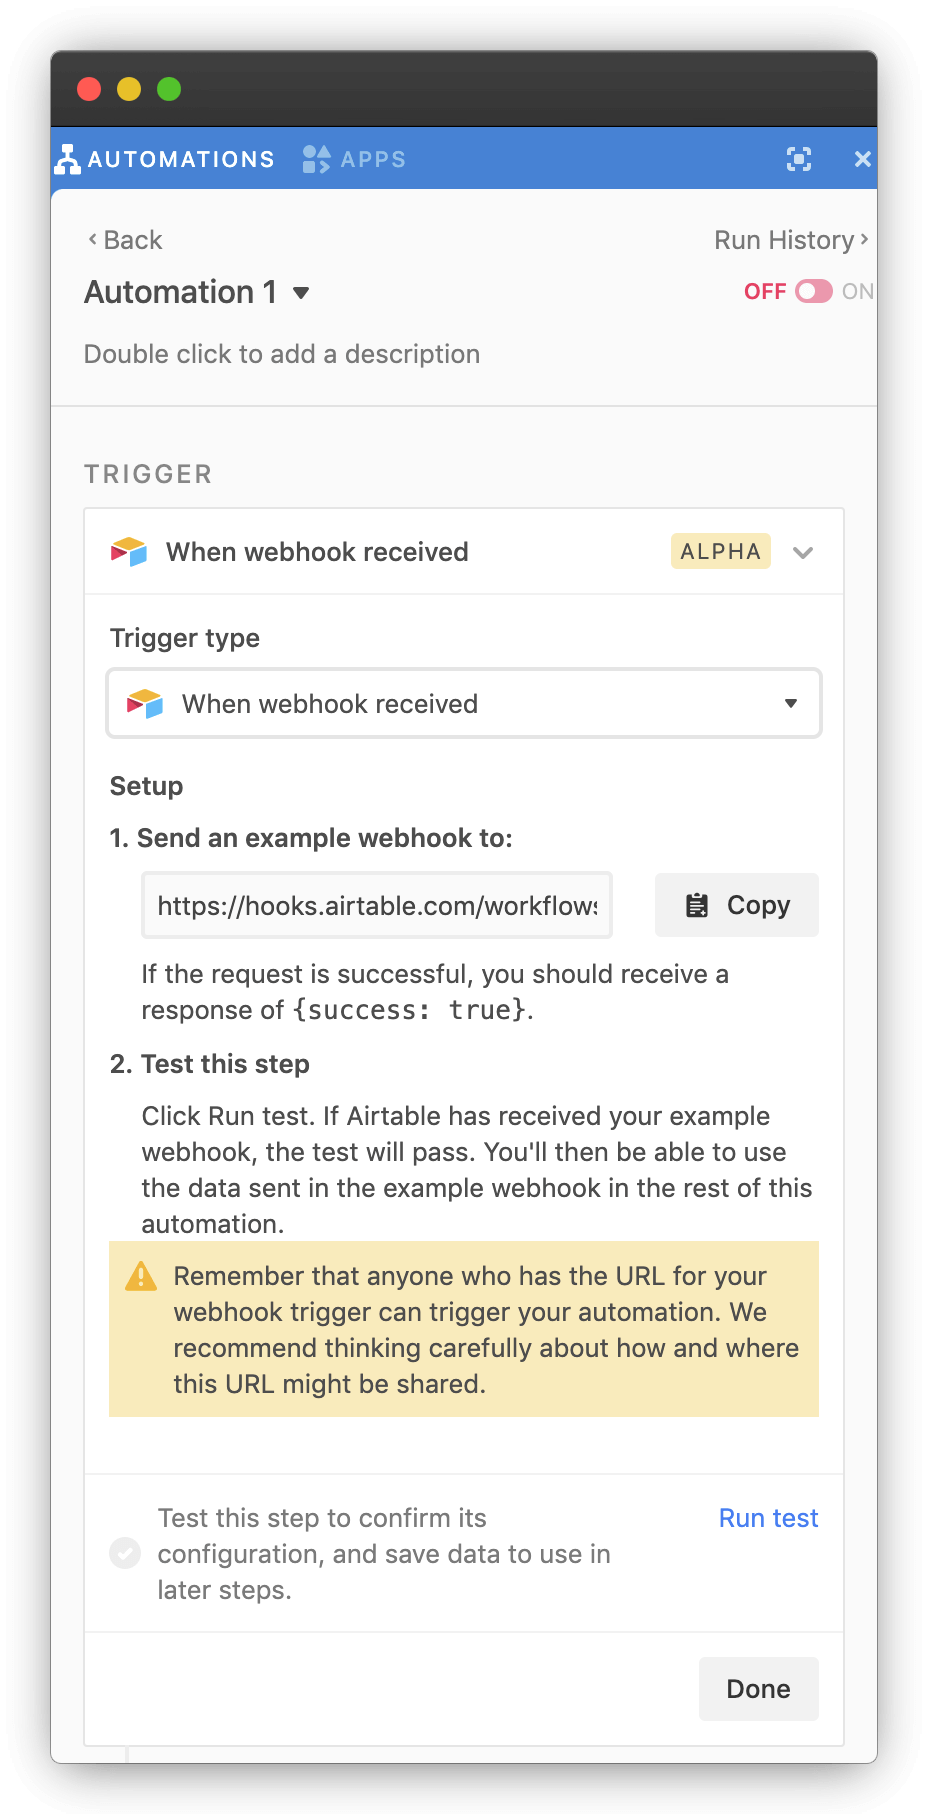 Figure 4. Get webhook link
4. Connect to CircleCI
-
With your webhook URL from Airtable in hand, open the project settings for the repository you want to monitor on CircleCI, and select "Webhooks" from the side panel.
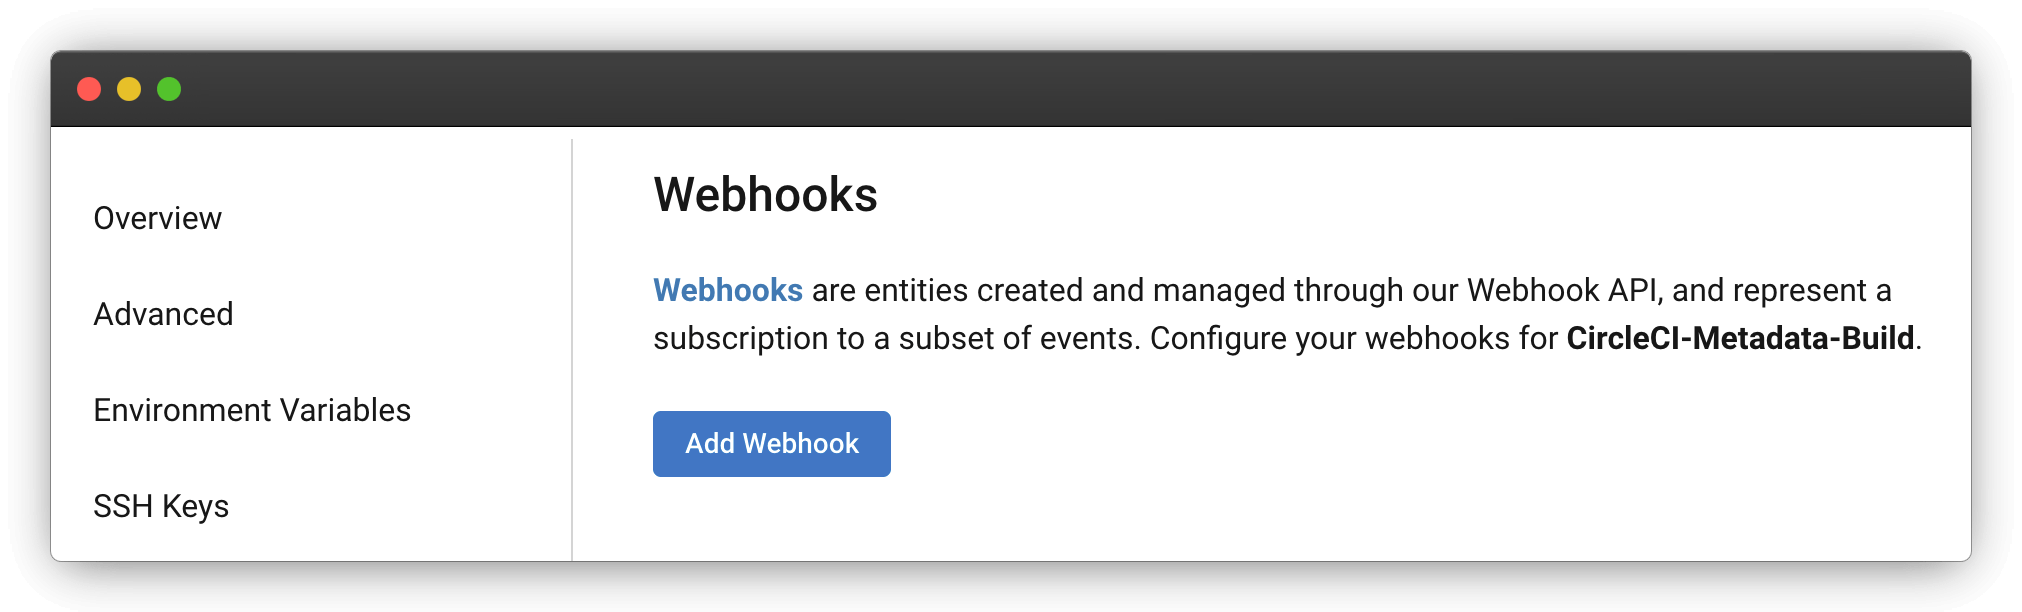 Figure 5. Set up webhooks on CircleCI
 -
Select "Add Webhook" and enter a name for the webhook and the webhook URL you copied earlier. Select the "Job Completed" event, then save by selecting "Add Webhook" again.
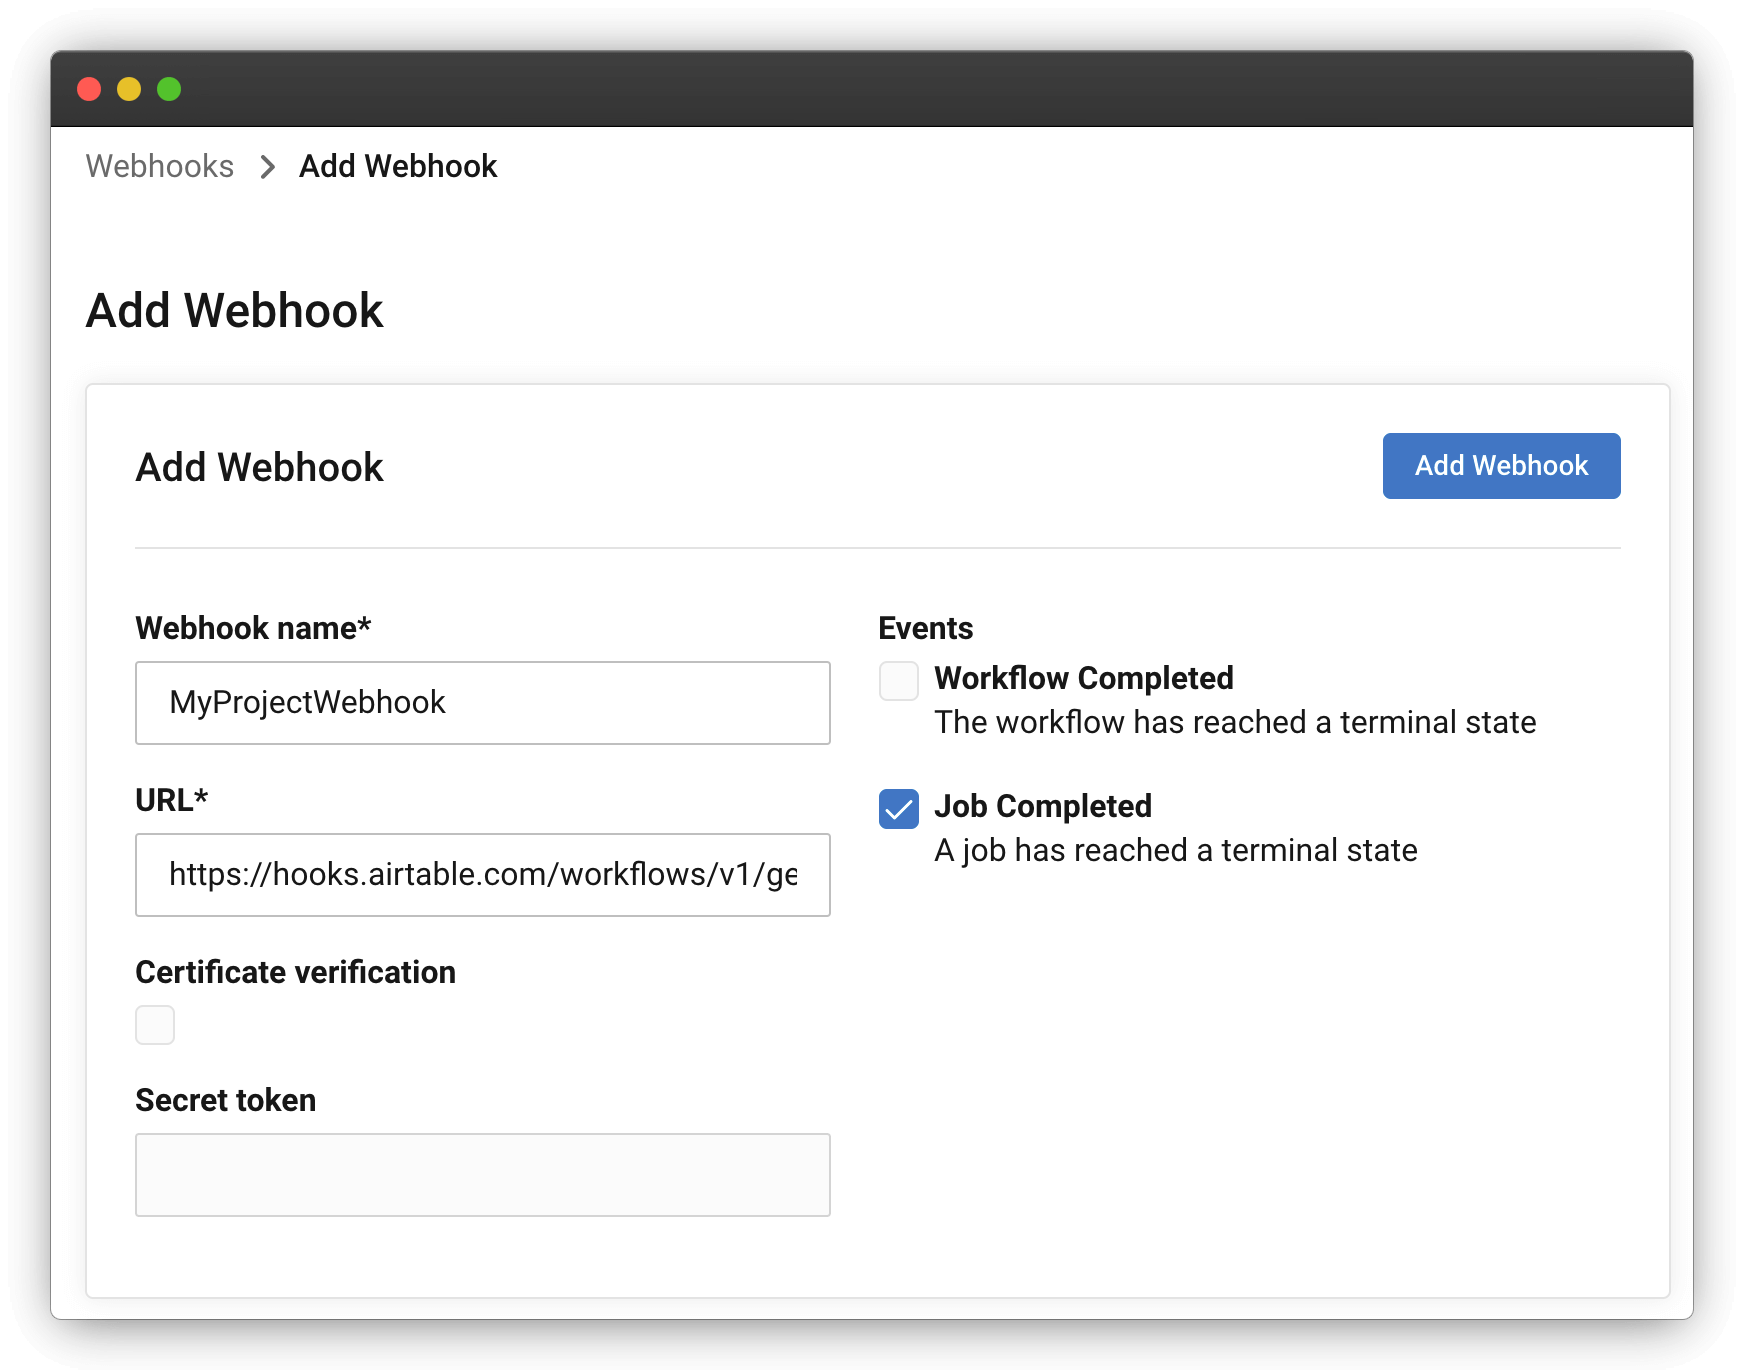 Figure 6. Entering details for a webhook
5. Trigger a test webhook
-
Now that your webhook is configured, trigger a CircleCI pipeline so Airtable has data to receive. View your project’s pipeline on CircleCI on any branch you can use for testing, and select the "Run Pipeline" button:
 Figure 7. Trigger a test webhook
 -
Once the pipeline completes, the test webhook is sent and you can validate it in Airtable. At the bottom of the webhook trigger config screen, select the "test" button and wait for the webhook data to populate.
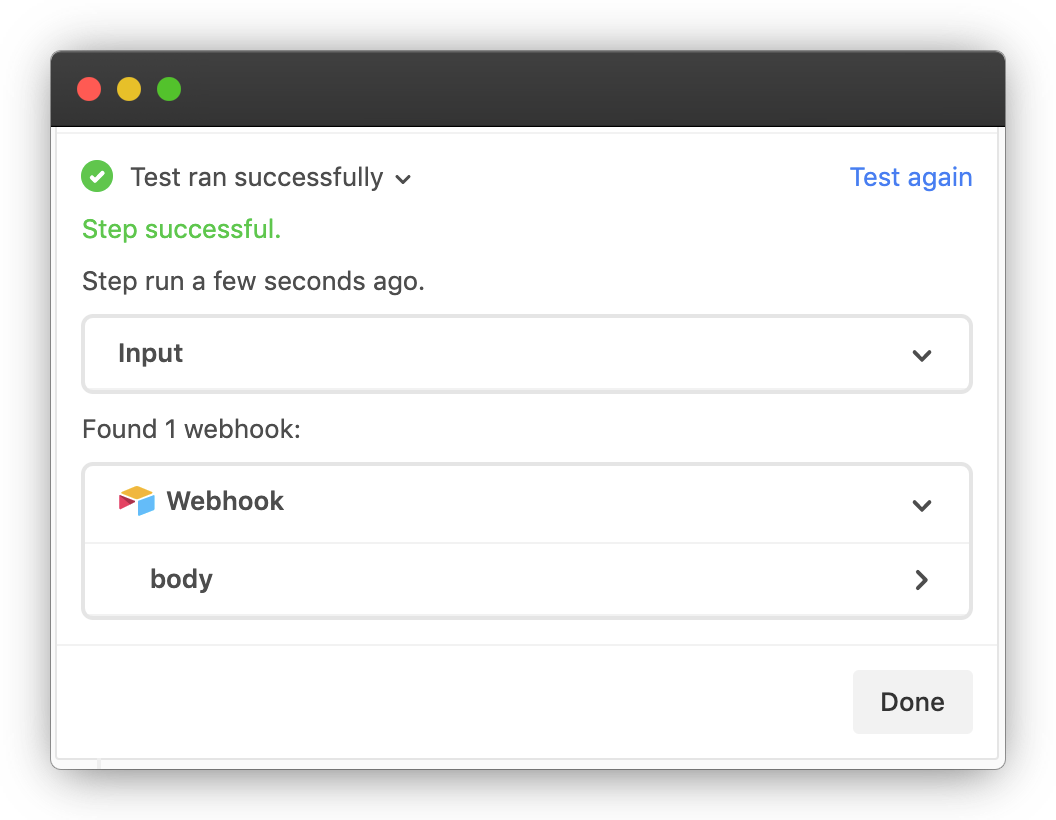 Figure 8. Validate results in Airtable
 -
When you have received the data successfully, select "Done" and move on to creating an Action for the Trigger.
6. Set up the action for our webhook trigger
-
For the Action Type, select from the drop-down "Create record", and select your Table.
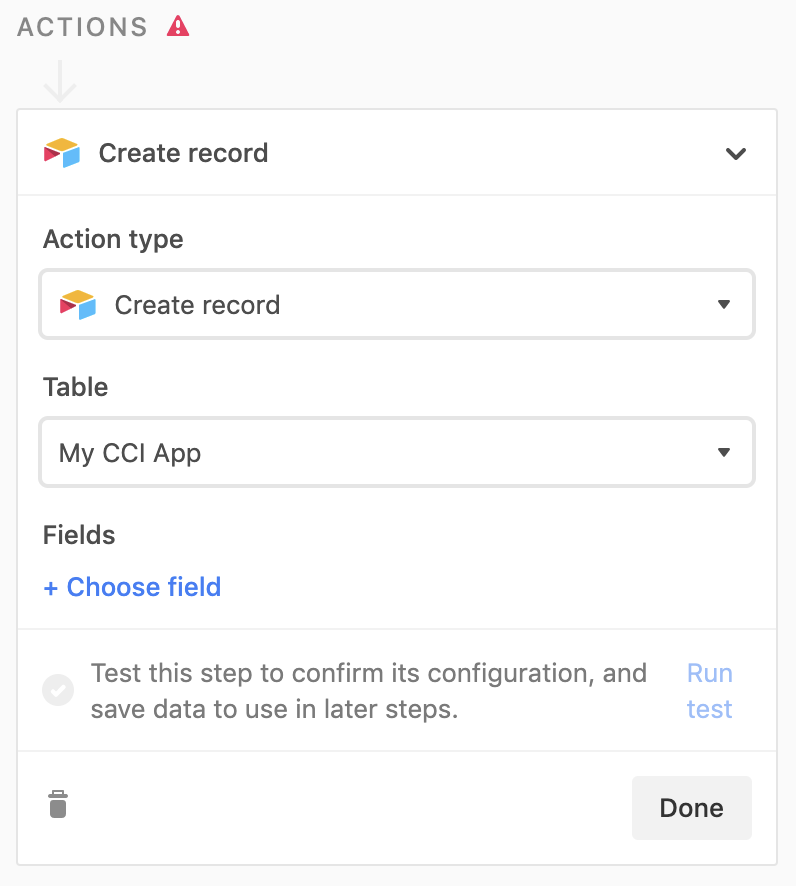 Figure 9. Create action in Airtable
 -
Next, select "Choose field" and map each column of your table to the corresponding webhook data.
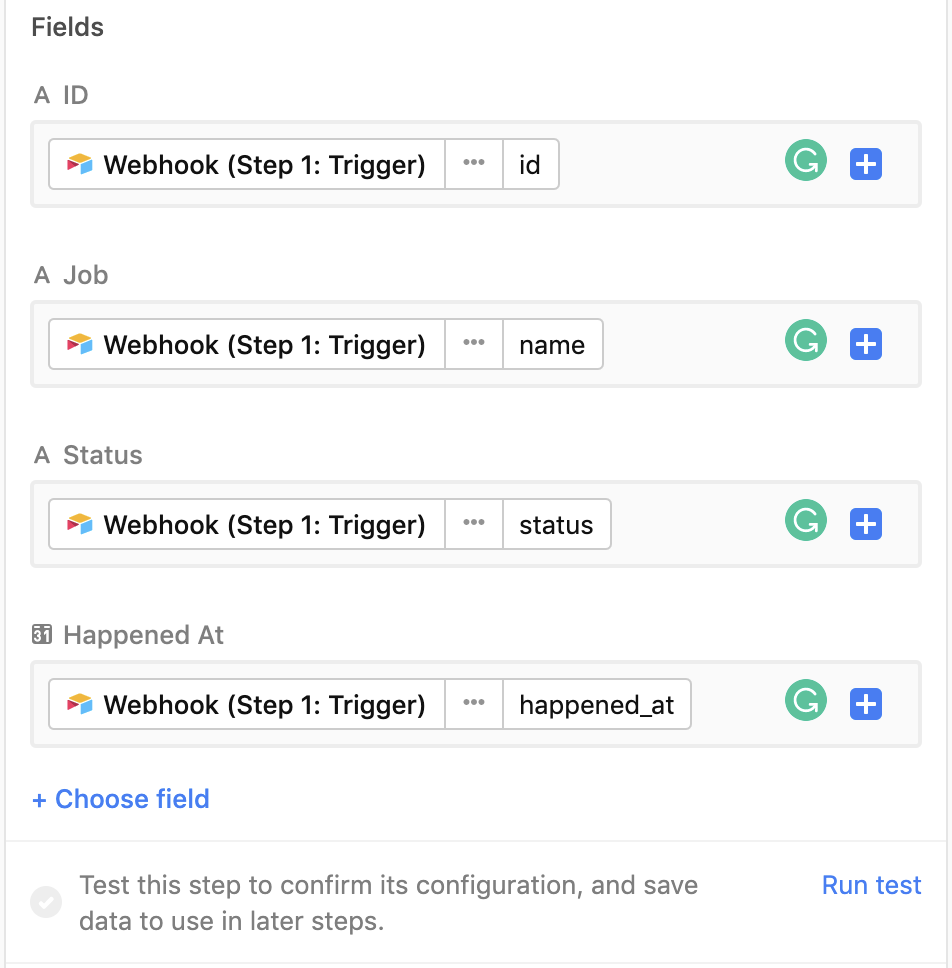 Figure 10. Map columns of table to webhook data
 -
Finally, click "Run test" to populate your first row.
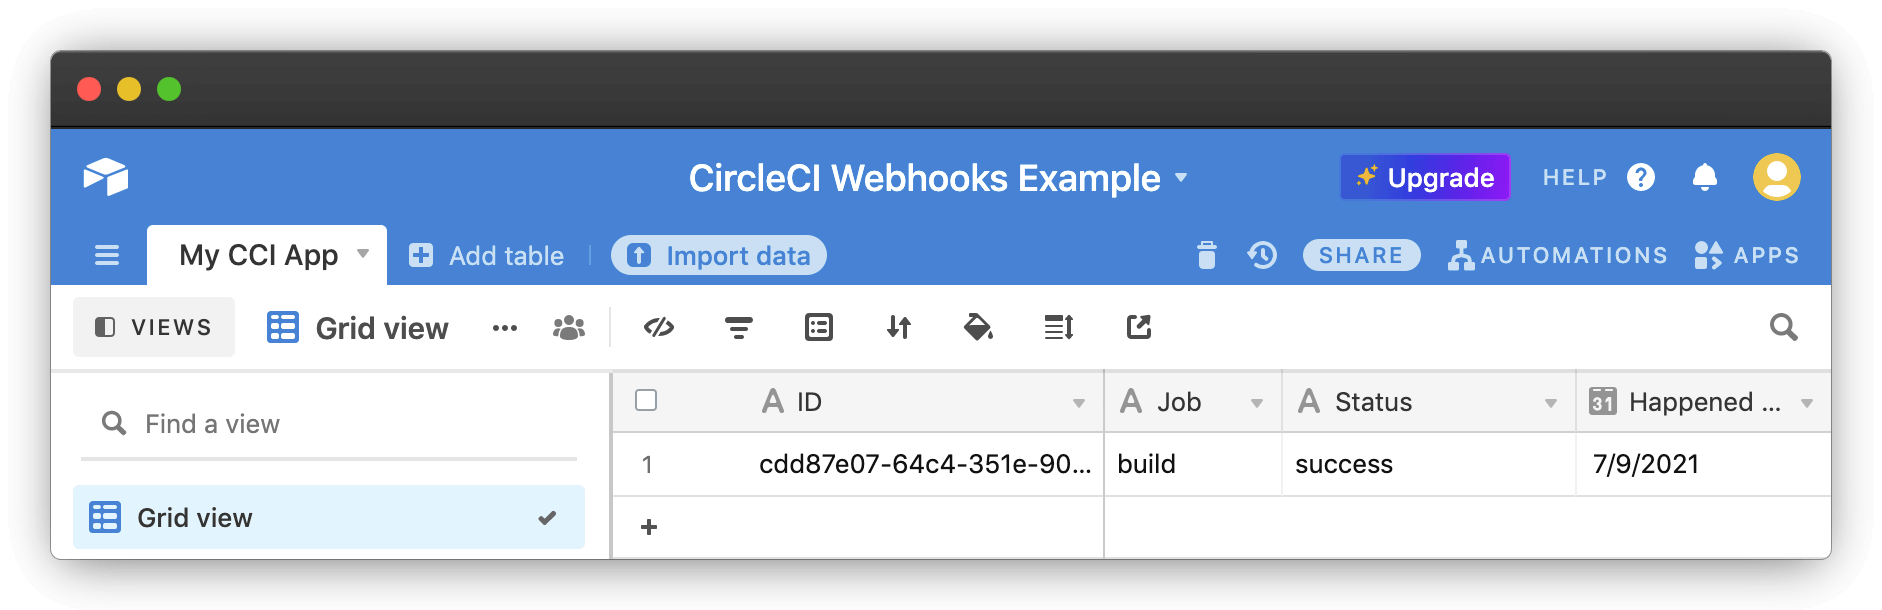 Figure 11. Run Airtable test
Done! Now, as jobs complete for your pipeline new data will be entered into Airtable. Airtable has both free and premium features for creating different views of your data. Your data can be cross-referenced with other tables, used in calculations, and more.
Tracking deployments with Airtable
While the above covers some basics with Airtable, let’s take things a step further and look at how we might further leverage the collected data. Once you have a sufficient amount of data, we can start to create helpful views of our data. How about a calendar view of our deployments to help us visualize how often we are deploying.
-
In Airtable, go to the bottom left of the "views" side panel and click the "plus" icon on "Calendar".
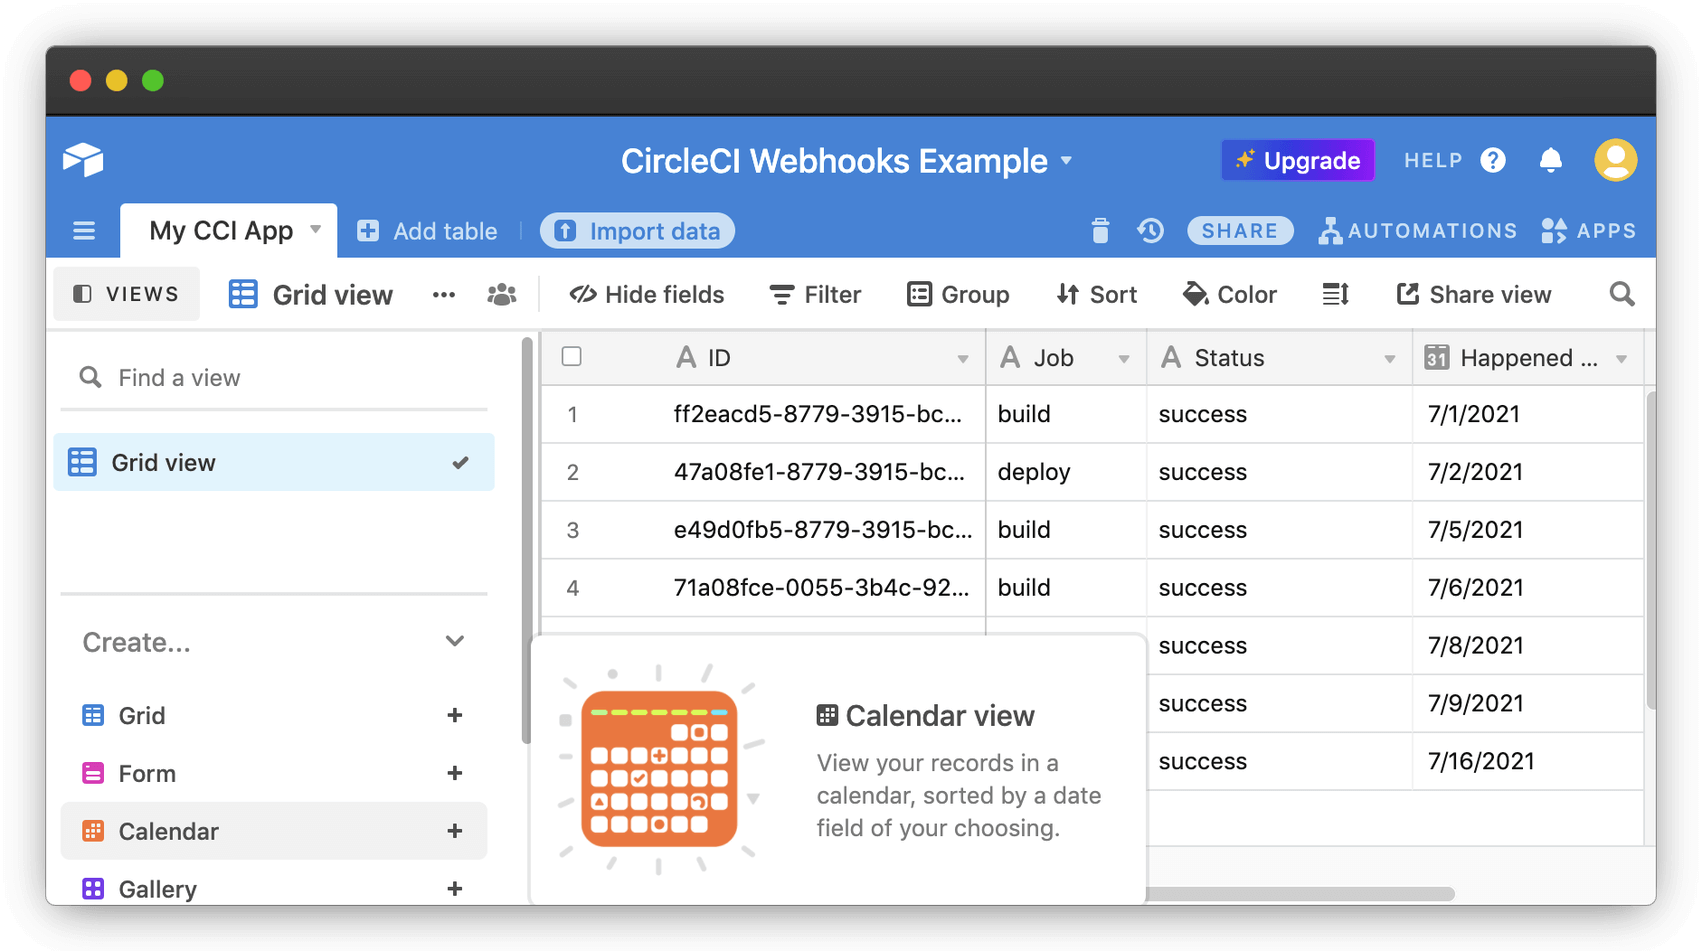 Figure 12. Add calendar in Airtable
 -
The next screen asks you to confirm which "Date" column to base the calendar on. Since you only have one, "Happened at", select that.
-
You will see a calendar view of all of your jobs. Rename this view "Deployments" to track just your deployments. Then, set a filter at the top to only show jobs with the name of your deployment job on CircleCI, which in this case is "deploy".
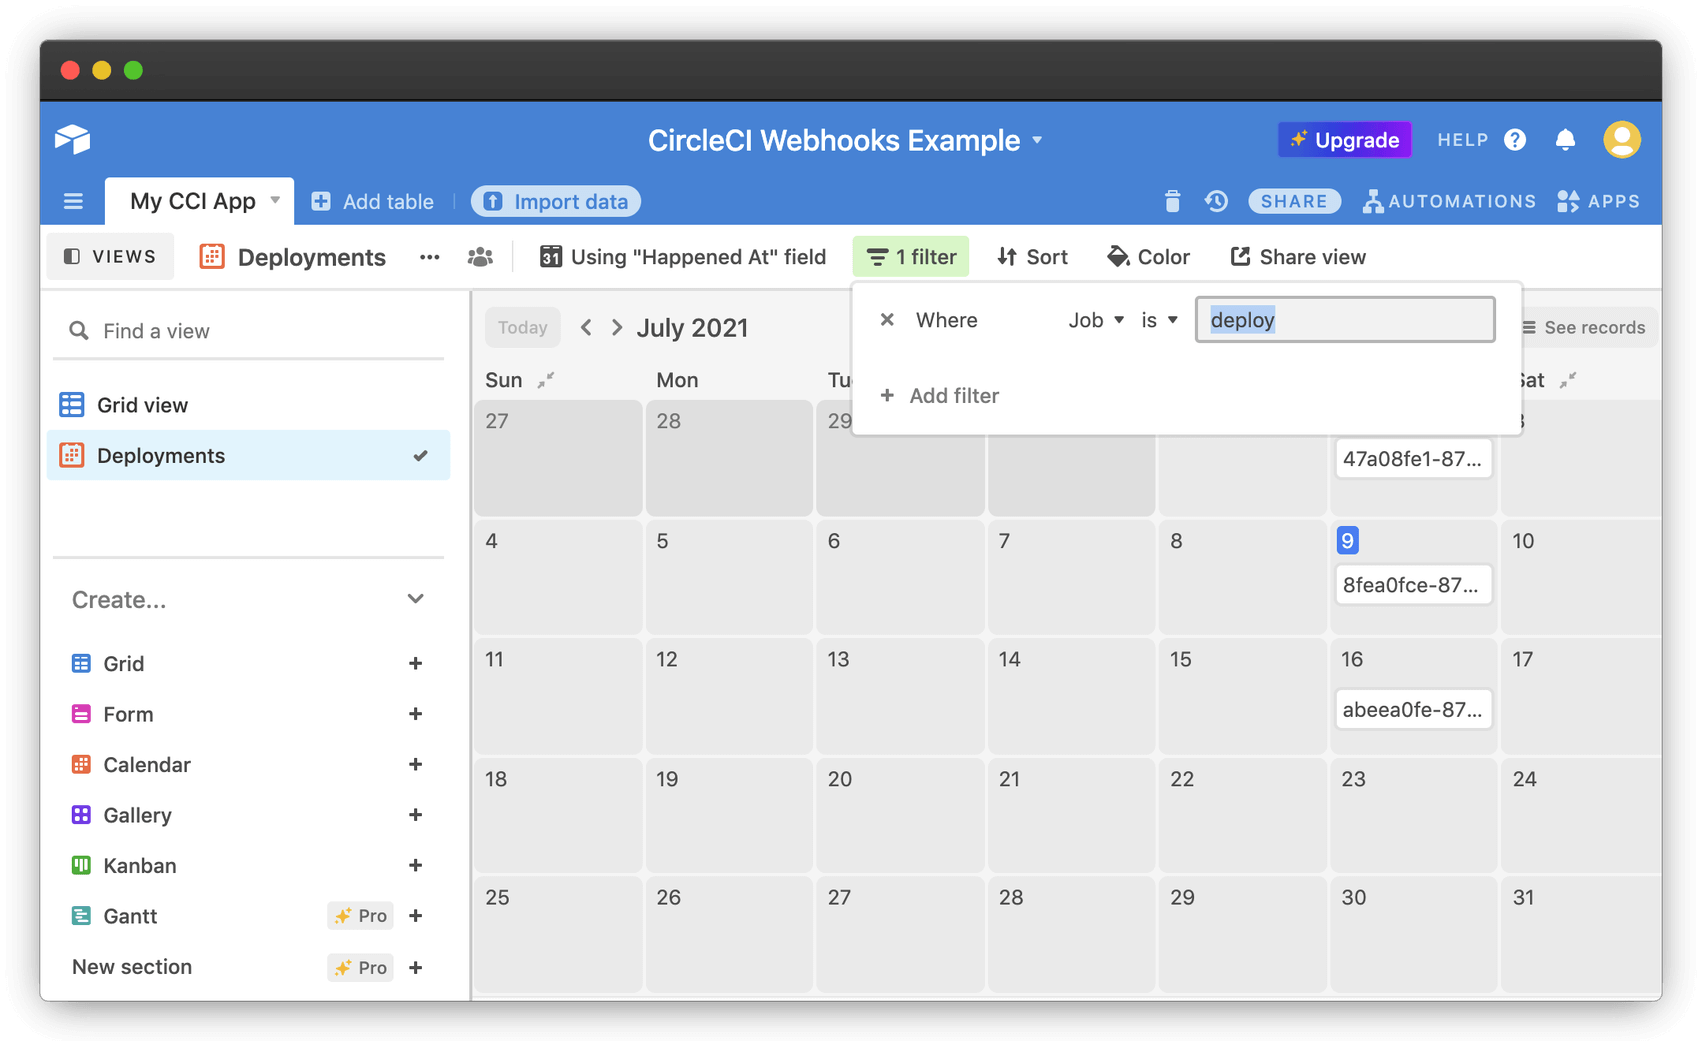 Figure 13. Airtable calendar filter
You now have a grid view that contains a spreadsheet of all of your data, and a calendar-based view named "Deployments" which shows only your deploy jobs.