

Container runner installation (Kubernetes)
This page describes how to install CircleCI’s container runner.
Prerequisites
To install container runners and run jobs, you will need to have root access, and have the following set up and installed:
-
Kubernetes 1.25+
-
Helm 3.x
-
A Kubernetes namespace without any other workloads.
-
The checkout step configures Git to check out over SSH - ensure that your cluster is configured to allow outbound connections over
port 22if you wish to use it. -
The CircleCI CLI if you wish to install runners from the command line.
Self-hosted runner terms agreement
-
Web app installation
-
CLI installation
Before you can install self-hosted runners through the web app, you will need to agree to the CircleCI Runner Terms. To access the Runners section of the CircleCI web app an organization admin must agree to the terms at .
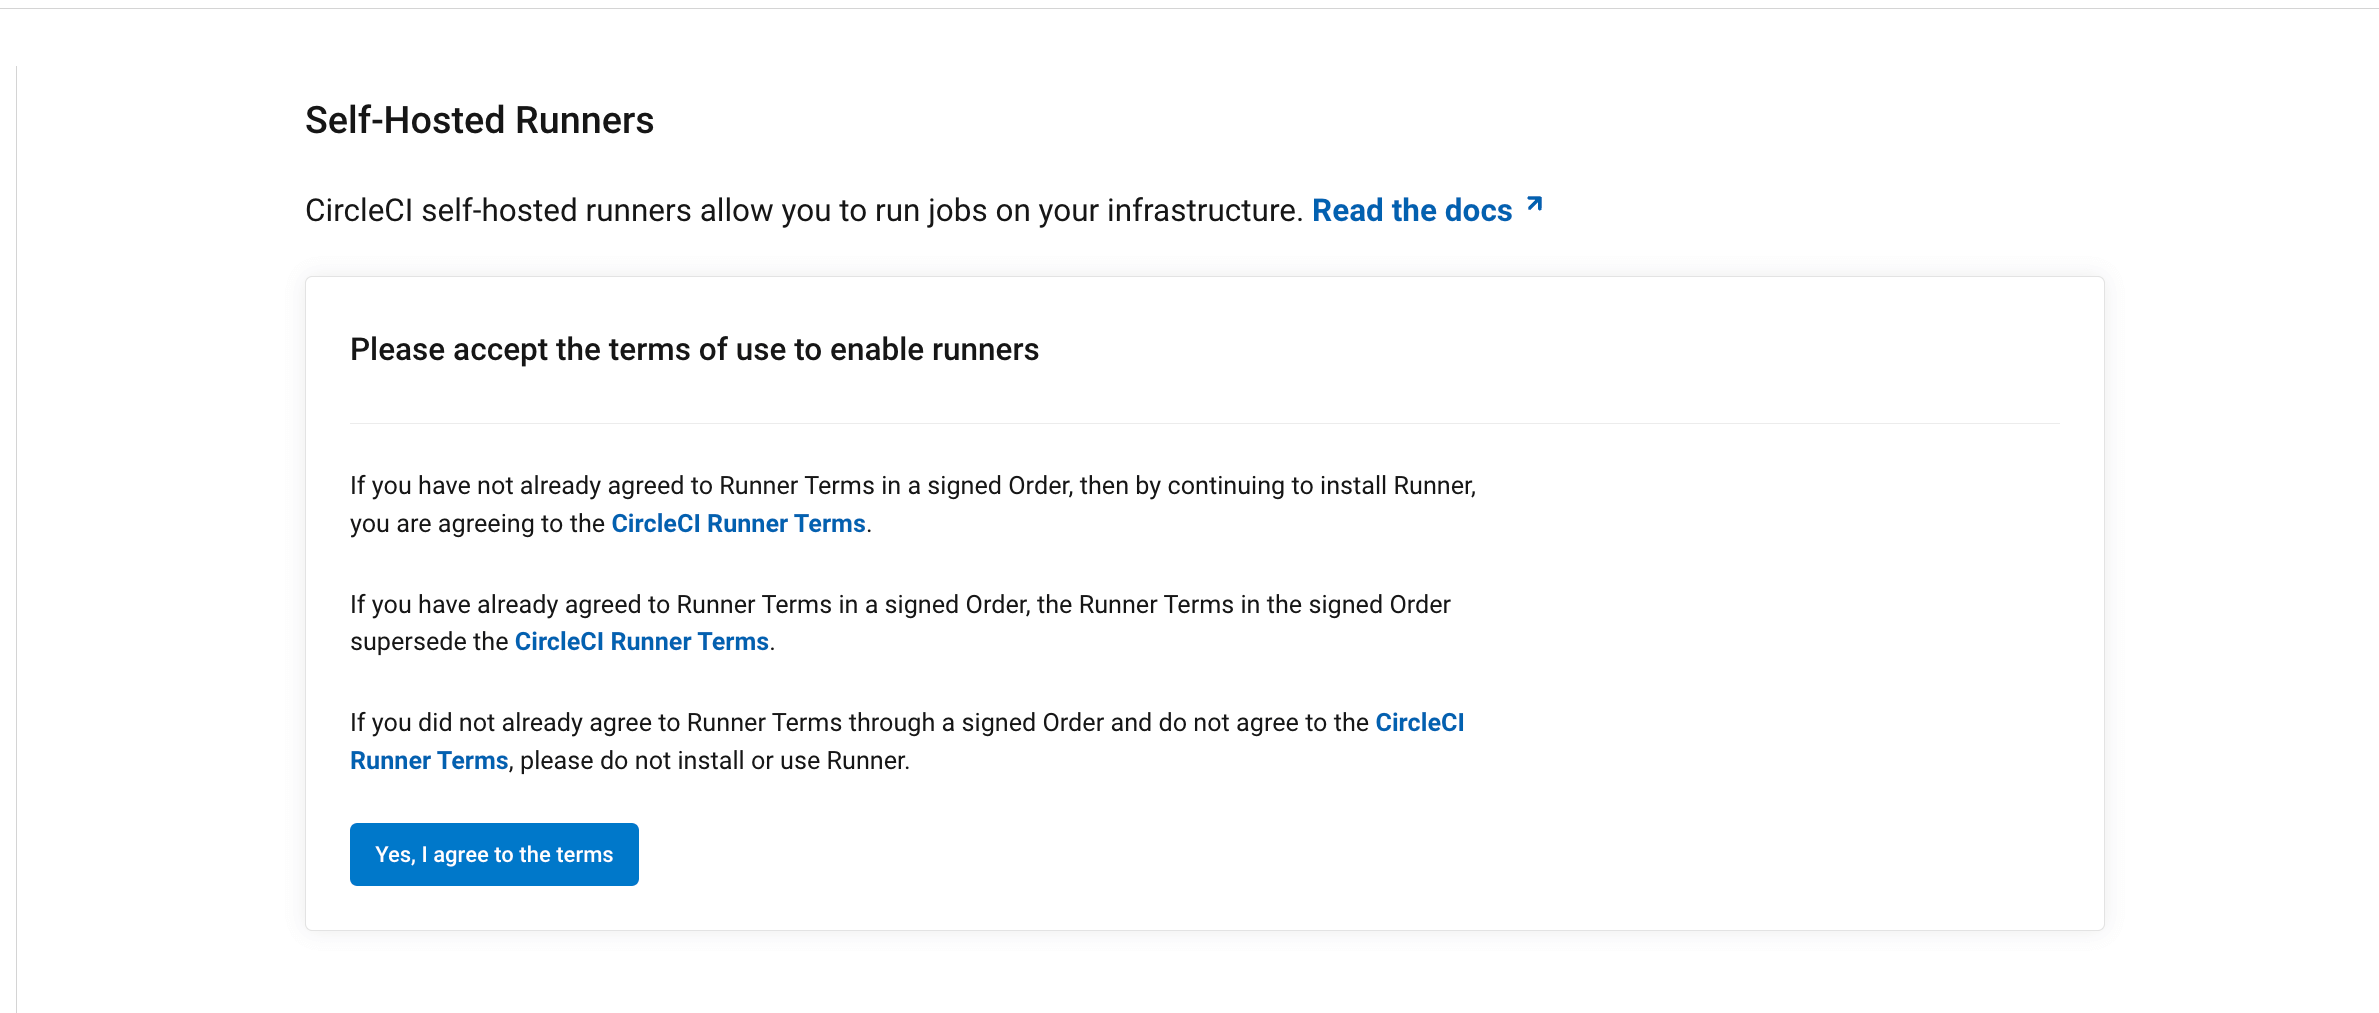
Once the terms have been accepted, Runners will appear permanently in the side navigation.
Your role within your org is determined differently depending on how you integrate with your code, as follows:
-
If you have a
githuborbitbuckettype organization, CircleCI mirrors VCS permissions for organizations. If you are an admin on your organization’s VCS, you are an admin on CircleCI. If you are unsure, check the admin permissions on your VCS. -
If you have a
circlecitype organization, you can check roles by navigating to . Full details on roles and permissions are available in the Roles and Permissions Overview.
| Find out about organization types in the Users, Organizations and Integrations Guide. |
If you are installing and using self-hosted runners through the CLI, you are agreeing to the CircleCI Runner Terms.
1. Create namespace and resource class
-
Web app installation
-
CLI installation
To install self-hosted runners, you need to create a CircleCI namespace and resource class. Once set up you will receive a resource class token. You must be an organization admin to complete this process. View your installed runners on the inventory page in the web app by selecting Runners from the sidebar.
| If you already create orb in your organization you will already have a namespace configured. You must use this same namespace for runners. Each organization can only create a single namespace. |
-
On the CircleCI web app, navigate to Runners and select Create Resource Class.
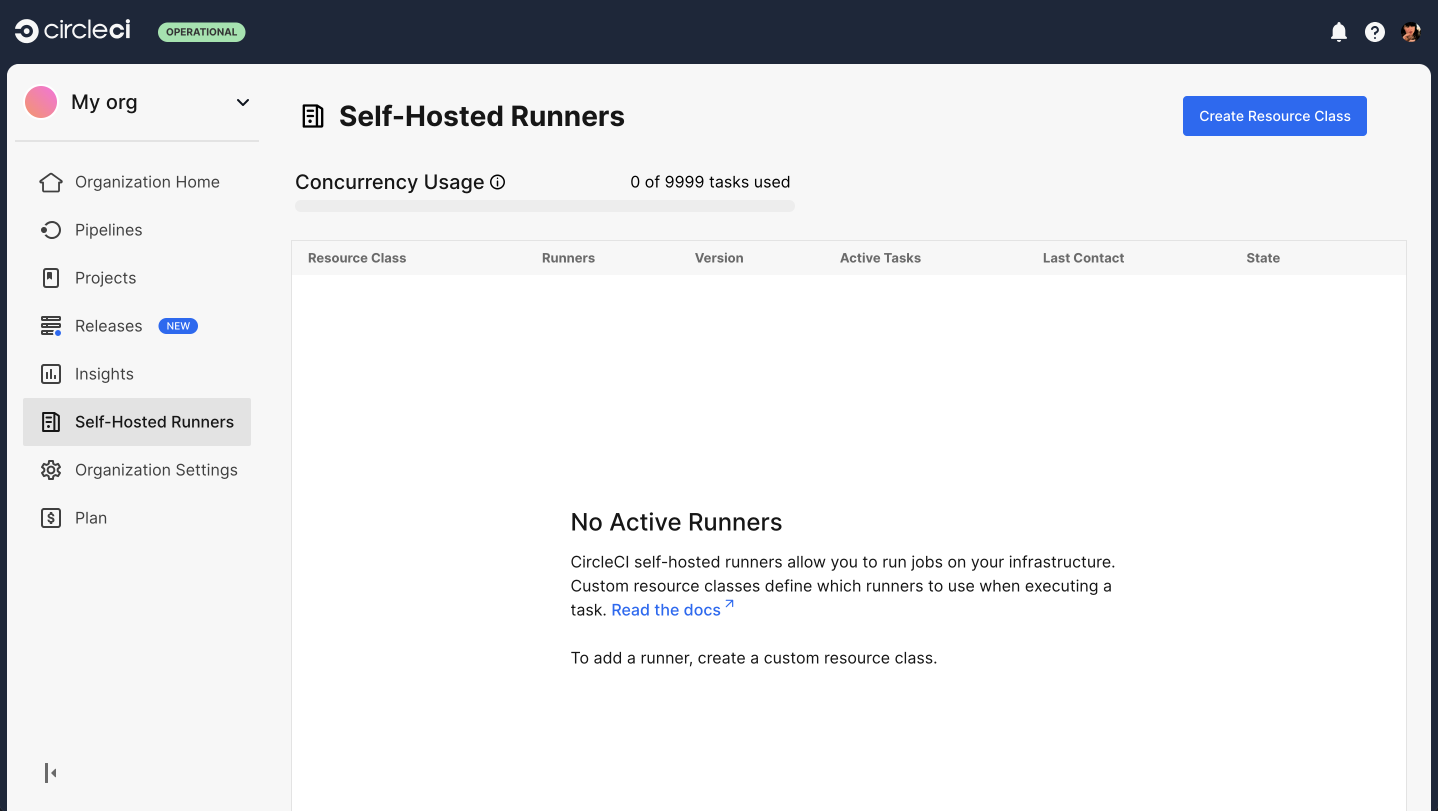 Figure 2. Runner set up, step one - Get started
 -
Create a custom Resource Class. You will configure jobs to use this resource class when you want them to run on your self-hosted runner.
We suggest using a lowercase representation of your CircleCI account name for your namespace. CircleCI will populate your org name as the suggested namespace by default in the UI.
Namespace and resource classes must follow specific naming conventions:
-
The namespace can contain lowercase letters, numbers, underscores, and dashes.
-
The resource class name can contain uppercase and lowercase letters, numbers, colons, underscores, dashes, and plus signs.
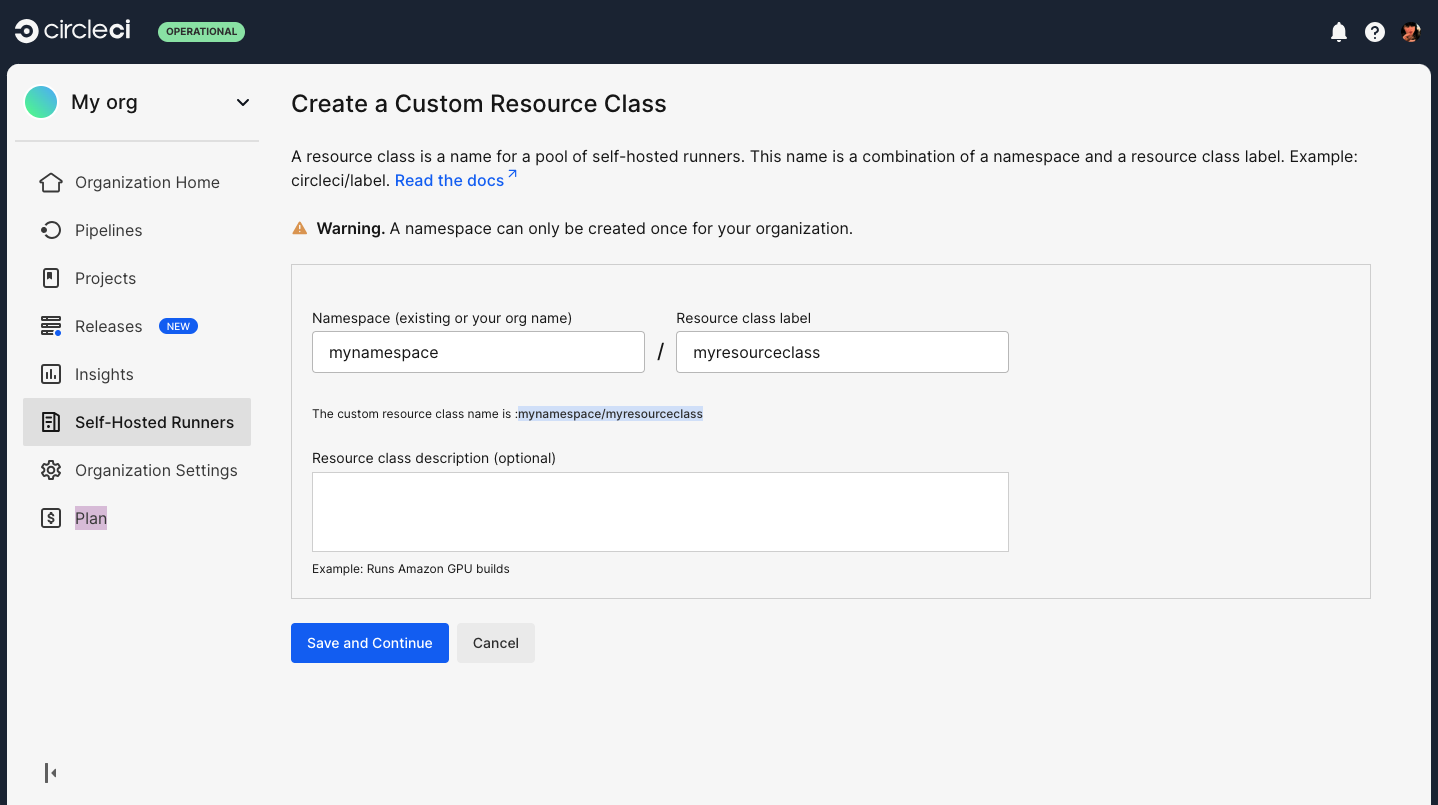 Figure 3. Runner set up, step two - Create a namespace and resource class
-
-
Enter a description for your resource class. The description is an optional field.
-
Select Save and continue to save and view your resource class token.
-
Copy and save the resource class token. Self-hosted runners use this token to claim work for the associated resource class.
The token is only displayed once, be sure to store it safely. 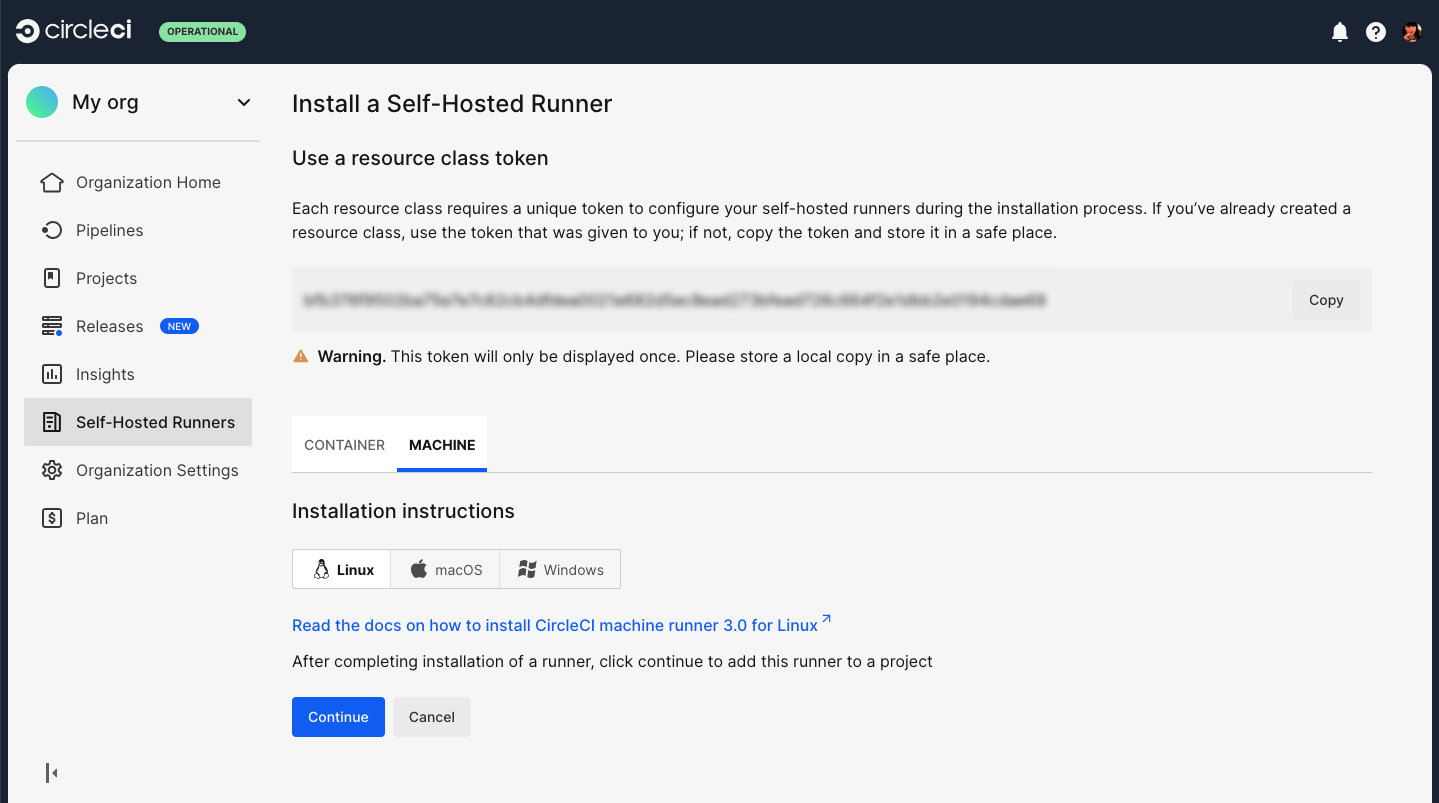 Figure 4. Runner set up, step three - Create a resource class token
 -
Select the Container tab and continue on to the container runner installation steps below.
To install self-hosted runners, you need to create a CircleCI namespace and resource class. Once set up you will receive a resource class token. You must be an organization admin to complete this process. View your installed runners on the inventory page in the web app by selecting Runners from the sidebar.
| If you already create orb in your organization you will already have a namespace configured. You must use this same namespace for runners. Each organization can only create a single namespace. |
-
Create a namespace for your organization’s self-hosted runners if you do not already have one configured. We suggest using a lowercase representation of your CircleCI organization’s account name.
Use the following command to create your CircleCI organization’s namespace:
$ circleci namespace create <name> --org-id <your-organization-id> -
Create a resource class for your runner using the following command. You will configure jobs to use this resource class when you want them to run on your slef-hosted runner:
$ circleci runner resource-class create <namespace>/<resource-class> <description> --generate-tokenMake sure to replace
<namespace>and<resource-class>with your org namespace and desired resource class name, respectively. You can add a description but this is optional.Resource class names must follow specific naming conventions.
-
The namespace can contain lowercase letters, numbers, underscores, and dashes.
-
The resource class name can contain uppercase and lowercase letters, numbers, colons, underscores, dashes, and plus signs.
The resource class token is returned after the runner resource class is successfully created.
The token is only displayed once, so be sure to store it safely.
-
2. Container runner installation
-
Add the container runner Helm repository by running the following command:
helm repo add container-agent https://packagecloud.io/circleci/container-agent/helm -
Next, run the following:
helm repo update -
Next, run the following command to create the
circleciKubernetes namespace:kubectl create namespace circleci -
Create a file called
values.yamlcontaining the following, substituting your namespace and resource class and token:agent: resourceClasses: <your-namespace>/<your-resource-class-name>: token: <your-resource_class_token> -
If you are using CircleCI Server, you will need to provide the URL for your install. You can do this by setting the runnerAPI in your
values.yaml:agent: runnerAPI: https://your.domain.here resourceClasses: <your-namespace>/<your-resource-class-name>: token: <your-resource_class_token> -
Finally, run the following command:
helm install container-agent container-agent/container-agent -n circleci -f values.yaml
Using a private container registry (optional)
If your cluster cannot pull images from Docker Hub, mirror the CircleCI container runner images to your own registry or configure a pull-through cache. This applies in air-gapped environments or when outbound registry access is restricted. Then point the Helm chart at those locations.
Container runner uses three separate images. Configure each image with a top-level key in values.yaml (not nested under agent):
| Helm key | Default image | Where it runs |
|---|---|---|
|
|
container-agent deployment |
|
|
init container on each task pod |
|
|
sidecar on task pods that use service containers |
Setting agent.image alone does not override the orchestrator or logging sidecar image settings. Task pods may still try to pull from Docker Hub and fail with ImagePullBackOff if you omit those keys.
Add the following to your values.yaml, substituting your registry host, repository path, and tags (tags must match your container-agent chart version for compatibility):
agent:
  image:
    registry: registry.example.com
    repository: circleci/runner-agent
    tag: kubernetes-3
  resourceClasses:
    <your-namespace>/<your-resource-class-name>:
      token: <your-resource_class_token>

orchestrator:
  image:
    registry: registry.example.com
    repository: circleci/runner-init
    tag: agent-server-4.7

logging:
  image:
    registry: registry.example.com
    repository: circleci/logging-collector
    tag: 3.1.9-9141-f95ed2b
If you use CircleCI Server, include agent.runnerAPI as shown in the CircleCI Server step above. Adjust the runner-init tag to match your Server version.
After updating values.yaml, upgrade the release:
helm upgrade container-agent container-agent/container-agent -n circleci -f values.yamlVerify the container-agent pod exposes your registry paths (not Docker Hub defaults):
kubectl describe pod -n circleci -l app=container-agent | grep -E 'KUBE_LOGGING_IMAGE|KUBE_RUNNER_INIT_IMAGE'For job images (not CircleCI runner components), use imagePullSecrets on the resource class pod spec. See Resource Class Configuration and the Support Center article on imagePullSecrets for container runner.
3. Enable rerun job with SSH (optional) Open preview
| The ability to rerun a job with SSH for CircleCI container runner is in open preview. |
To enable this optional feature, follow the instructions below after reading through the considerations. Rerunning jobs with SSH allows you to troubleshoot problems through inspecting log files, running processes, and directory paths.
The rerun job with SSH feature makes use of the Gateway API to facilitate SSH access from outside your cluster. To enable this feature, Gateway API resources must first be provisioned on your cluster, and the CircleCI container agent configuration must be updated.
A. Install Envoy Gateway to your cluster
-
First, install the Gateway API
CRDsand Envoy Gateway as defined in the Envoy Gateway Helm installation document. -
Replace
<version>with the most recent stable release compatible with your cluster, then run the following command:helm install eg oci://docker.io/envoyproxy/gateway-helm --version <version> -n envoy-gateway-system --create-namespace -
Finally, wait for Envoy Gateway to become available:
kubectl wait --timeout=5m -n envoy-gateway-system deployment/envoy-gateway --for=condition=Available
B. Enable the Rerun job with SSH feature
-
Once all Gateway API prerequisites are installed and available, add the
agent.ssh.enabled = trueparameter to the container runner configuration:agent: ssh: enabled: trueFor a full list of SSH configuration options, refer to the Helm chart values.
-
Redeploy the updated manifest:
helm upgrade --wait --timeout=5m <release-name> container-agent/container-agent -n <namespace> -f values.yaml -
Wait for the SSH Gateway to be programmed:
kubectl wait gateway --timeout=5m --all --for=condition=Programmed -n <namespace>Container runner is now ready for rerunning jobs with SSH.
Container runner configuration example
Once you have installed container runner, select Continue in the CircleCI web app. You will see an example configuration snippet showing a job configured to use your new self-hosted runner resource class.
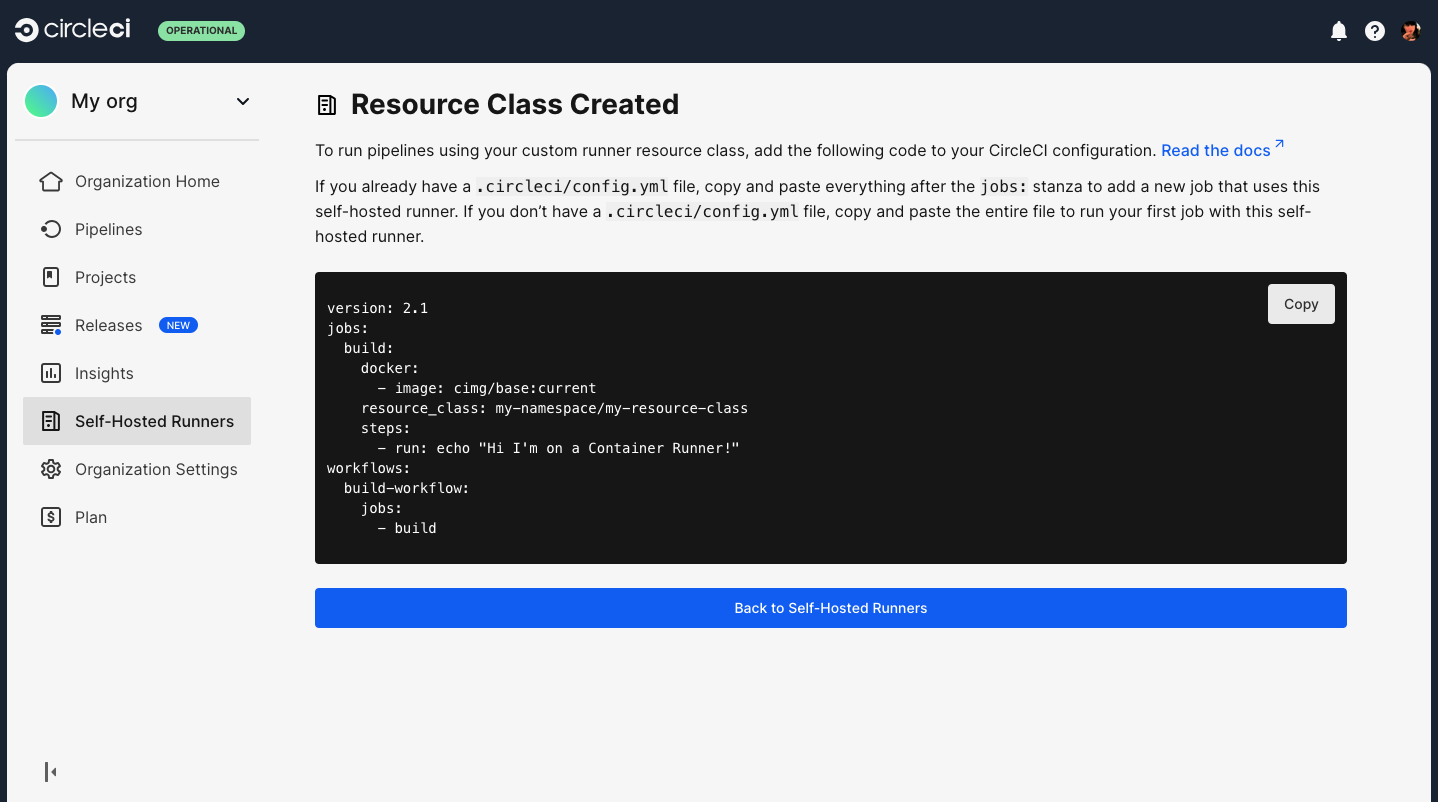
Once you have installed the container runner within your cluster, create and trigger a CircleCI job that uses the Docker executor to validate the installation. The fields you must set for a specific job to run using your container runners are:
-
image: -
resource_class: <namespace>/<resource-class>
Simple example of how you could set up a job (cimg/base:2021.11 is a commonly used CircleCI Docker image):
version: 2.1

jobs:
  build:
    docker:
      - image: cimg/base:2021.11
    resource_class: <namespace>/<resource-class>
    steps:
      - checkout
      - run: echo "Hi I'm on Runners!"

workflows:
  build-workflow:
    jobs:
- build| Do not use an existing job that uses Building Docker Images (see Building Container Images for more information). |
Troubleshooting
Refer to the Troubleshoot Container Runner section of the Troubleshoot Self-hosted Runner guide if you encounter issues installing or running container runner.